
Make a super cute and easy DIY mini paper drawers!
This origami drawer organizer is so easy to make and is perfect for storing small trinkets, organizing your desk and more!

Jump to:
- Why You'll Love This Pattern
- Exclusive Content Just For You
- Skill Level
- Materials Needed
- Instructions
- Tips For Success
- Common Mistakes & How To Avoid Them
- Color, Paper Ideas, and Variations
- FAQ
- Other Paper Crafts You Might Like To Try:
- Helpful Origami Tips
- Useful Paper Craft Terms
- Stay Connected
- Other Patterns You Might Like To Try:
- Comments
Transform paper into charming and functional mini drawers with this DIY origami project!
DIY mini paper drawers origami drawer organizers are small folded paper storage units designed as stackable drawers for organising tiny items. They are commonly used for desk storage, craft organisation, and lightweight storage solutions, combining modular folding with functional design.
Perfect for storing small treasures, craft supplies, or tiny gifts, these origami drawer organizers are as practical as they are decorative.
Personalize them with your favorite colors or patterns, and create a unique organizer that's perfect for gifting or adding a touch of creativity to your space.
Looking for a creative and functional paper craft that combines organization with charm? These DIY mini paper drawers are the perfect project!
Whether you're crafting a cute chest of drawers to store small trinkets, office supplies, or jewelry, this origami-inspired design is a fantastic blend of utility and art.
Made from lightweight cardstock, these drawers are sturdy yet easy to construct, making them ideal for both beginner and seasoned paper craft enthusiasts.
The drawers offer endless possibilities for personalization.
Use patterned cardstock for a fun and decorative look, or opt for sleek, solid colors for a minimalist vibe.
You'll need six sheets of paper, and with just a few folds and a bit of glue, you'll create a miniature organizer that's as functional as it is adorable.
This paper drawer set is perfect for various occasions-think homemade craft ideas for Mother's Day, personalized storage for small gifts at Christmas, or an addition to your desk organization system.
The compact size also makes it a wonderful teacher's gift or a unique handmade surprise for a loved one.
Read on to discover how you can create this charming project while honing your paper-folding skills.
Whether you're looking for a practical craft or a decorative organizer, these mini drawers are a great choice!

Other quick and easy desk organizers you might like to try include this super cute Hexagon DIY Pen Holder, Triangle DIY Desk Organizer, or even these Paper Pencil Wraps.
Why You'll Love This Pattern
- Practical and decorative: Combines storage with a beautiful design.
- Great for gifting: Perfect for personalizing as a unique gift.
- Eco-friendly: A sustainable and creative way to upcycle paper.
- These DIY mini paper drawers are easy to make and quick to make.
- Customizable: Adjust colors, patterns, and size to suit your needs.
- Don't be put off by the number of steps in these instructions! We have broken down the steps to make it easier for you to understand.
Exclusive Content Just For You
Not sure what you want to make next, but feeling a bit creative? Or maybe you've been searching for a pattern that sparks something new. We've got a few ideas waiting for you.
The Fold Collective, Easy Foldable Creations' community, provides you with a library of exclusive ad-free video tutorials, printable PDF patterns, helpful tips, and more so you can improve your skills and enjoy crafting in your own time.
Skill Level
★★★☆☆ (Easy to Intermediate)
Materials Needed
- 6 sheets of square lightweight cardstock (6 inches x 6 inches (15cm x 15cm) recommended)
- Scissors
- Craft Glue
- Ruler
Paper Size Options
- 6 inches x 6 inches (15cm x 15cm) sheets: Creates a medium sized drawer approximately 5 inches x 3 inches (12 cm x 7.5 cm).
Paper Type & GSM
- Lightweight cardstock (160-200 GSM) is ideal for durability while maintaining foldability.
- Decorative papers can add charm but should be sturdy enough for prolonged use.
Instructions
For these DIY mini paper drawers, you will need 6 square sheets of paper.
Making the Frame
Step 1: Take 1 sheet of paper and place the color you want the outside of the frame to be facing down.
Step 2: Fold the paper in half from right to left.
Step 3: Once again, fold the paper in half from right to left.
Step 4: Unfold the paper completely.

Step 5: Fold the bottom right and top right corners inward to meet the nearest vertical crease.
Step 6: Fold the bottom edge up, along the top edge of the bottom right triangle.
Step 7: Fold the top edge down, along the bottom edge of the top right triangle.
Step 8: Unfold previous 2 steps.

Step 9: Flip your paper over and arrange it so the diagonal edges are at the bottom.
Step 10: Fold the bottom left edge up to the top right corner, creasing only the top left side of the paper (see picture).
Step 11: Unfold previous step.
Step 12: Repeat previous 2 steps for the right side.

Step 13: Fold the bottom edge up to meet the top edge.
Step 14: Fold the bottom left corner inward to meet the edge of its nearest crease.
Step 15: Repeat previous step for the bottom right corner.
Step 16: Fold the top edge (top layer only) down to meet the bottom edge.

Step 17: Gently open out the paper to form an open rectangle. Re crease the outer edges.
Step 18: Working on the right side: hold the paper as shown. Fold the right edge to the left, along the middle crease.

Step 19: Tuck the right flap into the left pocket.
Step 20: Repeat steps 18 and 19 for the left side.
Step 21: Completed rectangle frame. Repeat steps 1 to 20 for "making the frame" 2 more times. You should end up with 3 rectangles in total.

Step 22: Glue the completed rectangles together to form a stack of rectangles. Set aside.

Making the Drawers
Step 1: Start with the color you want your drawer to be facing down.
Step 2: Fold the bottom edge of the paper up by 0.40 inches (1cm). Then unfold.
Step 3: Fold the right edge to the left by 0.40 inches (1 cm). Then unfold.
Step 4: Cut along the creases you just made. Keep the strips of paper aside (you will use them to make the handles).

Step 5: Take one of the strips and arrange it to sit vertically. Have the color you want your handles to be facing down.
Step 6: Roll the paper tightly on itself from bottom to top. Before you reach the end, add some glue to the strip and then finish rolling. Hold the paper together over the glue for a few seconds. This will help it stick.
Step 7: Place the second strip of paper vertically in front of you. Place a bit of glue at the bottom and then place the strip you rolled earlier on the bottom.
Step 8: Roll the strip up once more. When you reach the end, add some glue and finish rolling. Set aside.

Step 9: Working on the square paper you cut earlier: Arrange it so the color you want your drawer to be faces down. Fold the paper in half from right to left.
Step 10: Once again, fold the paper in half from right to left.
Step 11: Unfold the paper completely.
Step 12: Fold the bottom right and top right corners inward to meet the nearest vertical crease.

Step 13: Fold the bottom edge up, along the top edge of the bottom right triangle.
Step 14: Fold the top edge down, along the bottom edge of the top right triangle.
Step 15: Unfold previous 2 steps.
Step 16: Flip your paper over and arrange it so the diagonal edges are at the bottom.

Step 17: Fold the bottom left edge up to the top right corner, creasing only the top left side of the paper (see picture).
Step 18: Unfold previous step.
Step 19: Repeat previous 2 steps for the right side.
Step 20: Fold the bottom edge up to meet the top edge.

Step 21: Fold the bottom left corner inward to meet the edge of its nearest crease.
Step 22: Repeat previous step for the bottom right corner.
Step 23: Fold the top edge (top layer only) down to meet the bottom edge.
Step 24: Gently open out the paper to form an open rectangle. Re-crease edges.

✨ You're almost there! ✨
To unlock the final steps of the photo tutorial and complete your pattern, create a free account with Grow.me. below.
Make sure you tick the box to subscribe to our newsletter and stay up to date with the latest patterns, tips, and more!
Once you're signed up, you'll get instant access to finish your project with the photo tutorial and enjoy exclusive content in the future.
Already signed up? Hit the button below and select 'Switch to Log In' to pick up where you left off and finish your project!
Step 25: Working on the right side: hold the paper as shown. Then, fold the right edge to the left, along the middle crease.
Step 26: Tuck the right flap into the left pocket.

Step 27: Repeat steps 18 and 19 for the left side.
Step 28: Glue the handle you made earlier (from the strips) to the front of the drawer.
Step 29: Repeat steps 1 to 27 for "making the drawers" 2 more times. You will end up with 3 drawers.
Once you have made all 3 drawers, place drawers into frame. Completed DIY mini paper drawers.

Tips For Success
- Use a ruler to measure and fold precisely for snug-fitting drawers.
- Ensure the cardstock is thick enough to hold weight but not too stiff to fold.
- Apply glue sparingly to avoid warping the paper.

Common Mistakes & How To Avoid Them
- Uneven folds: Use a bone folder for crisp and accurate creases.
- Weak structure: Double-check that all edges are glued securely to maintain stability.
- Misaligned drawers: Stack and align pieces carefully during assembly.
Color, Paper Ideas, and Variations
- Use pastel tones for a delicate and soft aesthetic.
- Combine solid colors and prints for a chic contrast.
- Add embellishments like stickers, washi tape, or hand-drawn details for a personalized touch.
- Try a gradient or rainbow color scheme for a fun and vibrant look.
- Use red and green papers for a Christmas look.
- Use pinks and reds for Mother's Day or Valentine's Day.
FAQ
Absolutely! For larger origami drawer organizers use square sheets of paper bigger than 8" x 8" (20cm x 20cm).
For smaller origami drawer organizers we recommend using 6" x 6" (15cm x 15cm) paper.
These mini drawers are perfect for small items like jewelry, craft supplies, paper clips, or even tiny treats like candies.
Using lightweight cardstock improves durability, but avoid placing heavy or sharp items inside.
Yes, patterned paper adds a decorative touch.
Decorate with stickers, labels, or even tiny drawer handles made from beads for a unique look!
Other Paper Crafts You Might Like To Try:
Helpful Origami Tips
If you're curious to learn more about origami, you might like to look at our basic guides on how to make some common origami folds.
Start with the valley fold and mountain fold-these are the foundation of most origami models.
Once you're comfortable, you might like to try the petal fold for 3D shapes, and explore the bird base and square base for more complex designs.
The water bomb base is also great for creating inflatable or geometric models, like this inflatable origami rabbit.
Useful Paper Craft Terms
Want to learn a little more about paper crafts and origami?
We've made this helpful printable just for you. It explains common terms and helpful tips you might come across when you are folding origami or making a paper craft project.
You can download the useful paper craft terms printable PDF here.
Stay Connected
Made this pattern? Let us know how it went in the comments below!
Pin this post - Pin now to take your paper crafting skills to the next level.
Share on Instagram or Facebook - Capture the beauty of your finished paper craft project and share it on Instagram or Facebook! Tag us @easyfoldablecreations so we can see your work!

On the hunt for more easy paper crafts.
Why not try these easy origami for beginners, pleated gift wrapping idea, fan gift wrapping idea, origami shield, origami wallet, paper photo frame, Santa gift tag, sliding origami rectangle box, 3D origami owl, origami penguin, bunny cake toppers, bunny gift box, mini paper gift bags, or rabbit face.
Other Patterns You Might Like To Try:
Looking for other easy patterns like this? Try these:
- Minimalist Seasonal Paper Decoration Ideas
- DIY Paper Decor Ideas For Every Season
- Wedding Confetti Alternatives That Are Venue Friendly
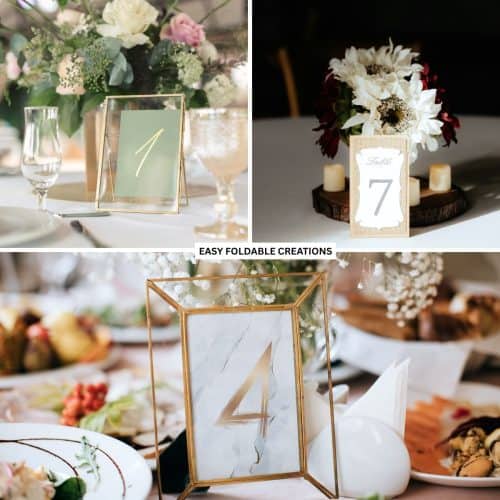
- DIY Wedding Table Number Ideas Using Paper
- DIY Paper Wedding Place Card Ideas You Can Make Yourself
- Gift Wrapping Topper Ideas
- Last Minute Gift Wrapping Ideas That Still Look Beautiful and Thoughtful
- Gift Wrapping Ideas For Oddly Shaped Gifts


Comments
No Comments