
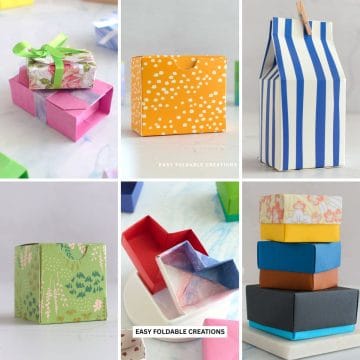
Want to take your gift wrapping to the next level?
This easy pleated gift wrapping idea adds an elegant, professional touch to any present, without complicated folds!
Perfect for Christmas, Valentine's Day, birthdays, weddings, and more, it's a simple but stylish way to make your gifts stand out.

Jump to:
Beautifully wrapped gifts make any occasion feel extra special.
Whether it's for Christmas, a birthday, a wedding, or just because, putting a little extra care into your wrapping can turn a simple present into something unforgettable.
An easy pleated gift wrapping idea is a decorative packaging technique that uses folded pleats in wrapping paper for a textured finish.
It is commonly used for gift presentation, holidays, and special occasions, and relies on simple repeated folding.
If you're looking for unique gift wrapping ideas that are easy but look impressive, this pleated gift wrapping technique is the perfect choice.
This method creates delicate pleats in the wrapping paper, giving your gift an elegant, high-end look.
Don't worry, it's simpler than it looks! With just some folding, pressing, and a bit of tape, you can achieve a professional finish in minutes.
This easy pleated gift wrapping idea works best for rectangle and square-shaped gifts, making it perfect for wrapping books, cookies or chocolates, clothing boxes, board games, perfume sets, and electronics like tablets or phones.
If the gift is slightly irregular in shape, you can place it in a box first and then wrap!
Looking for gift wrapping inspiration?
This pleated wrapping technique is perfect for Christmas gifts, wedding presents, birthdays, Mother's Day, and even baby shower gifts.
It's elegant yet simple, and you can easily customize it with different types of paper, ribbons, or embellishments.
Whether you want a classic, sophisticated look or something fun and festive, this method works for any occasion.
Oh, and if you're after something a little extra special to match with this gift wrapping idea, why not make these butterfly gift tags or 3D Christmas tree swing tags?
And to top it off, if you want to make your own matching gift bag for this gift, then you have to make these super easy wrapping paper gift bags!

Why You'll Love This Pattern
- Looks high-end but is surprisingly simple - No advanced skills needed
- Works for multiple occasions - Great for Valentine's Day, Easter, Christmas, birthdays, weddings, anniversaries, and more
- No special tools required - Just wrapping paper, tape, and scissors
- Customizable for any theme - Choose elegant, fun, or festive paper styles
- Perfect for rectangle and square gifts - An easy technique for common gift shapes
- Adds a unique touch - A step up from basic wrapping but still quick to do.
- Great if you're after an easy last minute gift wrapping idea.
Exclusive Content Just For You
Not sure what you want to make next, but feeling a bit creative? Or maybe you've been searching for a pattern that sparks something new. We've got a few ideas waiting for you.
The Fold Collective, Easy Foldable Creations' community, provides you with a library of exclusive ad-free video tutorials, printable PDF patterns, helpful tips, and more so you can improve your skills and enjoy crafting in your own time.
Skill Level
★☆☆☆☆ (Very Easy)
Materials Needed
- Wrapping paper Of Choice - Choose a paper that holds creases well
- Scissors
- Double-sided tape (or regular tape
- Ribbon or embellishments (optional)
Note: Thicker paper works best for crisp pleats, while thinner paper creates a softer, more delicate effect.
Best Paper Types for Pleated Wrapping
- Standard wrapping paper - Easy to fold and widely available
- Kraft paper - Creates a rustic, handmade feel
- Metallic or foil paper - Adds a luxurious, reflective finish
- Textured paper - Embossed or patterned paper makes the pleats stand out
- Recycled or upcycled paper - Old maps, newspaper, or sheet music.
Instructions
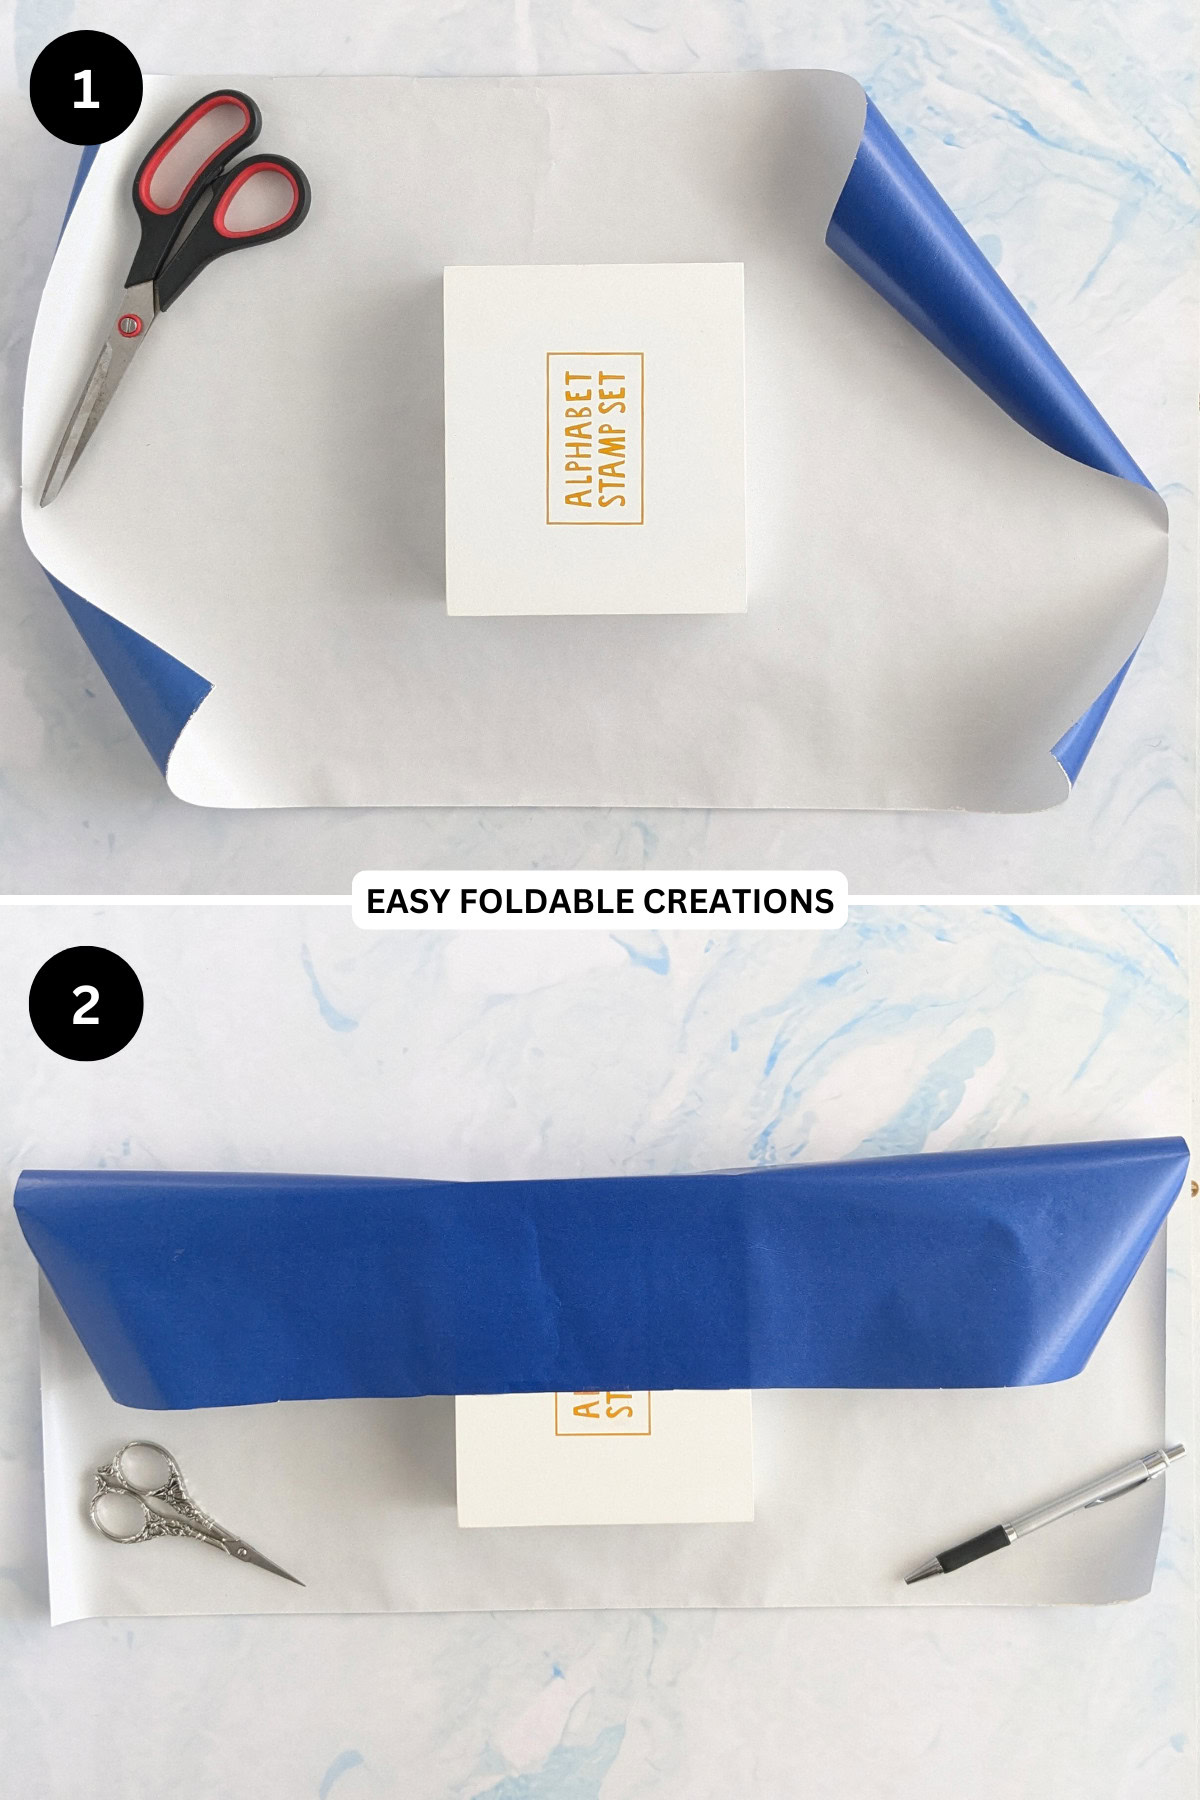
Step 1: Cut your wrapping paper to size. The top edge of the wrapping paper should be able to fold down about ¾ down the front of your gift.
The bottom edge should have enough so that it can fold just about a quarter up the gift.
Make sure there is also extra paper on the sides of the gift. You will need a bit more than 1 ¼ times the width of your gift on either side.
Step 2: Fold the top edge of the paper down so that it covers ¾ of the gift. Use a bit of tape to secure it if you want.
Step 3: Hold the left side of the paper as shown. Then bring it towards your gift, flattening it against the gift's left edge as shown.
Once you have lined it up with the edge of the gift, crease the left side.
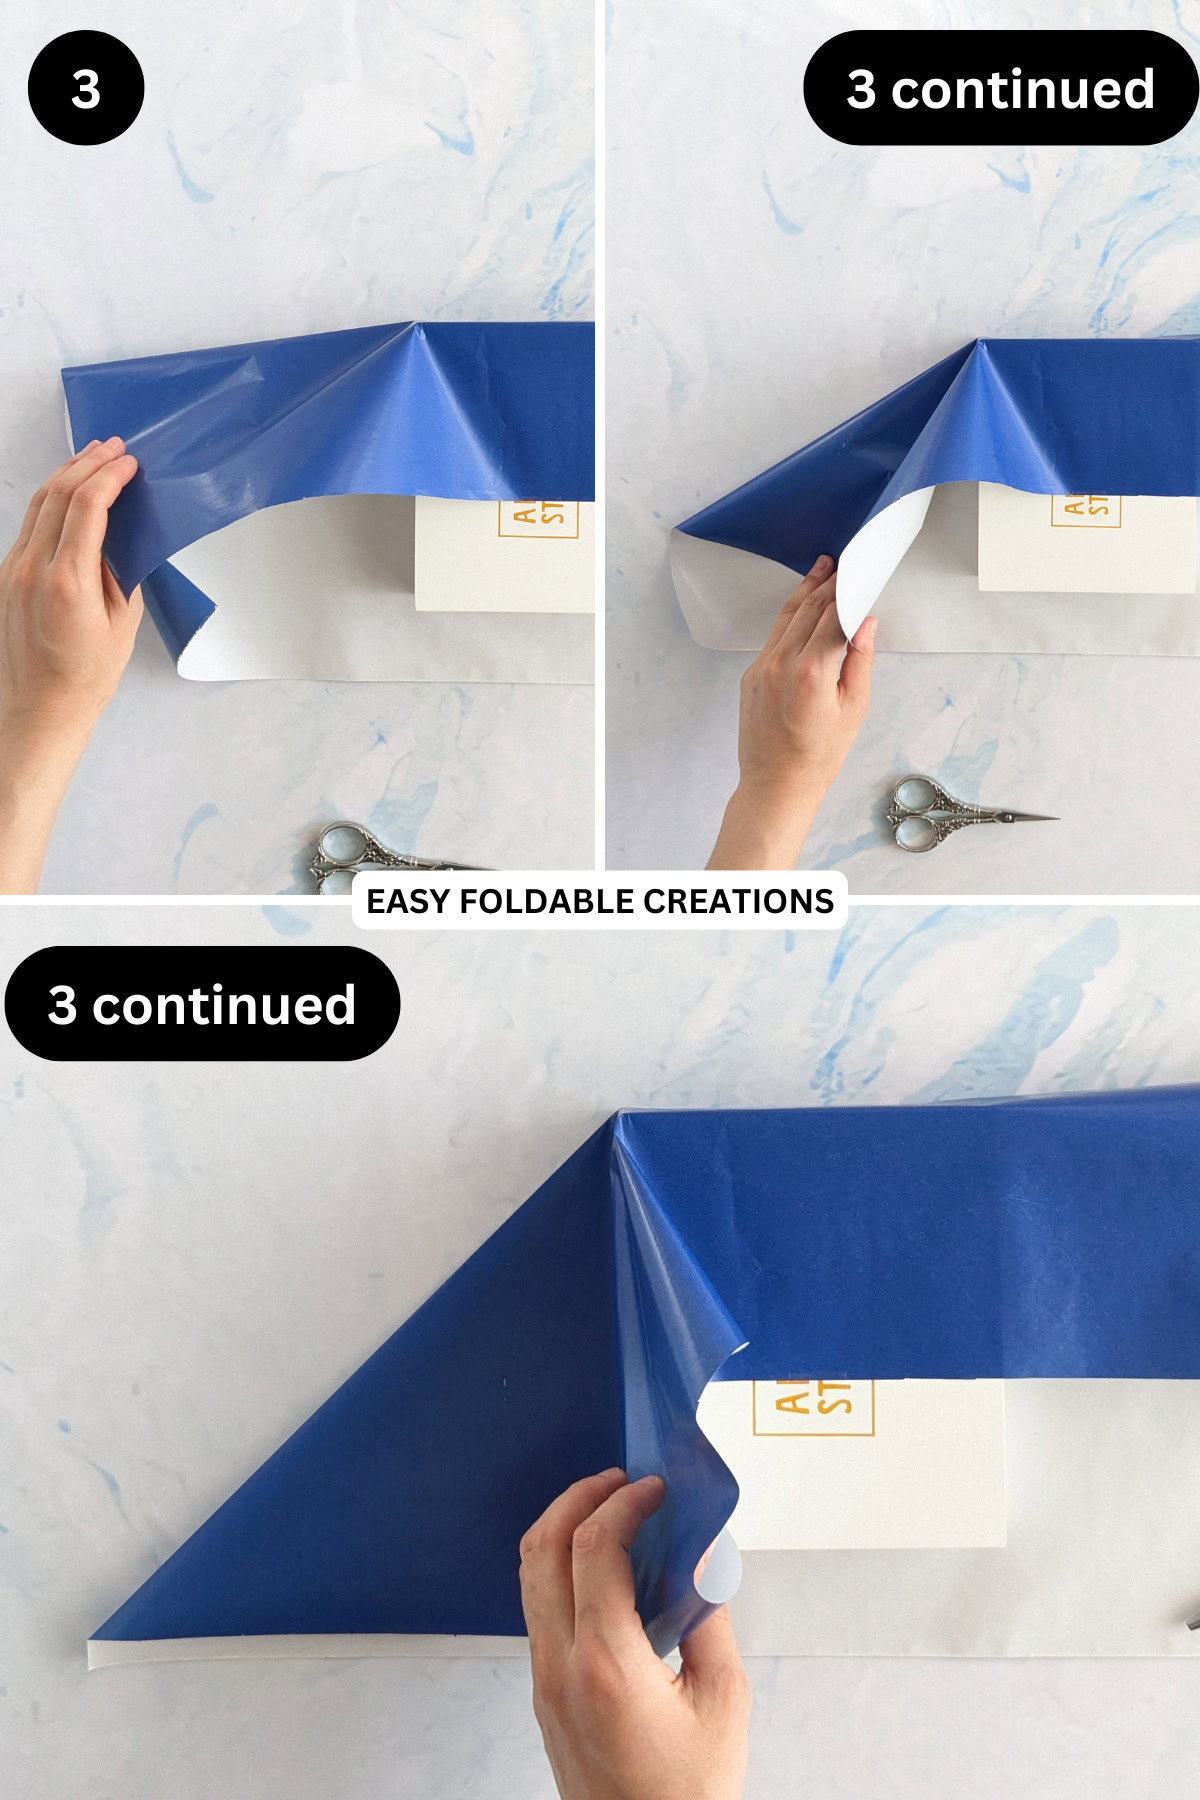
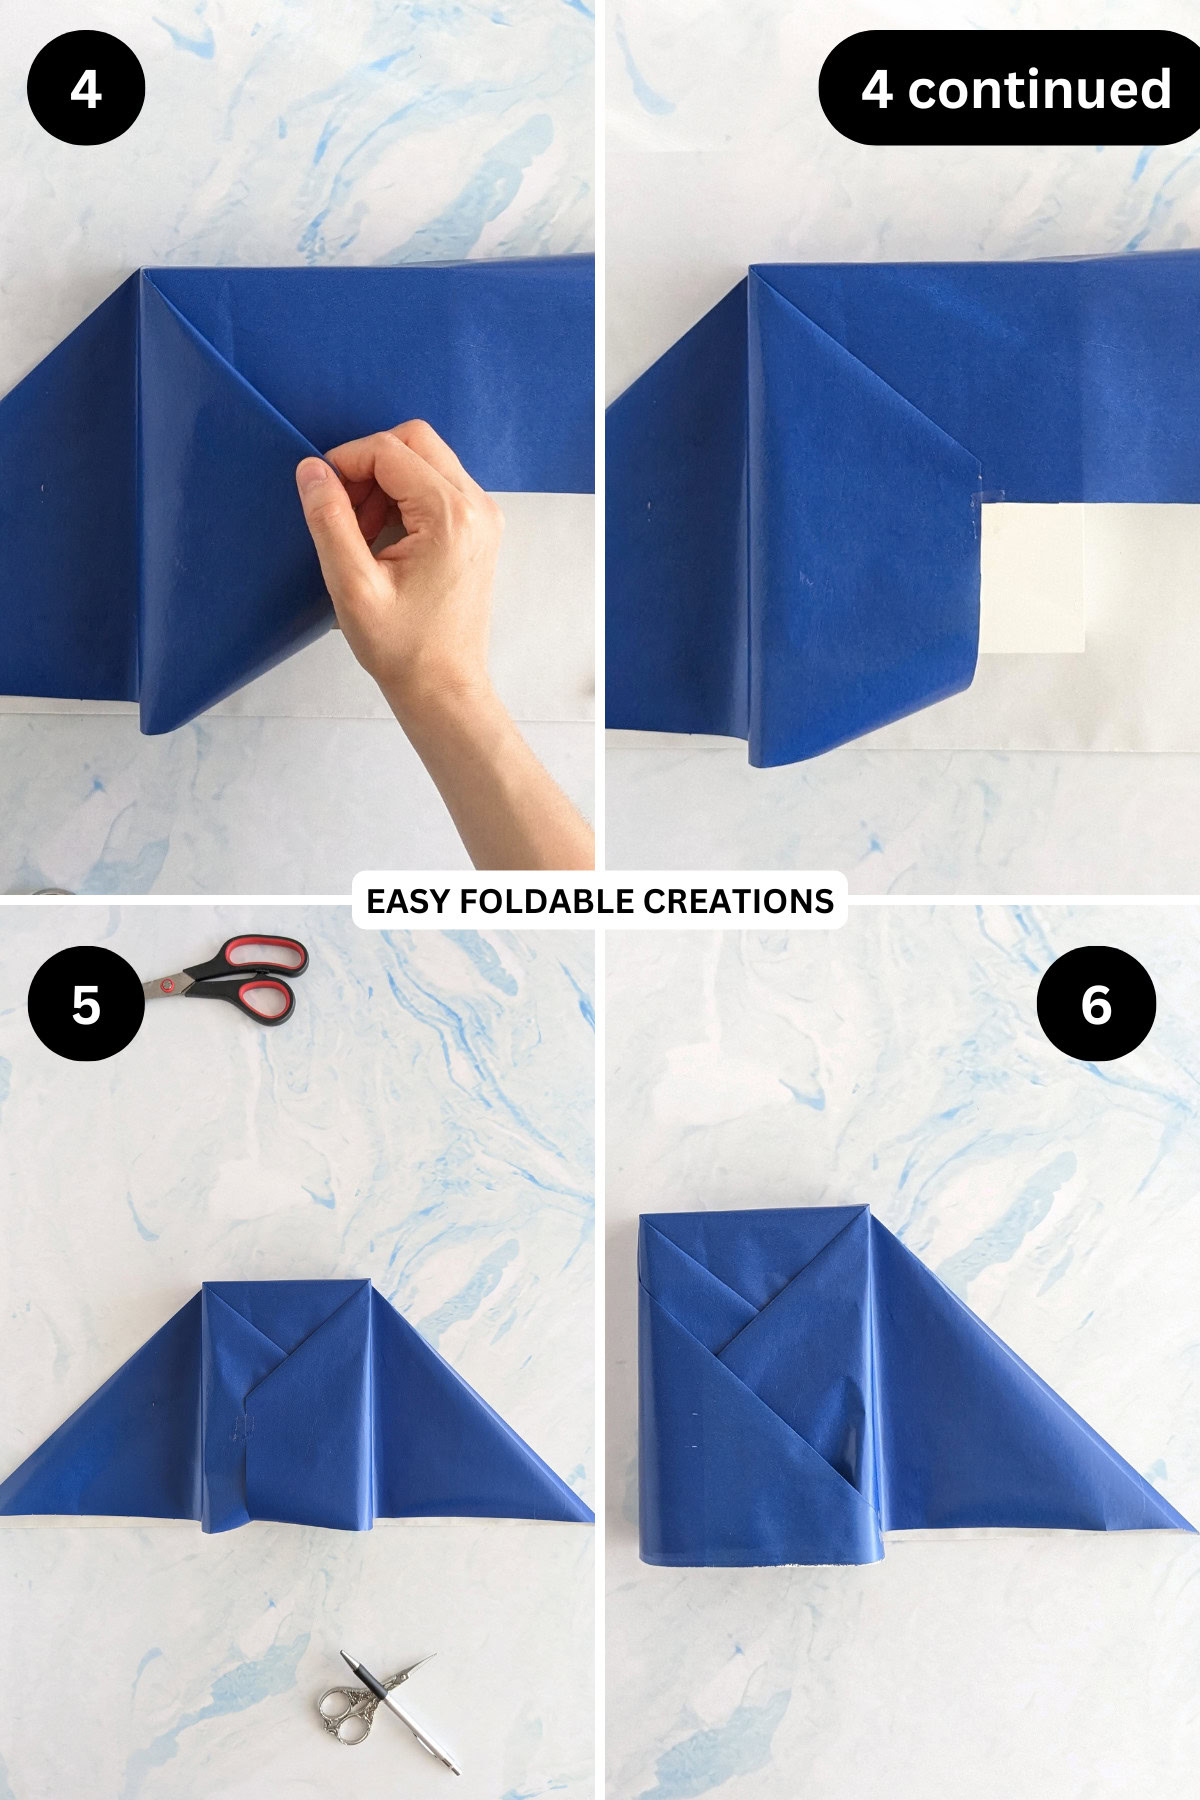
Step 4: Still working on the left side, flatten the top flap (that formed from the previous step) onto the gift as shown.
Make sure that the left side still sits snuggly against the edge of the gift before you crease. Place a little tape at the end of the flap to secure it.
Step 5: Repeat steps 3 and 4 for the right side.
Step 6: Fold the left side to the top of the gift. Secure it with a bit of tape at the bottom edge.
✨ You're almost there! ✨
To unlock the final steps of the photo tutorial and complete your pattern, create a free account with Grow.me. below.
Make sure you tick the box to subscribe to our newsletter and stay up to date with the latest patterns, tips, and more!
Once you're signed up, you'll get instant access to finish your project with the photo tutorial and enjoy exclusive content in the future.
Already signed up? Hit the button below and select 'Switch to Log In' to pick up where you left off and finish your project!
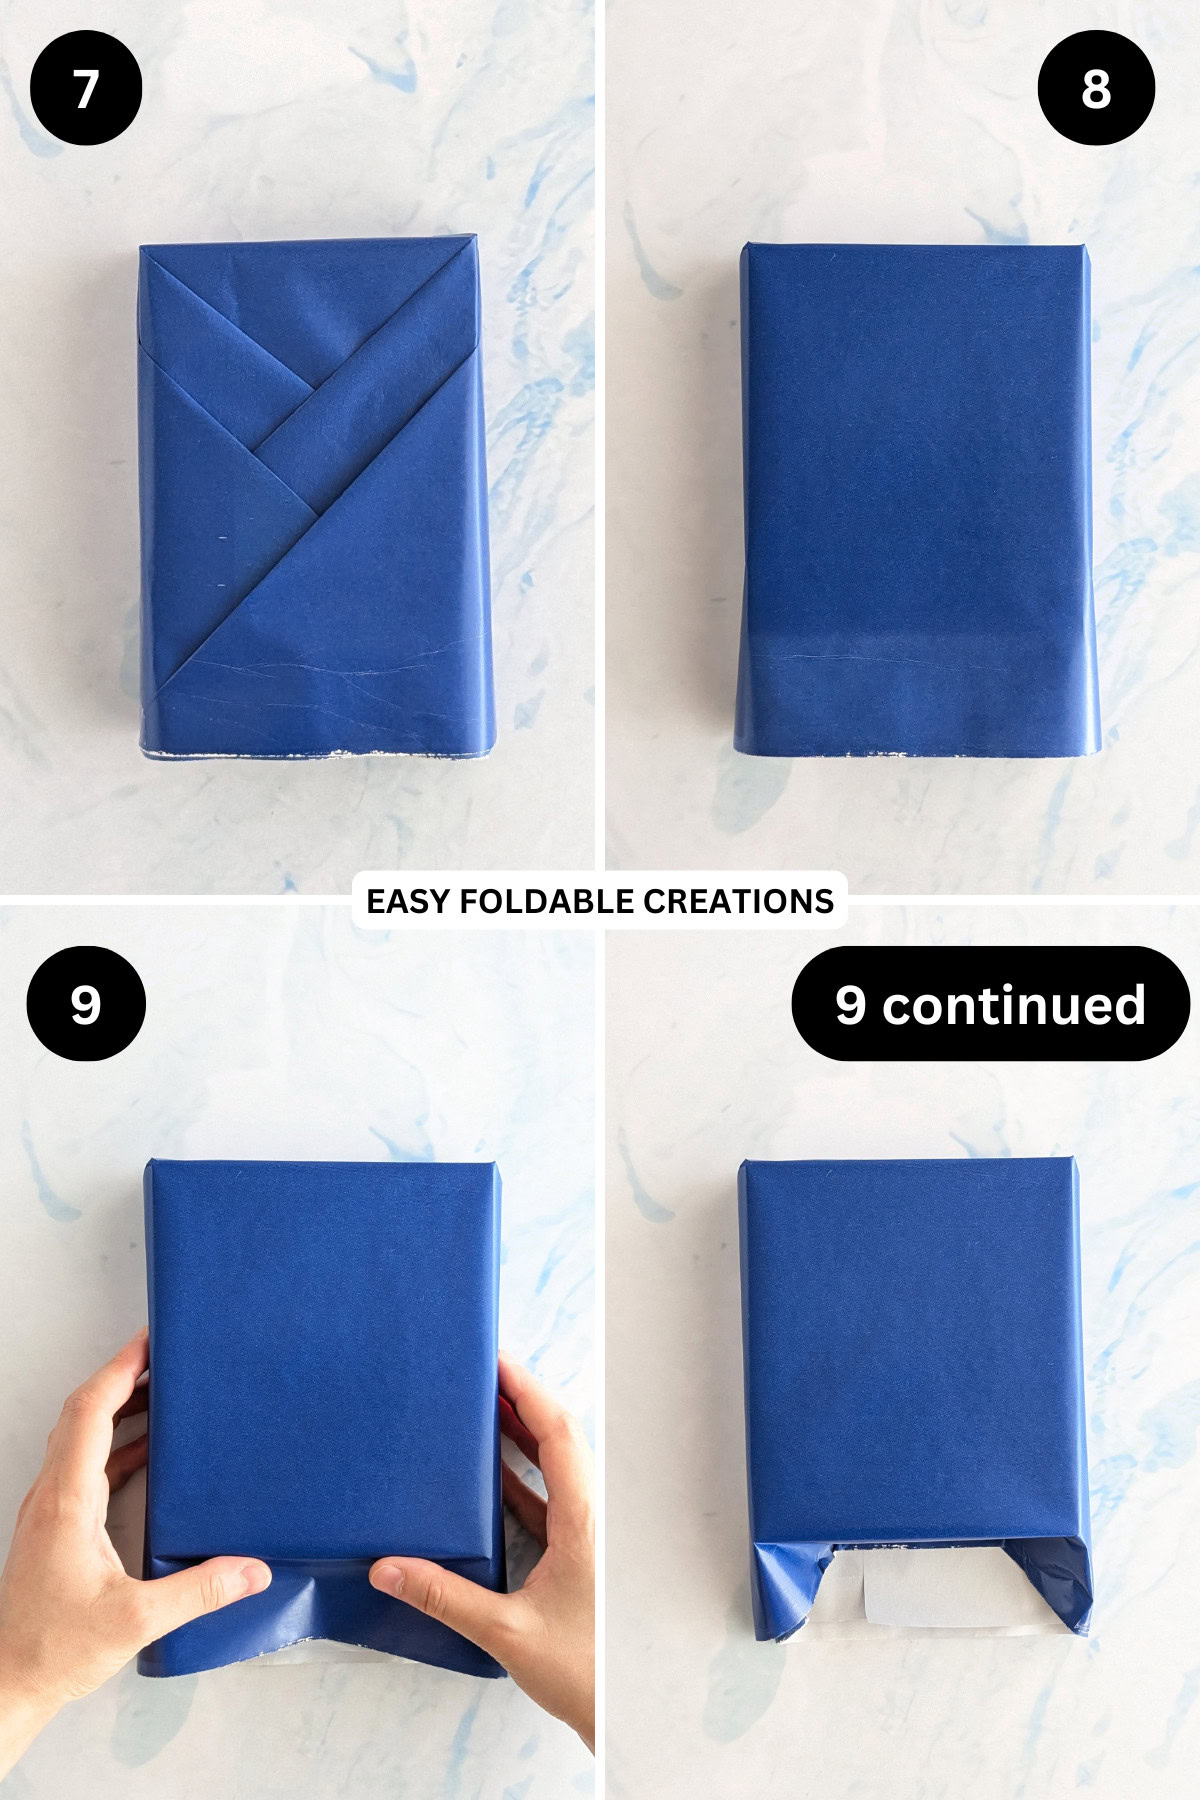
Step 7: Fold the right side to the top of the gift. Secure it with a bit of tape at the bottom edge.
Step 8: Flip your gift over from left to right.
Step 9: Run your fingers along the bottom edge of your gift to bring the paper down as shown. Tip: if it looks like the paper at the bottom of your gift is too long, you can trim it down slightly.
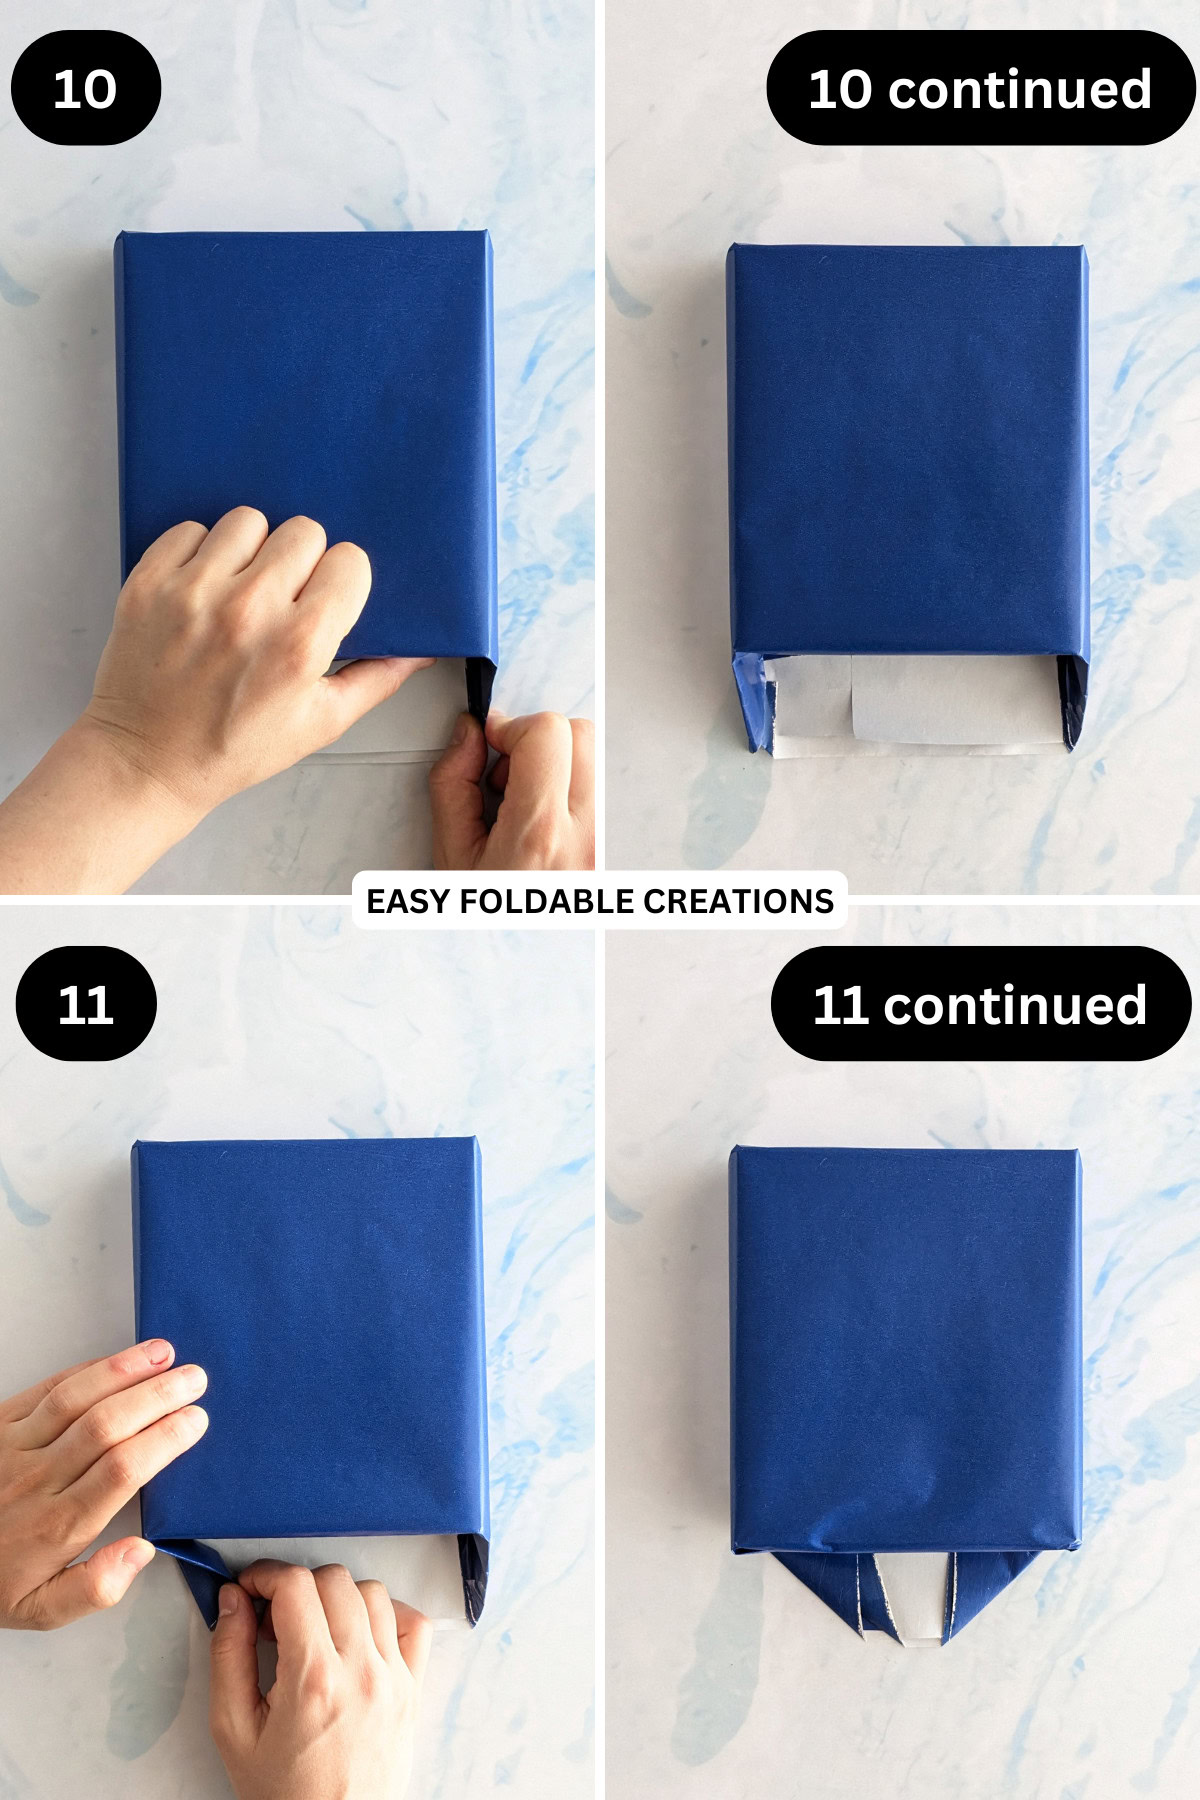
Step 10: Straighten out the bottom left and right sides as shown. They should align with the sides of your gift before you fold them in on the next step.
Step 11: Fold both the left and right sides in on the bottom.
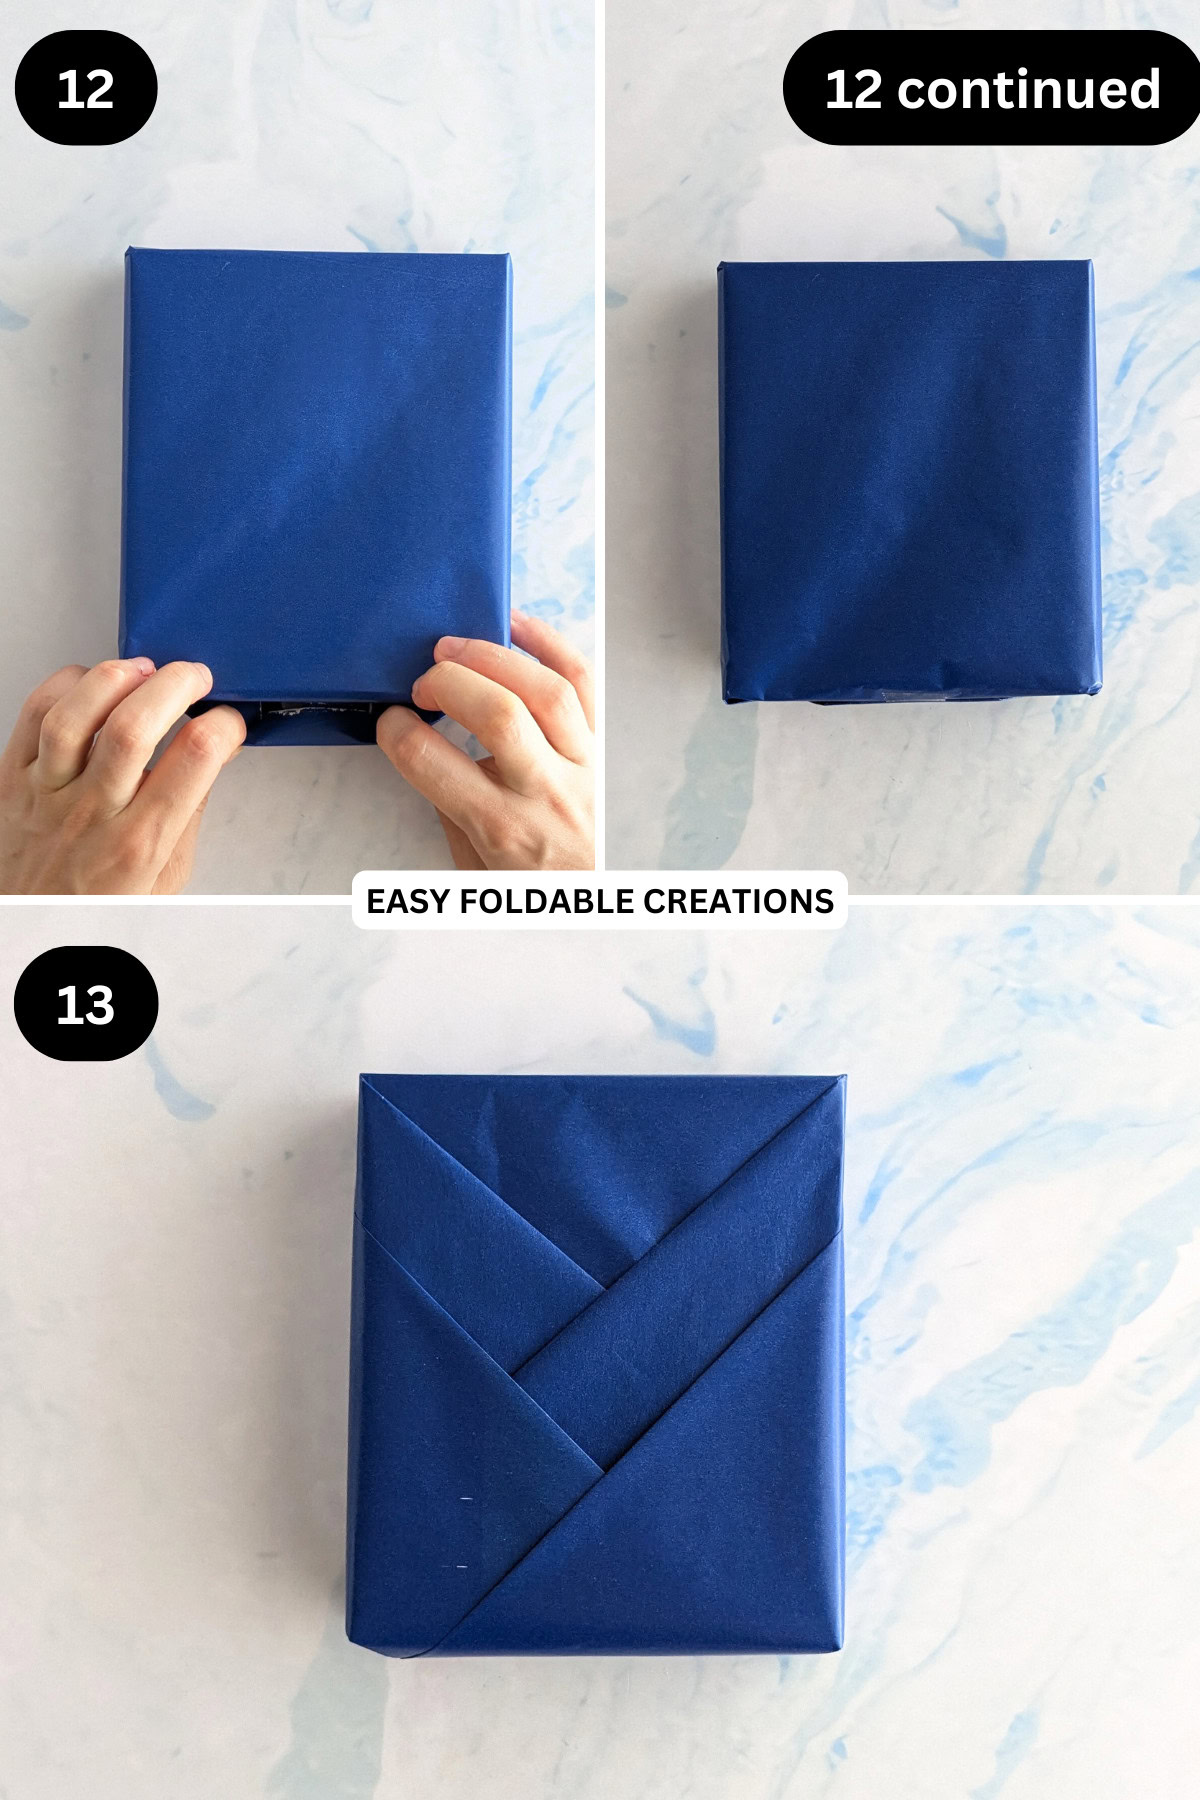
Step 12: Fold the bottom edge up (make sure that it doesn't go over the top edge - if it is too long, fold the bottom tip in slightly and then fold the bottom edge up) and secure with tape or glue.
Step 13: Flip your gift over, completed wrapping. You can decorate your wrapping as you like. E.g. tie a ribbon around it, add some embellishments, slip a card or gift tag into the wrapping, with washi tape, or keep it plain.
Tips For Success
- You don't have to add tape or glue between every step, this just makes it easier to wrap your gift. Once you get the hang of wrapping this way, it is possible to wrap it without using tape or glue during the process (you will still have to tape or glue the gift in the final step though!)
- If you are wrapping a large gift and your wrapping paper isn't wide enough, you could tape or glue two sheets of wrapping paper together to give you more length. This way you will also get a two toned look if you use two different kinds of wrapping paper.
- Secure with double-sided tape for a seamless, professional finish.
- Pair with a decorative ribbon to highlight the pleated section
- Practice on scrap paper first if you're new to pleated wrapping.

Common Mistakes & How To Avoid Them
- Uneven pleats - Fold carefully to keep them consistent
- Using too little paper - Allow extra width to accommodate the folds. If you don't cut your paper wide enough, you may find your pleats don't run all the way across.
- Paper tearing at the folds - Use a medium-weight paper to avoid this issue.
Color, Paper Ideas, and Variations
- Classic & Elegant - Use white, gold, or metallic wrapping paper for a sophisticated look.
- Festive & Fun - Choose bold colors or patterns for Christmas, birthdays, or celebrations
- Minimalist & Modern - Use solid-colored paper with subtle pleats for a clean, stylish effect.
- Rustic & Handmade - Try Kraft paper with twine for a charming, natural feel.
- Themed Wrapping - Match the paper and ribbon to the occasion, like florals for weddings or pastels for baby showers.
FAQ
It works best for rectangle and square gifts, but you can modify it slightly for other shapes.
A medium-weight paper (not too thick or too thin) works best. Foil or textured papers also hold pleats well.
Double-sided tape is best for a neat look, but glue dots or regular tape can also work.
Yes, pleats require extra width, so cut a slightly larger piece of paper than normal.
Absolutely! Try combining pleats with ribbon accents, layering different papers, or adding a decorative tag for a unique finish.
All occasions! From Christmas and Easter to birthdays, weddings, and even Valentine's Day!
It's also great for wrapping teachers gifts, Mother's Day gifts, Father's Day gifts, and so on.
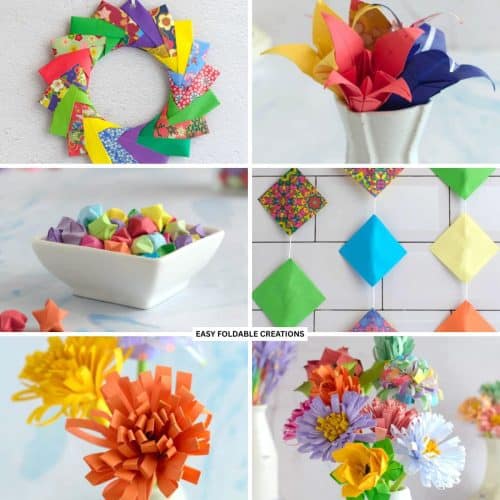
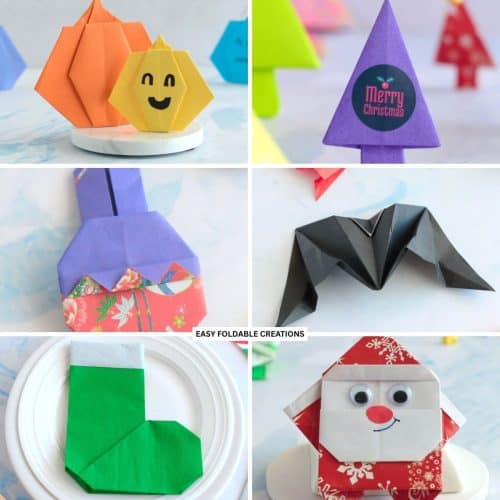
Other Paper Crafts You Might Like To Try:
Stay Connected
Made this pattern? Let us know how it went in the comments below!
Pin this post - Pin now to take your paper crafting skills to the next level.
Share on Instagram or Facebook - Capture the beauty of your finished paper craft project and share it on Instagram or Facebook! Tag us @easyfoldablecreations so we can see your work!

Other Patterns You Might Like To Try:
Looking for other easy patterns like this? Try these:
- Minimalist Seasonal Paper Decoration Ideas
- DIY Paper Decor Ideas For Every Season
- Wedding Confetti Alternatives That Are Venue Friendly
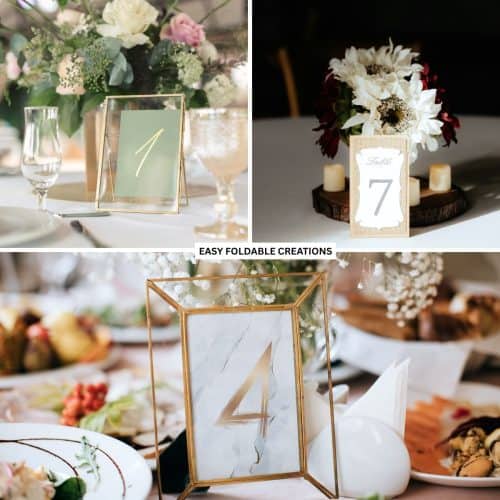
- DIY Wedding Table Number Ideas Using Paper
- DIY Paper Wedding Place Card Ideas You Can Make Yourself
- Gift Wrapping Topper Ideas
- Last Minute Gift Wrapping Ideas That Still Look Beautiful and Thoughtful
- Gift Wrapping Ideas For Oddly Shaped Gifts


Comments
No Comments