
Make your own custom DIY gift bags from wrapping paper!
This easy project adds a personal touch to gift-giving and uses just a few materials you likely have on hand.

Jump to:
- Why You'll Love This Pattern
- Exclusive Content Just For You
- Skill Level
- Materials Needed
- Instructions
- Tips For Success
- Common Mistakes & How To Avoid Them
- Color, Paper Ideas, and Variations
- FAQ
- Other Paper Crafts You Might Like To Try:
- Helpful Origami Tips
- Useful Paper Craft Terms
- Stay Connected
- Other Patterns You Might Like To Try:
- Comments
Creating DIY gift bags from wrapping paper is a delightful and practical craft that lets you add a unique, personal touch to any present.
Not only is it incredibly cost-effective, but it also allows you to make bags in just the right size, perfect for gifts that might otherwise be challenging to wrap.
These homemade bags can be customized in endless ways, allowing you to tailor them to different events and themes-whether it's a birthday, holiday, wedding, or just a thoughtful gesture.
Many of us have extra wrapping paper lying around after birthdays, holidays, or other events. Instead of letting it go to waste, transforming it into a beautiful gift bag is a fun and sustainable way to reduce waste while expressing creativity.
With just a few simple supplies-scissors, glue, a ruler, a hole punch, and some ribbon-you can craft bags that not only look professional but also show the recipient that you put in a little extra effort to make their gift special.
This project is an enjoyable way to unwind, adding a personal, polished touch to gifts without spending extra on store-bought packaging.
These DIY gift bags are versatile too-you can create them in various sizes and add embellishments like bows, or custom tags like this butterfly gift tag to make them extra festive.
Whether you're working with elegant holiday wrapping, bright birthday patterns, or simple Kraft paper for a rustic look, this project can be tailored to suit any occasion.
Plus, when you consider the impact of gift-wrapping waste on the environment, this is a fantastic way to repurpose materials, making your gift-giving both eco-friendly and charming.
In a few simple steps, you'll have a beautifully crafted, customized gift bag that stands out from anything store-bought.

Why You'll Love This Pattern
- Cost-effective and environmentally friendly.
- Adds a unique, handmade touch to gifts.
- Customizable to fit any gift size.
- A great way to use up leftover wrapping paper.
- Suitable for beginners and easy to personalize.
Exclusive Content Just For You
Not sure what you want to make next, but feeling a bit creative? Or maybe you've been searching for a pattern that sparks something new. We've got a few ideas waiting for you.
The Fold Collective, Easy Foldable Creations' community, provides you with a growing library of exclusive ad-free video tutorials, printable PDF patterns and more so you can improve your skills and enjoy crafting in your own time.
Skill Level
Difficulty: ★★☆☆☆ (Easy)
Materials Needed
- Wrapping paper (any design you love).
- Scissors.
- Glue or double-sided tape.
- Satin Ribbon
- Ruler.
- Hole Punch
Paper Size
- You will need wrapping paper that is approximately twice the width of the item you want to wrap. It must also be 1 ½ times tall.
- E.g. If you have a gift that is 6" x 8" (15cm x 20cm), you will need to cut your wrapping paper to be at least 12" (30cm) in width, and 12" (30cm) in height).
Paper Type & GSM
- Wrapping paper works best with a thickness of 60-80 GSM for easy folding but enough durability to hold the gift.
- For heavier gifts, consider using thicker wrapping paper or reinforcing the bag with a cardstock base.
Instructions
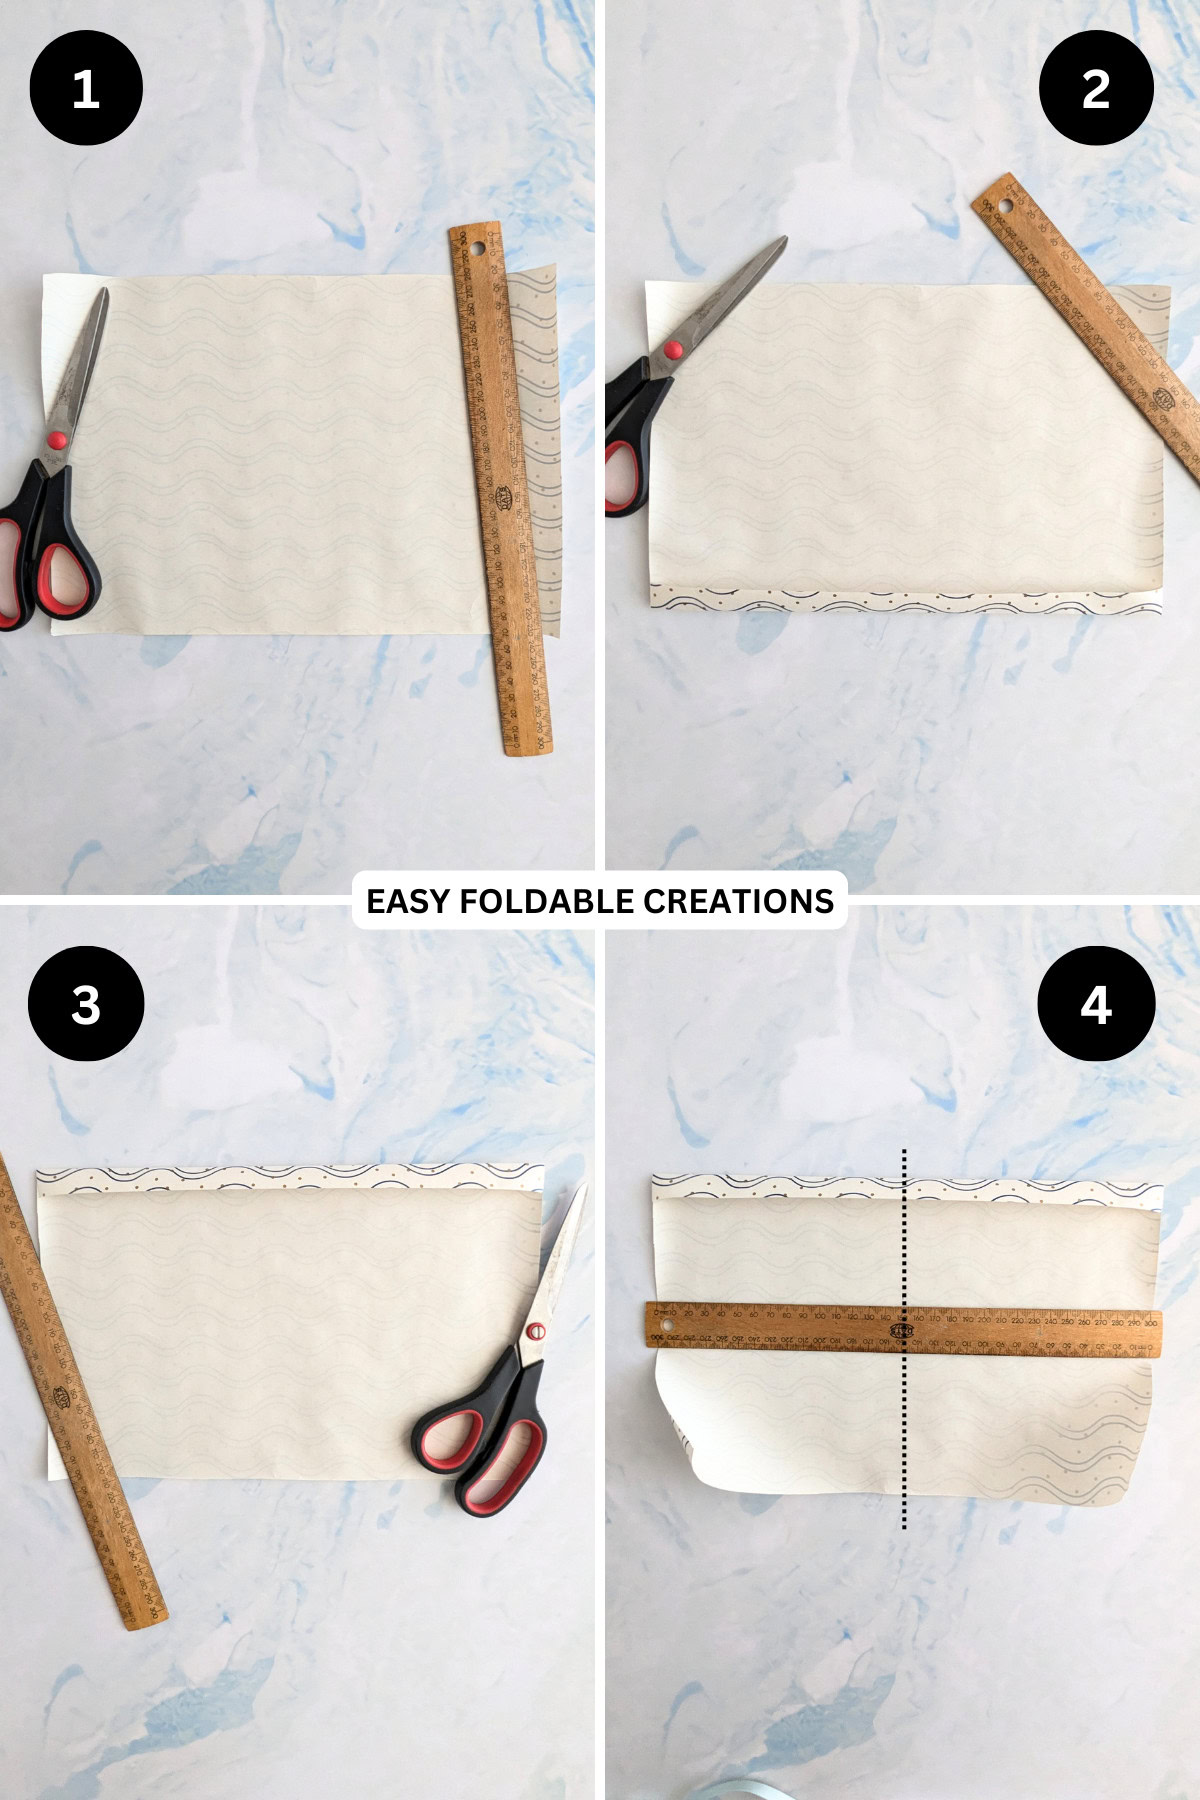
Step 1: Place your wrapping paper pattern side down. Cut the paper so that it is twice the width of the item you want to wrap, and it is 1 ½ times as tall. E.g. If your item is 5" x 8" (12cm x 20cm), you will need to cut your paper to be 10" x 12" (24cm x 30cm).
Step 2: Fold the bottom edge of the paper up by 1 to 2 inches (2.5cm to 5cm).
Step 3: Rotate your paper 180 degrees. The fold you made in the previous step should be on top.
Step 4: Using a ruler, mark the halfway point of your paper.
Step 5: Fold the left side to meet the halfway point.
Step 6: Fold the right side to meet the middle, overlapping with the left flap slightly.
Step 7: Unfold previous step.
Step 8: Place some glue or double sided tape on the edge of the left flap (found in the middle of the paper).
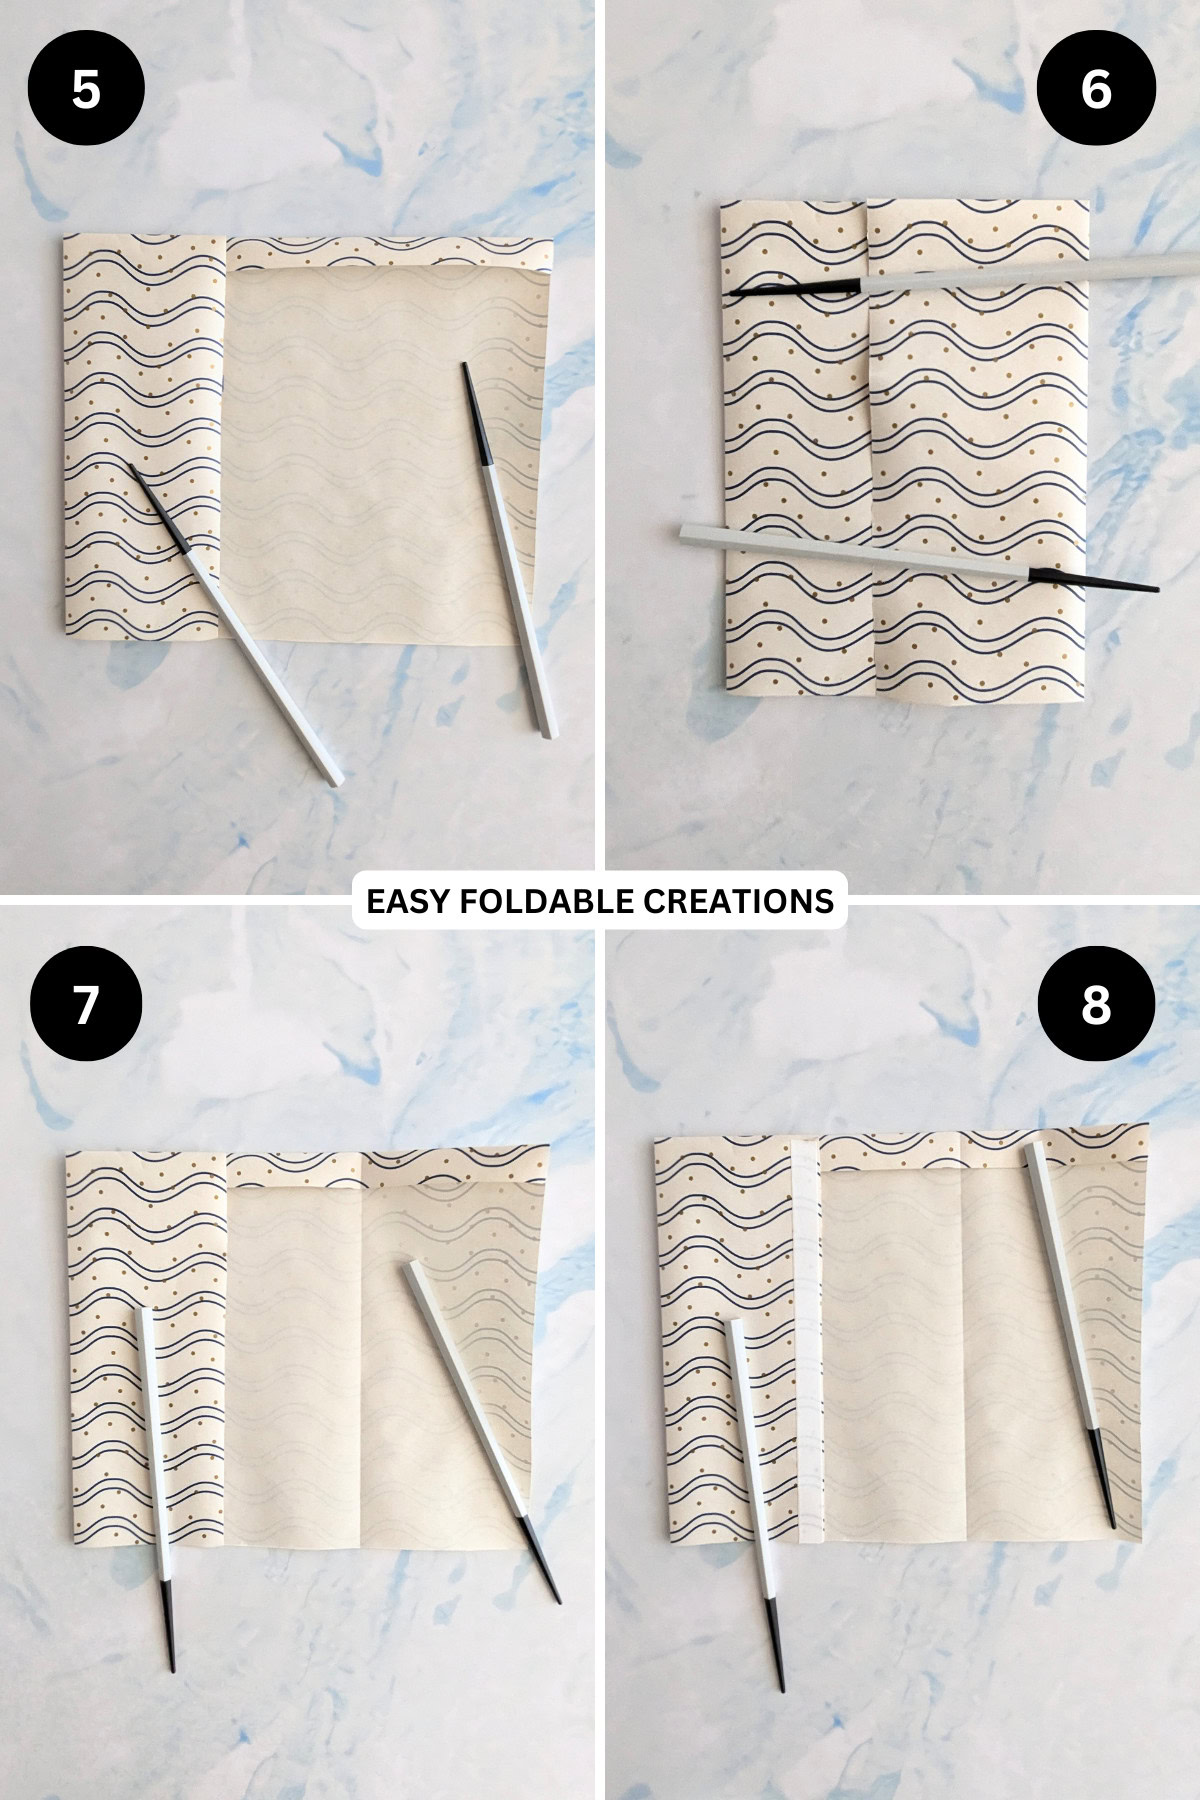
Step 9: Refold the right side to the middle and press to stick down. Allow glue to dry before moving on.
Step 10: Fold the bottom of the bag up slightly. This will be the base of the bag. If you want a big base, you will need to fold the bottom up higher.
Step 11: Open out the bottom flap you just made. You should end up with two triangles on either side of a rectangle.
Step 12: Fold the bottom edge up so that it overlaps the middle crease line of the base.
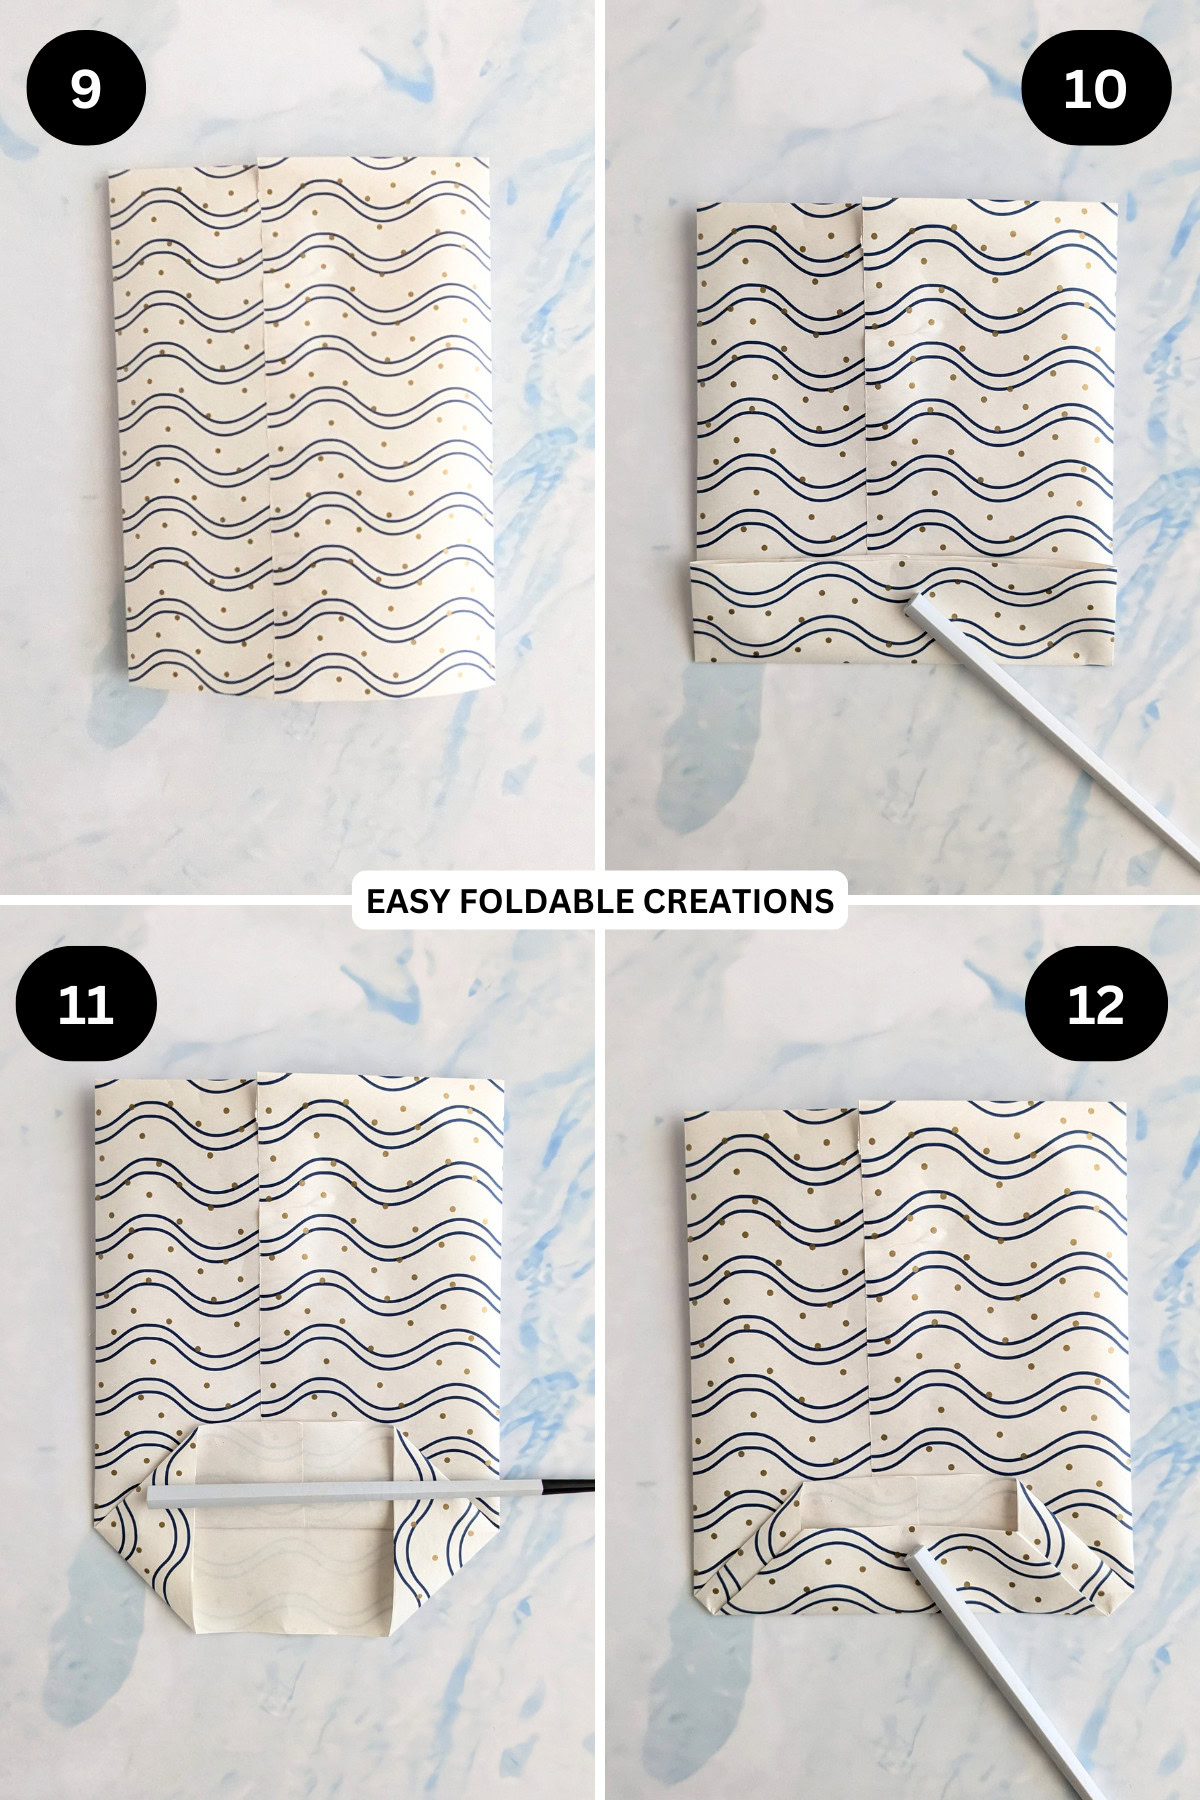
Step 13: Apply some glue or double sided tape on the bottom flap.
Step 14: Fold the top flap down, making sure it overlaps the bottom flap. Press to hold together. Allow glue to dry before next step.
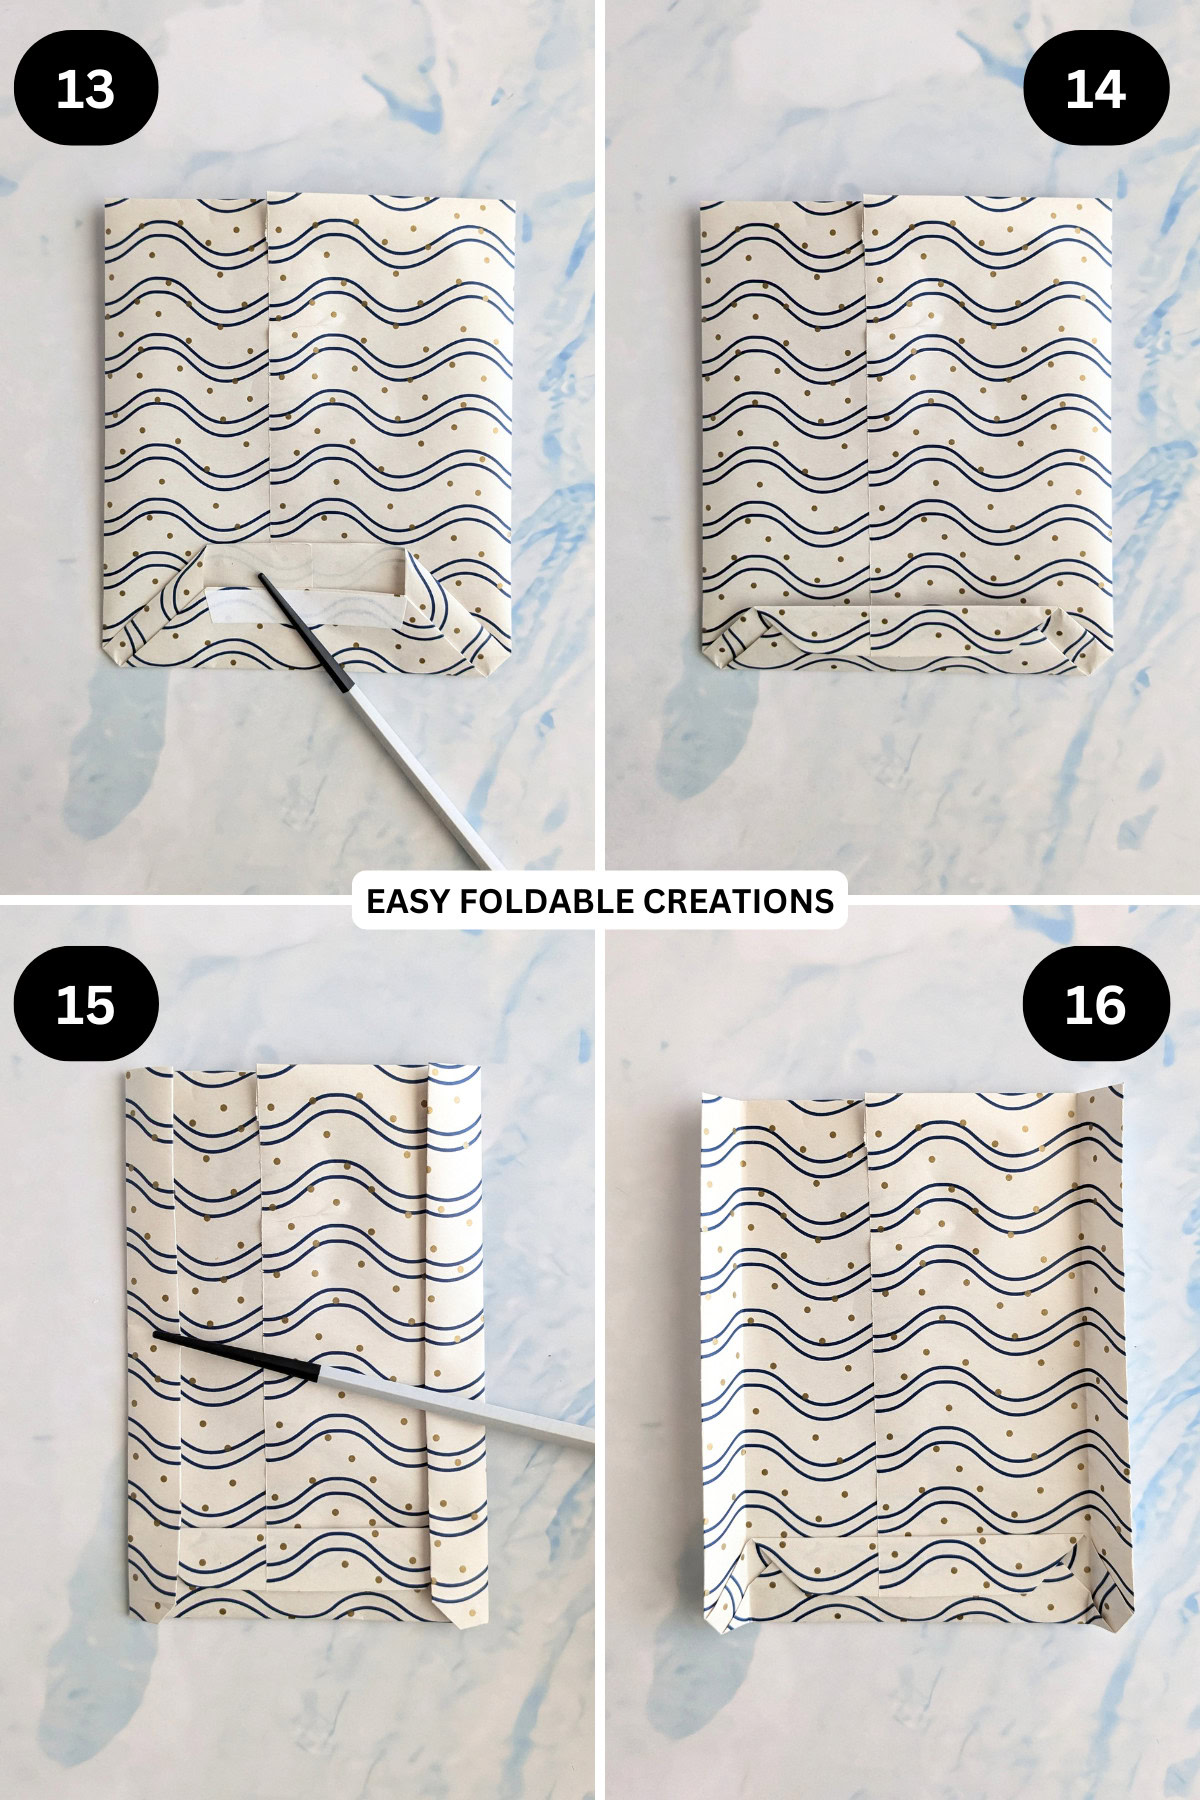
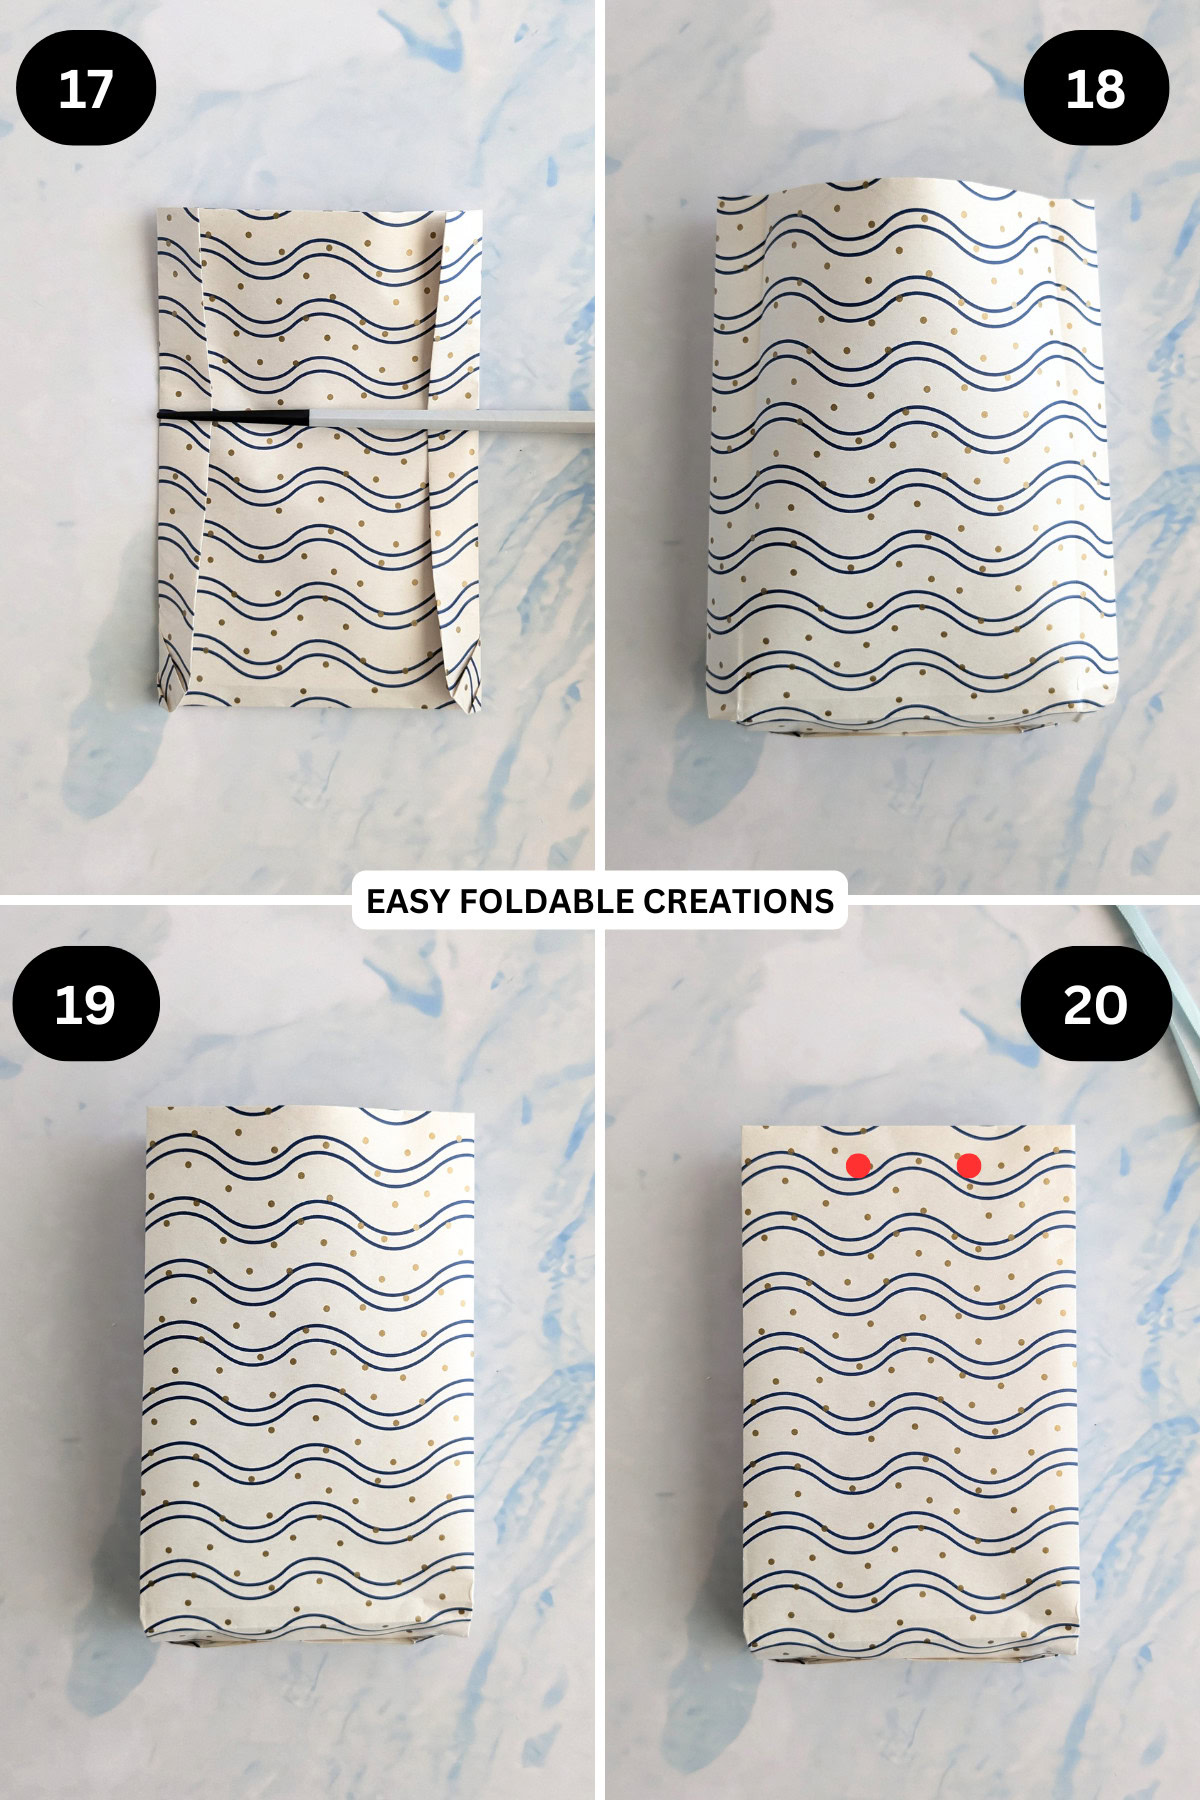
Step 15: Fold both the left and right sides of the bag in so the points of the diamonds (found on the base) meet the points of the sides. Crease well.
Step 16: Unfold previous step.
✨ You're almost there! ✨
To unlock the final steps of the photo tutorial and complete your pattern, create a free account with Grow.me. below.
Make sure you tick the box to subscribe to our newsletter and stay up to date with the latest patterns, tips, and more!
Once you're signed up, you'll get instant access to finish your project with the photo tutorial and enjoy exclusive content in the future.
Already signed up? Hit the button below and select 'Switch to Log In' to pick up where you left off and finish your project!
Step 17: Flip your bag over and re-crease sides.
Step 18: Open out your bag.
Step 19: Push sides into place.
Step 20: Using a hole punch, punch 2 holes on the top of your bag on both the sides.
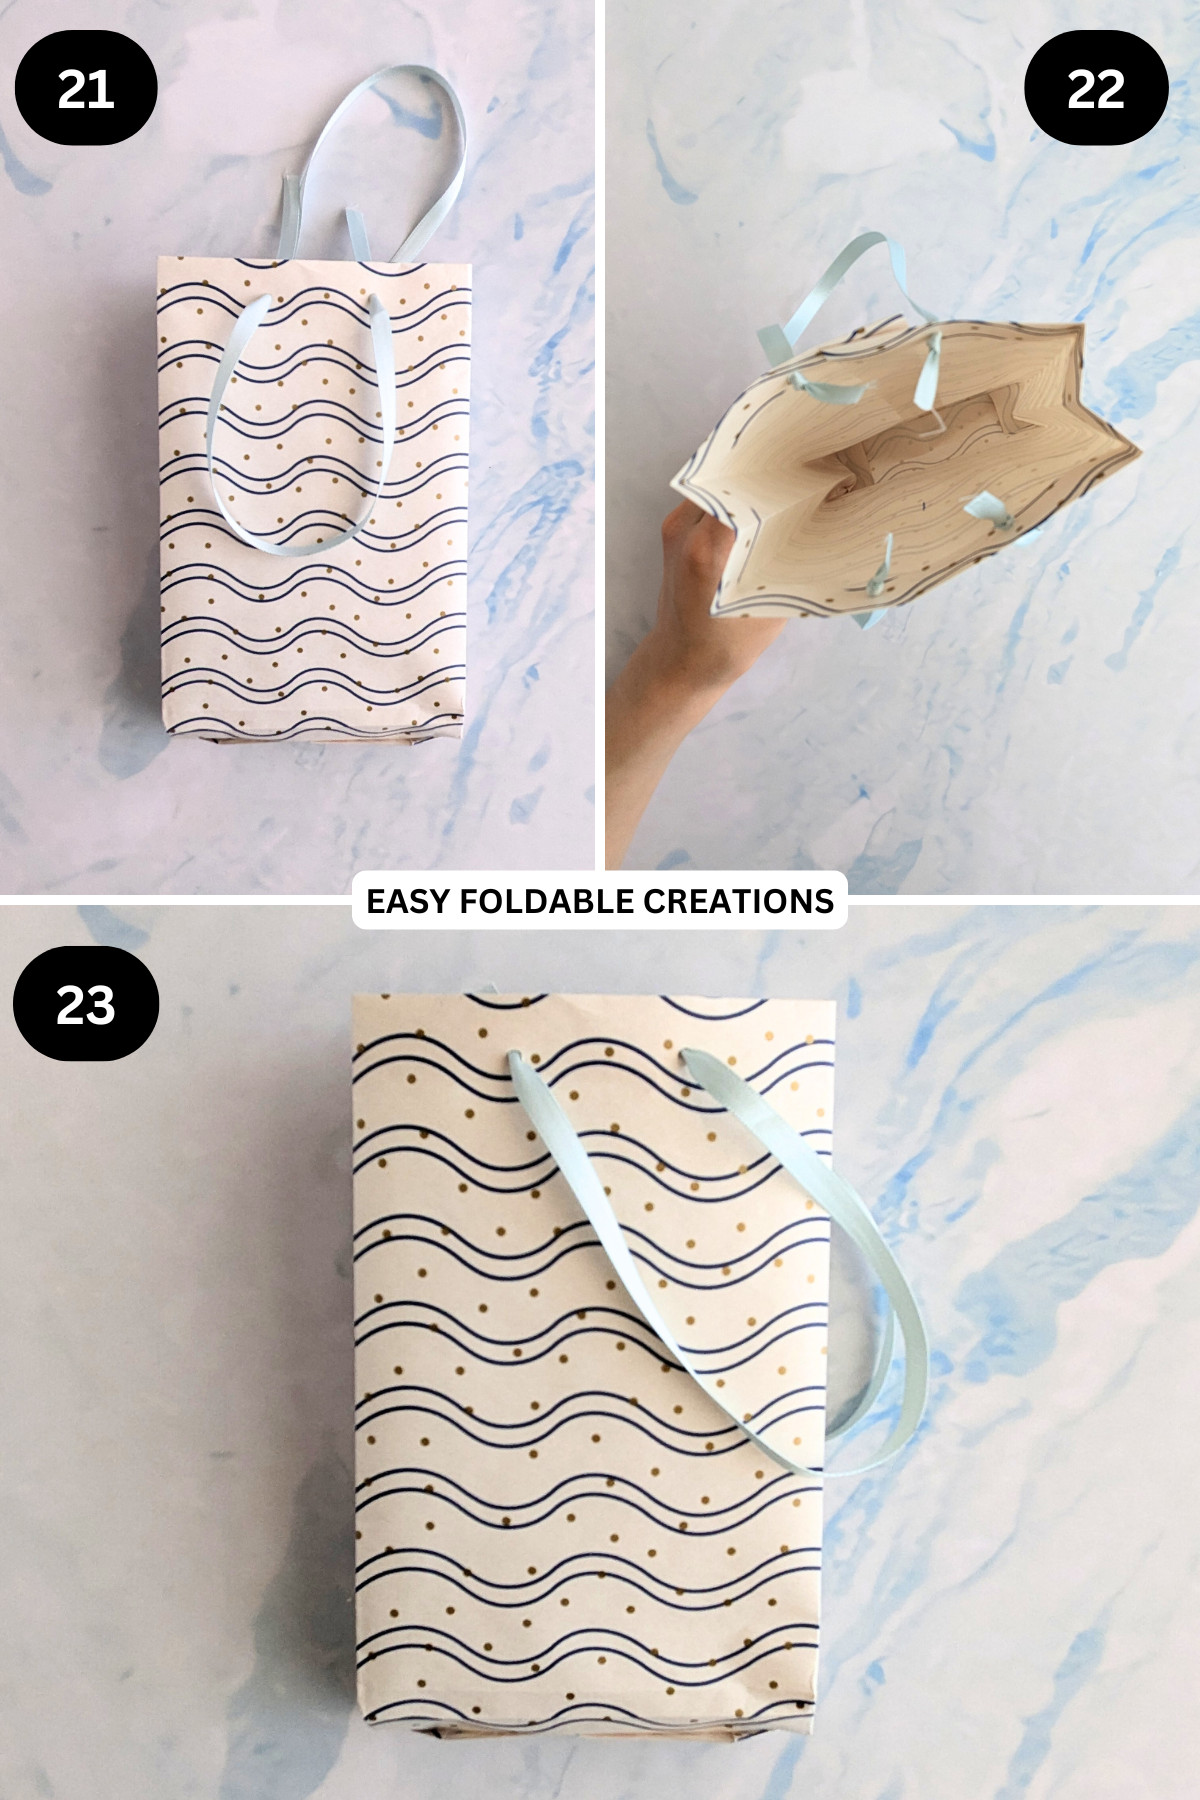
Step 21: Thread some ribbon through the holes on both sides. You will need 1 strand of ribbon per side.
Step 22: Knot each end of ribbon.
Step 23: Completed wrapping paper gift bag.
Optional: If you are using heavier gifts, reinforce the bottom of the bag by using some thick cardstock or cardboard.
To do this, trace the bottom of the bag onto cardstock, cut it out (trim it slightly so it is slightly smaller than the base of the bag). Then apply some glue to the cardstock and press down to the bottom of your bag on the inside.
Tips For Success
- Reinforce the base with a small piece of cardboard or thick cardstock for heavier gifts.
- Double-sided tape works well for a clean look, hiding glue lines.
- Use different ribbons or add embellishments for a more festive look.
- If you are wrapping a heavy gift, use thicker wrapping paper.

Common Mistakes & How To Avoid Them
- Not reinforcing the bottom for heavier items-always add support if your gift has weight.
- Using very thin wrapping paper may lead to tears; opt for sturdy paper or double-layer thin paper if needed.
Color, Paper Ideas, and Variations
- Go with festive prints for holidays or soft pastels for a wedding or baby shower.
- Personalize your gift bag with monograms, stickers, or seasonal embellishments.
FAQ
Yes, but sturdier wrapping paper works best to hold shape and prevent tears.
Simply use a larger sheet of paper or combine two sheets by gluing the edges for an extended piece.
Absolutely! They can often be reused multiple times if handled carefully.
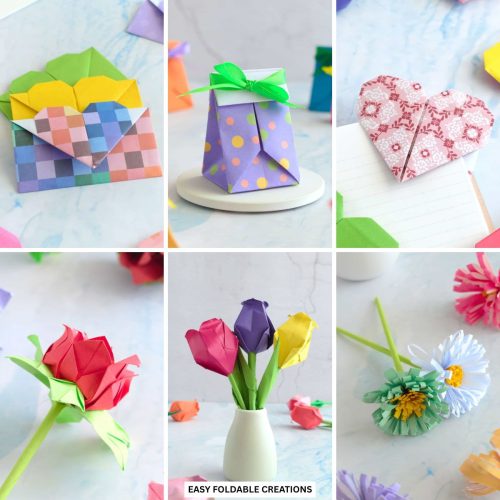
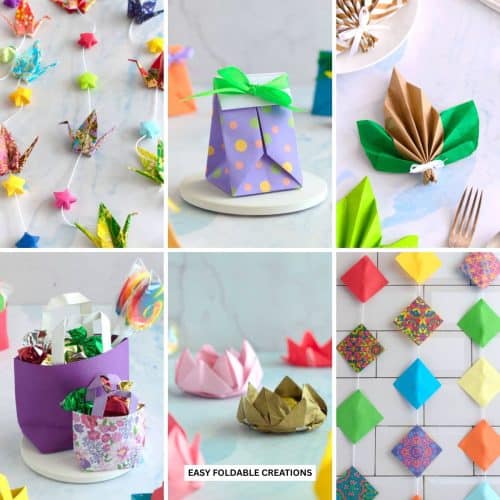
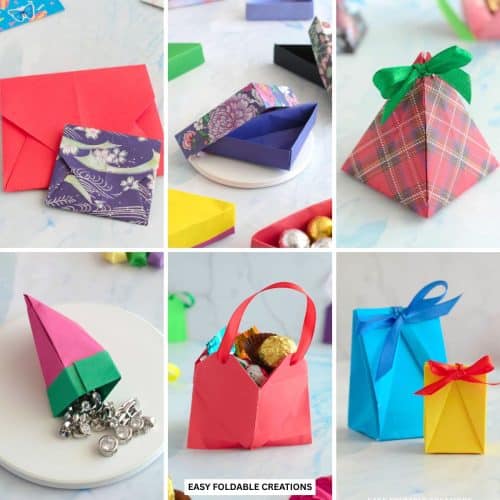
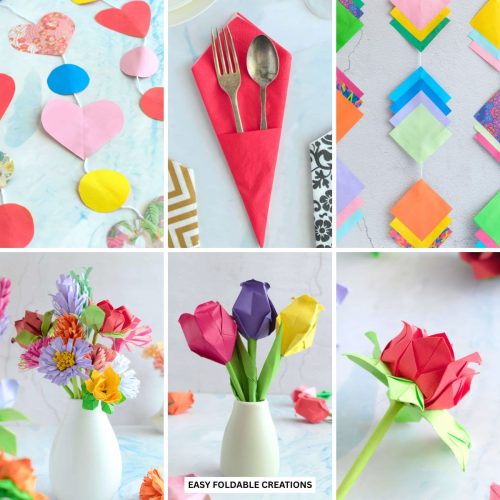
Other Paper Crafts You Might Like To Try:
Helpful Origami Tips
If you're curious to learn more about origami, you might like to look at our basic guides on how to make some common origami folds.
Start with the valley fold and mountain fold-these are the foundation of most origami models.
Once you're comfortable, you might like to try the petal fold for 3D shapes, and explore the bird base and square base for more complex designs.
The water bomb base is also great for creating inflatable or geometric models, like this inflatable origami rabbit.
Useful Paper Craft Terms
Want to learn a little more about paper crafts and origami?
We've made this helpful printable just for you. It explains common terms and helpful tips you might come across when you are folding origami or making a paper craft project.
You can download the useful paper craft terms printable PDF here.
Stay Connected
Made this pattern? Let us know how it went in the comments below!
Pin this post - Pin now to take your paper crafting skills to the next level.
Share on Instagram or Facebook - Capture the beauty of your finished paper craft project and share it on Instagram or Facebook! Tag us @easyfoldablecreations so we can see your work!

Look no further for your next craft project inspiration.
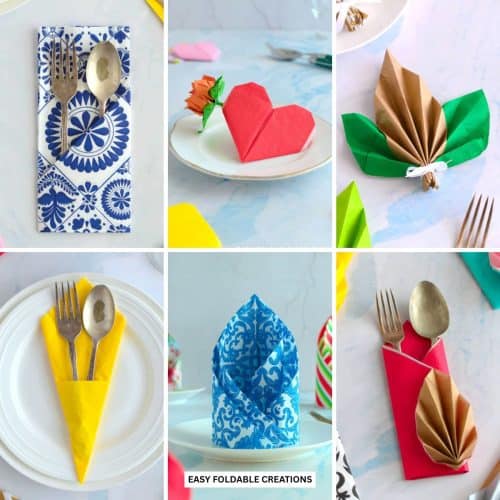
Try these Christmas stocking napkin folds, origami rabbit ear fold, DIY Christmas tree cake toppers, easy origami pouch, easy paper flowers, halloween origami, paper pencil wraps, 2D origami pumpkin, bottle gift wrapping idea with fan, cute origami Santa, or easy origami boxes next!
Other Patterns You Might Like To Try:
Looking for other easy patterns like this? Try these:
- Beautiful Wedding Gift Wrapping Ideas
- Creative Origami Ideas For Weddings
- DIY Paper Flowers for Wedding Decorations
- DIY Paper Wedding Favor Ideas Guests Will Love
- Easy Paper Crafts for Weddings
- DIY Wedding Favor Boxes and Bags
- DIY Paper Wedding Decorations for Your Big Day
- Wedding Napkin Folding Ideas For Elegant Tables


Cassandra says
Made these a few times now. Always works out great.
Sonya says
This tutorial was so easy to follow and helpful! I am going to make more bags using this method in the future!