
This bottle gift wrapping idea with a fan is a simple yet elegant way to wrap up a bottle of wine or any similarly shaped gift.
The accordion fold fan is created directly on the wrapping paper, adding texture and charm to your gift.
It's very easy to make!
Whether it's for a birthday, housewarming, or any special occasion, this easy DIY wrap is sure to impress and make your gift stand out.

Jump to:
Wrapping a gift can sometimes feel like the final step in a special celebration, and you want to make sure the presentation is just as memorable as the gift itself.
If you're looking to add a creative touch to your gift wrapping, this bottle gift wrap with a fan is the perfect way to stand out.
A bottle gift wrapping idea with fan is a decorative packaging technique that uses folded paper fan details to wrap or embellish bottle gifts. It is commonly used for celebrations, party gifts, and special occasions, and combines wrapping with layered decorative folding.
This easy yet elegant wrapping method works wonderfully not just for wine bottles but for other bottle-shaped gifts too, like olive oil, gourmet vinegar, or even small spirit bottles.
The fan fold is made directly on the same sheet of wrapping paper, which gives it a clean, cohesive look and makes it simple to create.
The fan adds a sophisticated texture that transforms any bottle-shaped gift into something that feels extra special.
Ideal for all sorts of occasions-from birthdays to housewarmings, Christmas to Thanksgiving-this unique wrapping style will impress anyone receiving a bottle as a gift.
It's quick and simple to do, and with a little bit of creativity, you can easily adapt it to suit the occasion.
Whether you want a formal, elegant presentation or something more casual and fun, you can customize the colors and decorations to match the theme of the event.
It's the perfect way to wrap up a bottle of wine for a dinner party or gift a beautiful bottle of olive oil as a thoughtful housewarming present.
With just a few easy steps, you'll be able to create a beautiful gift presentation that makes your gift even more memorable.

Why You'll Love This Pattern
- Simple and elegant: The fan fold adds a sophisticated, textured look to the gift wrap, transforming a simple bottle into a beautifully wrapped gift.
- Versatile: While designed for wine bottles, it works just as well for other gifts in bottle shapes like olive oil or gourmet vinegar.
- Quick to make: You can easily wrap a bottle in just a few minutes with this DIY wrapping idea.
- Perfect for any occasion: From birthdays and housewarmings to holidays like Christmas or Thanksgiving, this wrapping style works for every celebration.
- Customizable: With just one sheet of paper, you can choose a design that matches the recipient's personality or the theme of the event, whether it's formal or casual.
- Eco-friendly: Using wrapping paper that you already have around your home reduces waste and adds a personal touch to your gift-giving.
Exclusive Content Just For You
Not sure what you want to make next, but feeling a bit creative? Or maybe you've been searching for a pattern that sparks something new. We've got a few ideas waiting for you.
The Fold Collective, Easy Foldable Creations' community, provides you with a library of exclusive ad-free video tutorials, printable PDF patterns, helpful tips, and more so you can improve your skills and enjoy crafting in your own time.
Skill Level
★☆☆☆☆ (Very Easy)
Materials Needed
- Bottle (or any similar bottle-shaped gift, like wine, olive oil or vinegar)
- Wrapping paper (double-sided is ideal, but plain wrapping paper will work too)
- Scissors
- Tape (ordinary or double-sided)
- Ribbon (optional, for added decoration)
Instructions
Step 1: Cut your wrapping paper into a large triangle. You want the triangle to have a bit extra paper past the top of the bottle if you were to line the bottom of the bottle with the base of the triangle.
Note: If you are using single sided wrapping paper (e.g. white on one side), cut out two triangles and glue them together with the pattern side facing out.
Once you have cut out your triangle, arrange the triangle to sit as shown. The longest edge of the triangle should be at the bottom.
Step 2: Working from the left point, make accordion folds to the right of the paper, stopping just before the top point.
To accordion fold - fold the left point toward the right slightly, then flip your paper over and fold the same point (which would now be on the right) towards the left at the same width.
Once again flip your paper over. Then folded side will now be back on the left. Fold the left side towards the right again at the same width as before. Continue flipping and folding your paper, ending with the folds on the left.
You can make the folds of the accordion fold as wide or as narrow as you want. We recommend making them narrower because it will make your final fan look fuller.
Tip: If you want your final fan to be on the right side, instead of starting from the left point, start with the right point instead.
Step 3: Place your bottle on the paper as shown, lining the bottom of the bottle with the bottom edge of the triangle.

✨ You're almost there! ✨
To unlock the final steps of the photo tutorial and complete your pattern, create a free account with Grow.me. below.
Make sure you tick the box to subscribe to our newsletter and stay up to date with the latest patterns, tips, and more!
Once you're signed up, you'll get instant access to finish your project with the photo tutorial and enjoy exclusive content in the future.
Already signed up? Hit the button below and select 'Switch to Log In' to pick up where you left off and finish your project!
Step 4: Wrap the right point tightly over the bottle and then tape the paper to the bottle at the bottom.
Note: If you want your bottle's front to be facing out when it is completely wrapped, before taping, roll the bottle towards the left and see where the label sits. Adjust the bottle as needed and then tape.
Step 5: Roll the bottle towards the left, stopping at the beginning of the accordion folds.
Step 6: Apply some double sided tape along the bottom of the accordion fold closest to the bottle (the final accordion fold you made, not the very first fold) and then attach it to the bottle.

Step 7: Using some ribbon, wrap it around the bottom of the bottle as shown. Then tie it into a bow to hold the remaining accordion folds in place.
Step 8: Stand your bottle up. Adjust the folds as you like. Completed wrap.

Tips For Success
- Use double-sided paper: Double-sided wrapping paper gives your gift wrap an extra pop of color and contrast, especially when the fan folds are made.
- Play with different ribbon colors: The ribbon you tie around the neck of the bottle can either match the color of the wrapping paper or create a contrast. Experiment with different colors to see what looks best for the occasion.

Common Mistakes & How To Avoid Them
Fan folds not sharp enough: If your folds aren't crisp enough, the fan won't hold its shape. Use a bone folder or your fingernail to create sharp, precise folds.
Color, Paper Ideas, and Variations
- Opt for neutral tones like white, cream, or gold for formal events like weddings or holiday dinners.
- Bright and bold: Use fun, vibrant patterns or colors like red, blue, or green for birthdays or casual parties.
- Seasonal themes: For Christmas, use green, red, or metallics. For spring, light pastels or floral patterns work wonderfully.
- Textured papers: Experiment with textured wrapping paper like kraft paper or linen finishes for a rustic or vintage look.
- Double-sided paper: The double-sided paper not only adds visual contrast but also enhances the look of the fan folds.
FAQ
Yes! This wrapping style works for any bottle-shaped gift, including olive oil, vinegar, or even small spirit bottles.
Other Paper Crafts You Might Like To Try:
Stay Connected
Made this pattern? Let us know how it went in the comments below!
Pin this post - Pin now to take your paper crafting skills to the next level.
Share on Instagram or Facebook - Capture the beauty of your finished paper craft project and share it on Instagram or Facebook! Tag us @easyfoldablecreations so we can see your work!

Other Patterns You Might Like To Try:
Looking for other easy patterns like this? Try these:
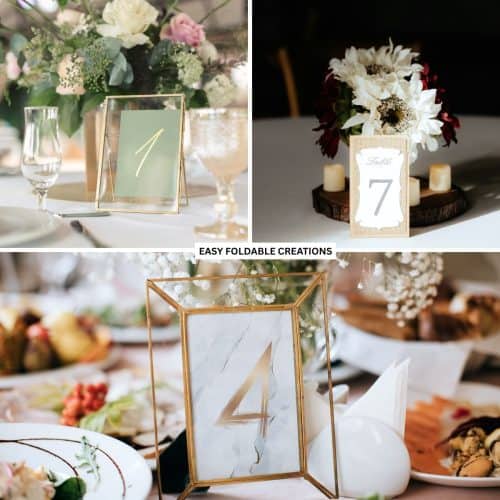
- DIY Wedding Table Number Ideas Using Paper
- DIY Paper Wedding Place Card Ideas You Can Make Yourself
- Gift Wrapping Topper Ideas
- Last Minute Gift Wrapping Ideas That Still Look Beautiful and Thoughtful
- Gift Wrapping Ideas For Oddly Shaped Gifts
- DIY Gift Box Ideas
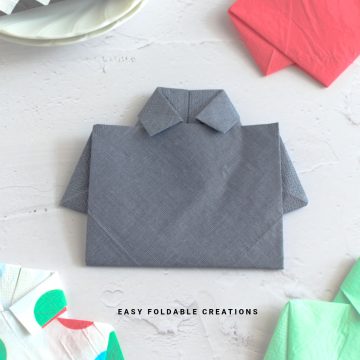
- Restaurant Style Napkin Folding Ideas You Can Do At Home
- Crown Napkin Fold


Comments
No Comments