
Create a charming square paper envelope using simple origami!
This homemade craft idea is perfect for letters, gift cards, and keepsakes, offering a personal touch to your correspondence.

Jump to:
- Why You'll Love This Pattern
- Exclusive Content Just For You
- Skill Level
- Materials Needed
- Instructions
- Tips For Success
- Common Mistakes & How To Avoid Them
- Color, Paper Ideas, and Variations
- FAQ
- Other Paper Crafts You Might Like To Try:
- Helpful Origami Tips
- Useful Paper Craft Terms
- Stay Connected
- Other Patterns You Might Like To Try:
- Comments
Creating a square paper envelope is not only a practical skill but also a delightful way to add a personal touch to your correspondence.
In today's digital world, where emails and text messages have taken over, a handwritten note enclosed in a beautifully crafted envelope can convey a sense of thoughtfulness and care that electronic communication often lacks.
This origami envelope is versatile and can be used for various purposes, including gift cards, invitations, or even love letters.
The beauty of this project lies in its simplicity; with just a few folds, you can transform a square piece of paper into an elegant envelope that will impress anyone who receives it.
Beyond its practical use, this square paper envelope is an excellent way to showcase your creativity.
You can use a variety of paper types and patterns, from plain colored sheets to decorative scrapbook paper, allowing you to customize each envelope for different occasions.
Consider using themed paper for special events, such as floral designs for weddings, festive patterns for holidays, or whimsical prints for birthdays.
This way, each envelope can reflect the spirit of the occasion and serve as a charming accessory to your note or card.
In addition to its decorative qualities, this square paper envelope is an eco-friendly alternative to traditional envelopes.
By making your own envelopes from recycled paper or leftover craft paper, you contribute to reducing waste and promoting sustainability.
You can also involve children in this fun craft, making it a wonderful family activity that encourages creativity while teaching the importance of recycling and reusing materials.
For those who want to take their envelope-making skills further, consider personalizing your envelopes with stamps, stickers, or even a wax seal for an elegant finish.
Adding a personal touch makes the envelope even more special and can turn a simple note into a treasured keepsake.
Whether you're looking to brighten someone's day with a surprise letter, a special occasion like Valentine's Day or Christmas, or just need a creative way to present a gift card, this square paper envelope project offers a perfect blend of function and artistry.
Get ready to fold, create, and share your personalized envelopes, making every message you send feel extra special!
Other easy envelopes you might like to try include this pleated origami envelope, DIY paper envelope, or this easy paper envelope.

Why You'll Love This Pattern
- Quick & Simple: No glue or cutting required, just a few easy folds.
- Versatile Use: Ideal for letters, gift cards, or small mementos.
- Customizable: Adjust the size or choose any paper type for a unique look.
- Eco-Friendly: Use recycled or leftover paper to craft these beautiful envelopes.
- Great for Special Occasions: Perfect for weddings, holidays, and birthday cards or invitations.
Exclusive Content Just For You
Not sure what you want to make next, but feeling a bit creative? Or maybe you've been searching for a pattern that sparks something new. We've got a few ideas waiting for you.
The Fold Collective, Easy Foldable Creations' community, provides you with a library of exclusive ad-free video tutorials, printable PDF patterns, helpful tips, and more so you can improve your skills and enjoy crafting in your own time.
Skill Level
Difficulty: ★★☆☆☆ (Easy)
Materials Needed
One square sheet of paper (any size)
Paper Size Options
- Common Sizes: 6x6 inches (15cm x 15cm), 8x8 inches (20cm x 20cm), or larger depending on the envelope size you need.
- A large square envelope can be made using 12x12 inches (30cm x 30cm) paper. This is big enough to hold a square card that is 5.5x5.5 inches (14cm x 14cm).
- A square that is 8x8 inches (21cm x 21cm) will hold a card that is 4x4 inches (10cm x 10cm).
Paper Type & GSM
- For a classic look, origami paper (70-80 GSM) works best, but for a sturdier envelope, cardstock or textured paper with a GSM of 100-120 is recommended.
- If you're looking for something special, try patterned or metallic paper for extra flair.
Instructions
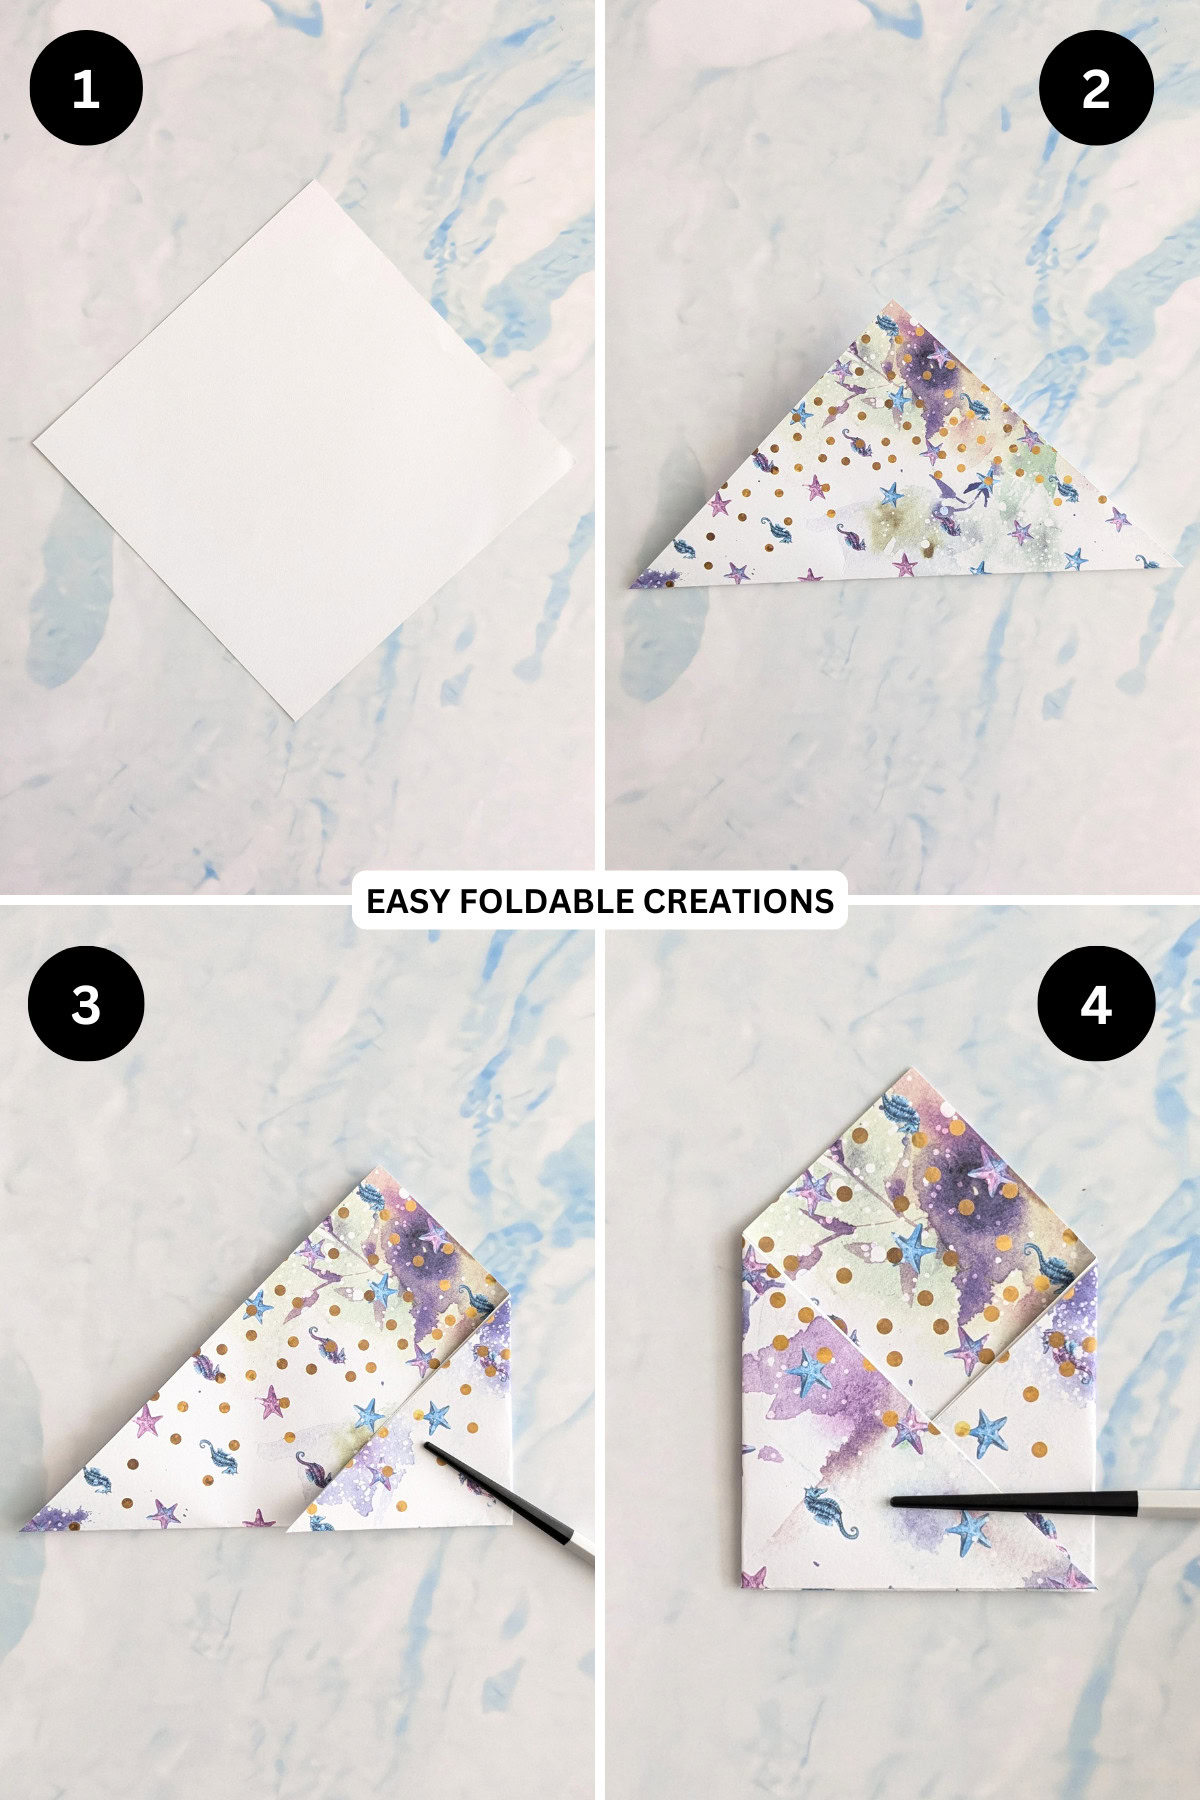
Step 1: Start with the color you want your envelope to be facing down. Arrange the paper so it sits in a diamond shape.
Step 2: Fold the bottom corner up to meet the top corner.
Step 3: Fold the right corner over a third of the way across. For this, it can help to use a ruler.
Step 4: Fold the left corner to meet the right corner.
✨ You're almost there! ✨
To unlock the final steps of the photo tutorial and complete your pattern, create a free account with Grow.me. below.
Make sure you tick the box to subscribe to our newsletter and stay up to date with the latest patterns, tips, and more!
Once you're signed up, you'll get instant access to finish your project with the photo tutorial and enjoy exclusive content in the future.
Already signed up? Hit the button below and select 'Switch to Log In' to pick up where you left off and finish your project!
Step 5: Slide the left triangle into the inside of the right triangle. Then press flat.
Step 6: Fold the top triangle down. Optional: Glue this triangle down.
Step 7: Fold down the other top triangle. This will be used to seal your envelope.
Step 8: Completed square paper envelope. To hold the flap down, use washi tape or a sticker.

Tips For Success
- Use a bone folder: To get sharp, crisp edges on your envelope, use a bone folder or a similar tool.
- Experiment with different papers: Try using patterned or textured paper to create a unique envelope for special occasions.

Common Mistakes & How To Avoid Them
- Misaligned folds: Take your time to align the edges properly for a neat result.
- Too thick paper: If you use paper that's too thick, it may be difficult to fold.
Color, Paper Ideas, and Variations
- Colors: Use holiday-themed paper for festive envelopes, or go for classic colors like white or kraft paper for a timeless look.
- Variations: Try adding a small sticker or wax seal to close the envelope for an elegant touch. You can also experiment with paper that has a pattern on one side for a creative contrast.
FAQ
Yes, simply tuck the flap into one of the folds, or you can use a sticker, washi tape, or wax seal to close it.
Absolutely! Just use a larger square sheet of paper to increase the size.
Other Paper Crafts You Might Like To Try:
Helpful Origami Tips
If you're curious to learn more about origami, you might like to look at our basic guides on how to make some common origami folds.
Start with the valley fold and mountain fold-these are the foundation of most origami models.
Once you're comfortable, you might like to try the petal fold for 3D shapes, and explore the bird base and square base for more complex designs.
The water bomb base is also great for creating inflatable or geometric models, like this inflatable origami rabbit.
Useful Paper Craft Terms
Want to learn a little more about paper crafts and origami?
We've made this helpful printable just for you. It explains common terms and helpful tips you might come across when you are folding origami or making a paper craft project.
You can download the useful paper craft terms printable PDF here.
Stay Connected
Made this pattern? Let us know how it went in the comments below!
Pin this post - Pin now to take your paper crafting skills to the next level.
Share on Instagram or Facebook - Capture the beauty of your finished paper craft project and share it on Instagram or Facebook! Tag us @easyfoldablecreations so we can see your work!

If you are after more easy crafts that don't take long to make, you may like to try these paper tulips, heart origami box with lid, origami cup, Valentine's origami, diy paper envelope, candy box, lucky stars, or mini paper drawers.
Other Patterns You Might Like To Try:
Looking for other easy patterns like this? Try these:
- DIY Paper Decor Ideas For Every Season
- Wedding Confetti Alternatives That Are Venue Friendly
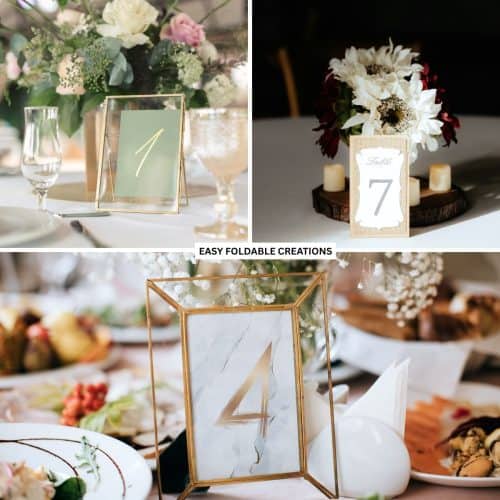
- DIY Wedding Table Number Ideas Using Paper
- DIY Paper Wedding Place Card Ideas You Can Make Yourself
- Gift Wrapping Topper Ideas
- Last Minute Gift Wrapping Ideas That Still Look Beautiful and Thoughtful
- Gift Wrapping Ideas For Oddly Shaped Gifts
- DIY Gift Box Ideas


Bailey says
Love love love these! I've made a few already for my birthday party invitations. My friends are going to love them!
Ricky says
Just what I was after! I will be making some this evening.
Patty says
Saving this for later! So going to make these for my Christmas cards. Can't wait.