
Set sail on a crafting adventure with this easy origami boat pattern!
Perfect for beginners and seasoned folders alike, this charming project can be used for play, decorations, or as gifts.

Jump to:
- Why You'll Love This Pattern
- Exclusive Content Just For You
- Skill Level
- Materials Needed
- Instructions
- Tips For Success
- Common Mistakes & How To Avoid Them
- Color, Paper Ideas, and Variations
- FAQ
- Other Paper Crafts You Might Like To Try:
- Helpful Origami Tips
- Useful Paper Craft Terms
- Stay Connected
- Other Patterns You Might Like To Try:
- Comments
This origami boat is a classic paper-folding project that captures the spirit of adventure with its simple yet charming design.
Made from a square sheet of paper, this origami boat is easy to create and is a delightful project for all ages.
Whether you're looking for a fun activity to enjoy with your kids or a creative way to showcase your crafting skills, this origami boat fits the bill perfectly.
These boats can be used in a variety of ways.
Once crafted, they can serve as playful decorations for a themed party, a charming centerpiece, or even as part of a nautical display in your home.
Additionally, they can be personalized and given as gifts for birthdays or special occasions, adding a unique and heartfelt touch.
You can even use them as place cards for a seaside-themed dinner party or as party favors at nautical-themed events.
This guide will walk you through how to make an origami boat step by step with pictures, ensuring that both beginners and experienced folders can enjoy the process.
So grab your sheet of paper, and let's set sail!

Why You'll Love This Pattern
This origami boat is not only easy to make but also highly versatile.
It's a fantastic introduction to the world of origami, allowing beginners to practice basic folding techniques while still being enjoyable for seasoned crafters.
The simplicity of the design means you can experiment with various paper types, colors, and patterns to create a fleet of unique boats.
Exclusive Content Just For You
Not sure what you want to make next, but feeling a bit creative? Or maybe you've been searching for a pattern that sparks something new. We've got a few ideas waiting for you.
The Fold Collective, Easy Foldable Creations' community, provides you with a library of exclusive ad-free video tutorials, printable PDF patterns, helpful tips, and more so you can improve your skills and enjoy crafting in your own time.
Skill Level
Difficulty: ★☆☆☆☆ (Very Easy)
Materials Needed
Paper Size Options
A square piece of paper, ideally 6x6 inches (15x15 cm), creates a boat that's approximately 5 inches (12 cm) long when completed.
You can use any size square paper; larger sizes will make bigger boats.
Paper Type & GSM
Lightweight origami paper (around 60-80 GSM) is ideal for this project, as it folds easily and holds its shape well.
You can also use thicker paper such as cardstock or scrapbook paper but these are best for making bigger boats.
Instructions
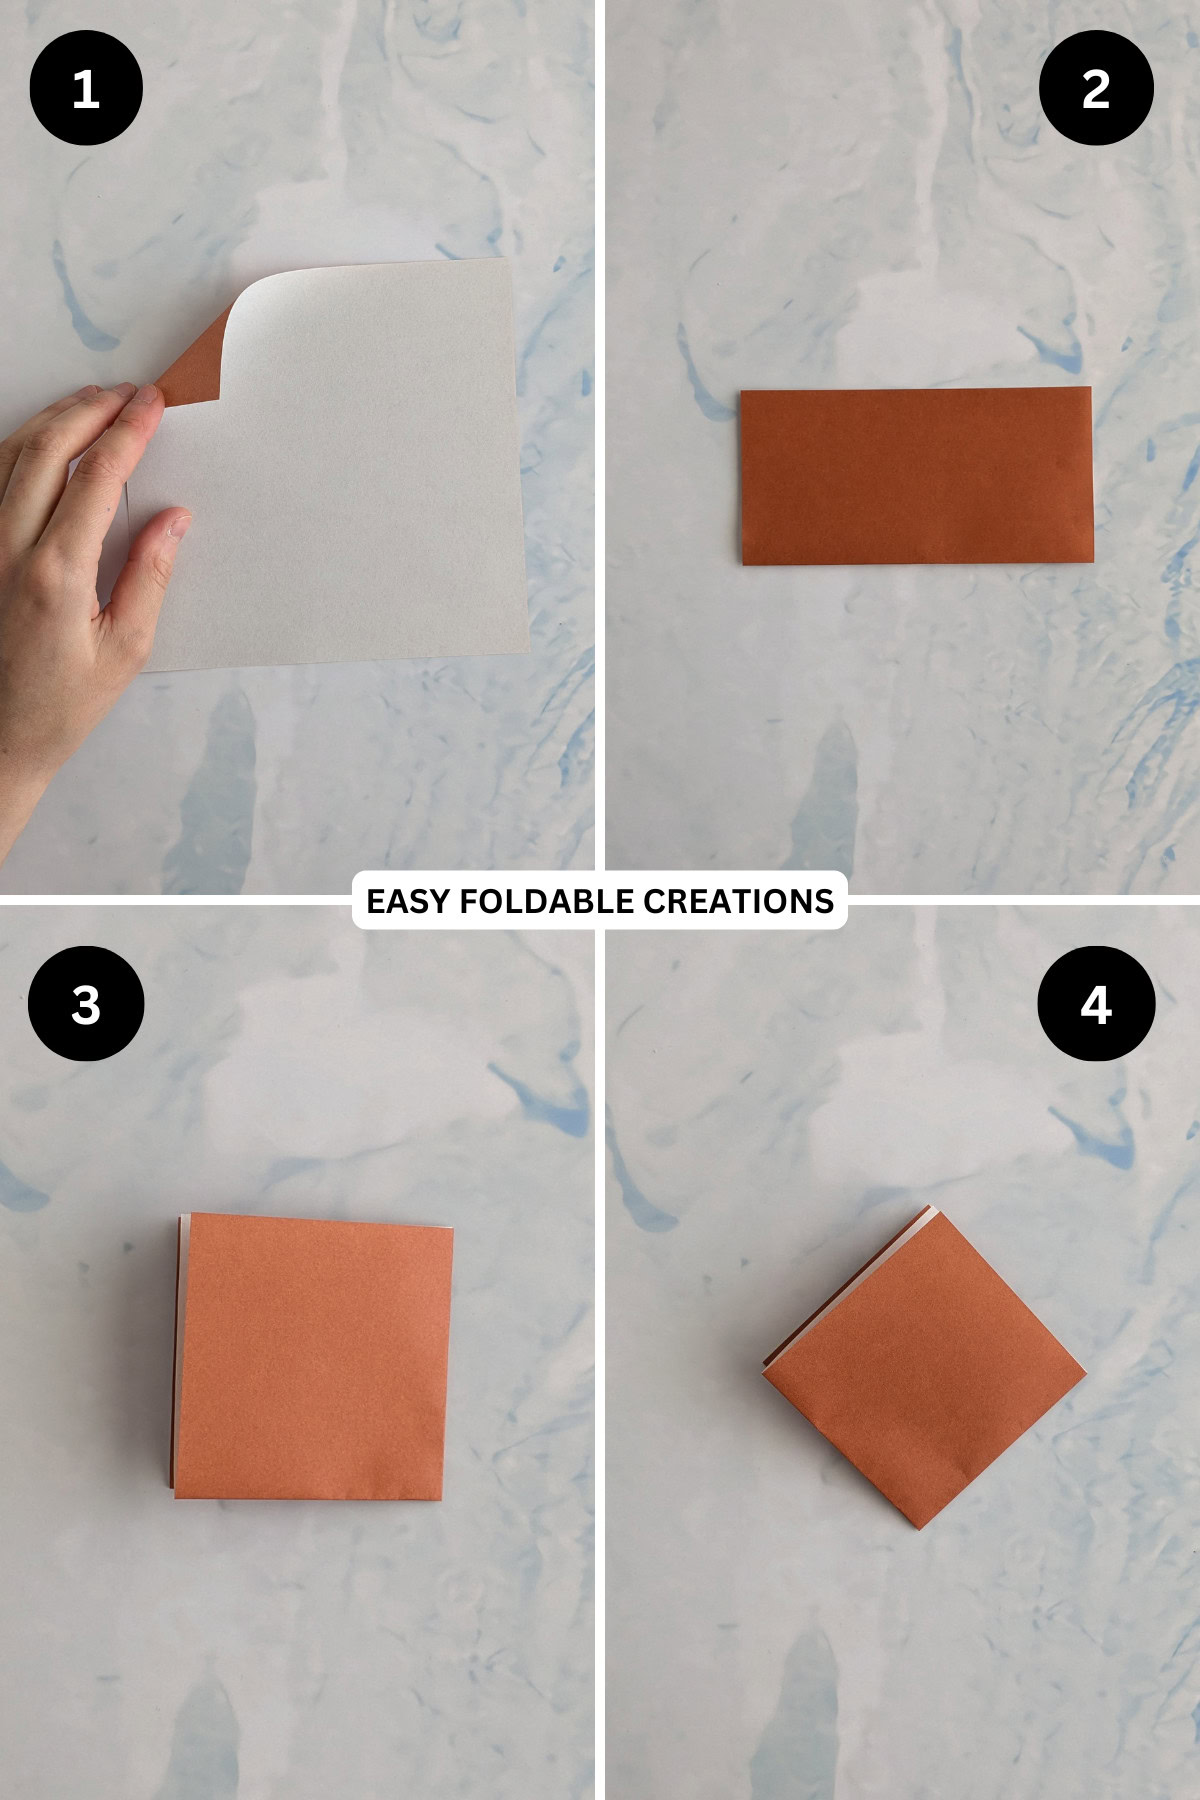
Step One: Start with the color you want your boat to be facing up. This will become the outer color of the boat.
Step Two: Fold the bottom edge to the top edge.
Step Three: Fold the right edge to the left edge. Crease well. You should now have a square.
Step Four: Rotate the paper so the open edge is away from you.
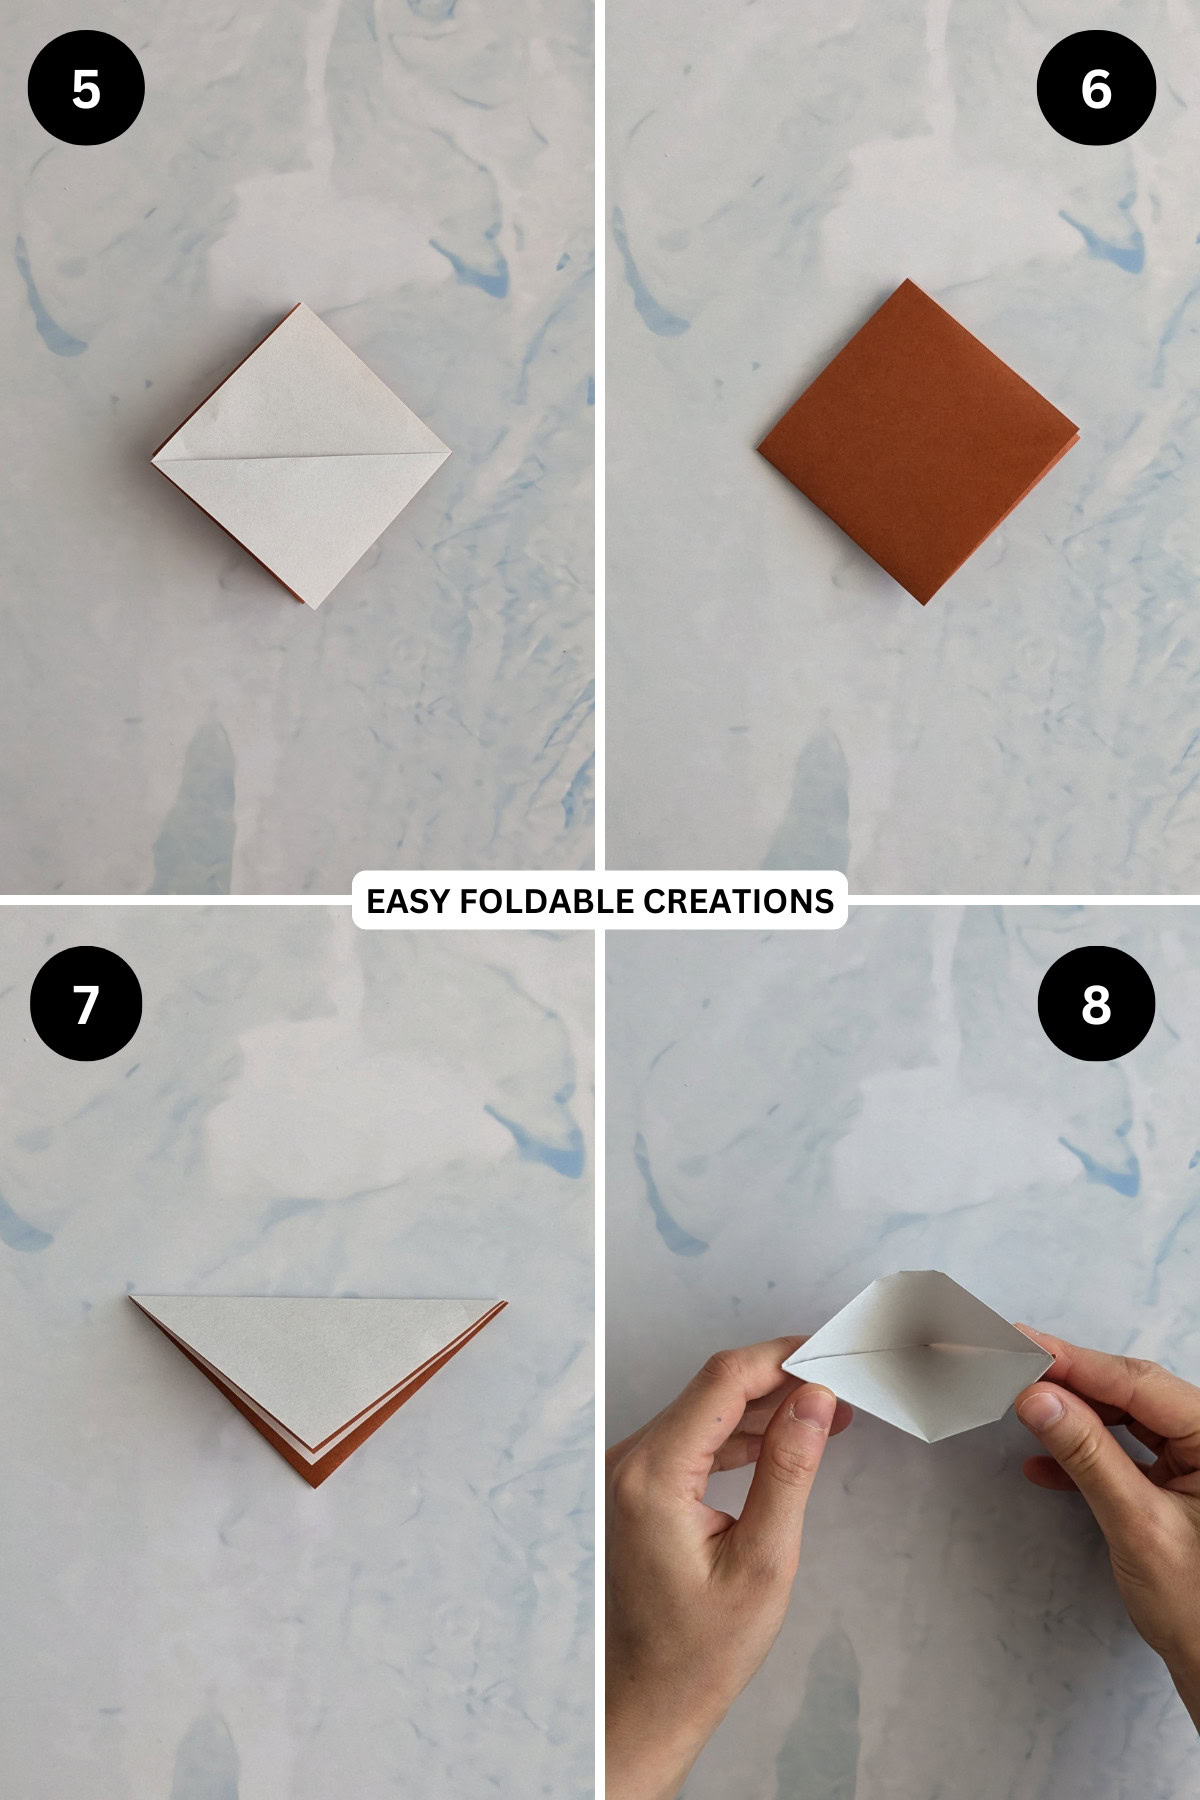
Step Five: Fold the point of the top layer to the bottom point.
Step Six: Turn the paper over from left to right.
Step Seven: Fold the point of the remaining layers to the bottom point. Crease well.
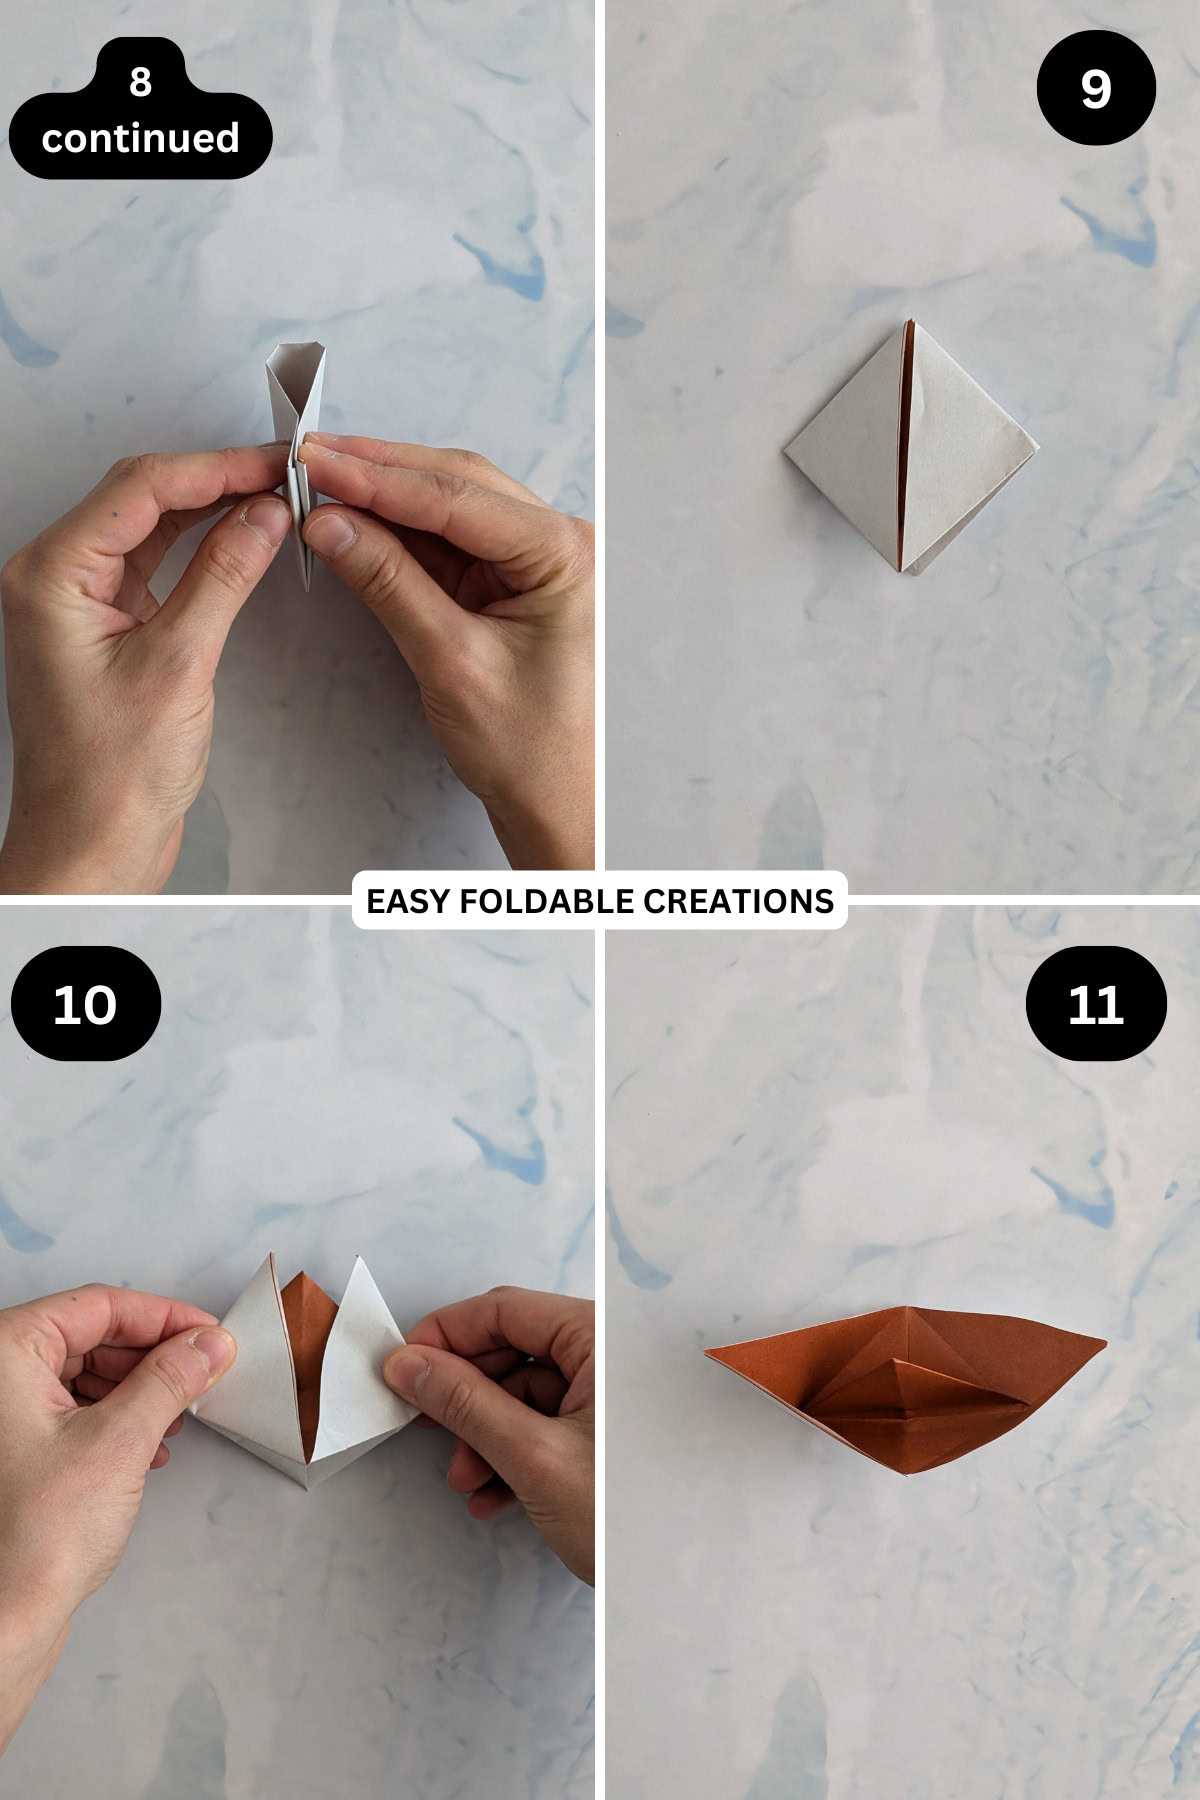
Step Eight: Carefully open the triangle and then squash the two (2) outer points together. This will form a square (you should have a line showing on either side of the square).
✨ You're almost there! ✨
To unlock the final steps of the photo tutorial and complete your pattern, create a free account with Grow.me. below.
Make sure you tick the box to subscribe to our newsletter and stay up to date with the latest patterns, tips, and more!
Once you're signed up, you'll get instant access to finish your project with the photo tutorial and enjoy exclusive content in the future.
Already signed up? Hit the button below and select 'Switch to Log In' to pick up where you left off and finish your project!
Step Nine: Rotate the paper so the open edge is now towards you.
Step Ten: Carefully unpeel both the left and right sides of the paper to form the shape of your boat.
Step Eleven: Completed boat.
Tips For Success
- Use a bone folder for sharp creases to enhance the boat's shape.
- Practice with scrap paper first to get the folding technique down before using your final sheet.

Common Mistakes & How To Avoid Them
Make sure to press down firmly on each fold and use a bone folder if available.
Color, Paper Ideas, and Variations
- Use patterned origami paper for a fun twist on the classic boat design.
- Consider using metallic or holographic paper for a striking appearance.
- Experiment with different sizes to create a fleet of boats for a playful display or party centerpiece.
FAQ
This pattern specifically requires a square sheet of paper.
Using a rectangular sheet would not yield the correct shape.
However, if you cut the rectangular sheet into a square you can make this pattern.
Lightweight origami paper is recommended for easy folding, but you can experiment with other types as well.
Other Paper Crafts You Might Like To Try:
Helpful Origami Tips
If you're curious to learn more about origami, you might like to look at our basic guides on how to make some common origami folds.
Start with the valley fold and mountain fold-these are the foundation of most origami models.
Once you're comfortable, you might like to try the petal fold for 3D shapes, and explore the bird base and square base for more complex designs.
The water bomb base is also great for creating inflatable or geometric models, like this inflatable origami rabbit.
Useful Paper Craft Terms
Want to learn a little more about paper crafts and origami?
We've made this helpful printable just for you. It explains common terms and helpful tips you might come across when you are folding origami or making a paper craft project.
You can download the useful paper craft terms printable PDF here.
Stay Connected
Made this pattern? Let us know how it went in the comments below!
Pin this post - Pin now to take your paper crafting skills to the next level.
Share on Instagram or Facebook - Capture the beauty of your finished paper craft project and share it on Instagram or Facebook! Tag us @easyfoldablecreations so we can see your work!

Other Patterns You Might Like To Try:
Looking for other easy patterns like this? Try these:


Comments
No Comments