
Create your very own paper photo frame with just a few folds.
This origami project is perfect for showcasing memories or as a thoughtful homemade craft idea for gifts!

Jump to:
- Why You'll Love This Pattern
- Exclusive Content Just For You
- Skill Level
- Materials Needed
- Instructions
- Tips For Success
- Common Mistakes & How To Avoid Them
- Color, Paper Ideas, and Variations
- FAQ
- Other Crafts You Might Like To Try:
- Helpful Origami Tips
- Useful Paper Craft Terms
- Stay Connected
- Other Patterns You Might Like To Try:
- Comments
This paper photo frame is a unique and practical origami craft that allows you to frame your favorite pictures with a personal touch.
A paper photo frame is a handmade craft designed to display photos using folded or assembled paper. It is commonly used for gifts, classroom projects, and decorative displays, and allows for customisation in size, shape, and design.
Whether it's a gift for a loved one, a keepsake from a special event, or simply a creative addition to your desk decor, this paper frame offers a charming and homemade touch.
Using a square sheet of paper, you can fold a functional frame that holds photos, artwork, or notes securely.
This paper photo frame can be customized in endless ways.
You can choose papers with colors and patterns that match the occasion or the decor of the room where the frame will be displayed.
It's also a versatile craft because you can adjust the size of the frame to fit different photo dimensions.
Beyond being a beautiful way to display memories, this frame can be used as a gift for birthdays, anniversaries, or as a thoughtful surprise for friends and family.
This step by step origami project is perfect for DIY crafters of all levels. It's a fun way to explore different paper types and create a practical item.
You can also experiment with decorating the frame further by adding embellishments, stickers, or even small drawings to make it truly one-of-a-kind.
Plus, this frame is portable and lightweight, making it easy to gift or send through the mail as part of a special surprise.
Whether you're looking to make a unique gift or want a handmade way to display your favorite photo, this origami paper photo frame is a simple project.

Why You'll Love This Pattern
- Versatile Gift Idea: Perfect for gifts, parties, or holiday decorations.
- Simple & Practical: Easy to make and functional for displaying pictures.
- Customizable: Choose any paper design to match your style or event.
- Eco-Friendly: Recycle old or leftover papers into beautiful photo frames.
Exclusive Content Just For You
Not sure what you want to make next, but feeling a bit creative? Or maybe you've been searching for a pattern that sparks something new. We've got a few ideas waiting for you.
The Fold Collective, Easy Foldable Creations' community, provides you with a library of exclusive ad-free video tutorials, printable PDF patterns, helpful tips, and more so you can improve your skills and enjoy crafting in your own time.
Skill Level
Difficulty: ★☆☆☆☆ (Easy)
Materials Needed
- Square sheet of paper (any size depending on your photo)
- Optional: Decorative materials like stickers, embellishments, or markers
Paper Size Options
Final Project Sizes:
- 5x5 inch (12cm x 12cm) sheet will hold a photo approximately 2.5x2.5 inches (6.5cm x 6.5cm).
- 6x6 inch (15cm x 15cm) sheet will hold a photo approximately 3x3 inches (7.5cm x 7.5cm).
- 7.5x7.5 inch (19cm x 19cm) sheet will hold a photo approximately 3.5x3.5 inches (9cm x 9cm).
Paper Type & GSM
- Origami paper (70-80 GSM) works great for this craft, providing a balance between flexibility and sturdiness. Thicker paper like 100-120 GSM works if you want a more durable frame.
Instructions
Step 1: Start with the color you want the outside of your photo frame to be facing down. Arrange it to sit like a diamond.
Step 2: Fold the bottom corner to the top corner.
Step 3: Unfold previous step.
Step 4: Fold the left corner to meet the right corner.

Step 5: Unfold previous step.
Step 6: Fold the bottom corner to meet the centre point.
Step 7: Repeat previous step for remaining corners.
Step 8: Unfold completely.

Step 9: Fold the bottom corner to meet the crease directly above it.
Step 10: Repeat previous step for remaining corners.
Step 11: Fold the bottom edge over its nearest crease line.
Step 12: Repeat previous step for remaining edges.

✨ You're almost there! ✨
To unlock the final steps of the photo tutorial and complete your pattern, create a free account with Grow.me. below.
Make sure you tick the box to subscribe to our newsletter and stay up to date with the latest patterns, tips, and more!
Once you're signed up, you'll get instant access to finish your project with the photo tutorial and enjoy exclusive content in the future.
Already signed up? Hit the button below and select 'Switch to Log In' to pick up where you left off and finish your project!
Step 13: Flip the paper over and arrange it so it sits in a diamond shape.
Step 14: Fold the bottom corner to meet the middle point.
Step 15: Repeat previous step for other corners.
Step 16: Take the top layer of the left side and fold back out so it slightly sticks over the edge.

Step 17: Repeat previous step for other sides, keeping the folds as symmetrical as possible.
Step 18: Flip the paper over. Completed paper photo frame. To insert photo, gently open out frame and place photo inside. Then fold frame back into position.

Tips For Success
- Choose paper with contrasting colors on either side to create a striking border effect.
- Make crisp folds to ensure your frame holds its shape.

Common Mistakes & How To Avoid Them
- Flimsy Frame: Using paper that's too thin can lead to a floppy frame. Opt for slightly thicker paper if needed.
- Misaligned Folds: Make sure all your edges align perfectly for a neat and professional look.
Color, Paper Ideas, and Variations
- Colors: Use solid colors for a clean, minimalist look or patterned paper for a more playful vibe.
- Creative Ideas: Add a personal message or small drawings along the frame borders to make it extra special.
- Variations: Experiment with double-sided paper for a more dynamic effect.
FAQ
Yes, just adjust the size of the paper.
The larger the sheet, the bigger the frame. Just remember, if you are making a larger frame use thicker paper like cardstock so that it is sturdier.
Other Crafts You Might Like To Try:
Helpful Origami Tips
If you're curious to learn more about origami, you might like to look at our basic guides on how to make some common origami folds.
Start with the valley fold and mountain fold-these are the foundation of most origami models.
Once you're comfortable, you might like to try the petal fold for 3D shapes, and explore the bird base and square base for more complex designs.
The water bomb base is also great for creating inflatable or geometric models, like this inflatable origami rabbit.
Useful Paper Craft Terms
Want to learn a little more about paper crafts and origami?
We've made this helpful printable just for you. It explains common terms and helpful tips you might come across when you are folding origami or making a paper craft project.
You can download the useful paper craft terms printable PDF here.
Stay Connected
Made this pattern? Let us know how it went in the comments below!
Pin this post - Pin now to take your paper crafting skills to the next level.
Share on Instagram or Facebook - Capture the beauty of your finished paper craft project and share it on Instagram or Facebook! Tag us @easyfoldablecreations so we can see your work!

If you are after more easy crafts that don't take long to make, you may like to try these paper tulips, heart origami box with lid, origami cup, Valentine's origami, diy paper envelope, candy box, square paper envelope, lucky stars, or mini paper drawers.
Other Patterns You Might Like To Try:
Looking for other easy patterns like this? Try these:
- Minimalist Seasonal Paper Decoration Ideas
- DIY Paper Decor Ideas For Every Season
- Wedding Confetti Alternatives That Are Venue Friendly
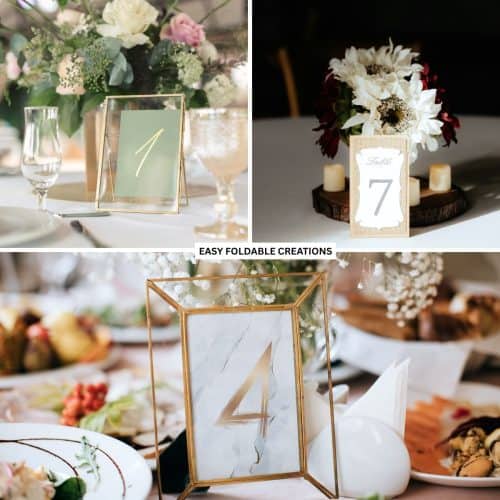
- DIY Wedding Table Number Ideas Using Paper
- DIY Paper Wedding Place Card Ideas You Can Make Yourself
- Gift Wrapping Topper Ideas
- Last Minute Gift Wrapping Ideas That Still Look Beautiful and Thoughtful
- Gift Wrapping Ideas For Oddly Shaped Gifts


Lily says
Aw these are super cute! Mom's b'day is coming up so I'll be making her one of these for sure.