
Add a bit of fun to your paper crafts with a jumping origami snake!
This playful design is perfect for kids and adults alike, making it a delightful addition to any origami collection.

Jump to:
This easy origami jumping snake is a delightful project that combines the art of paper folding with a touch of charm.
This playful creation not only looks charming but also has a fun surprise element; when you press down on its tail, the snake will spring back, creating a jumping motion that's sure to entertain.
Perfect for kids and adults alike, this homemade craft idea is an excellent way to engage in creative play.
This origami snake is a fantastic introduction to the world of origami animals, offering an exciting way to explore creativity while developing fine motor skills. It's a great activity for family gatherings, classrooms, or even solo crafting sessions.
You can personalize your snake by using colorful paper, adding googly eyes, or even decorating it with patterns.
Once completed, it can serve as a fun toy or an engaging decorative piece.
This paper craft is versatile enough to be made for parties, as educational tools for teaching about snakes, or simply as a quirky decoration for your desk or shelf.
Whether you're an origami novice or a seasoned pro, this jumping origami snake is sure to bring smiles and laughter.
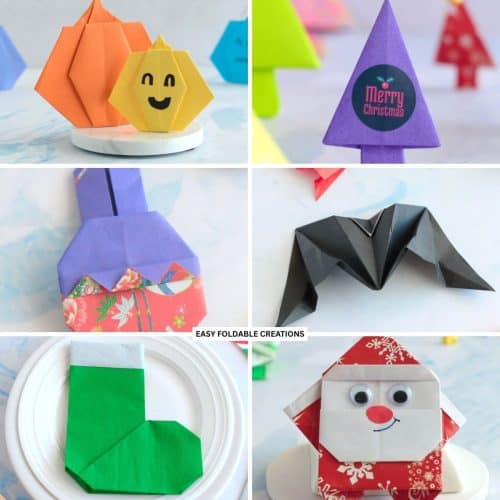
This easy Halloween origami project is perfect for those looking to add a bit of fun to their crafting repertoire.

Other easy and cute origami animals you might like to make include this origami butterfly, classic paper crane, origami mouse, talking origami fish, and origami bunny.
Why You'll Love This Pattern
This pattern is simple and requires just a few folds, making it ideal for beginners. Its jumping action adds an element of playfulness that makes it great for kids' parties or as a charming gift.
Plus, the materials are minimal-just a single piece of paper-and the results are both visually appealing and interactive.
Exclusive Content Just For You
Not sure what you want to make next, but feeling a bit creative? Or maybe you've been searching for a pattern that sparks something new. We've got a few ideas waiting for you.
The Fold Collective, Easy Foldable Creations' community, provides you with a library of exclusive ad-free video tutorials, printable PDF patterns, helpful tips, and more so you can improve your skills and enjoy crafting in your own time.
Skill Level
★★★☆☆ (Easy to Intermediate)
Materials Needed
- Origami Paper - One square sheet.
- Googly Eyes - Optional for added character.
- Markers or Crayons - Optional for decoration.
Paper Size Options
- 6 inches 6 inches (15cm x 15cm) Paper - Standard size for a medium snake.
- 8 inches x 8 inches (20cm x 20cm) Paper - Makes a larger snake for more dramatic jumps.
Paper Type & GSM
For this project, lighter paper (around 70-80 GSM) is ideal as it allows for easier folding and better spring action. Consider using patterned or colored paper to make your snake visually interesting and to add your personal touch.
Instructions
Step 1: Start with the color you want your snake to be facing down.
Step 2: Fold the bottom edge to meet the top edge.
Step 3: Fold the bottom edge to meet the top edge once more.
Step 4: Unfold previous step.

Step 5: Fold the paper in half from right to left.
Step 6: Unfold previous step.
Step 7: Fold the bottom edge to meet the middle crease.
Step 8: Fold the top edge to meet the middle crease.
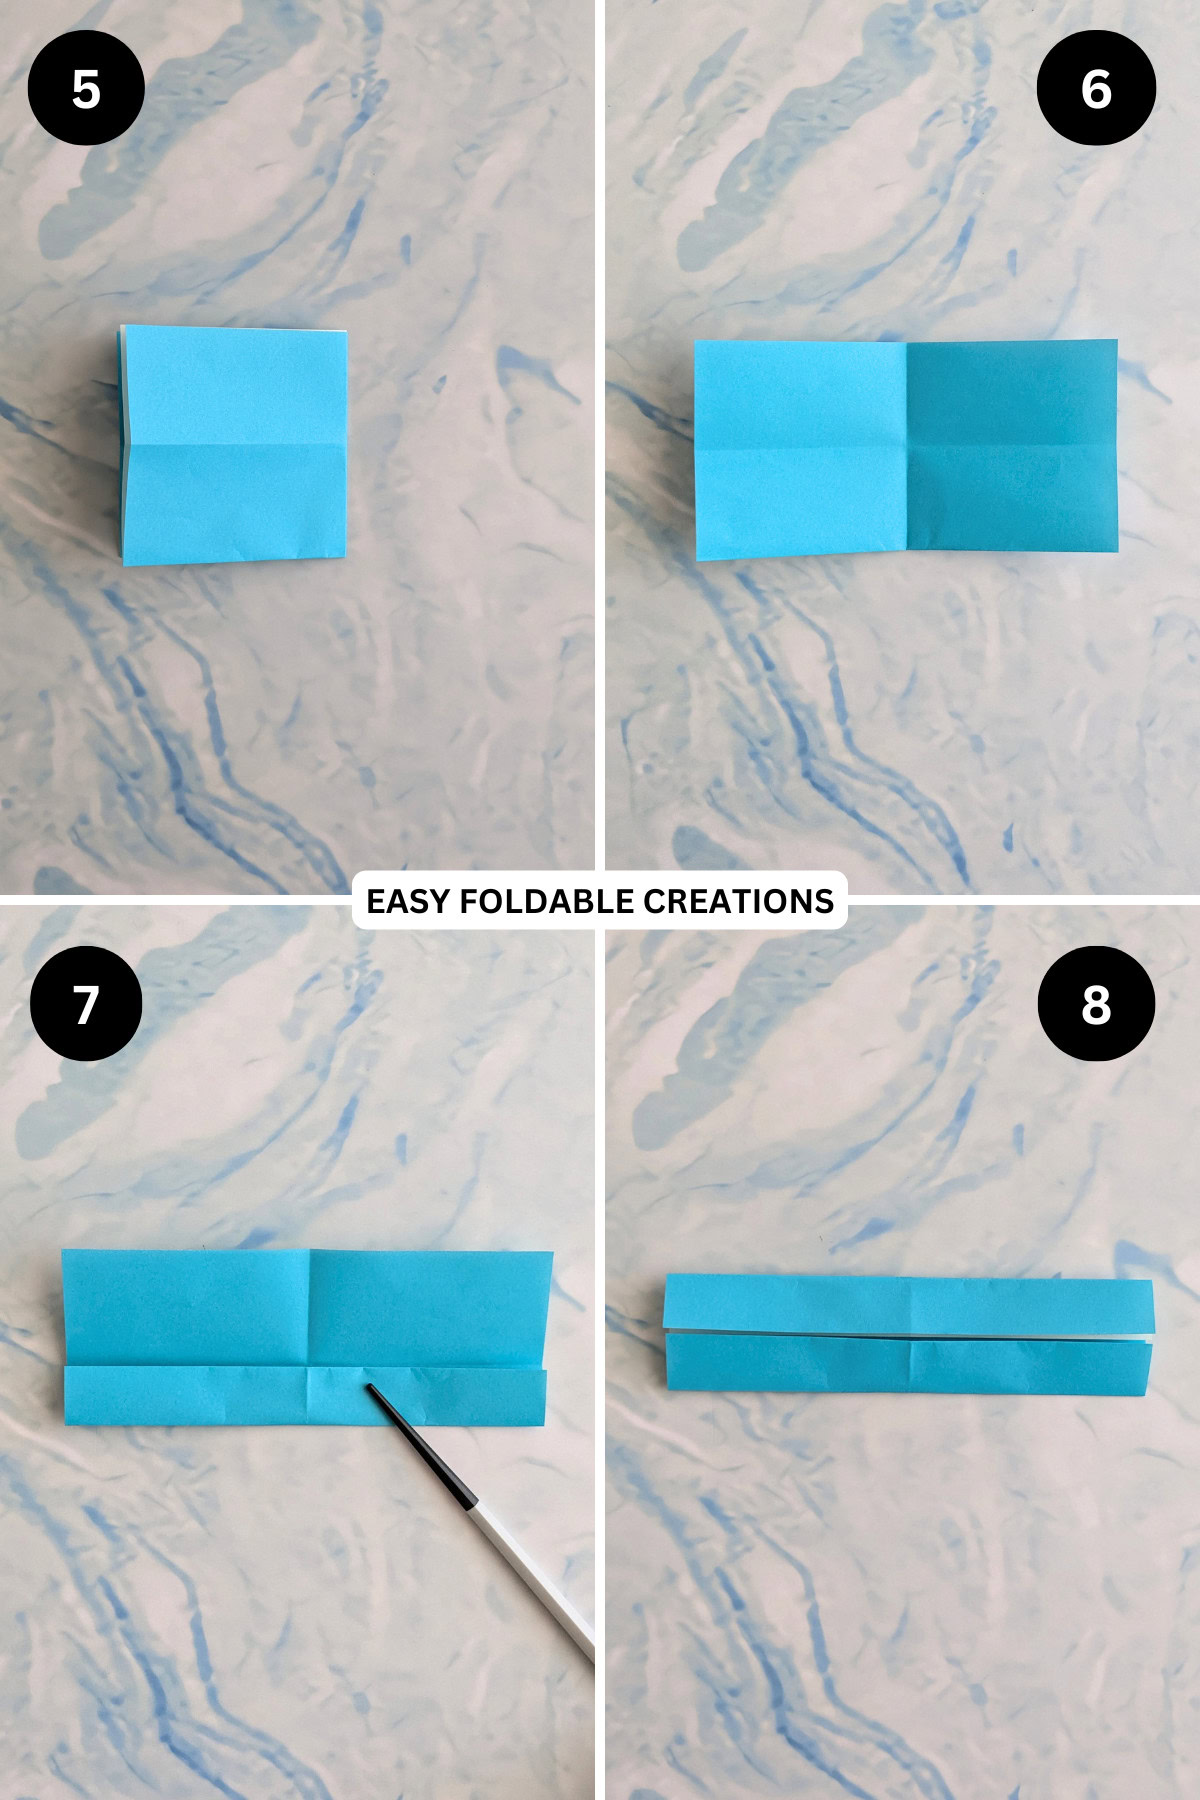
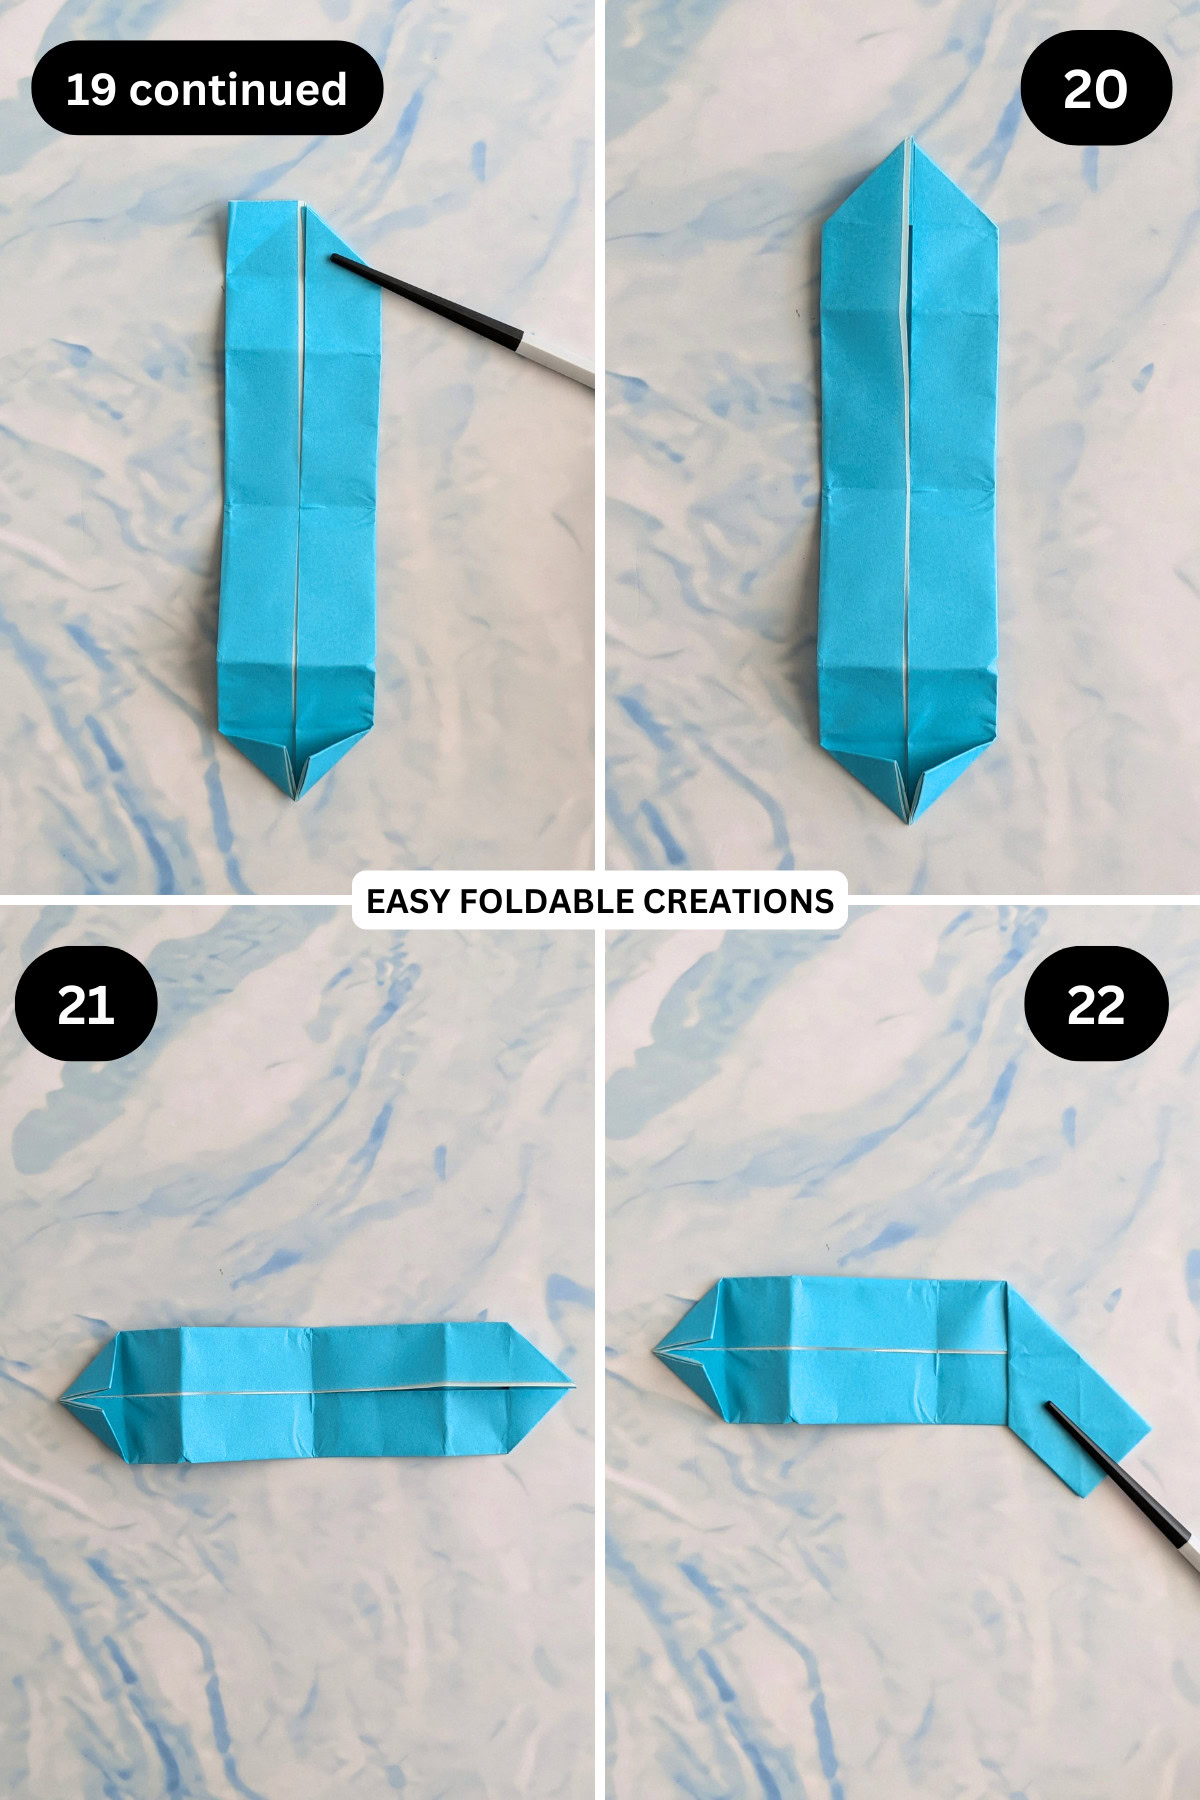
Step 9: Fold the paper in half from left to right.
Step 10: Fold the left edge (top layer only) to meet the right edge.
Step 11: Fold the right edge (top layer only) to meet the middle crease.
Step 12: Flip your paper over from top to bottom.
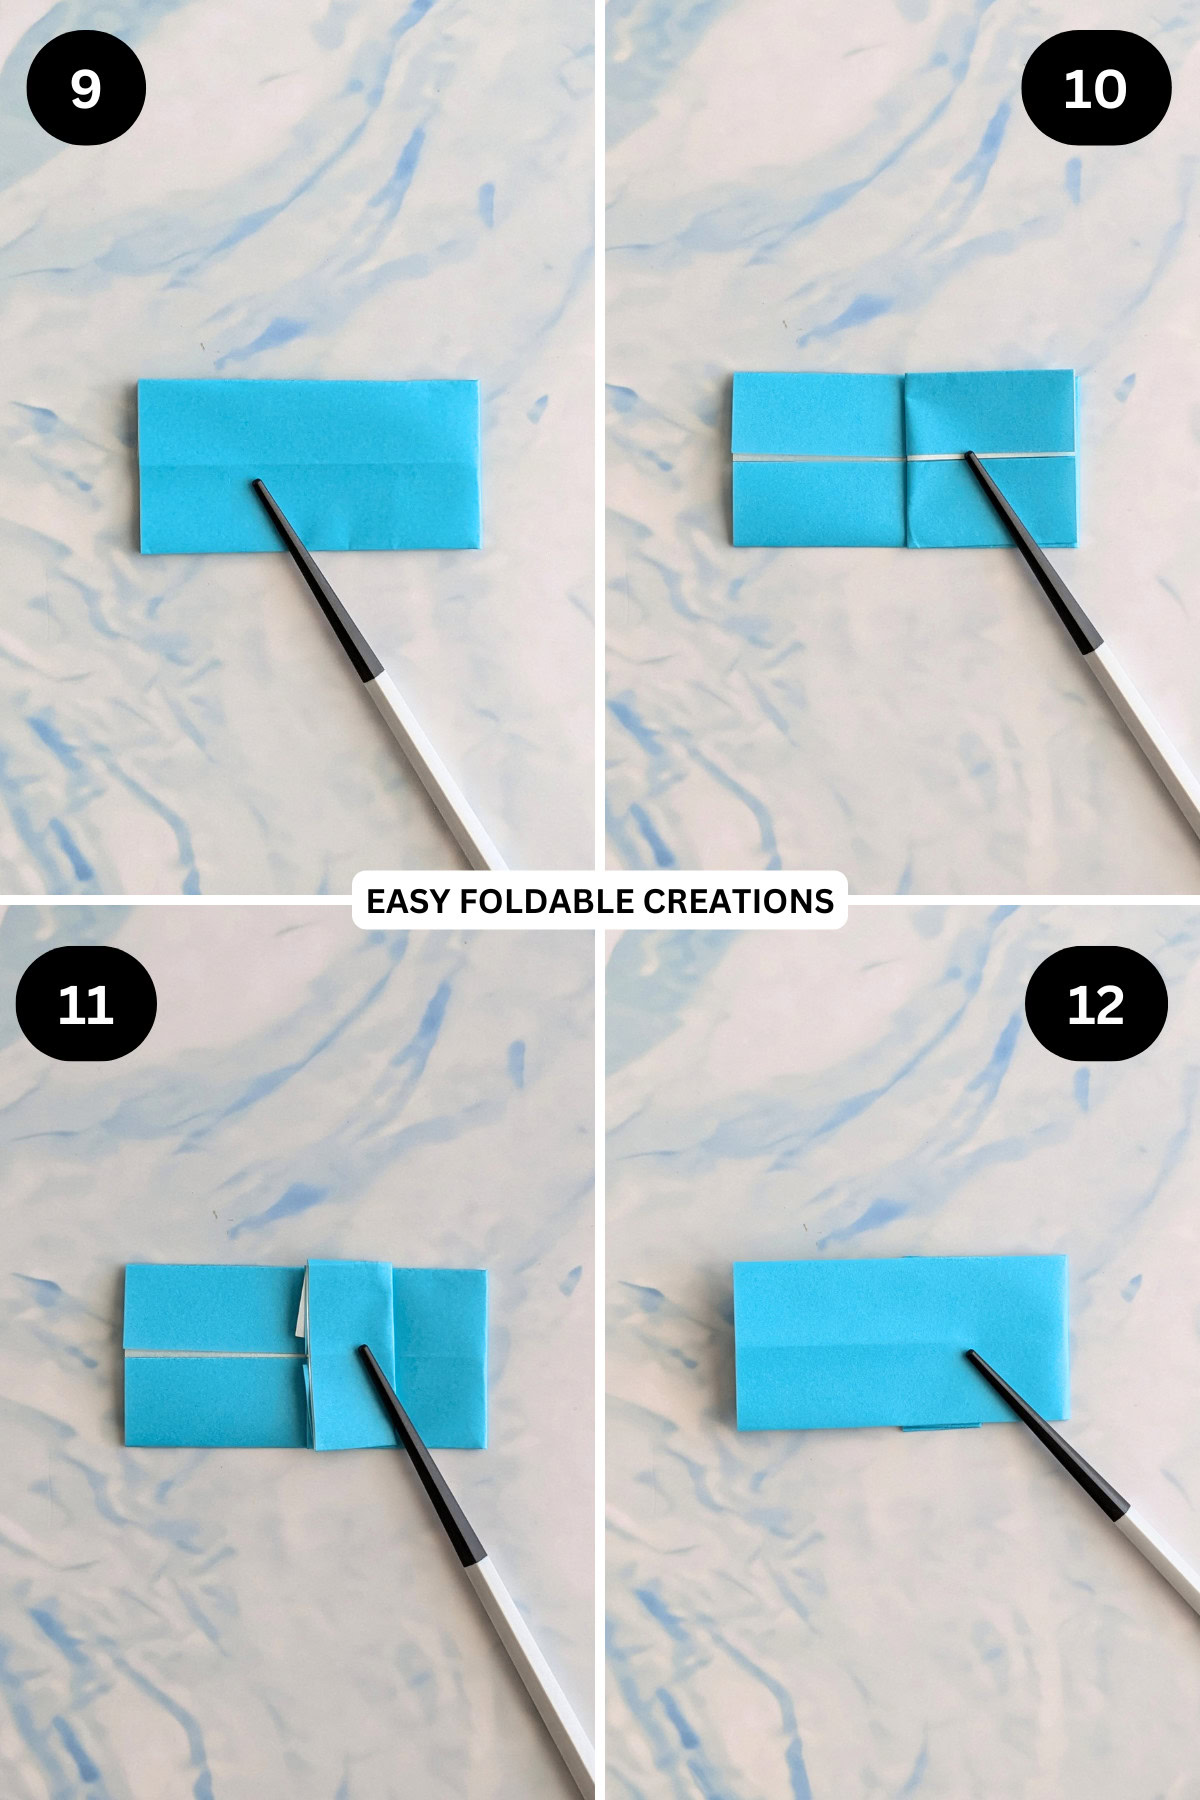
Step 13: Repeat steps 10 and 11.
Step 14: Unfold the previous 4 steps.
Step 15: Rotate your paper 90 degrees.
Step 16: Fold the top left point to meet the middle crease, forming a small triangle.
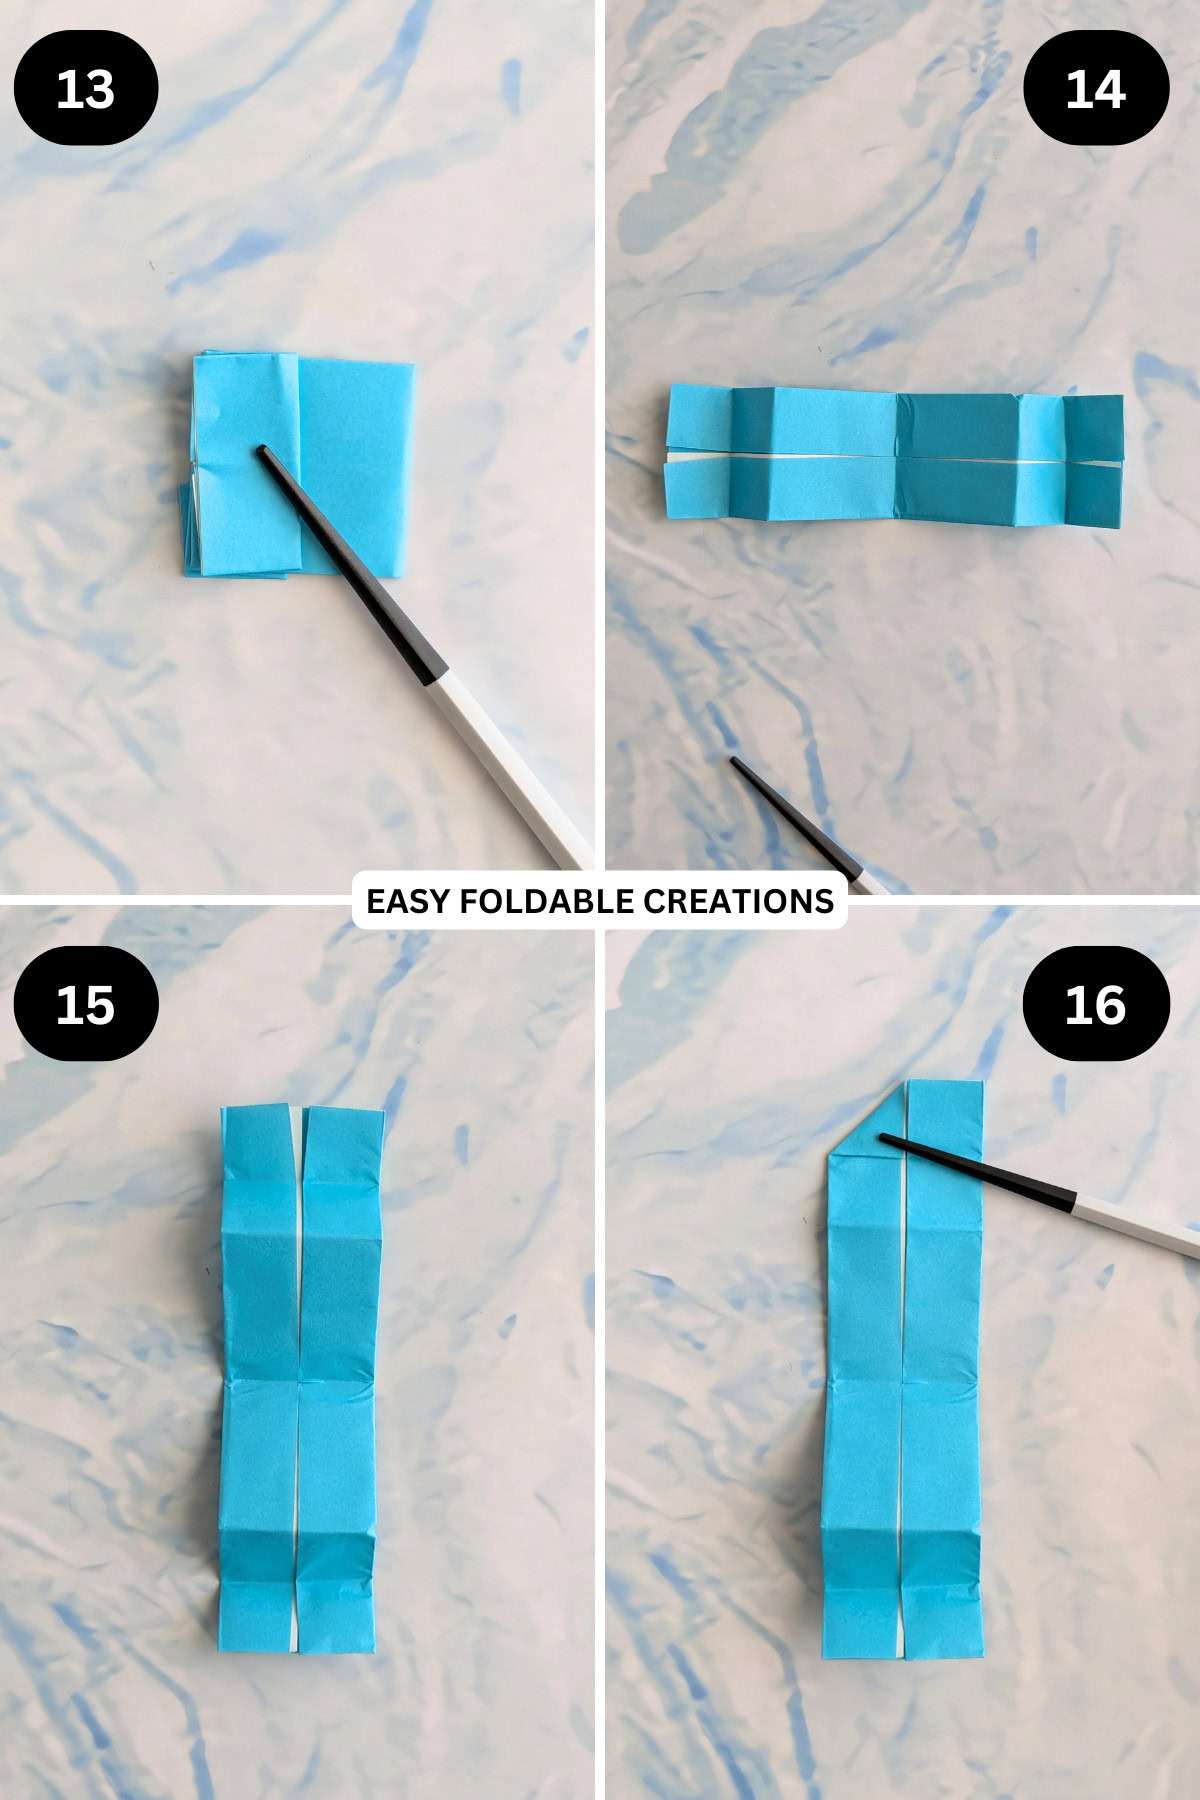
Step 17: Repeat previous step for remaining points.
Step 18: Unfold the triangles on the top.
Step 19: Open out the top right corner and push it in following the existing crease lines.
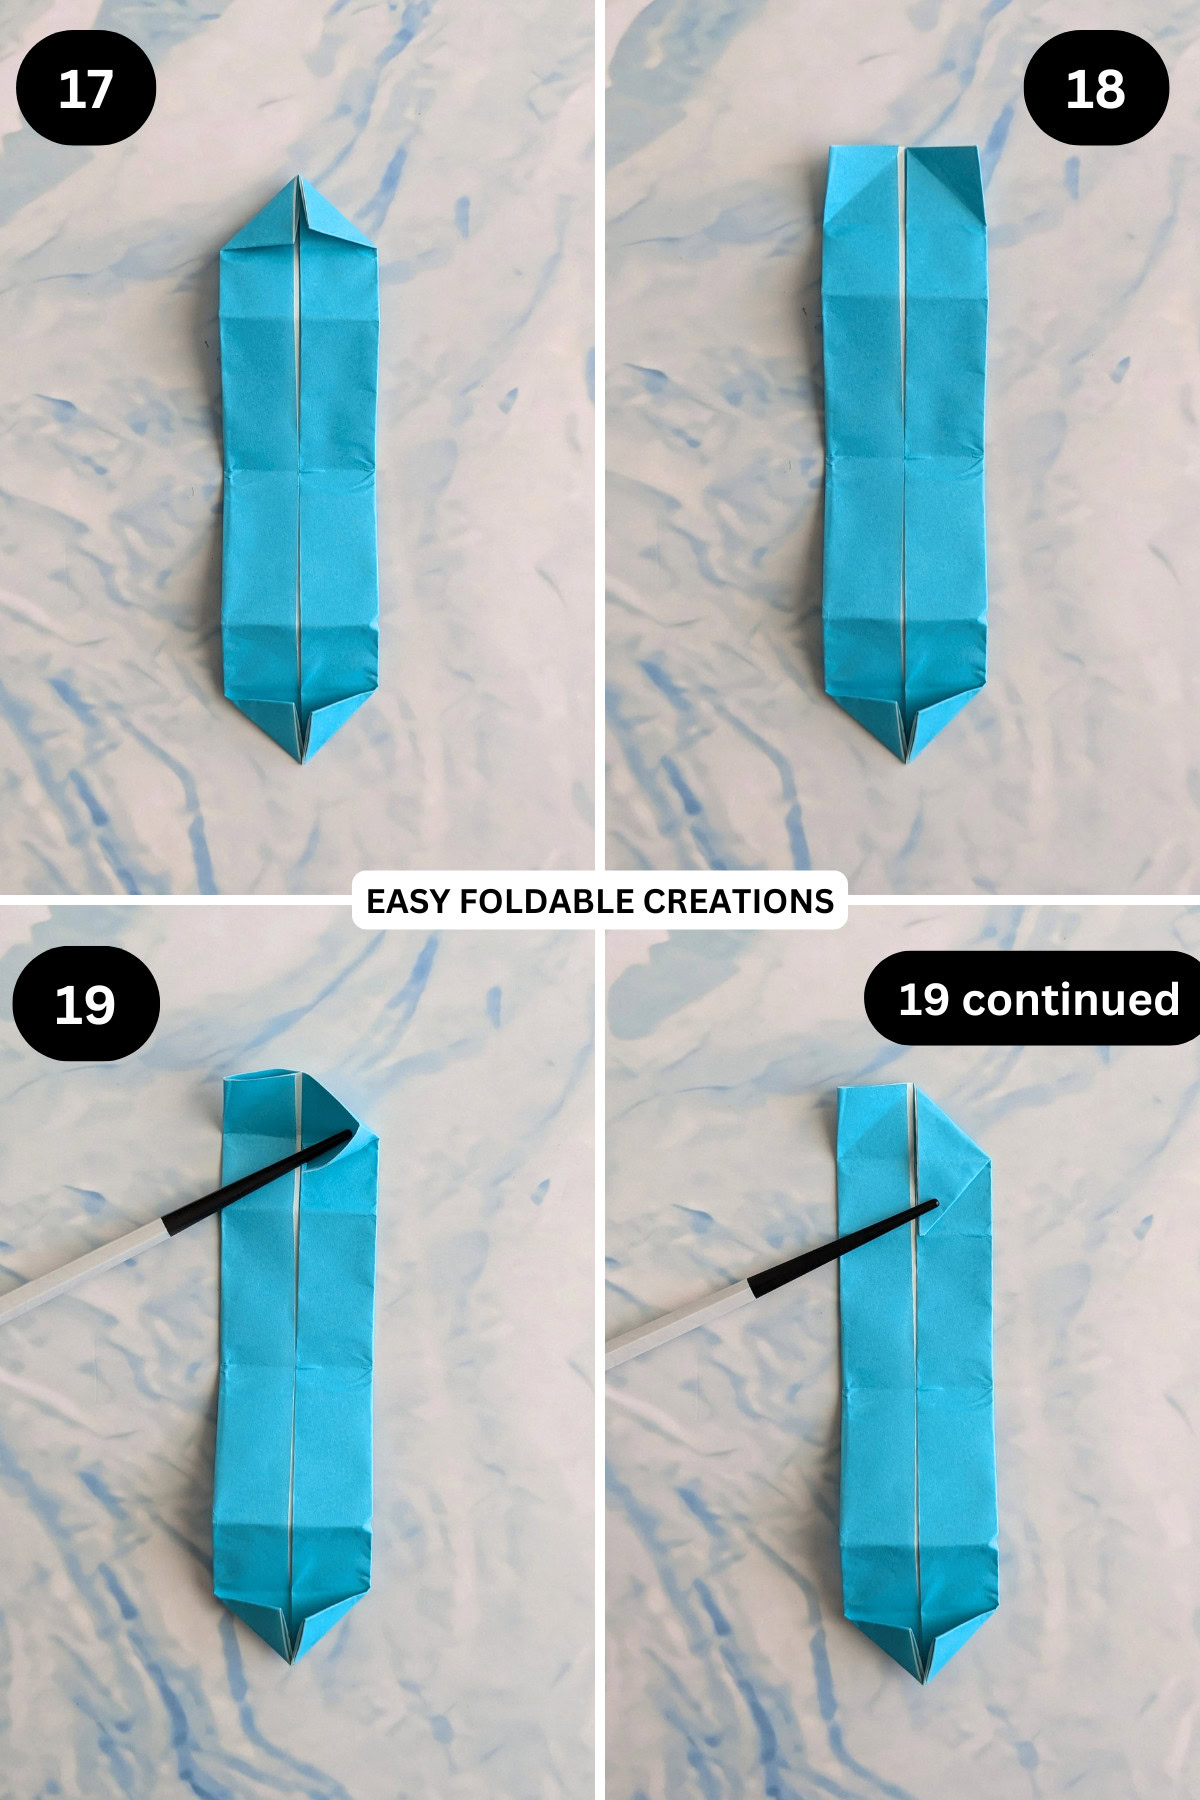
Step 20: Repeat previous step for top left corner.
Step 21: Rotate your paper 90 degrees.
Step 22: Fold the right side of the paper towards the left on an angle, lining its edge along the middle of the 2 crease lines (see picture). The top right point should line up with the bottom edge of the paper.
Step 23: Unfold previous step.
Step 24: Repeat the previous 2 steps but this time fold the right side of the paper up.
Step 25: Rotate the paper 90 degrees.
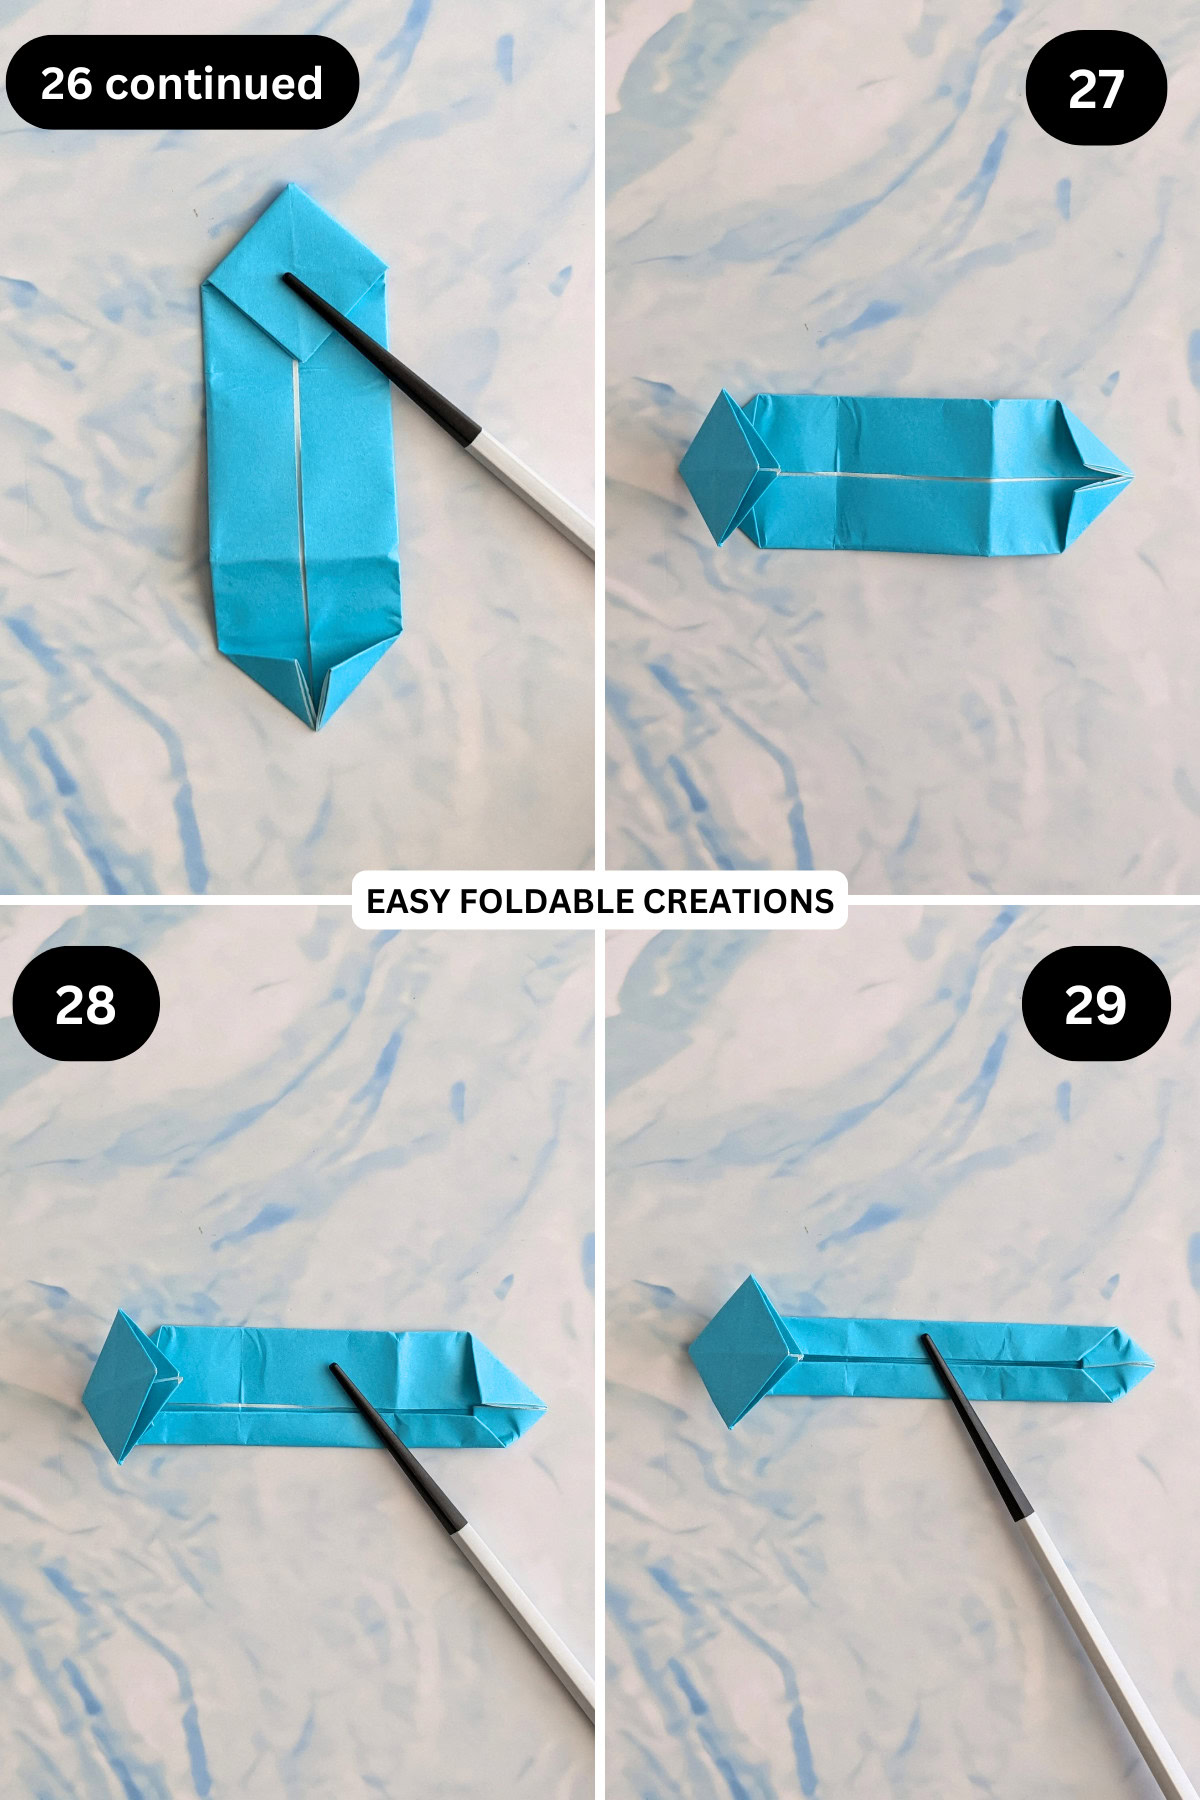
Step 26: Squash fold the paper down along the crease lines you made in steps 22 and 24.

Step 27: Rotate the paper 90 degrees so the head is on the left.
Step 28: Fold the bottom edge up to the middle crease.
Step 29: Repeat on top edge.
✨ You're almost there! ✨
To unlock the final steps of the photo tutorial and complete your pattern, create a free account with Grow.me. below.
Make sure you tick the box to subscribe to our newsletter and stay up to date with the latest patterns, tips, and more!
Once you're signed up, you'll get instant access to finish your project with the photo tutorial and enjoy exclusive content in the future.
Already signed up? Hit the button below and select 'Switch to Log In' to pick up where you left off and finish your project!
Step 30: Flip your paper over and arrange it so the head is towards you.
Step 31: Fold the top edge to the bottom, lining it up along the middle crease on the head.
Step 32: Fold the bottom edge up matching it with the bottom point of the head.
Step 33: Fold the top edge down again, lining it up with the edge of the previous creases.
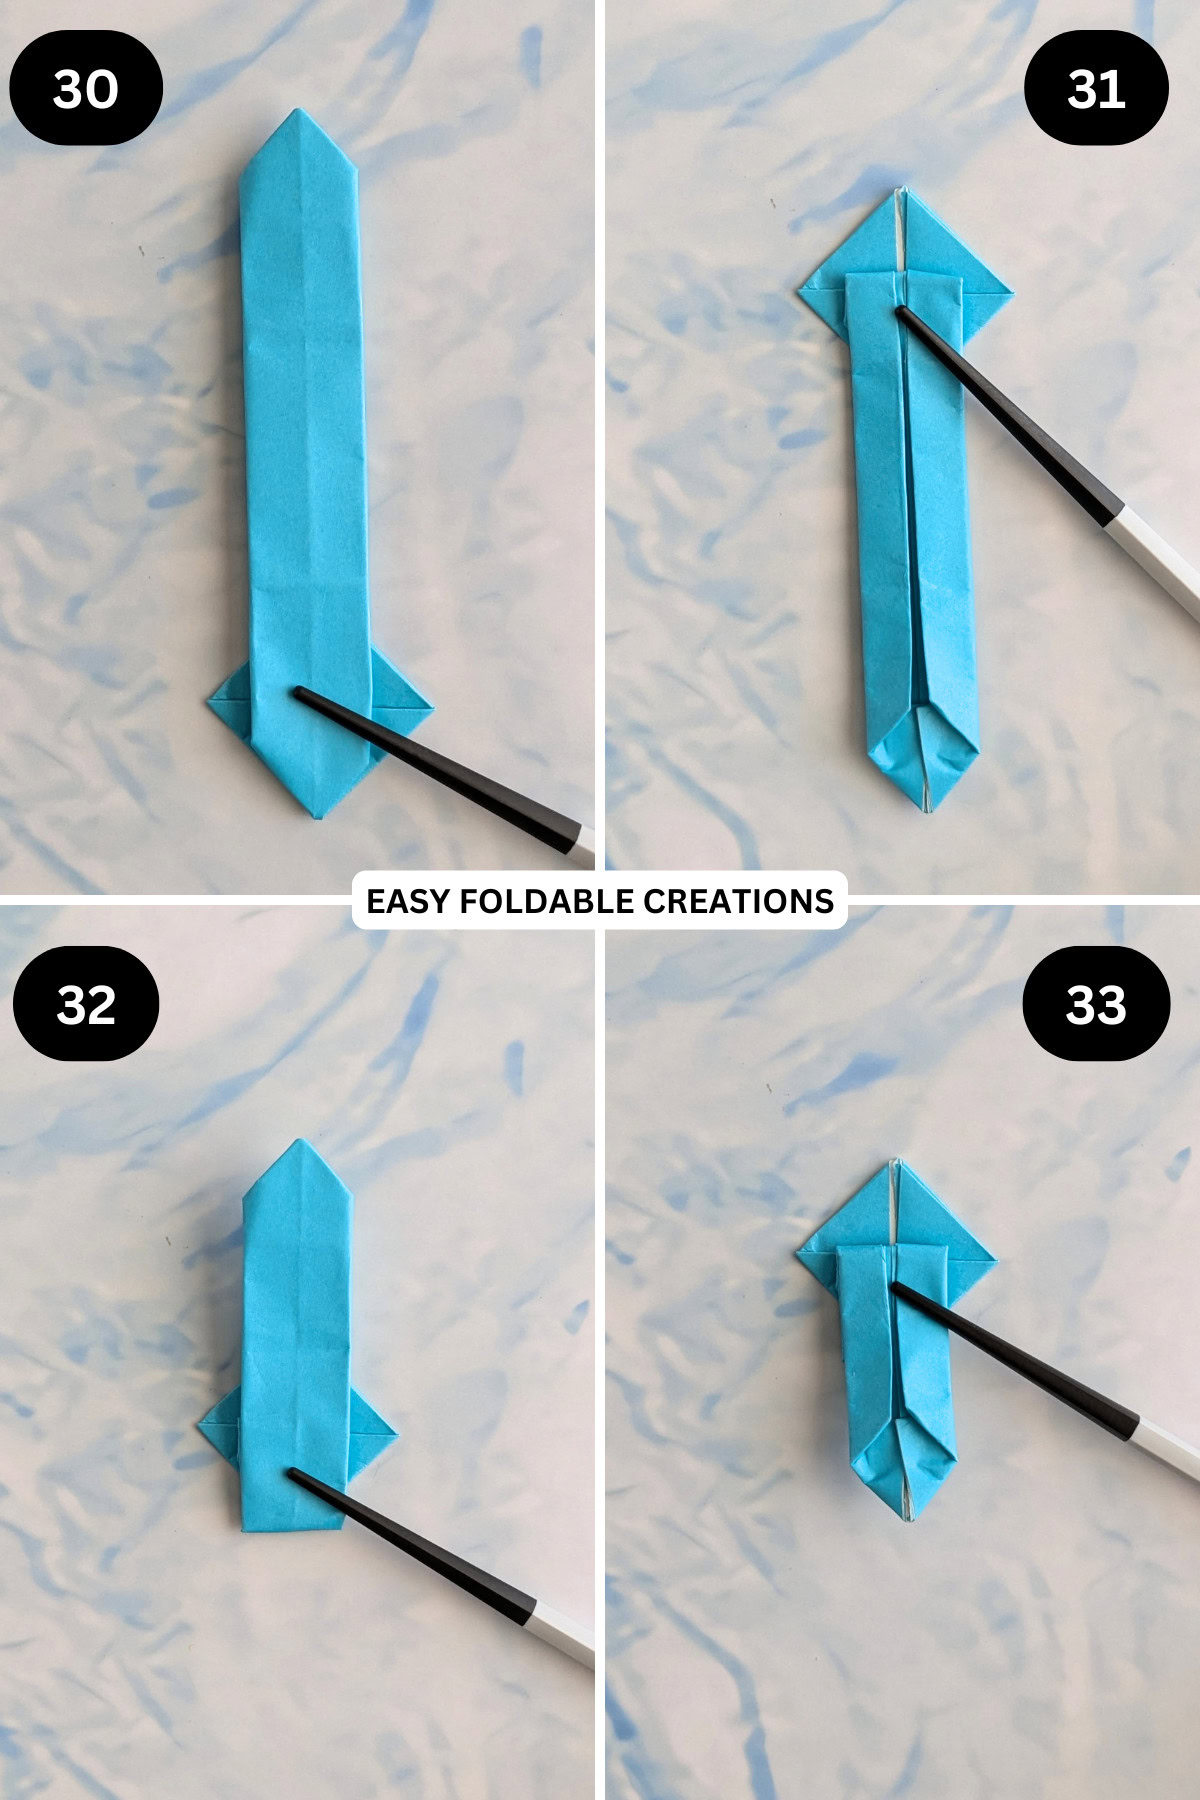
Steps 34: Repeat previous 2 steps until you have folded the whole strip. You should end up with the point of the tail towards you.
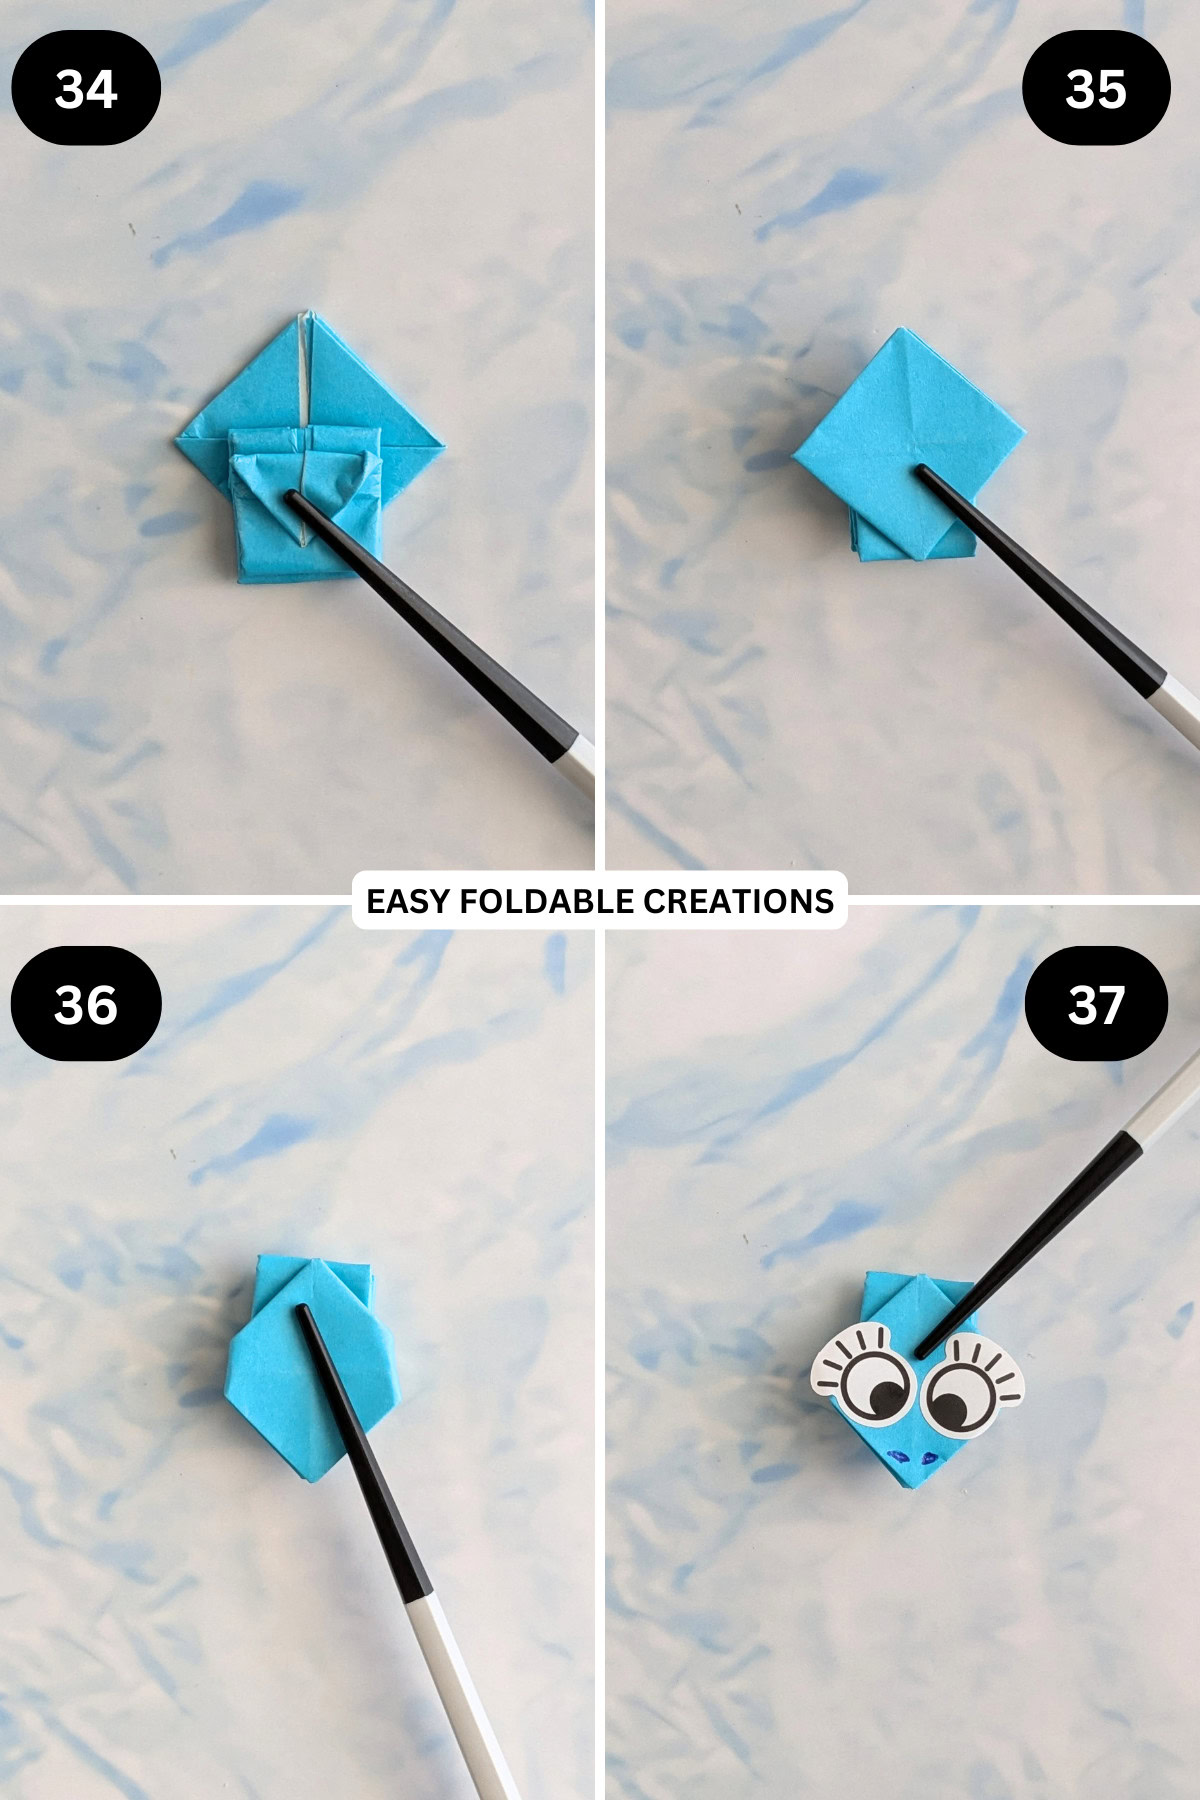
Steps 35: Flip your snake over.
Step 36: Fold the left and right points of the face in slightly.
Step 37: Decorate your snake with markers or stickers. Completed jumping snake.
Tips For Success
- Crisp Folds - Use a bone folder or a similar tool to achieve sharp creases.
- Test the Jump - Adjust the tail's length to see how it affects the jumping action.
- Common Mistakes & How to Avoid Them
- Loose Folds - Ensure all folds are firm to create the best jumping effect.
- Paper Quality - Using too thick or heavy paper can hinder the snake's ability to jump.

Color, Paper Ideas, and Variations
Try using vibrant colors or patterned paper to make your snake eye-catching.
You can create a whole family of snakes in different sizes and colors for a fun display.
Adding decorations like stickers or drawing patterns on your snake can personalize your project further.
Consider making these snakes in Halloween colors for a festive twist or themed colors for birthday parties.
FAQ
While you can use any paper, lighter origami paper will yield better results in terms of folding and jumping.
Use patterned or colored origami paper, or decorate the snake with markers or stickers after folding.
You could even add a tongue by sticking on a stripe of red paper.
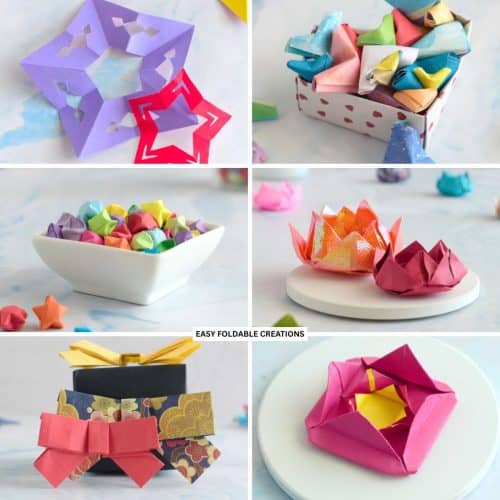
Other Paper Crafts You Might Like To Try:
Helpful Origami Tips
If you're curious to learn more about origami, you might like to look at our basic guides on how to make some common origami folds.
Start with the valley fold and mountain fold-these are the foundation of most origami models.
Once you're comfortable, you might like to try the petal fold for 3D shapes, and explore the bird base and square base for more complex designs.
The water bomb base is also great for creating inflatable or geometric models, like this inflatable origami rabbit.
Useful Paper Craft Terms
Want to learn a little more about paper crafts and origami?
We've made this helpful printable just for you. It explains common terms and helpful tips you might come across when you are folding origami or making a paper craft project.
You can download the useful paper craft terms printable PDF here.
Stay Connected
Made this pattern? Let us know how it went in the comments below!
Pin this post - Pin now to take your paper crafting skills to the next level.
Share on Instagram or Facebook - Capture the beauty of your finished paper craft project and share it on Instagram or Facebook! Tag us @easyfoldablecreations so we can see your work!

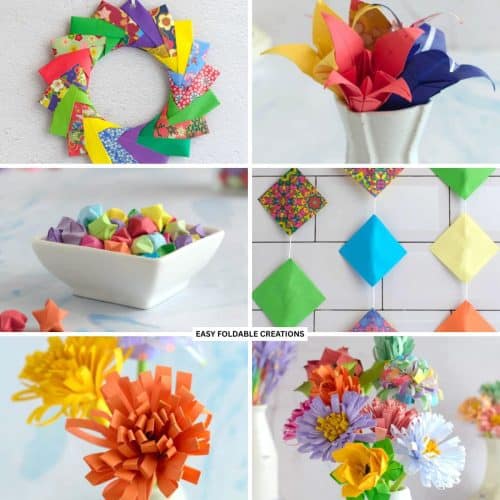
On the hunt for more easy paper crafts?
Then you just have to try these origami mouse, butterfly, origami heart, paper card holder, origami swan, origami boat with square paper, origami fox, talking fish, and diy gift bags from wrapping paper!
Other Patterns You Might Like To Try:
Looking for other easy patterns like this? Try these:
- Minimalist Seasonal Paper Decoration Ideas
- DIY Paper Decor Ideas For Every Season
- Wedding Confetti Alternatives That Are Venue Friendly
- DIY Wedding Table Number Ideas Using Paper
- DIY Paper Wedding Place Card Ideas You Can Make Yourself
- Gift Wrapping Topper Ideas
- Last Minute Gift Wrapping Ideas That Still Look Beautiful and Thoughtful
- Gift Wrapping Ideas For Oddly Shaped Gifts


Comments
No Comments