
Craft a charming origami heart ring with just one square sheet of paper!
This crafty accessory is perfect for Valentine's Day, Mother's Day, anniversaries, or as a sweet handmade gift for someone special.

Jump to:
This origami heart ring is an adorable and meaningful project that combines the beauty of traditional origami with the sentiment of gift-giving.
What's great about this paper heart ring is how versatile and accessible it is. All you need is a square sheet of paper, and within minutes, you can transform it into a wearable piece of art.
Choose soft pastels for a delicate and understated look, vibrant reds and pinks for a romantic vibe, or metallic paper for a strikingly elegant finish.
With no glue or cutting involved, this origami project is not only eco-friendly but also easy to make, even for beginners.
Using only a small square of paper, you can create a wearable piece of art that's perfect for occasions like Valentine's Day, Mother's Day, or even anniversaries.
It's a unique way to show love and appreciation, and the best part? No glue or scissors are required!
It's also a fun craft for group settings-gather friends, family, or kids and have a creative crafternoon making personalized rings for each other.
Whether you're looking to celebrate love, friendship, or simply enjoy the art of origami, this tutorial promises a delightful crafting experience with a stunning end result.
This step by step origami tutorial is easy to follow, making it a fantastic craft for beginners and seasoned paper-folding enthusiasts alike.
You can make a ring in any size. Use it as a hand ring or even make bigger ones to use as napkin rings!
Experiment with different colors and patterns to match the occasion or your personal style.
Whether you're crafting for a loved one or creating an entire set for a party, these rings add a handmade touch of elegance and charm.
Add a special touch if you are giving this origami heart ring as a gift by placing them in this super cute Heart Origami Box With Lid!

Other heart crafts you might like to try Blossom Origami Heart, Heart Origami Bookmark, Long Heart Origami Bookmark, or this Origami Lucky Hearts.
Why You'll Love This Pattern
- Sentimental and Handmade: A heartfelt alternative to store-bought gifts.
- Quick and Easy: Simple steps make it beginner-friendly.
- Customizable: Use any paper to match your style or the event.
- Perfect for Special Occasions: Ideal for Valentine's Day, Mother's Day, and anniversaries.
- Great for party favors or personalized decorations.
- Make bigger heart rings to use as napkin rings!
Exclusive Content Just For You
Not sure what you want to make next, but feeling a bit creative? Or maybe you've been searching for a pattern that sparks something new. We've got a few ideas waiting for you.
The Fold Collective, Easy Foldable Creations' community, provides you with a library of exclusive ad-free video tutorials, printable PDF patterns, helpful tips, and more so you can improve your skills and enjoy crafting in your own time.
Skill Level
Difficulty: ★☆☆☆☆ (Very Easy)
Materials Needed
- 1 sheet of square paper (3.5 inches x 3.5 inches is a good size for most rings)
Paper Size Options:
- 3.5 inches x 3.5 inches (9 cm x 9 cm): Standard adult ring size.
- 3 inches x 3 inches (7.5 cm x 7.5 cm): Smaller ring, ideal for kids.
- 4 inches x 4 inches (10 cm x 10 cm): Larger ring for a looser fit or decorative purposes.
If you want to make napkin rings, we suggest using 6 inch x 6 inch (15cm x 15cm) square paper or larger.
Paper Type & GSM:
- Thin origami paper (70-90 GSM) works best for this project to achieve crisp folds and avoid bulkiness.
- Choose solid colors, metallic paper, or even heart-printed patterns for added flair.
Instructions
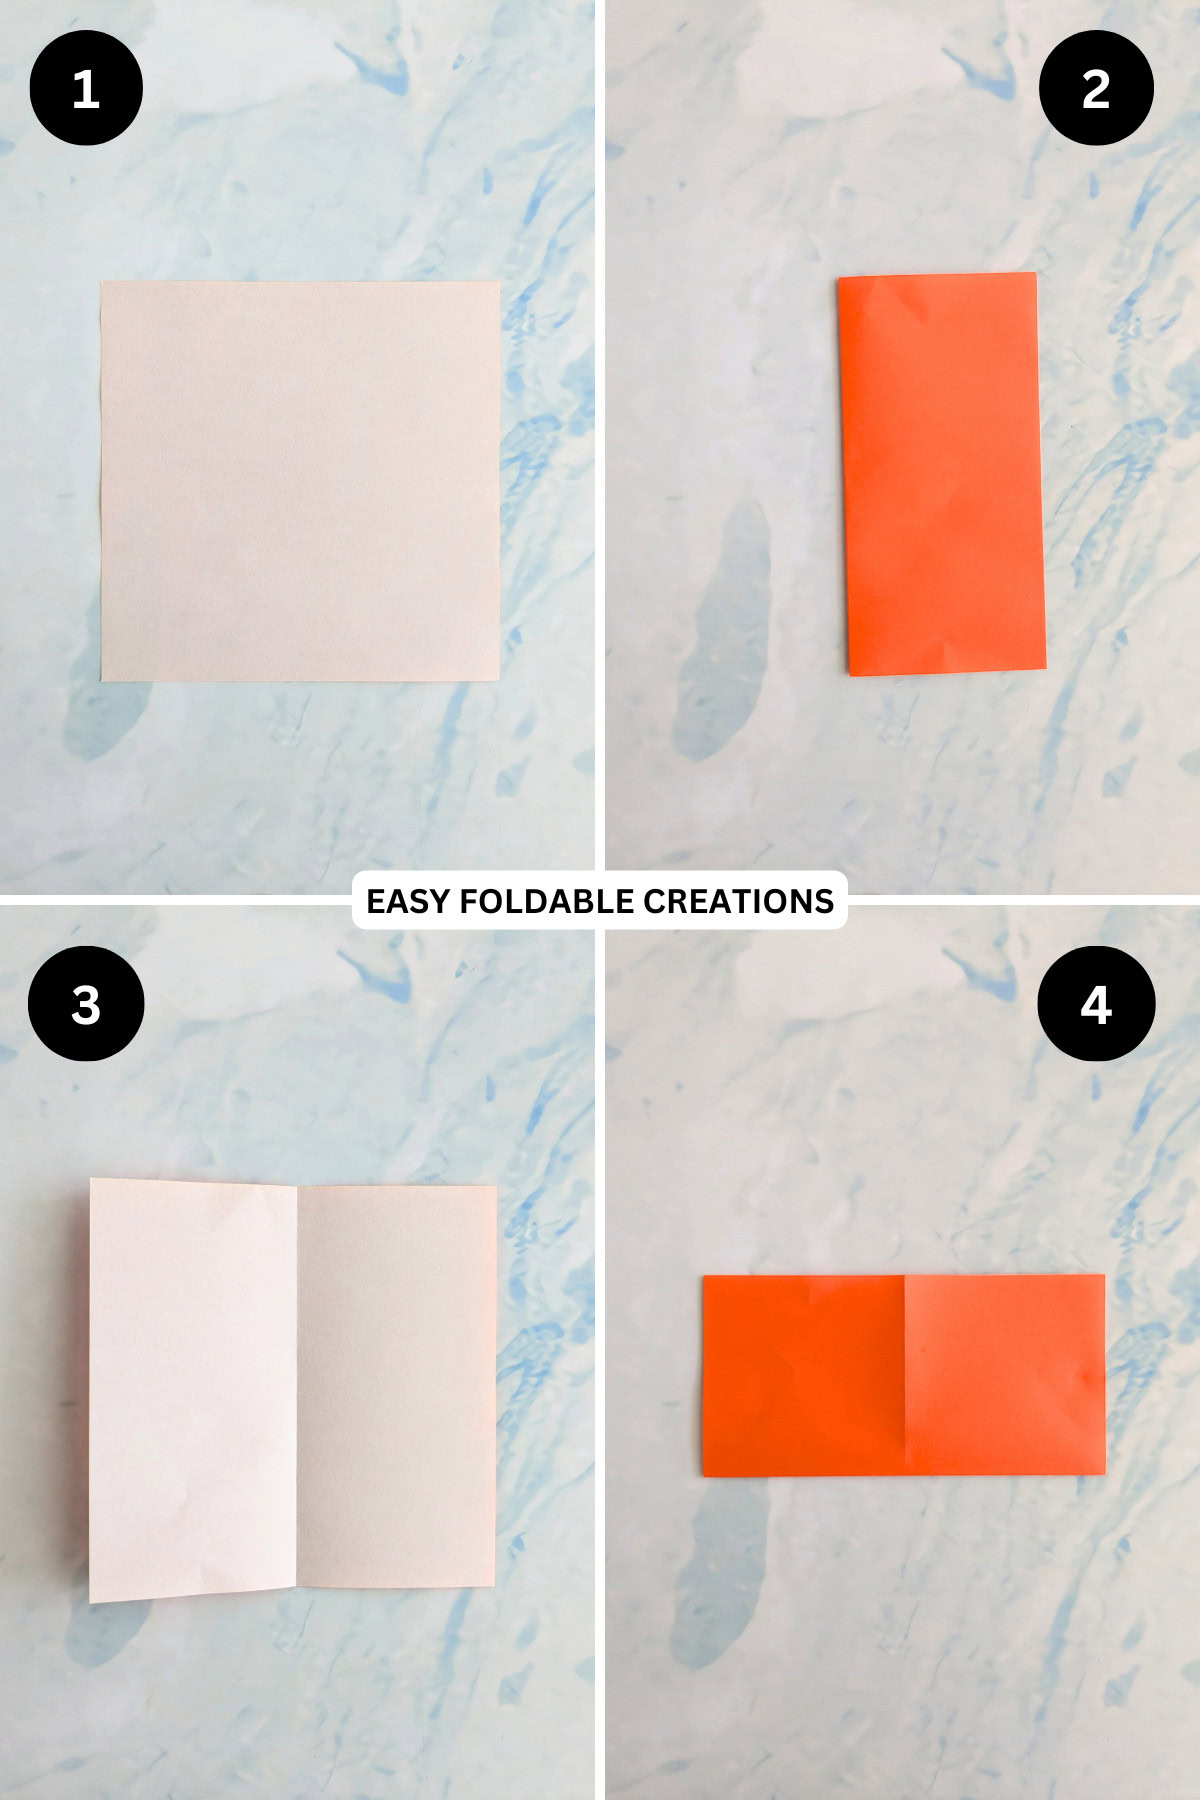
Step 1: Start with the color you want your heart to be facing down. The color facing up will become the band of your ring.
Step 2: Fold the left edge to meet the right edge.
Step 3: Unfold previous step.
Step 4: Fold the bottom edge to meet the top edge.
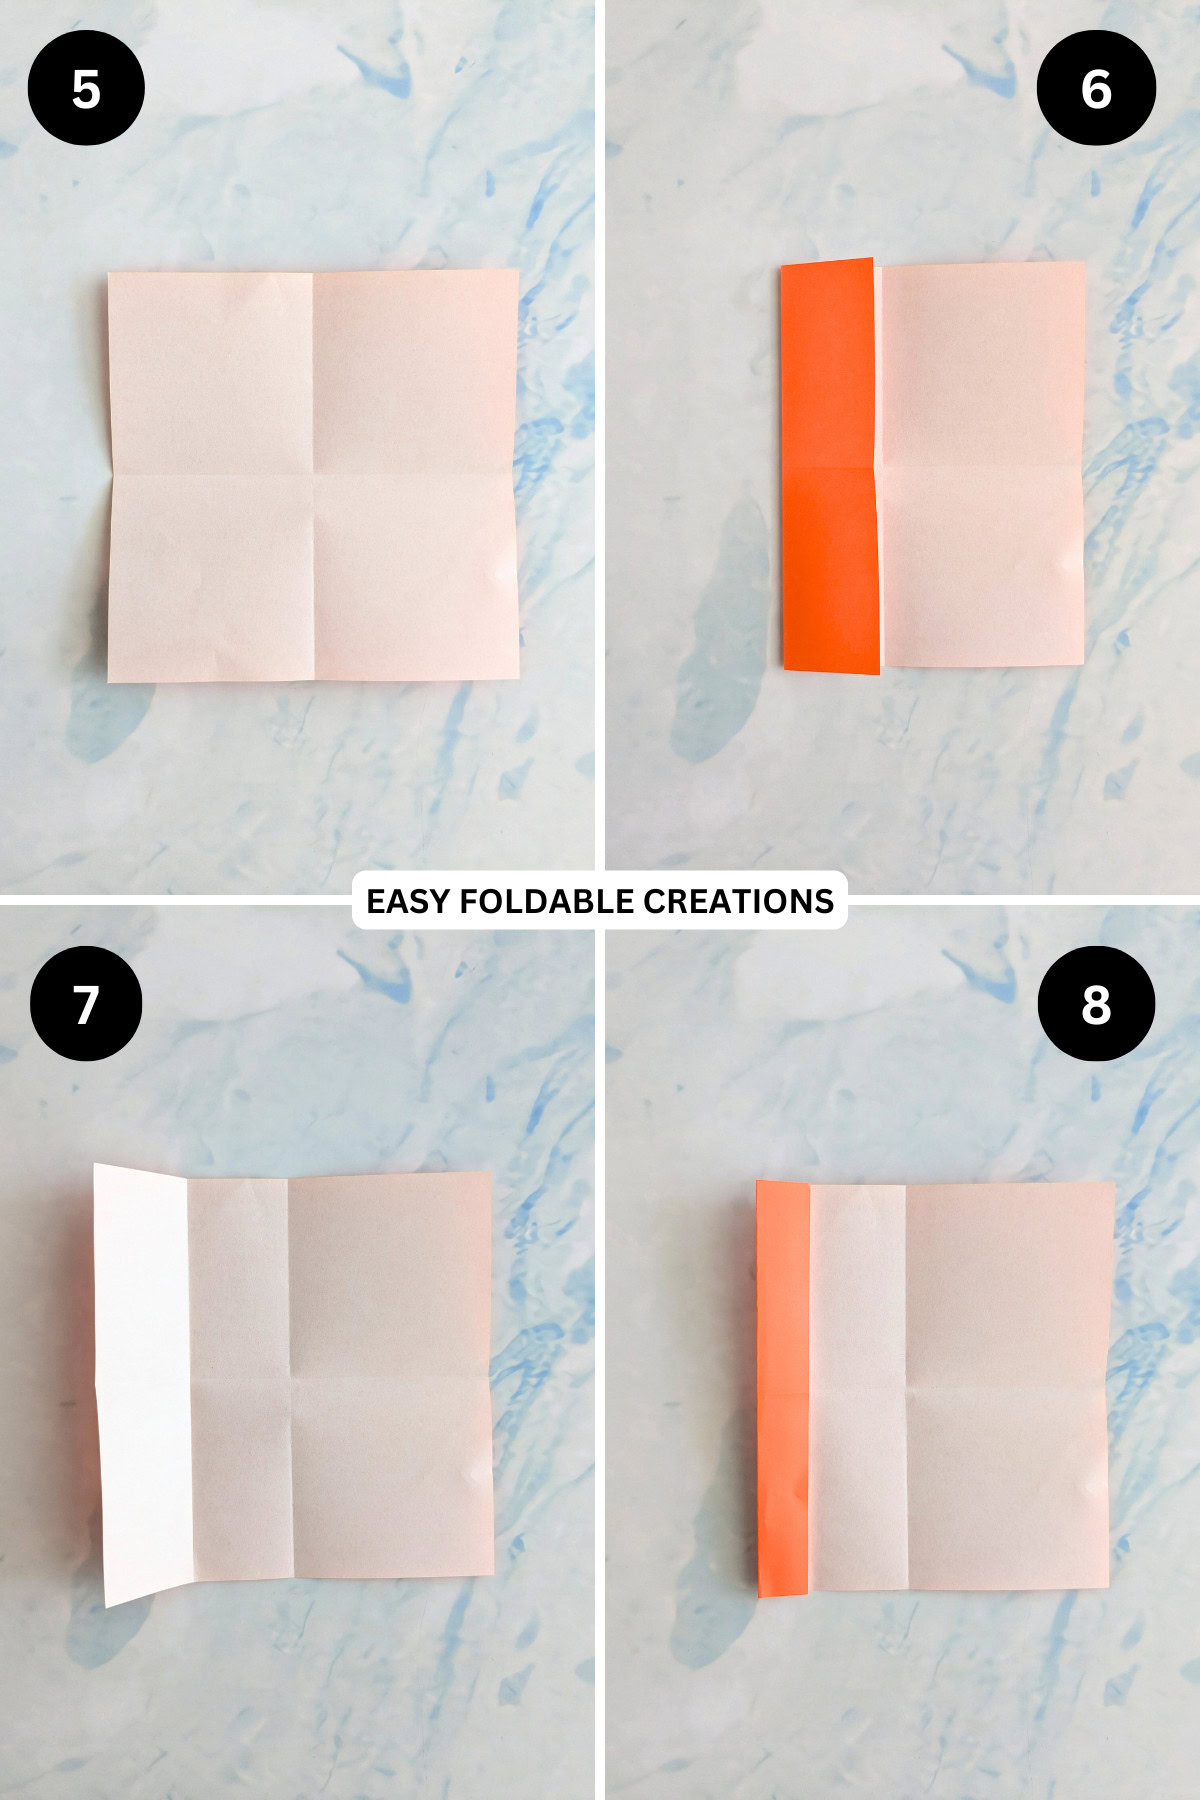
Step 5: Unfold previous step.
Step 6: Fold the left edge to meet the centre crease.
Step 7: Unfold previous step.
Step 8: Fold the left edge to meet its nearest vertical crease (the one you made in step 6).
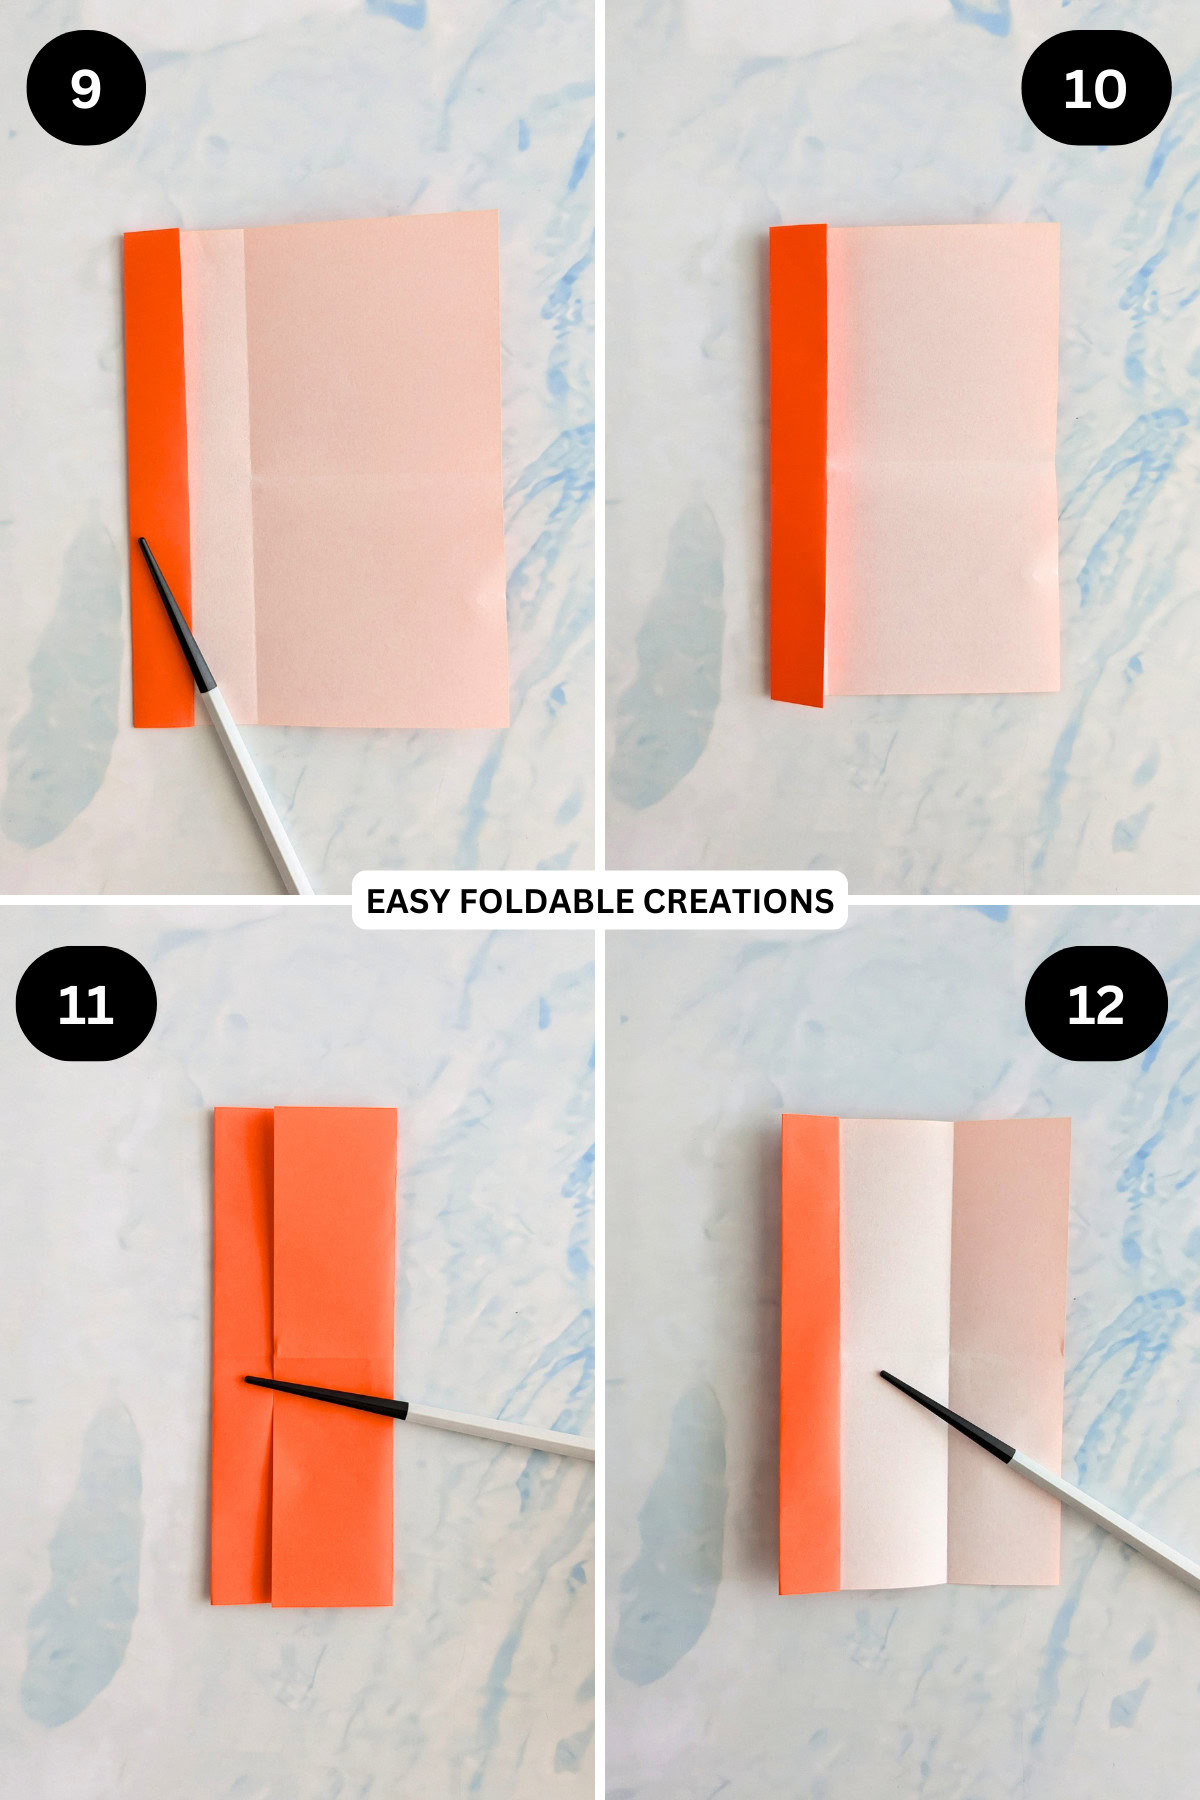
Step 9: Fold the left edge to the right along the existing crease.
Step 10: Fold the left edge to the right once more, to meet the centre crease.
Step 11: Fold the right edge to meet the centre crease.
Step 12: Unfold previous step.
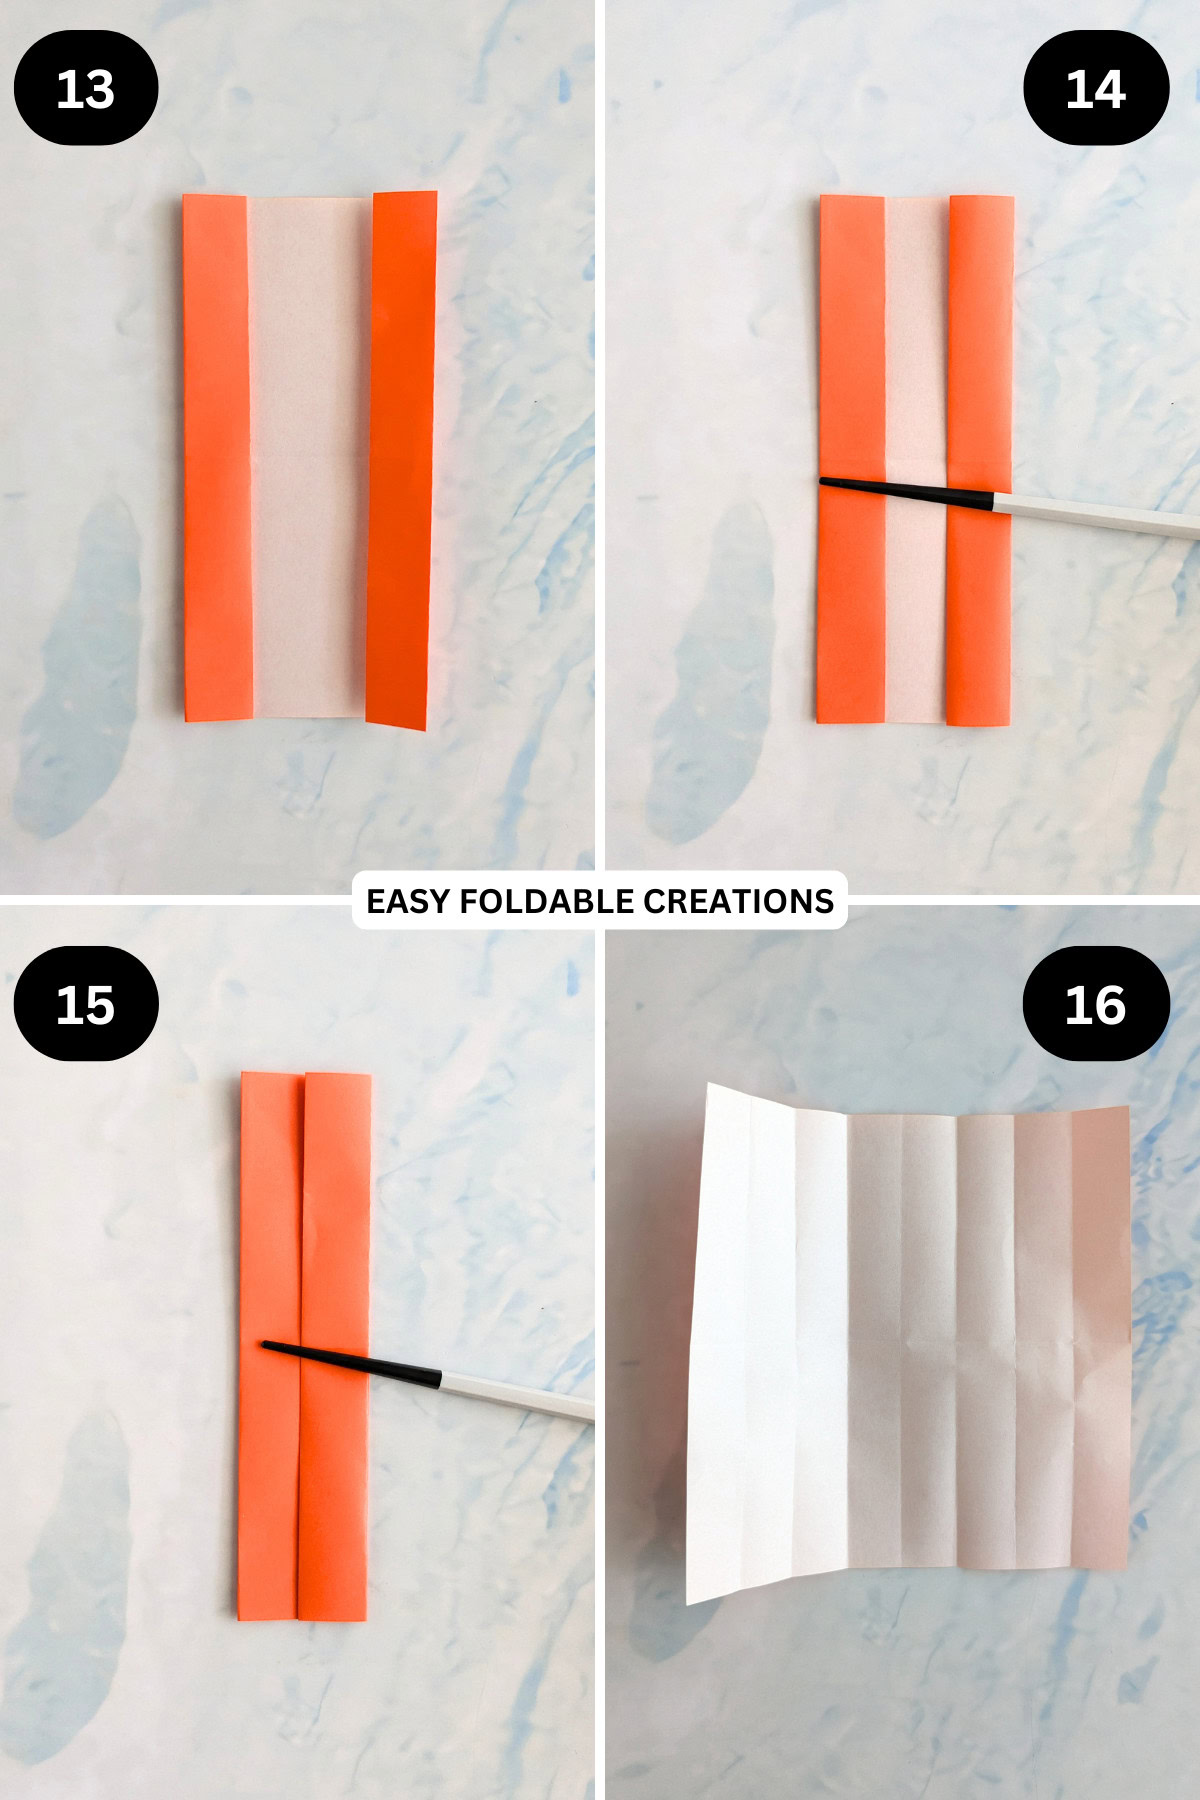
Step 13: Fold the right edge to meet its nearest vertical crease (the one you made in step 11).
Step 14: Fold the right edge to the left, following the existing crease.
Step 15: Fold the right edge to the left again, matching its edge to the centre crease.
Step 16: Unfold the paper completely.
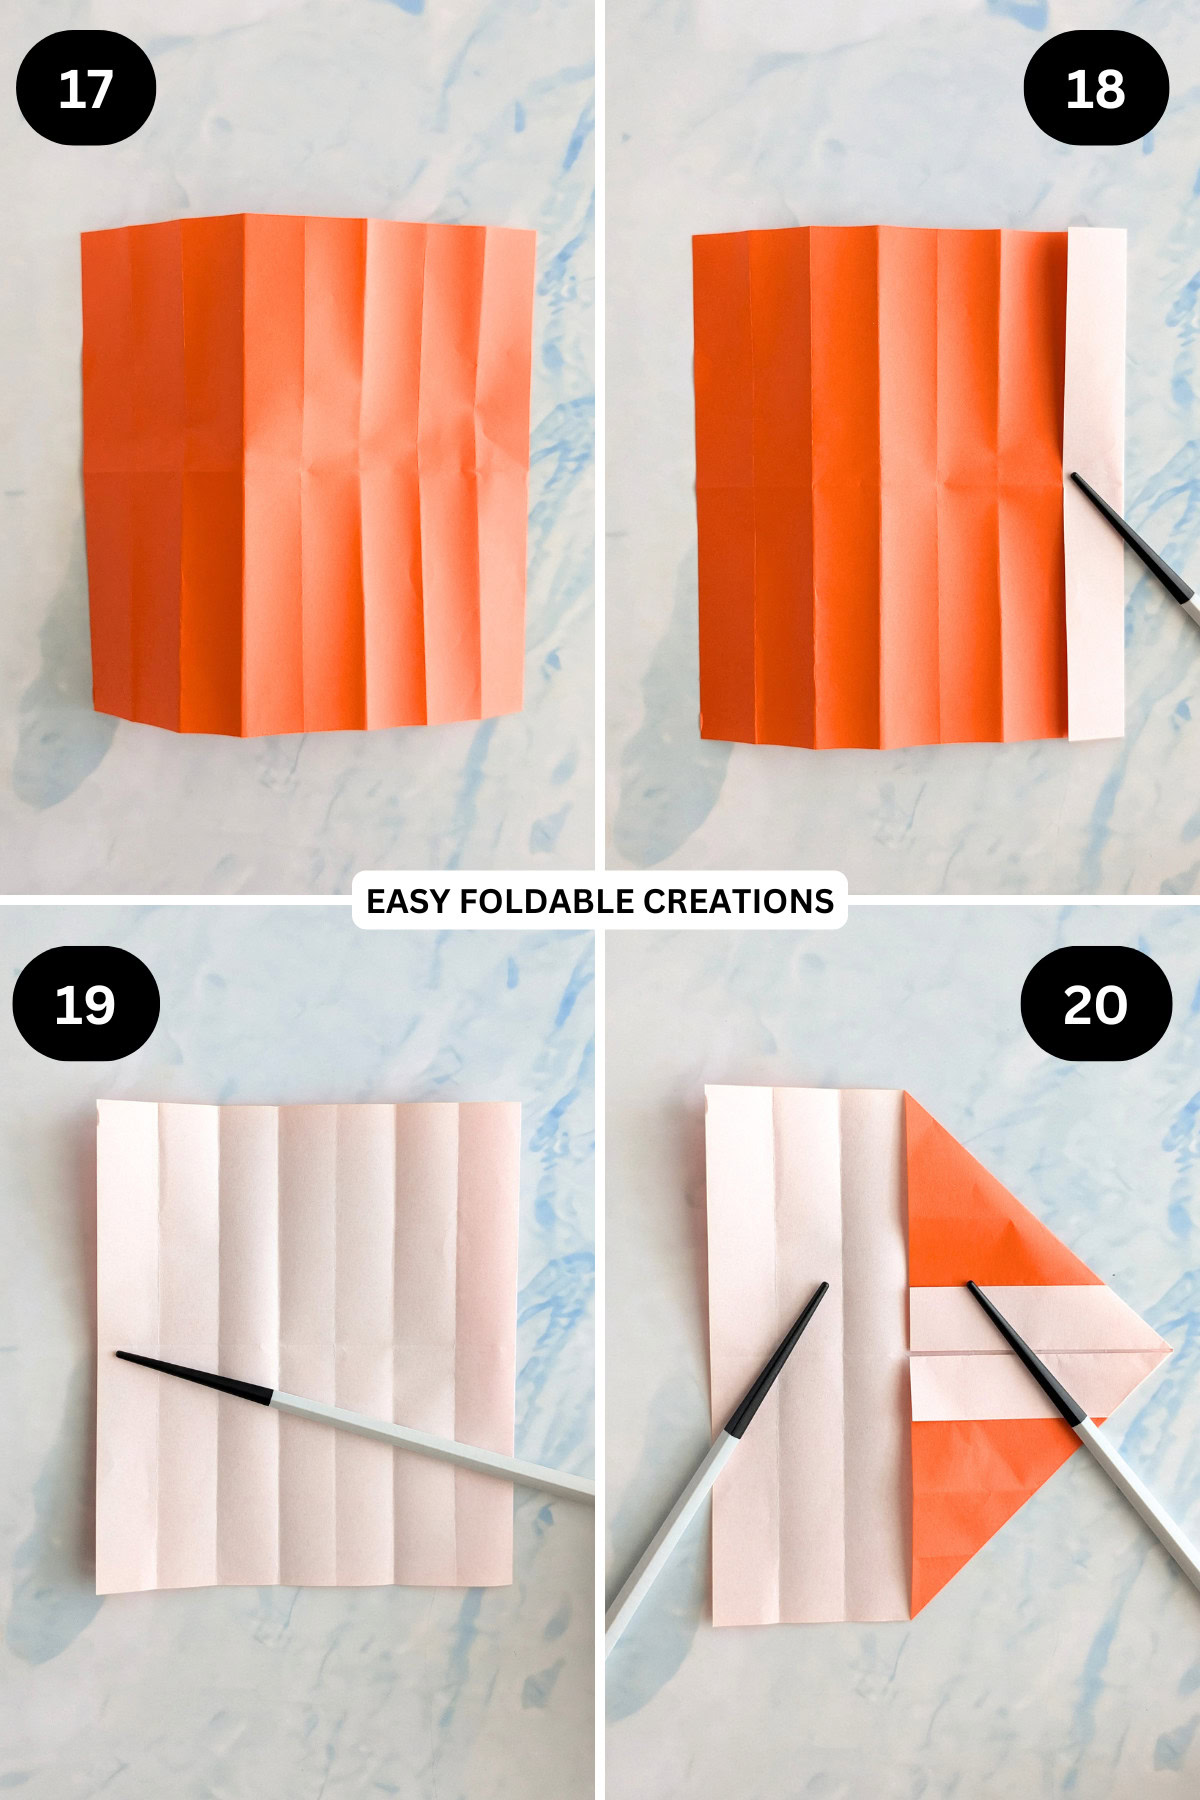
Step 17: Flip your paper over from top to bottom.
Step 18: Fold the right edge to the left along it's nearest vertical crease.
Step 19: Flip your paper over from top to bottom, keeping the crease you just made on the right side.
Step 20: Fold both the top right and bottom right corners to the centre (the 3rd vertical crease from the left).
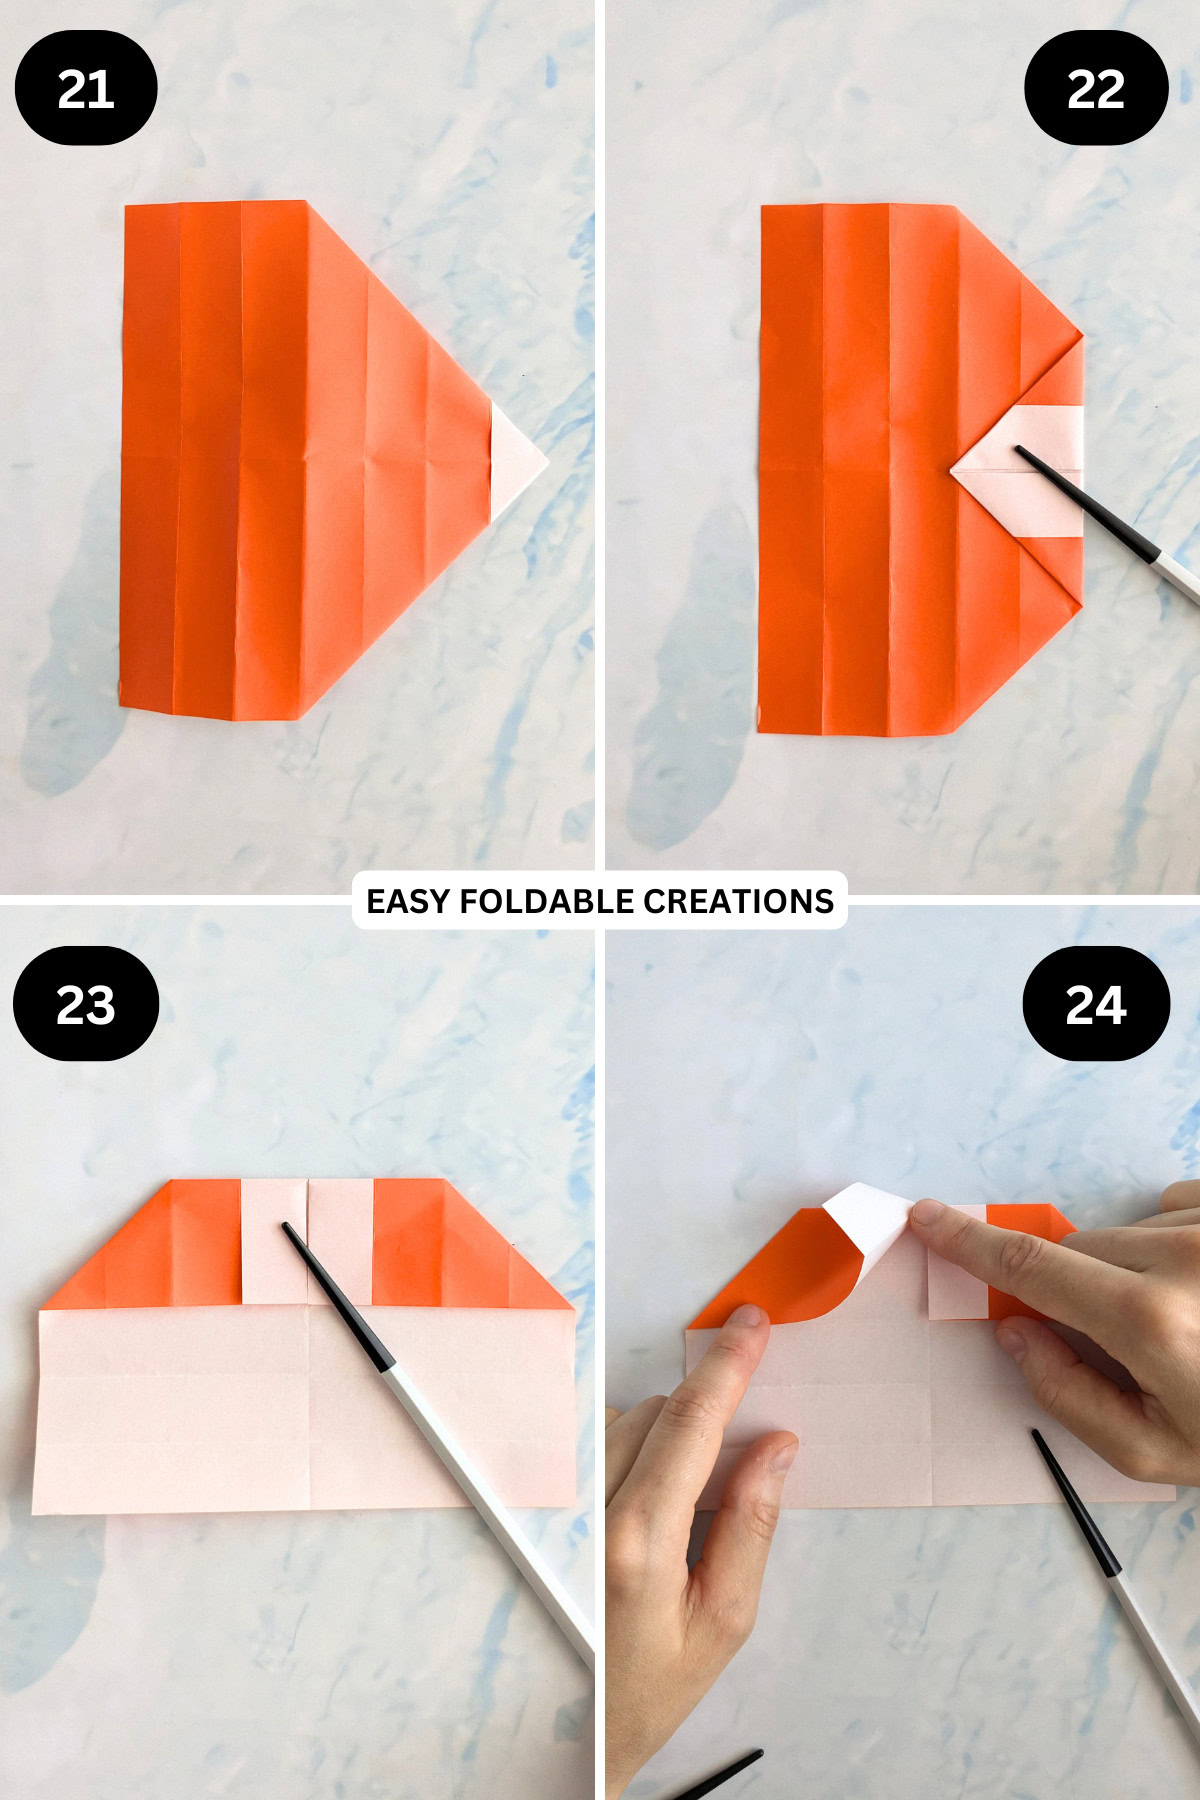
Step 21: Flip your paper over from top to bottom.
Step 22: Fold the right point to the left along the second vertical crease from the right.
Step 23: Flip your paper over and arrange it to sit as shown in the picture.
Step 24: Gently open out the top left flap found in the middle.
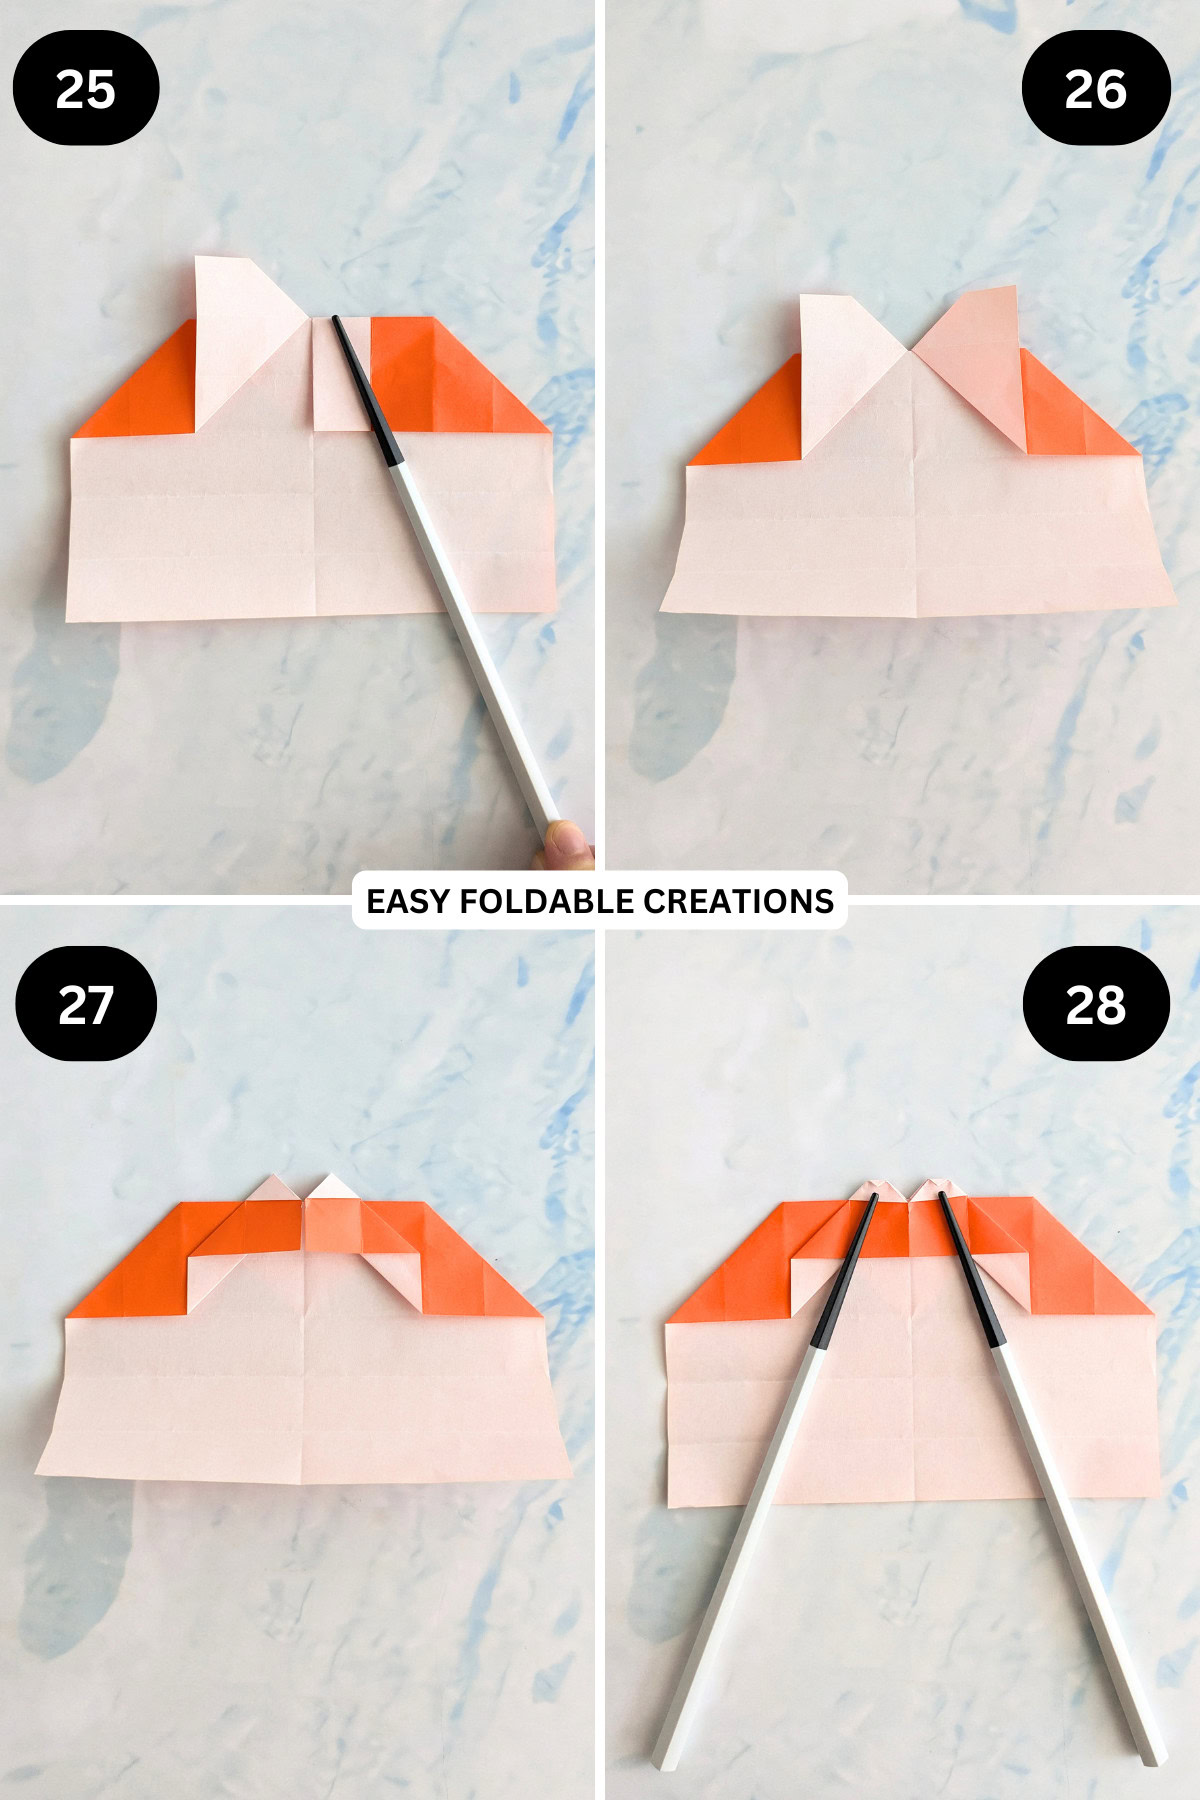
Step 25: Bring the flap you just opened upwards and then flatten it.
Step 26: Repeat steps 24 and 25 for the top right flap.
Step 27: Fold both the top left and top right corners inward and down to meet the centre crease.
Step 28: Fold the tips of the 2 upper points down slightly.
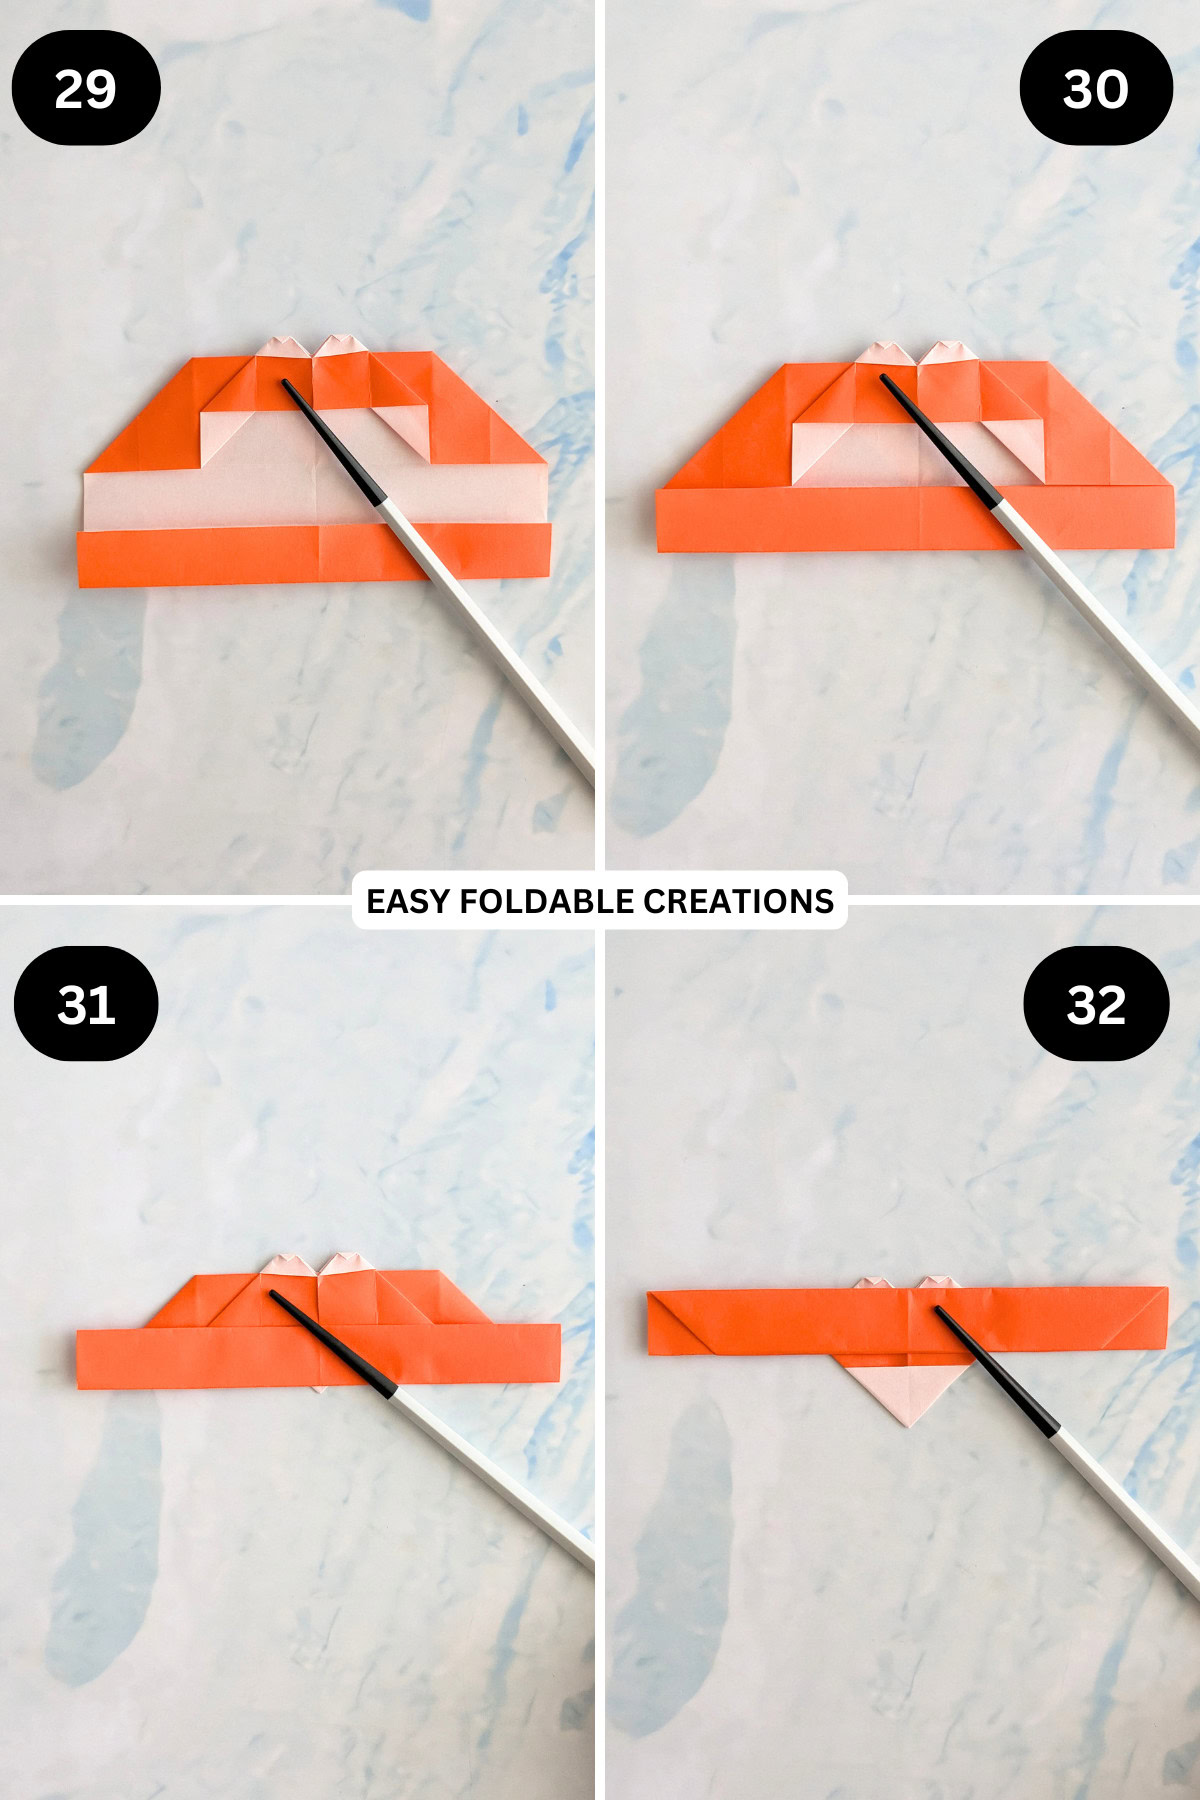
Step 29: Fold the bottom edge up along the 1st crease from the bottom.
Step 30: Fold the bottom edge up again, following the existing horizontal crease.
Step 31: Fold the bottom edge up once more, following the existing horizontal crease.
Step 32: Finally, fold the bottom edge up one more time, following the existing horizontal crease.
✨ You're almost there! ✨
To unlock the final steps of the photo tutorial and complete your pattern, create a free account with Grow.me. below.
Make sure you tick the box to subscribe to our newsletter and stay up to date with the latest patterns, tips, and more!
Once you're signed up, you'll get instant access to finish your project with the photo tutorial and enjoy exclusive content in the future.
Already signed up? Hit the button below and select 'Switch to Log In' to pick up where you left off and finish your project!
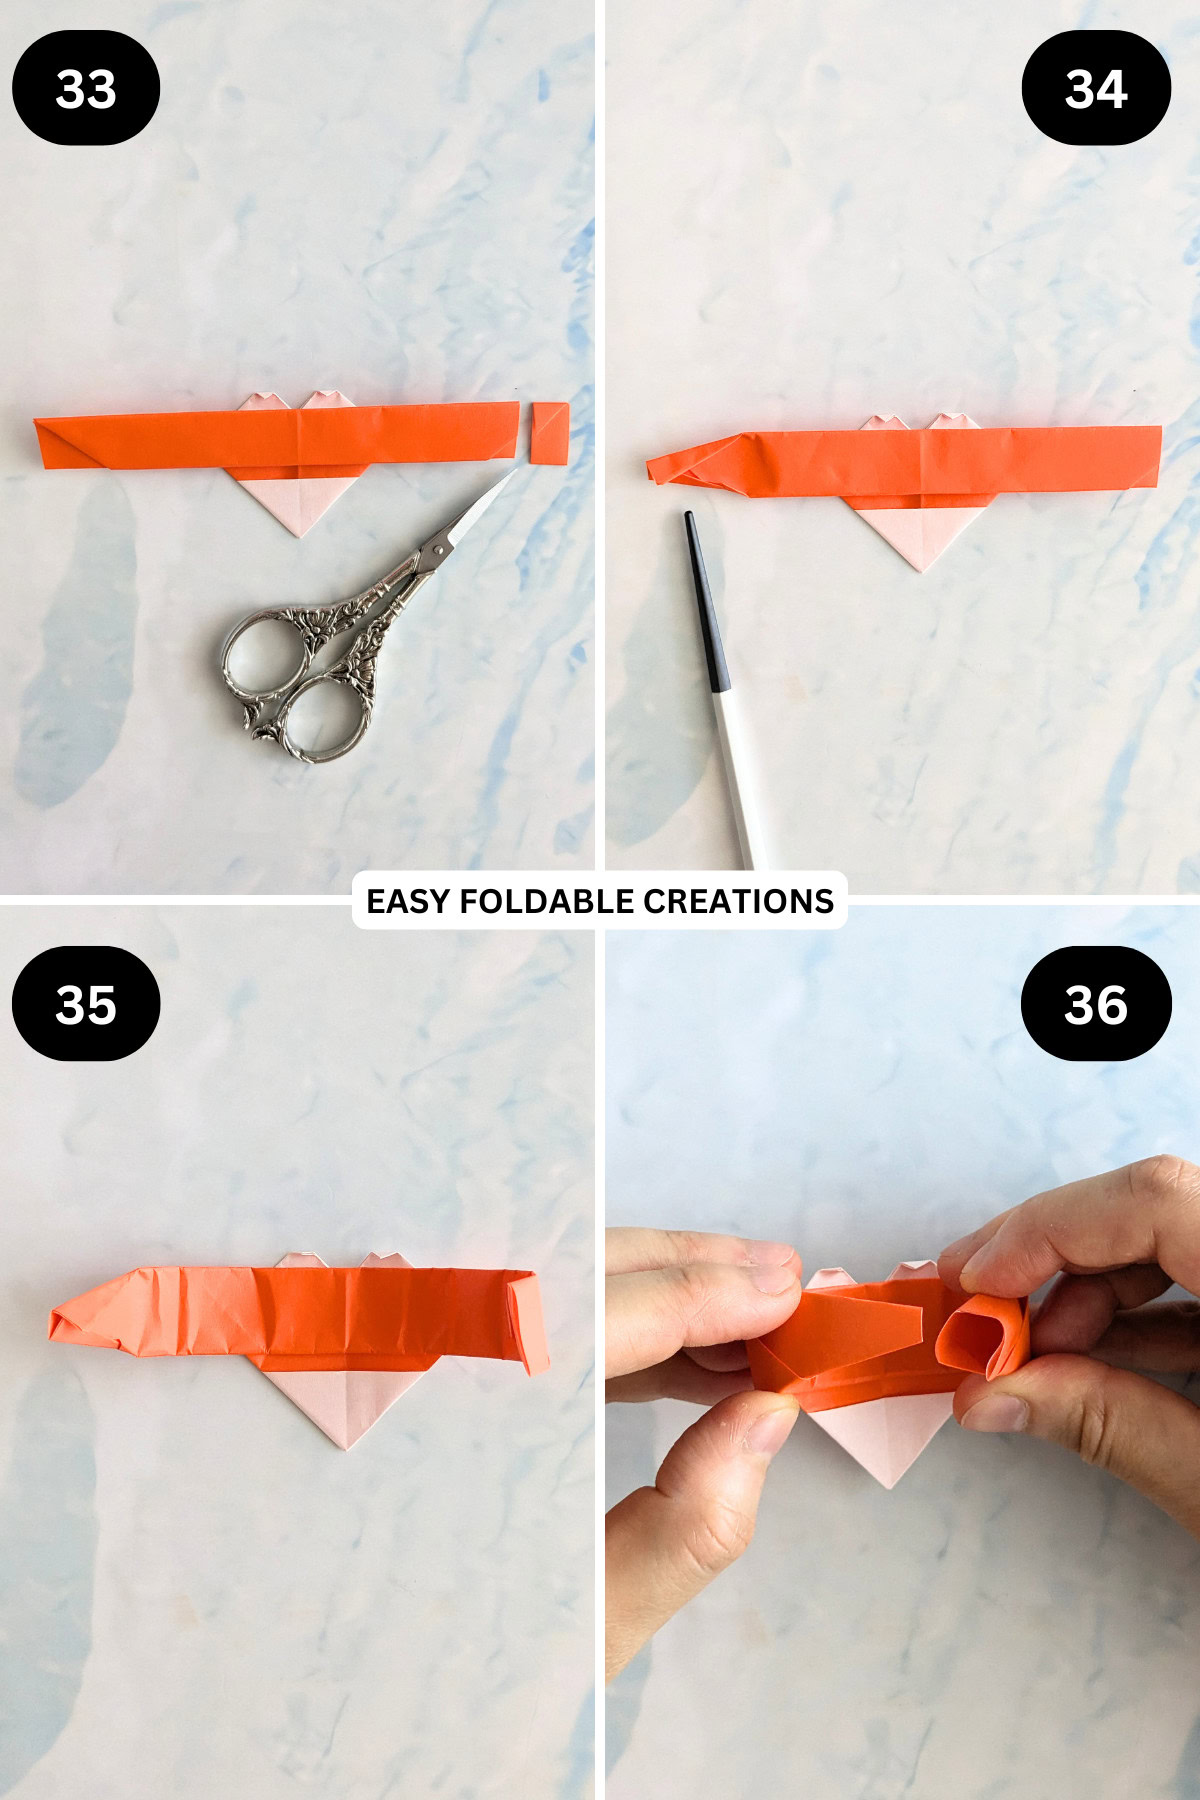
Step 33: Optional (if using bigger paper): To shorten the band of the ring, cut off a small part off the right side. (If using small paper e.g. 4 inch (10cm) square paper, continue to next steps. If ring is too large, then cut a small part off).
Step 34: On the left side, fold both the top and bottom edges inward slightly.
Step 35: Roll both the left side and right side towards the centre.
Step 36: Insert the left end into the right.
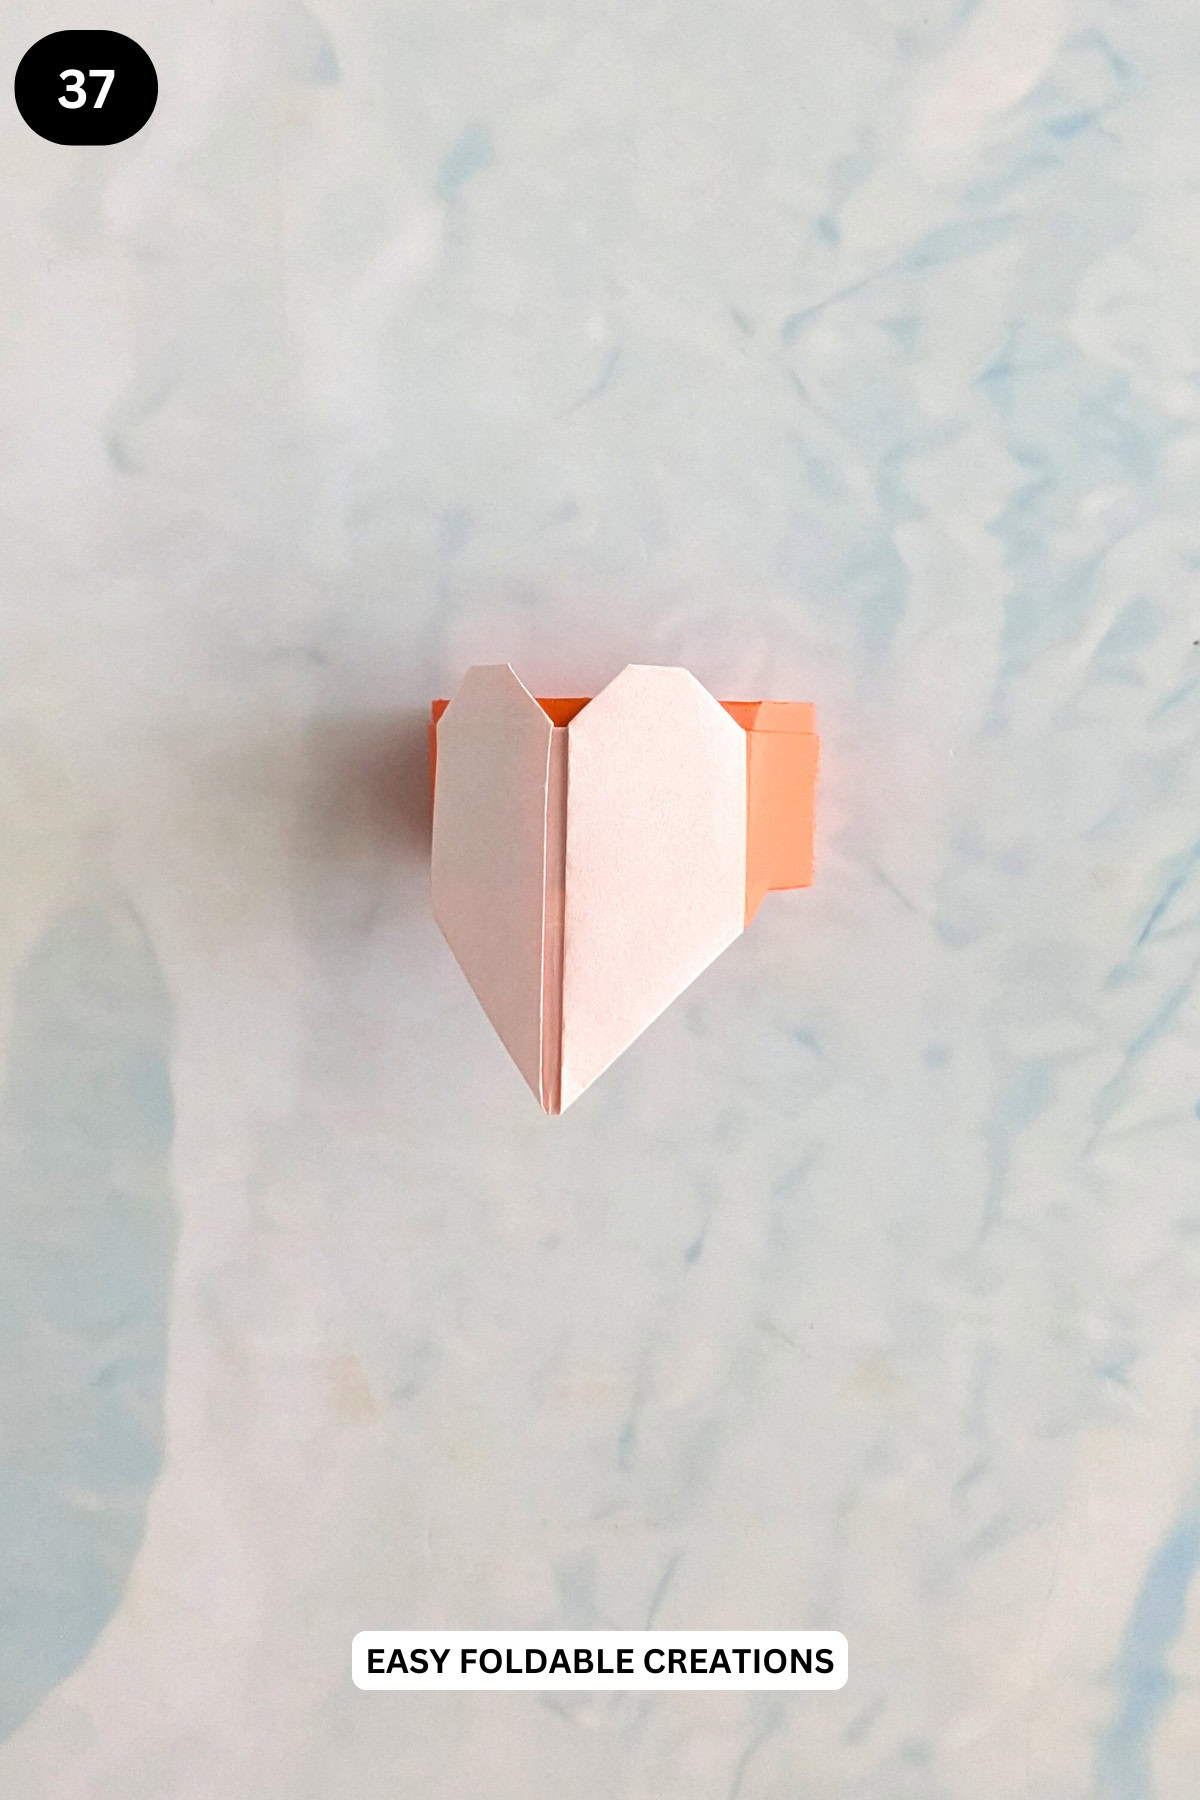
Step 37: Flip your ring over. Completed heart ring.
Tips For Success
- Use thin paper for a sleek finish, as thicker paper may be harder to fold neatly.
- If gifting, consider presenting the ring in a small box (like this heart shaped box or masu box) or attached to a card.
- Use a bone folder or the edge of a ruler for sharp creases.

Color, Paper Ideas, and Variations
- Red or pink paper for Valentine's Day or anniversaries.
- Use metallic gold or silver paper for a luxurious feel.
- Polka dots, florals, or hearts for a unique look.
- Add tiny embellishments like rhinestones or stickers for extra sparkle.
FAQ
Absolutely! Adjust the band by using larger or smaller paper and test the fit before securing.
Thin origami or lightweight craft paper is ideal for neat, sharp folds and a comfortable fit.
Besides wearing them, you can use them as decorative toppers on gift boxes, cards, or even as party favors.
Other Crafts You Might Like To Try:
Helpful Origami Tips
If you're curious to learn more about origami, you might like to look at our basic guides on how to make some common origami folds.
Start with the valley fold and mountain fold-these are the foundation of most origami models.
Once you're comfortable, you might like to try the petal fold for 3D shapes, and explore the bird base and square base for more complex designs.
The water bomb base is also great for creating inflatable or geometric models, like this inflatable origami rabbit.
Useful Paper Craft Terms
Want to learn a little more about paper crafts and origami?
We've made this helpful printable just for you. It explains common terms and helpful tips you might come across when you are folding origami or making a paper craft project.
You can download the useful paper craft terms printable PDF here.
Stay Connected
Made this pattern? Let us know how it went in the comments below!
Pin this post - Pin now to take your paper crafting skills to the next level.
Share on Instagram or Facebook - Capture the beauty of your finished paper craft project and share it on Instagram or Facebook! Tag us @easyfoldablecreations so we can see your work!

Stuck on inspiration for your next craft project?
Try one of these: heart napkin fold with pouch, origami egg cup, origami ghost in pumpkin, turkey napkin folding idea, 3D Christmas tree gift tag, blintz fold, pinwheel origami box, triangle origami box, cute origami, DIY square paper garland, double diagonal pocket napkin fold, or easy origami chicken.
Other Patterns You Might Like To Try:
Looking for other easy patterns like this? Try these:


Comments
No Comments