
Create a stunning origami star box that's perfect for party favors, gift packaging, or even decluttering your desk.
This easy-to-make box is versatile and adds a personal touch to any occasion.

Jump to:
- Where to Use This Origami Star Box
- Why You'll Love This Pattern
- Exclusive Content Just For You
- Skill Level
- Materials Needed
- Instructions
- Tips For Success
- Common Mistakes & How To Avoid Them
- Color, Paper Ideas, and Variations
- Other Crafts You Might Like To Try:
- Helpful Origami Tips
- Useful Paper Craft Terms
- Stay Connected
- Other Patterns You Might Like To Try:
- Comments
This easy origami star box is a charming and versatile project that combines both beauty and practicality.
An origami star box is a folded paper container designed in a star-shaped form for decorative storage or gifting. It is commonly used for party favors, seasonal décor, and gift packaging, combining functional storage with a visually striking geometric design.
Not only is it fun to make, but it's also a great way to showcase your creativity.
The star-shaped design makes it an eye-catching addition to any occasion, whether you're using it to hold small gifts, snacks, or even as part of your party decor.
Perfect for birthday parties, nesting parties, baby showers, holidays, and more, this box can hold all kinds of treats, keepsakes, or stationery supplies like paper clips and pens.
Plus, it's a fantastic gift presentation idea that adds a personal, handmade touch.
What makes this origami box so special is its flexibility. You can adjust the size by using different paper dimensions, which makes it suitable for everything from small candies to larger gifts.
Whether you need something for a baby shower, a wedding, or simply as a way to brighten up someone's day, this 3D origami star box makes a great DIY gift box. can do it all. It's perfect as a party favor, gift box, or as a way to organize small items on your desk or dresser.
Making an origami star box is also a wonderful beginner project if you're new to the world of paper folding.
All you need is a square piece of paper, a bit of patience, and a steady hand to fold the creases.
The geometric star shape can be achieved with just a few folds, making it an easy yet satisfying project. Even if you've never done origami before, this box is simple enough to get you hooked on paper crafting!
From organizing your desk to gifting small trinkets, it's the perfect box for anyone who loves both crafting and practicality.
Whether you're planning a party, shower, or just need a way to package your little treasures, this easy-to-make box is sure to be a hit.

Other origami boxes you might like to try include this easy Rectangle Origami Box, Heart Origami Box With Lid, Origami Masu Box, or this Square Origami Box (With Interlocking Lid).
Where to Use This Origami Star Box
This origami star box can be used in many creative ways:
- Party Favors: Use it for birthday parties, baby showers, or even as a cute packaging idea for wedding favors.
- Holiday Gifts: It's perfect for small holiday gifts like chocolates, mini ornaments, or even gift cards.
- Snacks: Serve up bite-sized snacks like nuts, candies, or cookies at your next gathering.
- Home Organization: Use the boxes to organize small items on your desk or in your craft space.
Why You'll Love This Pattern
- Quick and Easy: You don't need a lot of time or supplies to make these charming boxes, making it a great last-minute gift or party favor idea.
- Versatile: Use the box for a wide variety of occasions, from organizing small items on your desk to gifting snacks, candies, and trinkets.
- Customizable: You can experiment with paper colors and patterns to fit any theme. Try using festive papers for Christmas or soft pastels for a baby shower.
- Great for Gifting: If you need a cute way to wrap up a small gift, this box works wonders. Add a ribbon or a bow to complete the look.
Exclusive Content Just For You
Not sure what you want to make next, but feeling a bit creative? Or maybe you've been searching for a pattern that sparks something new. We've got a few ideas waiting for you.
The Fold Collective, Easy Foldable Creations' community, provides you with a library of exclusive ad-free video tutorials, printable PDF patterns, helpful tips, and more so you can improve your skills and enjoy crafting in your own time.
Skill Level
Difficulty: ★★☆☆☆ (Easy)
Materials Needed
- 1 square sheet of paper: Ideal size is 6 inches x 6 inches (15 cm x 15 cm).
- Paper: Lightweight paper like origami paper or even patterned scrapbook paper works best.
Paper Size Options
- 6 inches x 6 inches (15 cm x 15 cm): Creates a small star box that's perfect for small treats or jewelry.
- 8 inches x 8 inches (20 cm x 20 cm): Makes a slightly larger box, ideal for party favors or small snacks.
- 10 inches x 10 inches (25 cm x 25 cm): Ideal for larger gifts, such as small plush toys or chocolates.
For larger boxes, you could use lightly cardstock for a sturdier box.
Instructions
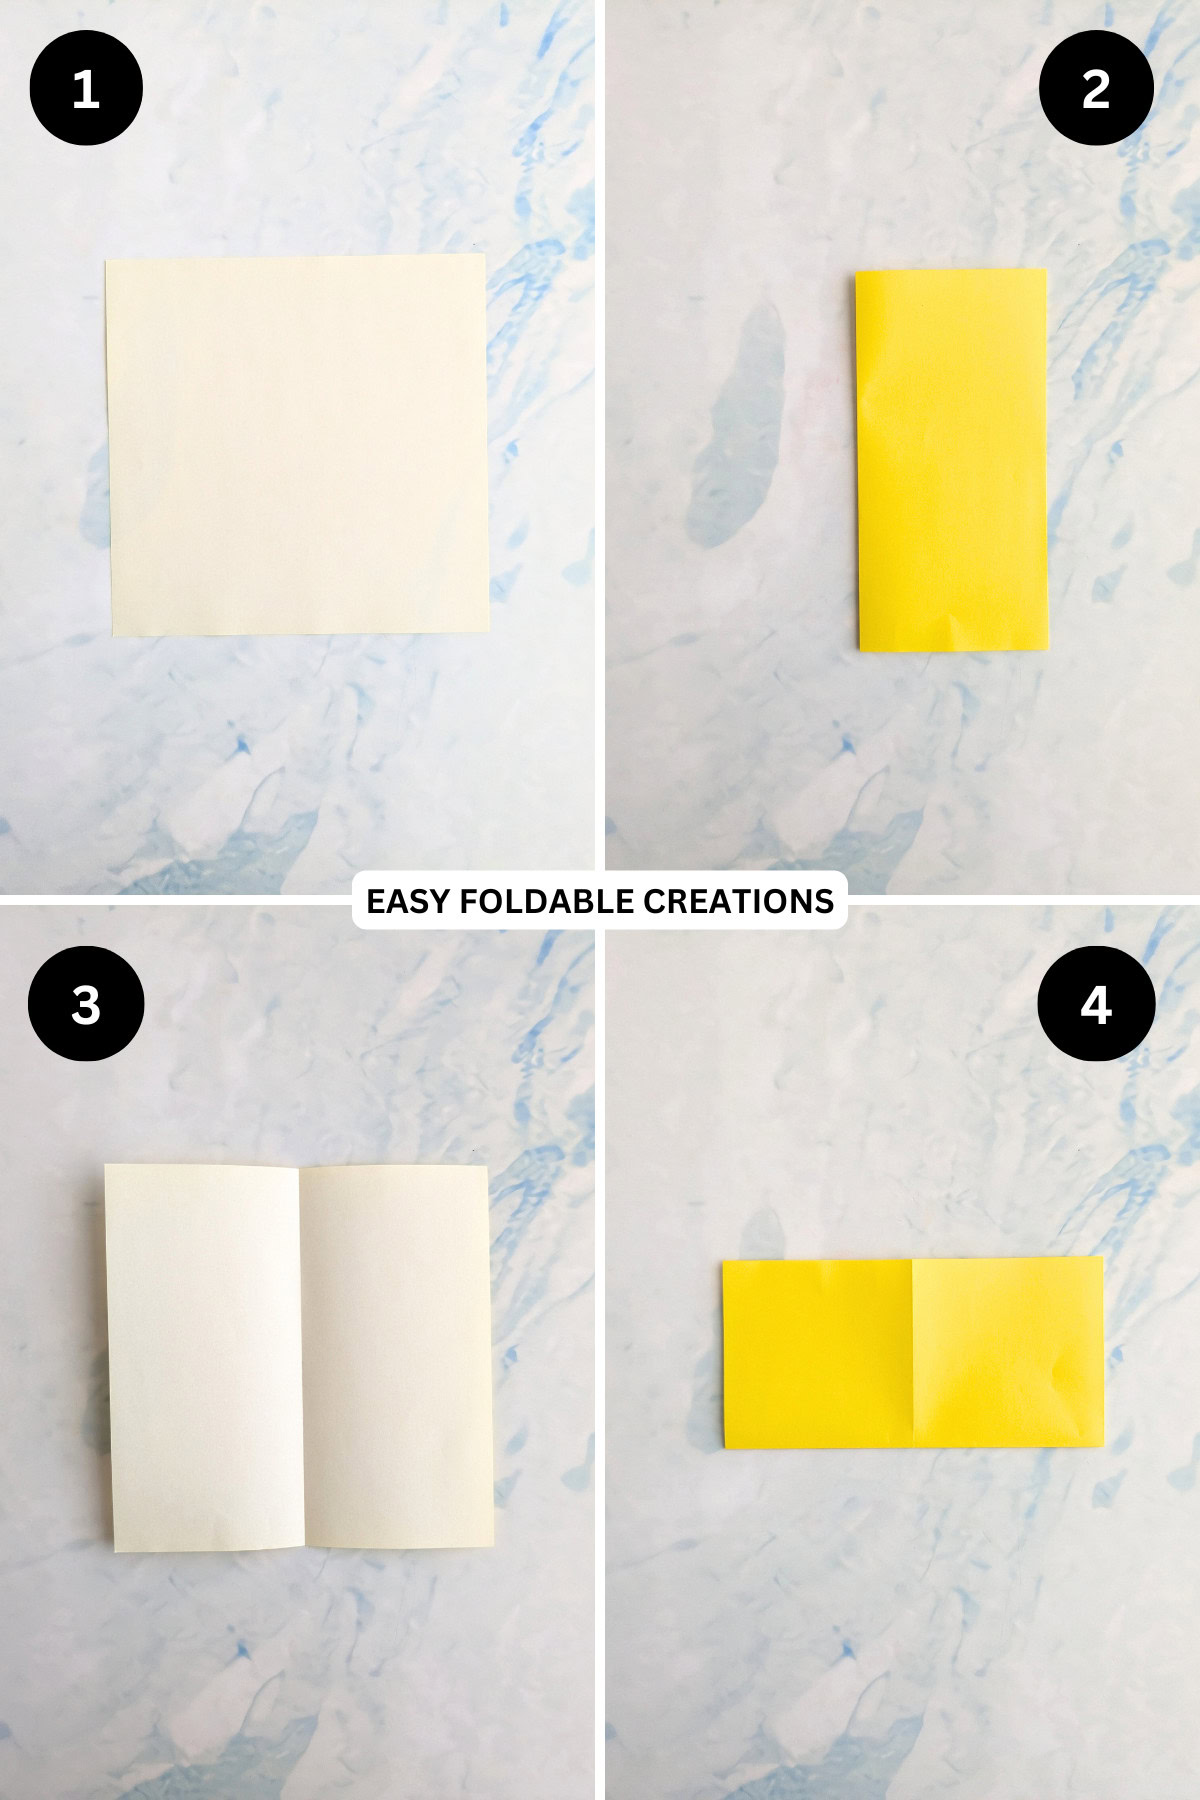
Step 1: Start with the color you want the outside of your box to be facing down.
Step 2: Fold the left edge to the right edge.
Step 3: Unfold previous step.
Step 4: Fold the bottom edge to meet the top edge.
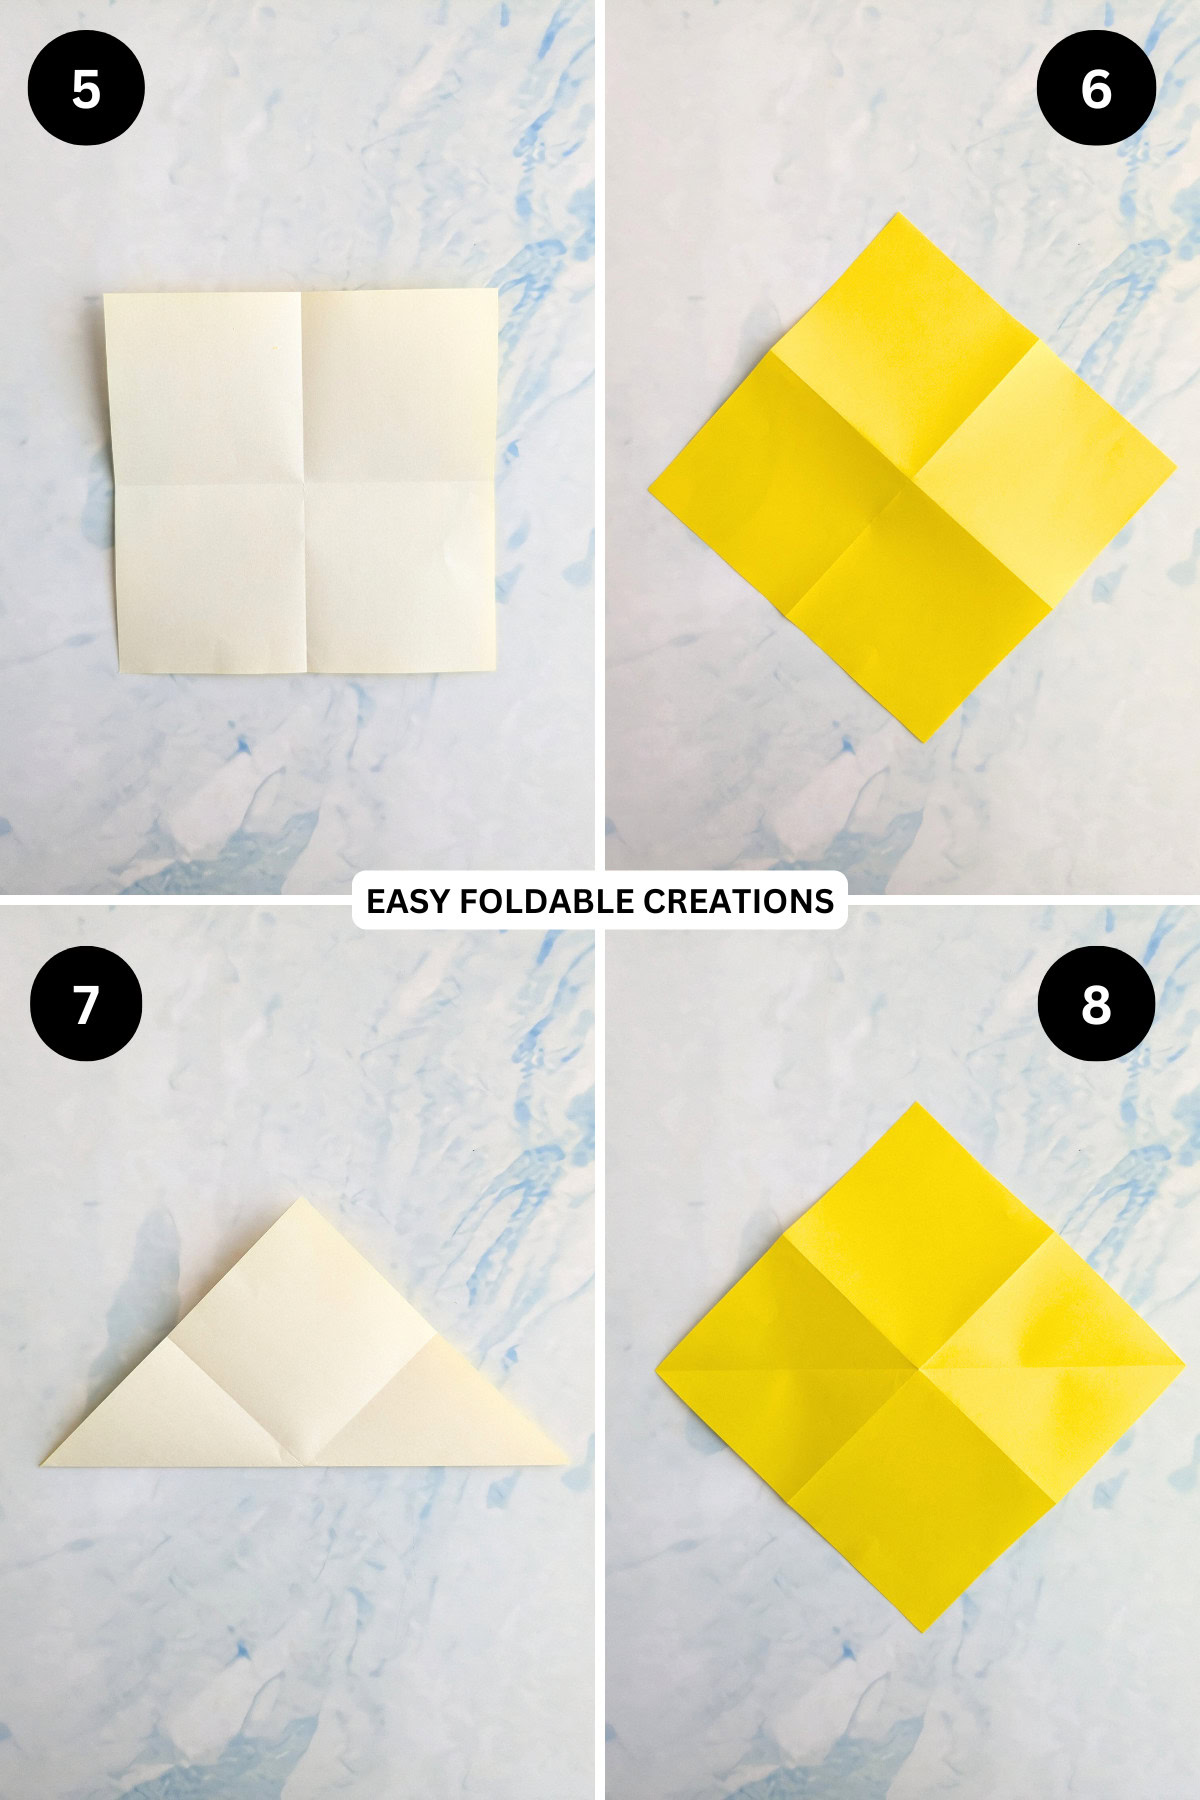
Step 5: Unfold previous step.
Step 6: Flip your paper over and arrange it to sit like a diamond.
Step 7: Fold the left point to meet the right point.
Step 8: Unfold previous step.
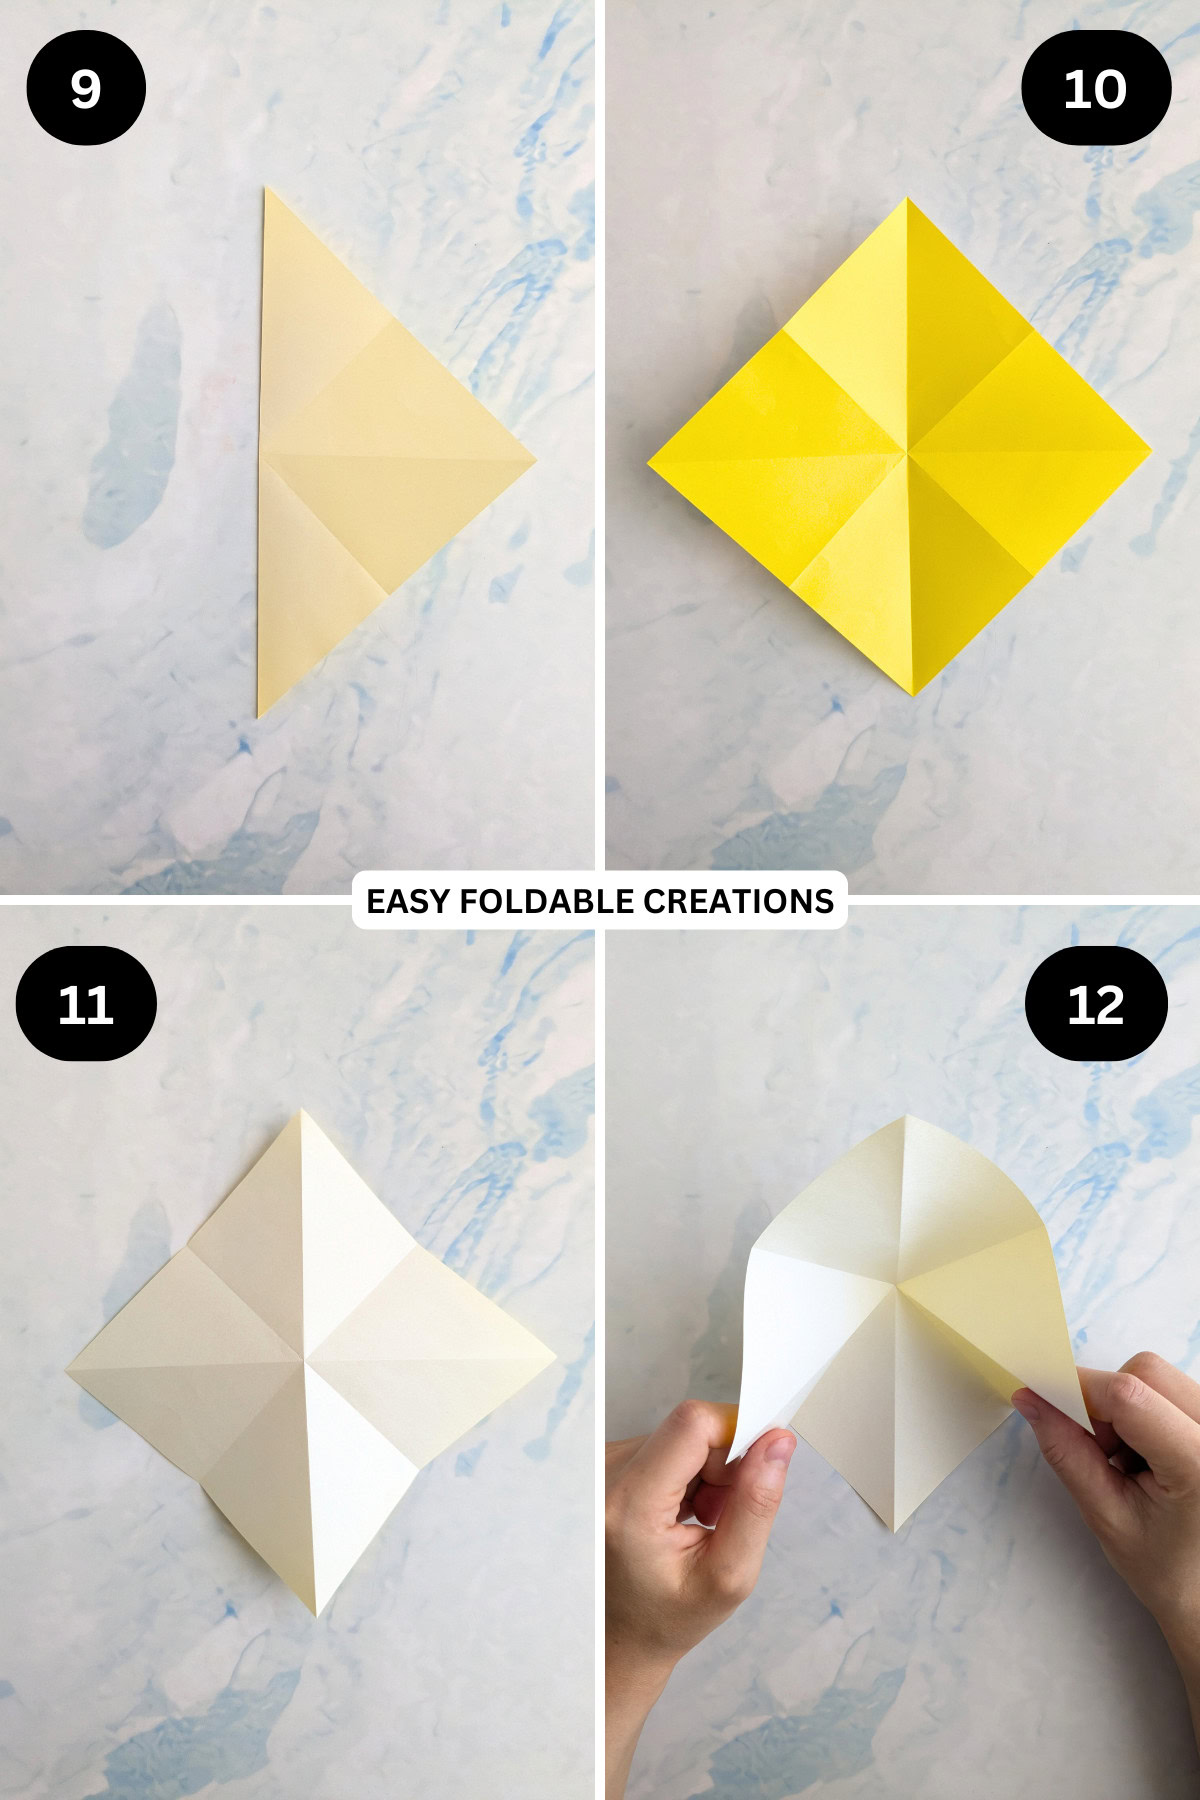
Step 9: Fold the bottom point to meet the top point.
Step 10: Unfold previous step.
Step 11: Flip your paper over and arrange it to sit like a diamond.
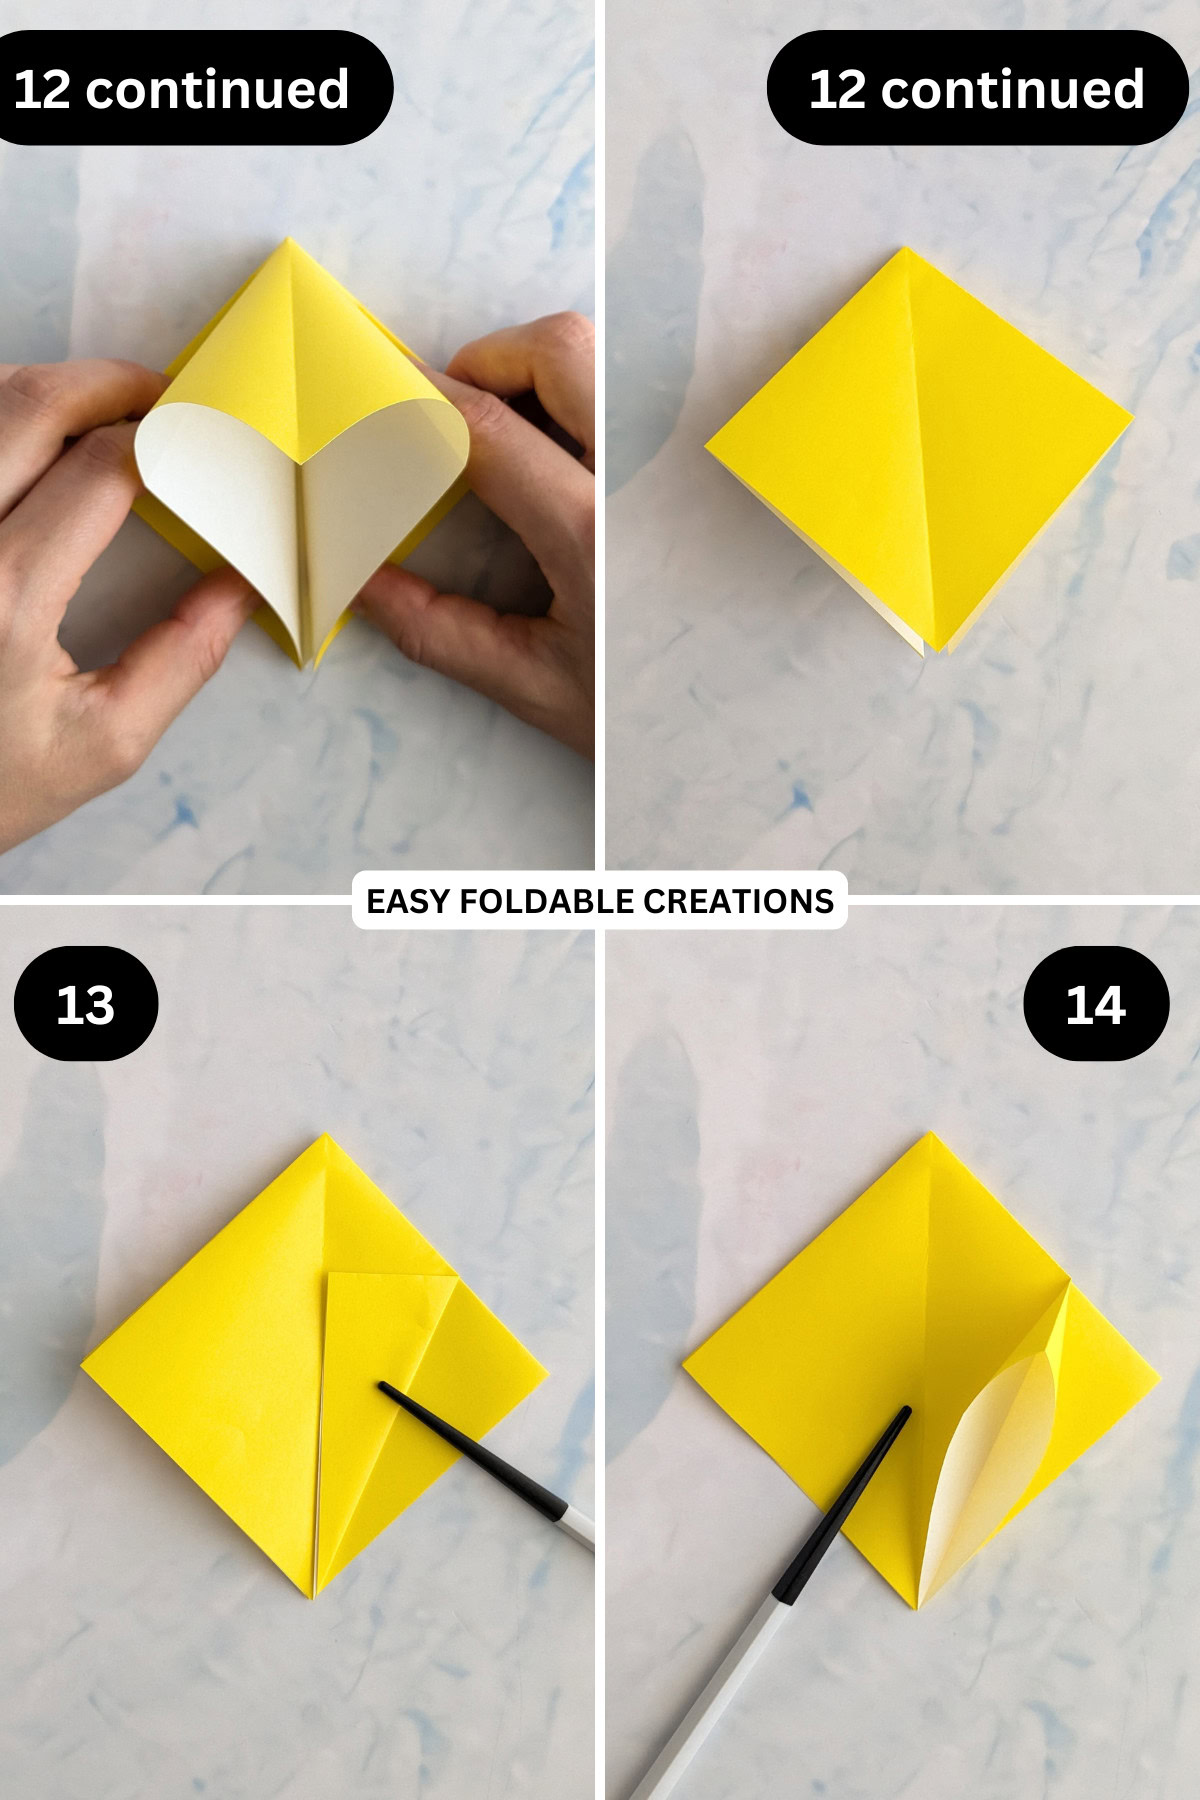
Step 12: Gently push the centre in, then bring the left and right points of the paper towards you, collapsing the paper in on itself. Match the left and right points to the bottom point. Flatten.
Step 13: Fold the bottom right edge (top layer only) to meet the middle crease.
Step 14: Gently open out the flap you just made in the previous step.
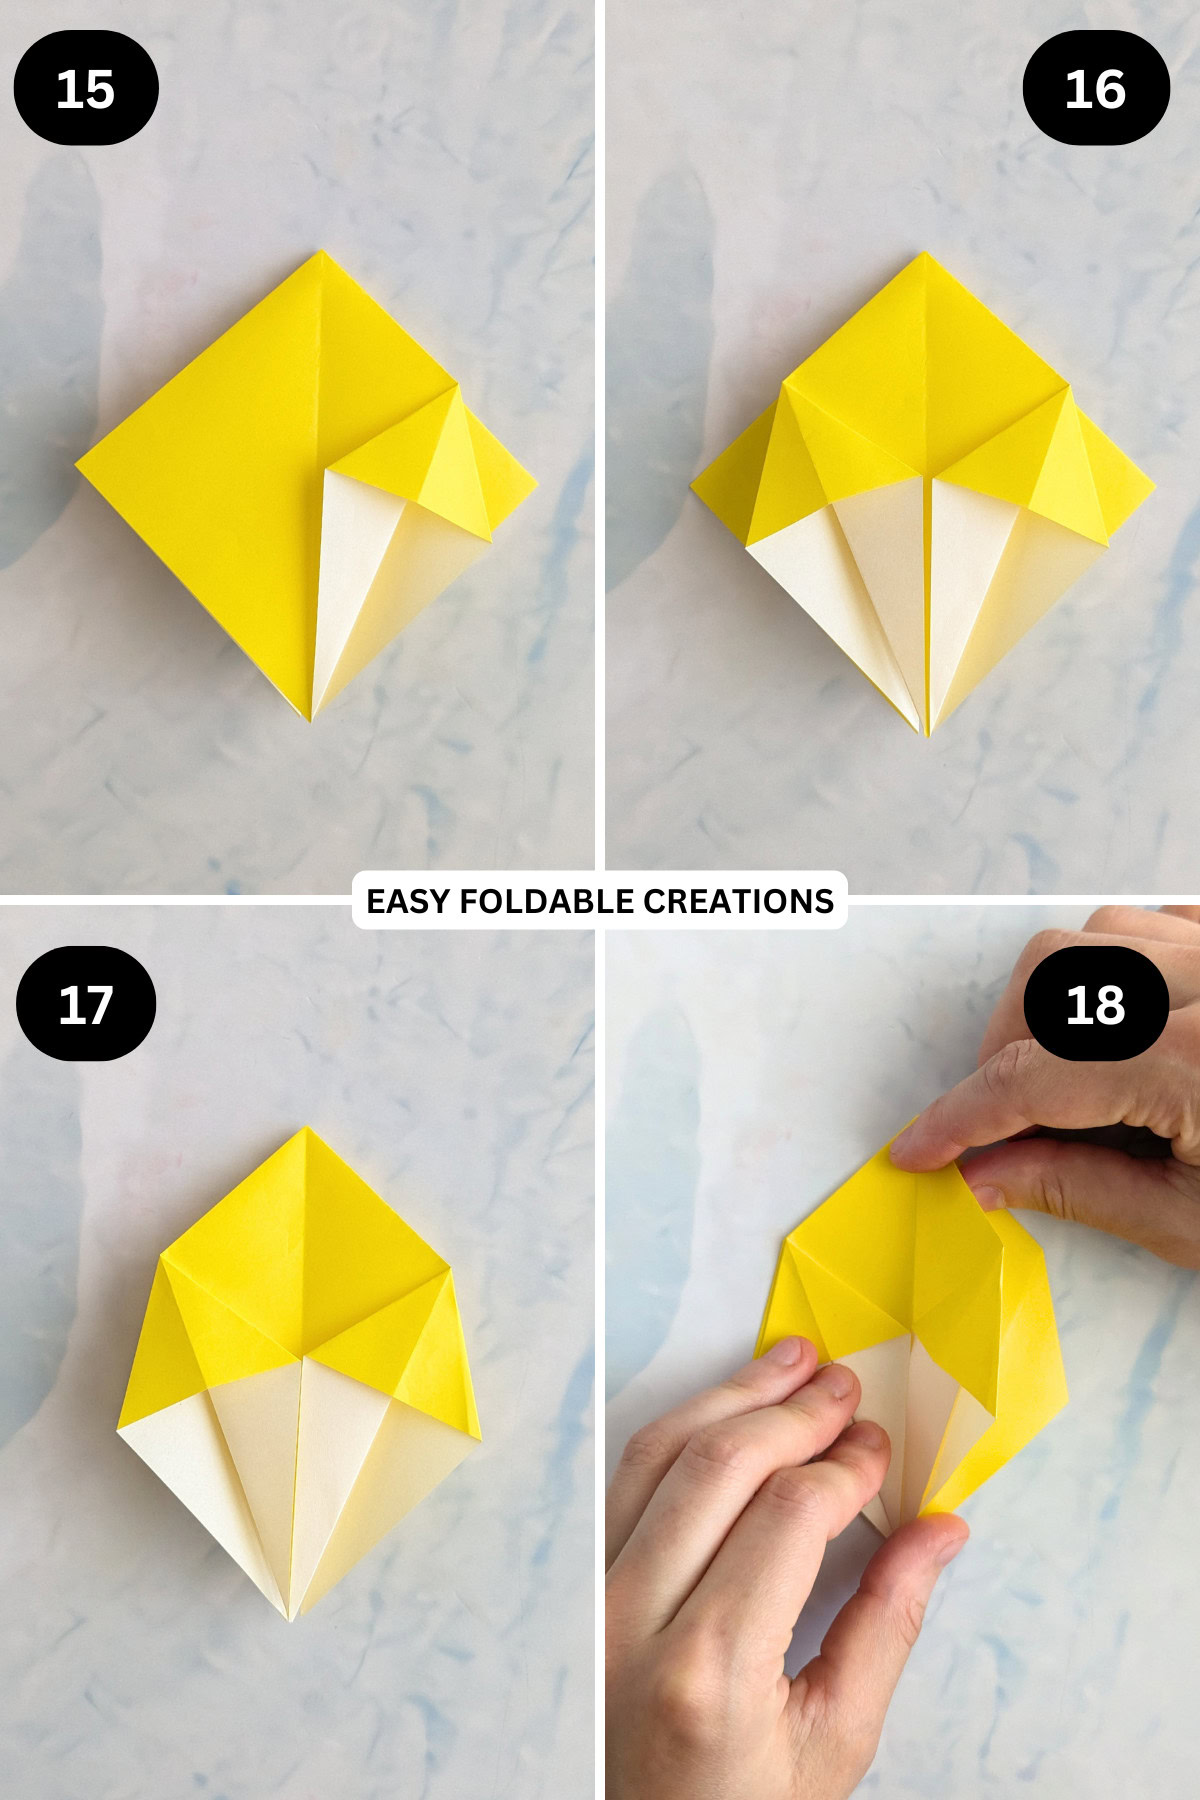
Step 15: Flatten the flap on itself.
Step 16: Repeat steps 13 to 15 for the left side.
Step 17: Flip your paper over and repeat steps 13 to 16.
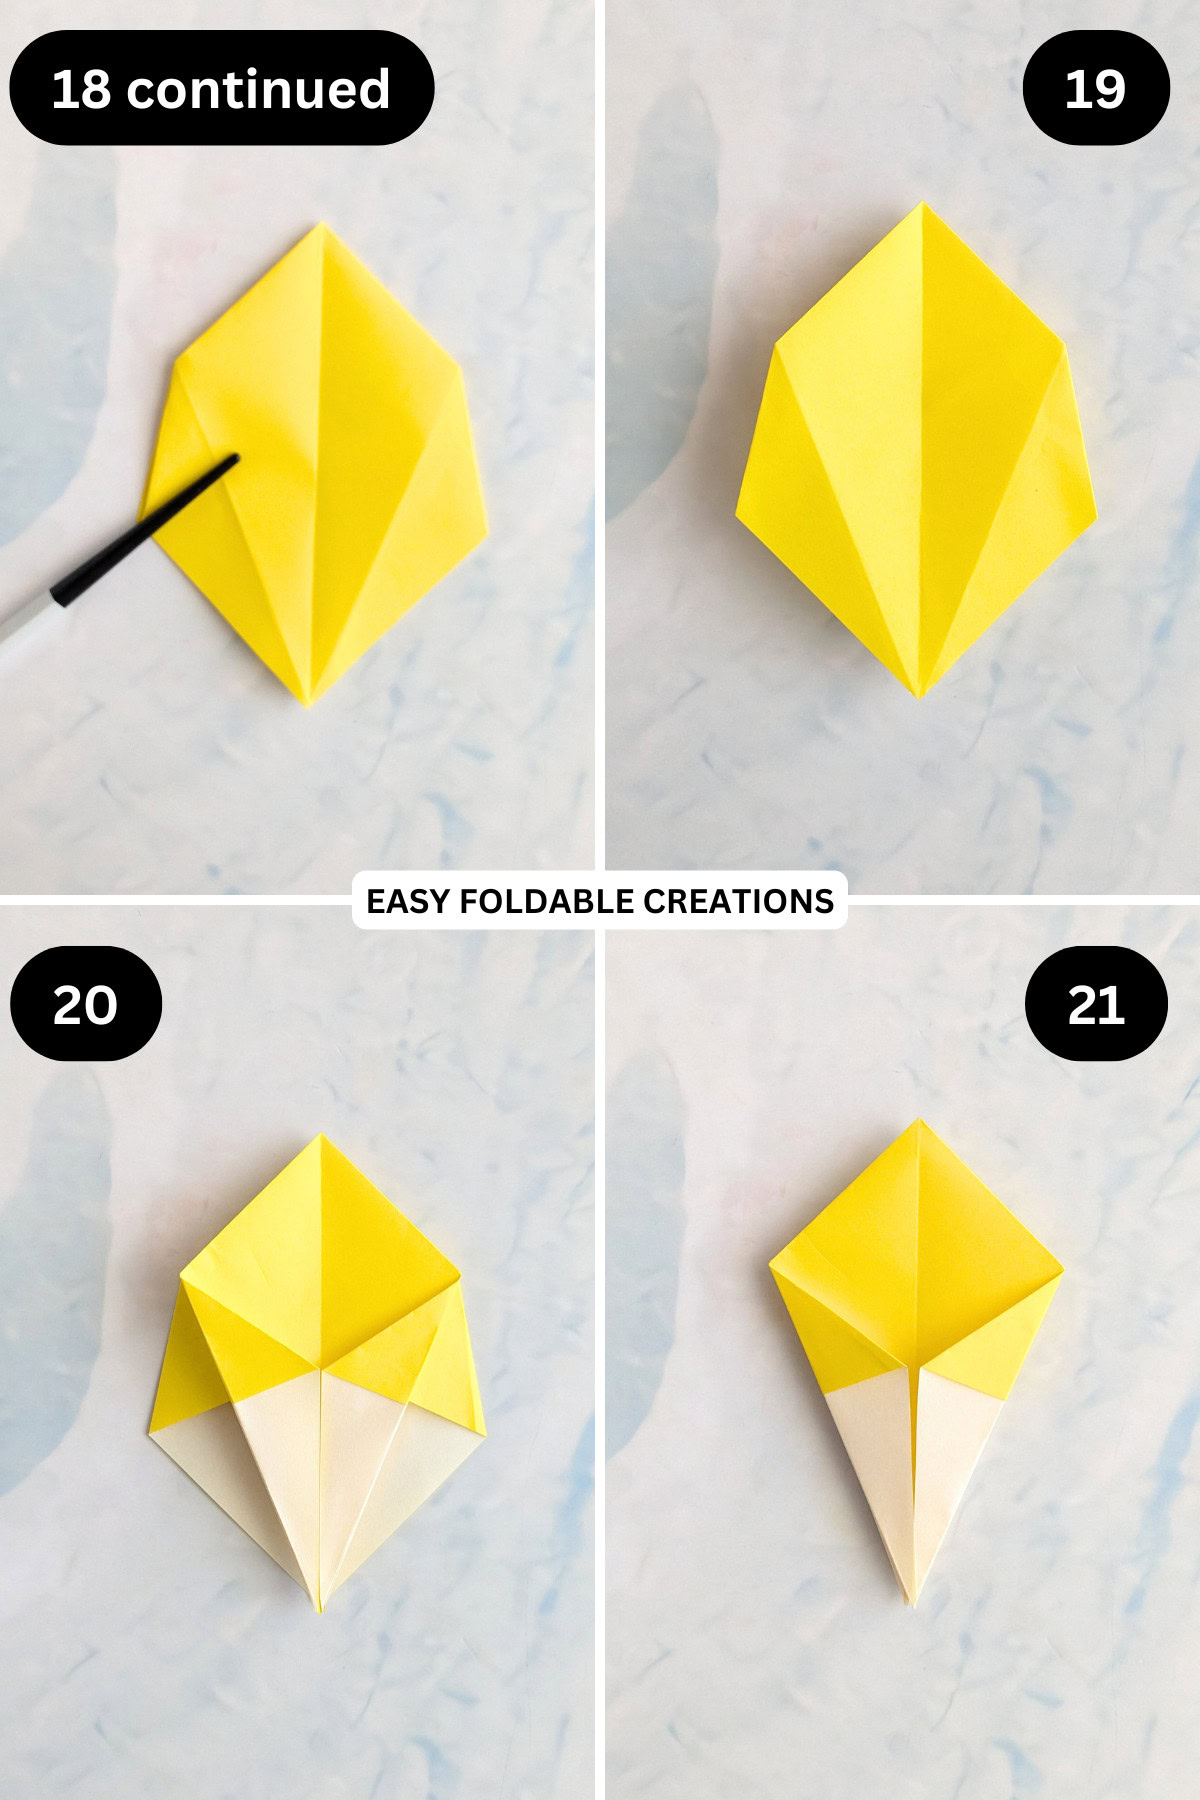
Step 18: Fold the right side of the paper (top layer only) to the left.
Step 19: Flip your paper over and repeat previous step.
Step 20: Fold both the left and right lower diagonal edges to meet the middle.
Step 21: Flip your paper over and repeat previous step.
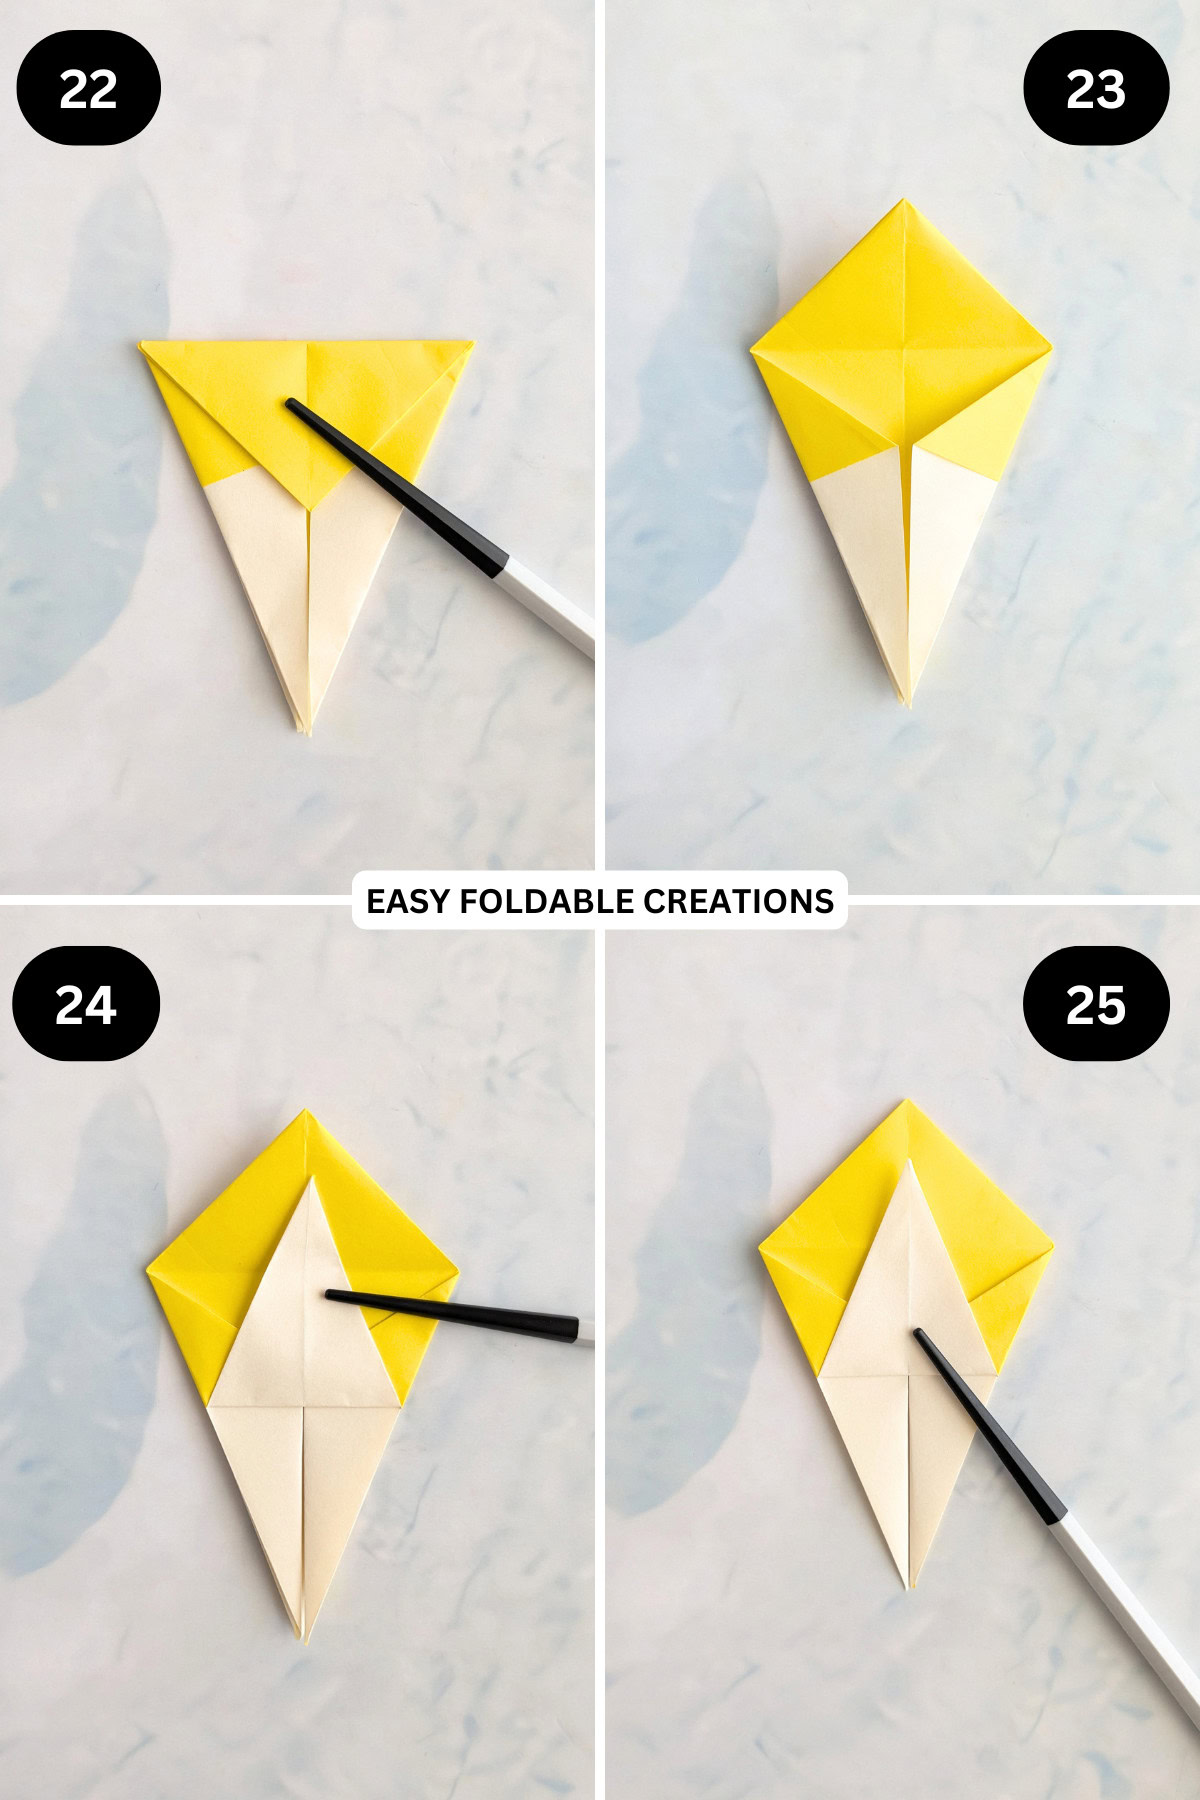
Step 22: Fold the top point down (it's folded edge should be along the left and right points of the paper).
Step 23: Unfold previous step.
Step 24: Fold the bottom point (top layer only) up as far as it will go.
Step 25: Flip your paper over and repeat previous step.
✨ You're almost there! ✨
To unlock the final steps of the photo tutorial and complete your pattern, create a free account with Grow.me. below.
Make sure you tick the box to subscribe to our newsletter and stay up to date with the latest patterns, tips, and more!
Once you're signed up, you'll get instant access to finish your project with the photo tutorial and enjoy exclusive content in the future.
Already signed up? Hit the button below and select 'Switch to Log In' to pick up where you left off and finish your project!
Step 26: Fold the right side of the paper (top layer only) to the left.
Step 27: Flip your paper over and repeat previous step.
Step 28: Fold the bottom point (top layer only) up as far as it will go.
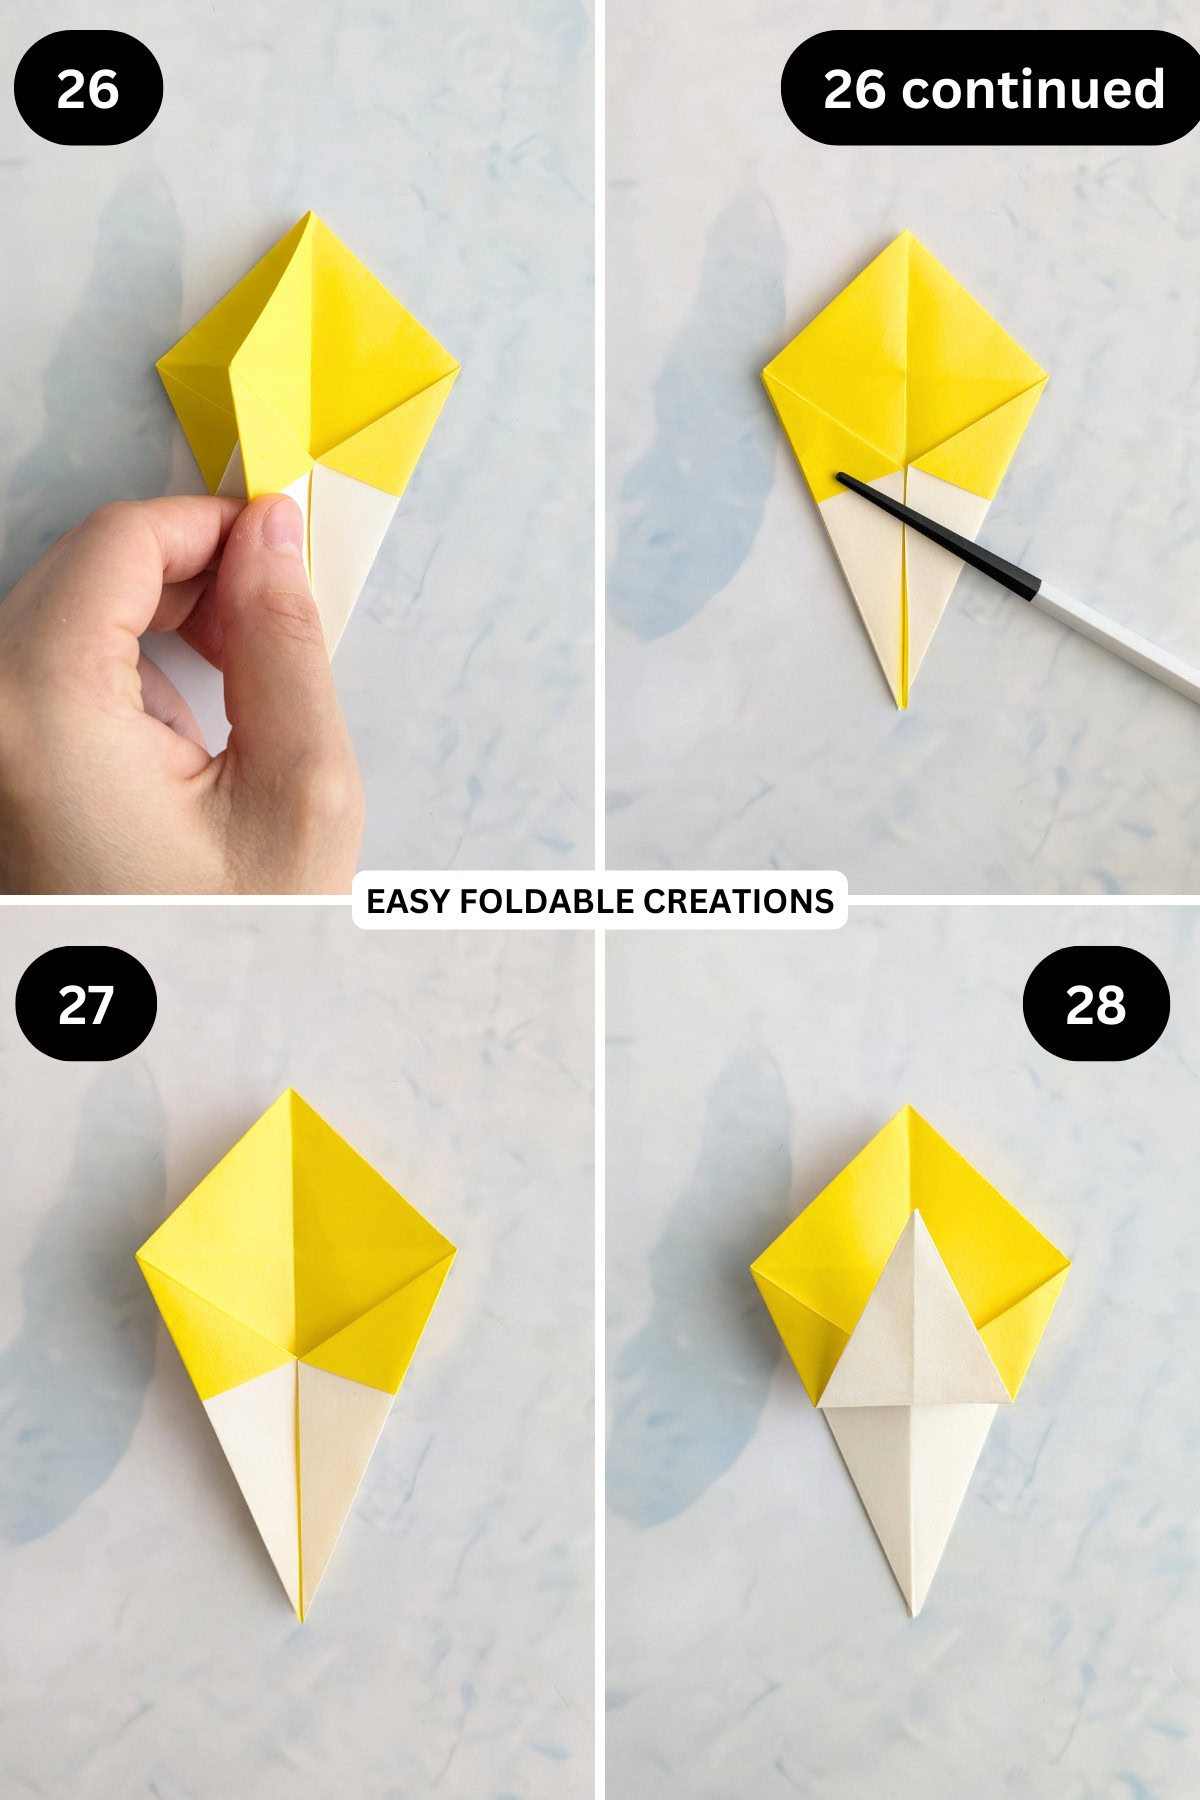
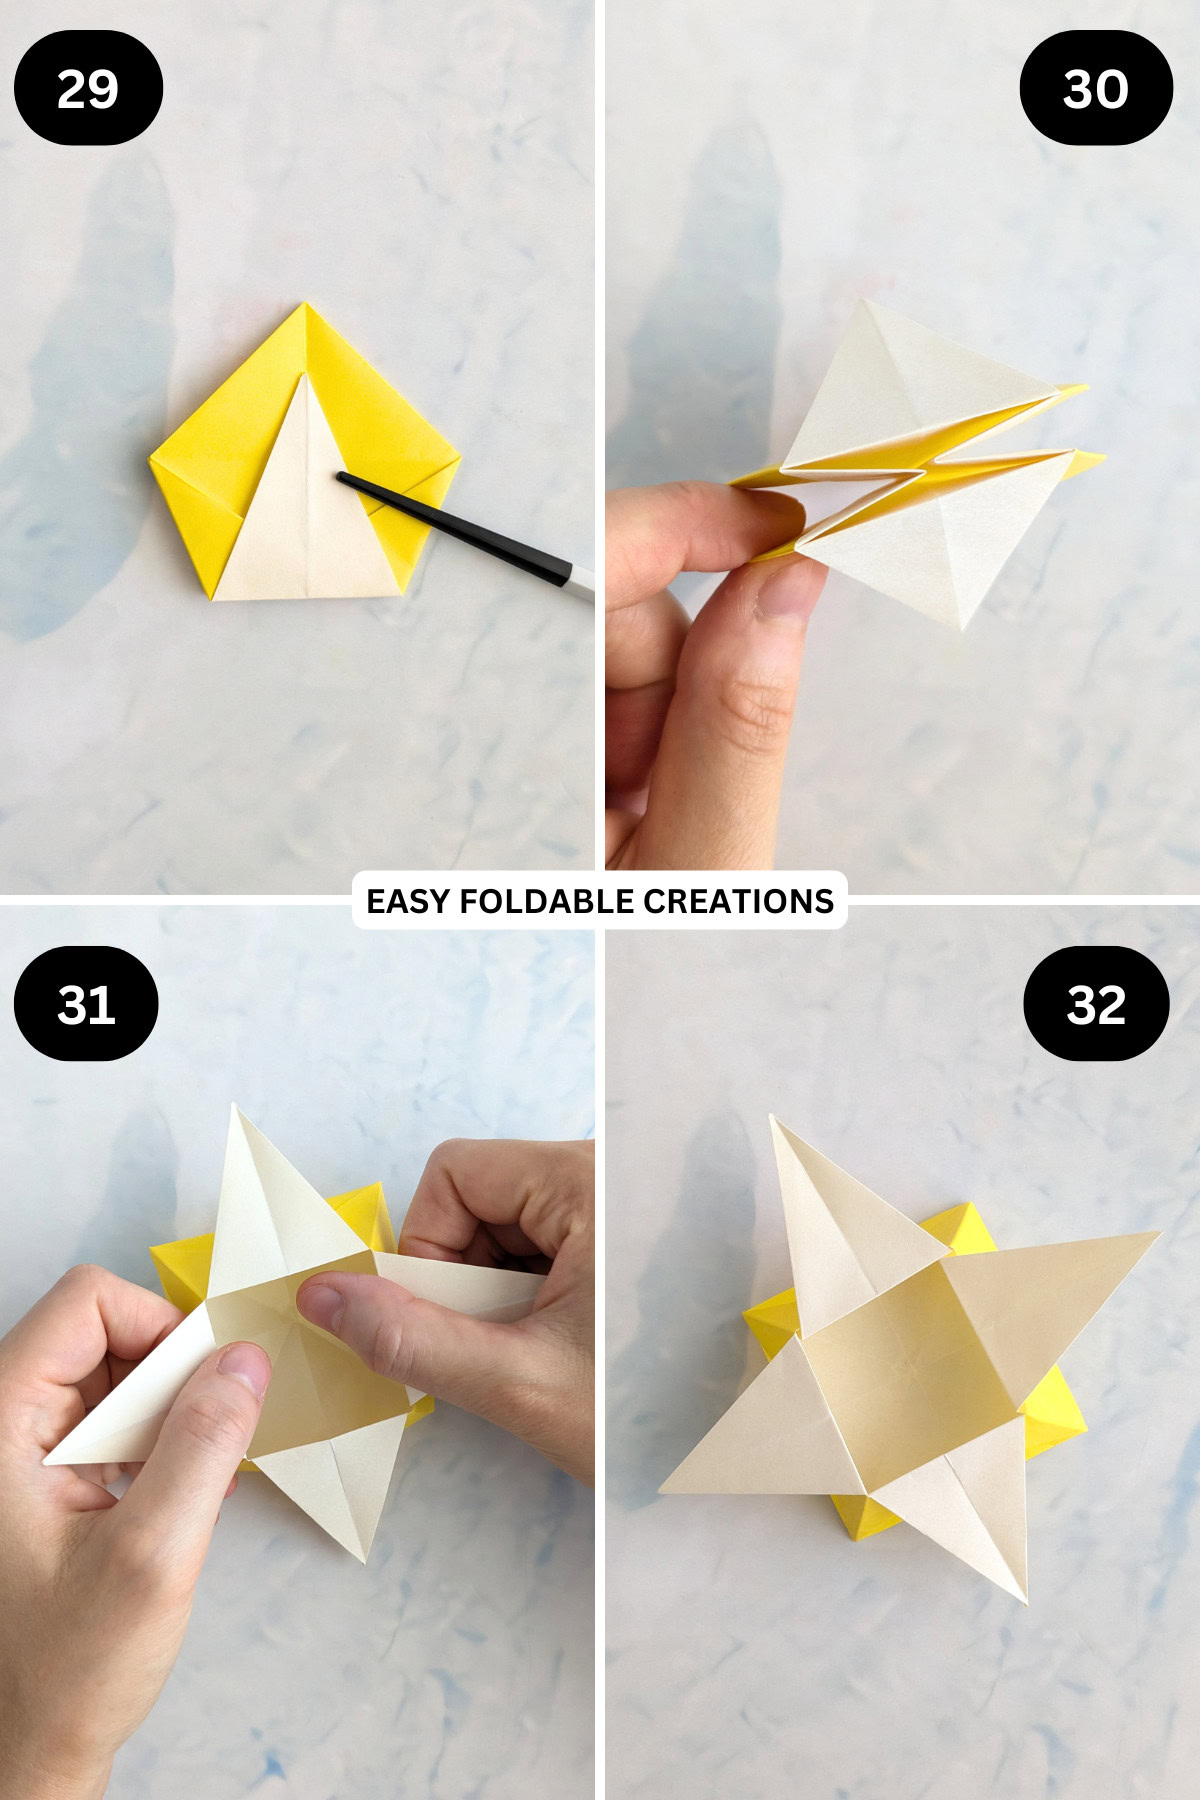
Step 29: Flip your paper over and repeat previous step.
Step 30: Rotate your paper so the open edges are at the top.
Step 31: Gently open out your box. Re crease the base edges of the box if needed.
Step 32: Completed origami star box.
Tips For Success
- Be Precise with Your Folds: The beauty of this origami star box relies on sharp, even creases. Use a ruler or a bone folder to ensure each fold is crisp.
- Use Patterned Paper: Try using vibrant, patterned paper to make the star box stand out. Floral, polka dot, or even metallic papers are great options for parties and events.
- Add a Personal Touch: Personalize the box by adding a ribbon, a sticker, or a hand-drawn note for an extra-special touch.

Common Mistakes & How To Avoid Them
- Uneven Folds: If the folds aren't even, the box may look misshapen. Make sure each edge is folded precisely to get a neat, symmetrical star box.
- Paper Too Thick: While thicker paper is durable, it can make the folds harder to manage. Stick to lightweight paper (if you are making a smaller box) for easier folding and better results.
Color, Paper Ideas, and Variations
The beauty of this origami star box lies in its versatility, and by simply choosing different colored paper, you can transform your box to suit any event. Here are some color variations and ideas to help you create the perfect origami star box for various occasions:
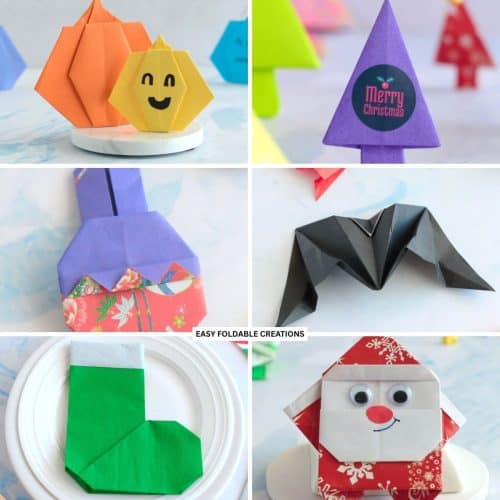
- Christmas: For a festive touch, opt for traditional holiday colors like red, green, gold, and silver. Metallic or glittery paper can add a special sparkle, perfect for Christmas party favors.
- Valentine's Day: Nothing says "love" like pink, red, and white. For Valentine's Day, try folding the box using heart-patterned paper or solid colors that fit the romantic theme. These star boxes make wonderful small gift boxes for chocolates, love notes, or trinkets for your significant other, friends, or even as party favors at a Galentine's Day event.
- Game Day: For sports fans, create star boxes in your team's colors! Whether it's red and yellow for a football team or blue and white for a favorite basketball squad, this box can become a part of your game day celebrations. Use it to hold snacks like pretzels, peanuts, or candies, or even as a fun way to present party favors to your guests.
- Halloween: Embrace spooky vibes by using orange, black, and purple paper for Halloween. These colors can make the star box the perfect treat holder for handing out candy to trick-or-treaters or as a party favor for your Halloween bash. For a more fun look, go for candy-themed patterns to capture the Halloween spirit.
- Baby Showers: For a baby shower, choose soft pastel colors like baby blue, pink, lavender, or mint green. These colors are not only calming but are also associated with new beginnings. You can even opt for patterned paper featuring cute baby motifs, such as onesies, bottles, or teddy bears.
- Weddings: For weddings, consider using elegant shades such as white, ivory, gold, or silver. This will give the star box a sophisticated, delicate look that complements the elegance of the big day. Use these boxes to hold little keepsakes, mints, or small jewelry gifts for guests or the bridal party. For a more personalized touch, you could print the couple's initials or wedding date on the box's exterior.
- Easter: Pastel colors are always a hit for Easter! Light yellow, pastel pink, soft blue, and lavender work wonderfully for this holiday, evoking a cheerful, springtime feel. You can even decorate these boxes with tiny Easter egg designs or flowers. They make great little containers for chocolates, jelly beans, or even small toys for Easter egg hunts.
Other Crafts You Might Like To Try:
Helpful Origami Tips
If you're curious to learn more about origami, you might like to look at our basic guides on how to make some common origami folds.
Start with the valley fold and mountain fold-these are the foundation of most origami models.
Once you're comfortable, you might like to try the petal fold for 3D shapes, and explore the bird base and square base for more complex designs.
The water bomb base is also great for creating inflatable or geometric models, like this inflatable origami rabbit.
Useful Paper Craft Terms
Want to learn a little more about paper crafts and origami?
We've made this helpful printable just for you. It explains common terms and helpful tips you might come across when you are folding origami or making a paper craft project.
You can download the useful paper craft terms printable PDF here.
Stay Connected
Made this pattern? Let us know how it went in the comments below!
Pin this post - Pin now to take your paper crafting skills to the next level.
Share on Instagram or Facebook - Capture the beauty of your finished paper craft project and share it on Instagram or Facebook! Tag us @easyfoldablecreations so we can see your work!

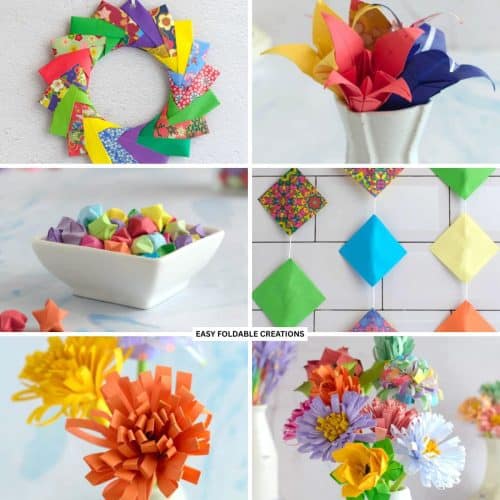
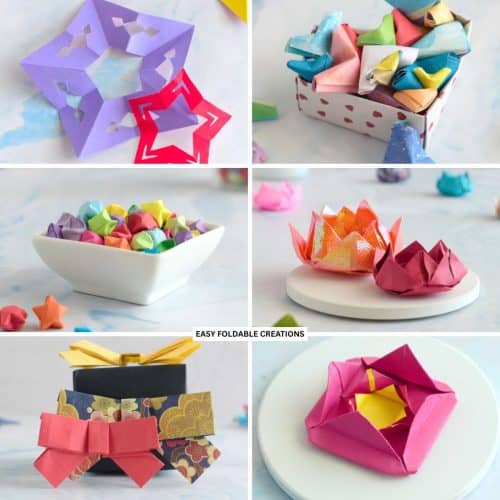
If you're after other easy paper crafts to make in your spare time, try these easy origami stars, heart crafts with paper, origami chicken in egg, pocket leaf napkin folding idea, day lily paper flower, DIY star paper bracelet, easy Christmas origami ornament, easy origami bunny, origami banana, origami birds, origami grasshopper, daisy paper flowers, or 2D origami Christmas tree.
Other Patterns You Might Like To Try:
Looking for other easy patterns like this? Try these:
- Minimalist Seasonal Paper Decoration Ideas
- DIY Paper Decor Ideas For Every Season
- Wedding Confetti Alternatives That Are Venue Friendly
- DIY Wedding Table Number Ideas Using Paper
- DIY Paper Wedding Place Card Ideas You Can Make Yourself
- Gift Wrapping Topper Ideas
- Last Minute Gift Wrapping Ideas That Still Look Beautiful and Thoughtful
- Gift Wrapping Ideas For Oddly Shaped Gifts


Comments
No Comments