
Crafting a simple paper heart is a delightful way to express your feelings or add a personal touch to your gifts.
Perfect for any occasion, this easy project requires no cutting or glue!
So, if you've ever wondered how to make a paper heart read on.

Jump to:
- Why You'll Love This Pattern
- Exclusive Content Just For You
- Skill Level
- Materials Needed
- Video Tutorial
- Instructions
- Tips For Success
- Common Mistakes & How To Avoid Them
- Color, Paper Ideas, and Variations
- FAQ
- Other Paper Crafts You Might Like To Try:
- Helpful Origami Tips
- Useful Paper Craft Terms
- Stay Connected
- Other Patterns You Might Like To Try:
- Comments
Creating a paper heart is a wonderfully simple yet meaningful craft that can be used for various occasions, from Valentine's Day to Mother's Day, or even as a thoughtful gesture to brighten someone's day.
With just a few folds, you can transform a flat piece of A4 paper into a beautiful heart, perfect for gift-giving, card-making, or even as a decoration.
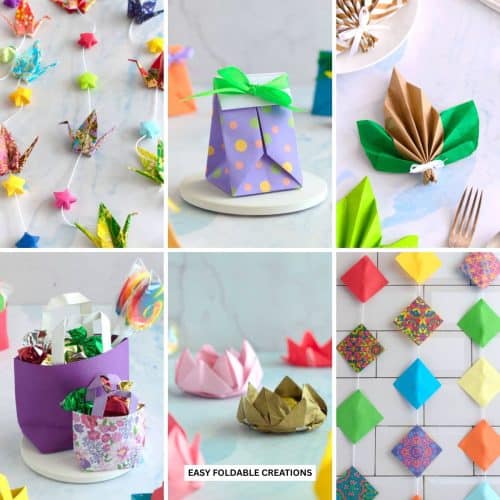
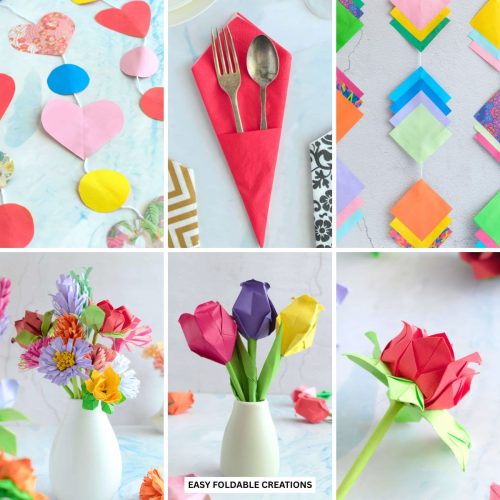
The versatility of this project allows you to use hearts in a multitude of ways-attach them to a card, string them together for a festive garland, or even tuck them into a bouquet.
This project not only serves as a creative outlet but also conveys heartfelt sentiments that store-bought items often lack.
Imagine surprising a loved one with a handmade card featuring your carefully crafted heart or using them to decorate a special gift.
Whether you're planning for a holiday, a birthday, or simply wanting to show someone you care, these paper hearts are an excellent choice.
Best of all, they require no cutting or glue, making them accessible for crafters of all ages and skill levels.
With just a few folds, you'll be able to create lovely paper hearts.
Other easy paper hearts you might like to try include these Origami Heart With Wings, Blossom Origami Heart, Origami Heart Envelope, Origami Heart With Bow, Origami Lucky Hearts, or this useful Heart Origami Box With Lid.

Why You'll Love This Pattern
- Quick and easy to make
- No cutting or glue required
- Perfect for any occasion
- Versatile for decorations or gift embellishments
- A fun project for kids and adults alike
Exclusive Content Just For You
Not sure what you want to make next, but feeling a bit creative? Or maybe you've been searching for a pattern that sparks something new. We've got a few ideas waiting for you.
The Fold Collective, Easy Foldable Creations' community, provides you with a growing library of exclusive ad-free video tutorials, printable PDF patterns and more so you can improve your skills and enjoy crafting in your own time.
Skill Level
★☆☆☆☆ (Very Easy)
Materials Needed
A4 paper or U.S. letter paper (any color you prefer)

Video Tutorial
Struggling with a tricky fold or want to see it done in real time?
You're not alone - that's why we created a full step-by-step video tutorial for this design inside The Fold Collective (an Easy Foldable Creations exclusive community).
We guide you through each fold at a pace that's easy to follow, so you can fold along with confidence and enjoy the process.
Joining gives you access to this video tutorial and a growing library of exclusive tutorials - all designed to inspire you, help you improve, and make folding even more fun.
The Fold Collective is more than just exclusive video tutorials and printable PDF patterns.
It's about building a thriving community of paper crafters from all over the world.
If you want to be part of something special, and gain access to a growing library of exclusive tutorials, join The Fold Collective and start folding today.
Prefer the step-by-step photo tutorial instead?
No problem - the full photo guide is waiting just below.
Instructions
Step 1: Start with the color you want your heart to be facing down. Arrange your paper so it sits vertically.
Step 2: Fold the top right corner down to meet the left edge.
Step 3: Unfold previous step.
Step 4: Fold the top left corner down to meet the right edge.
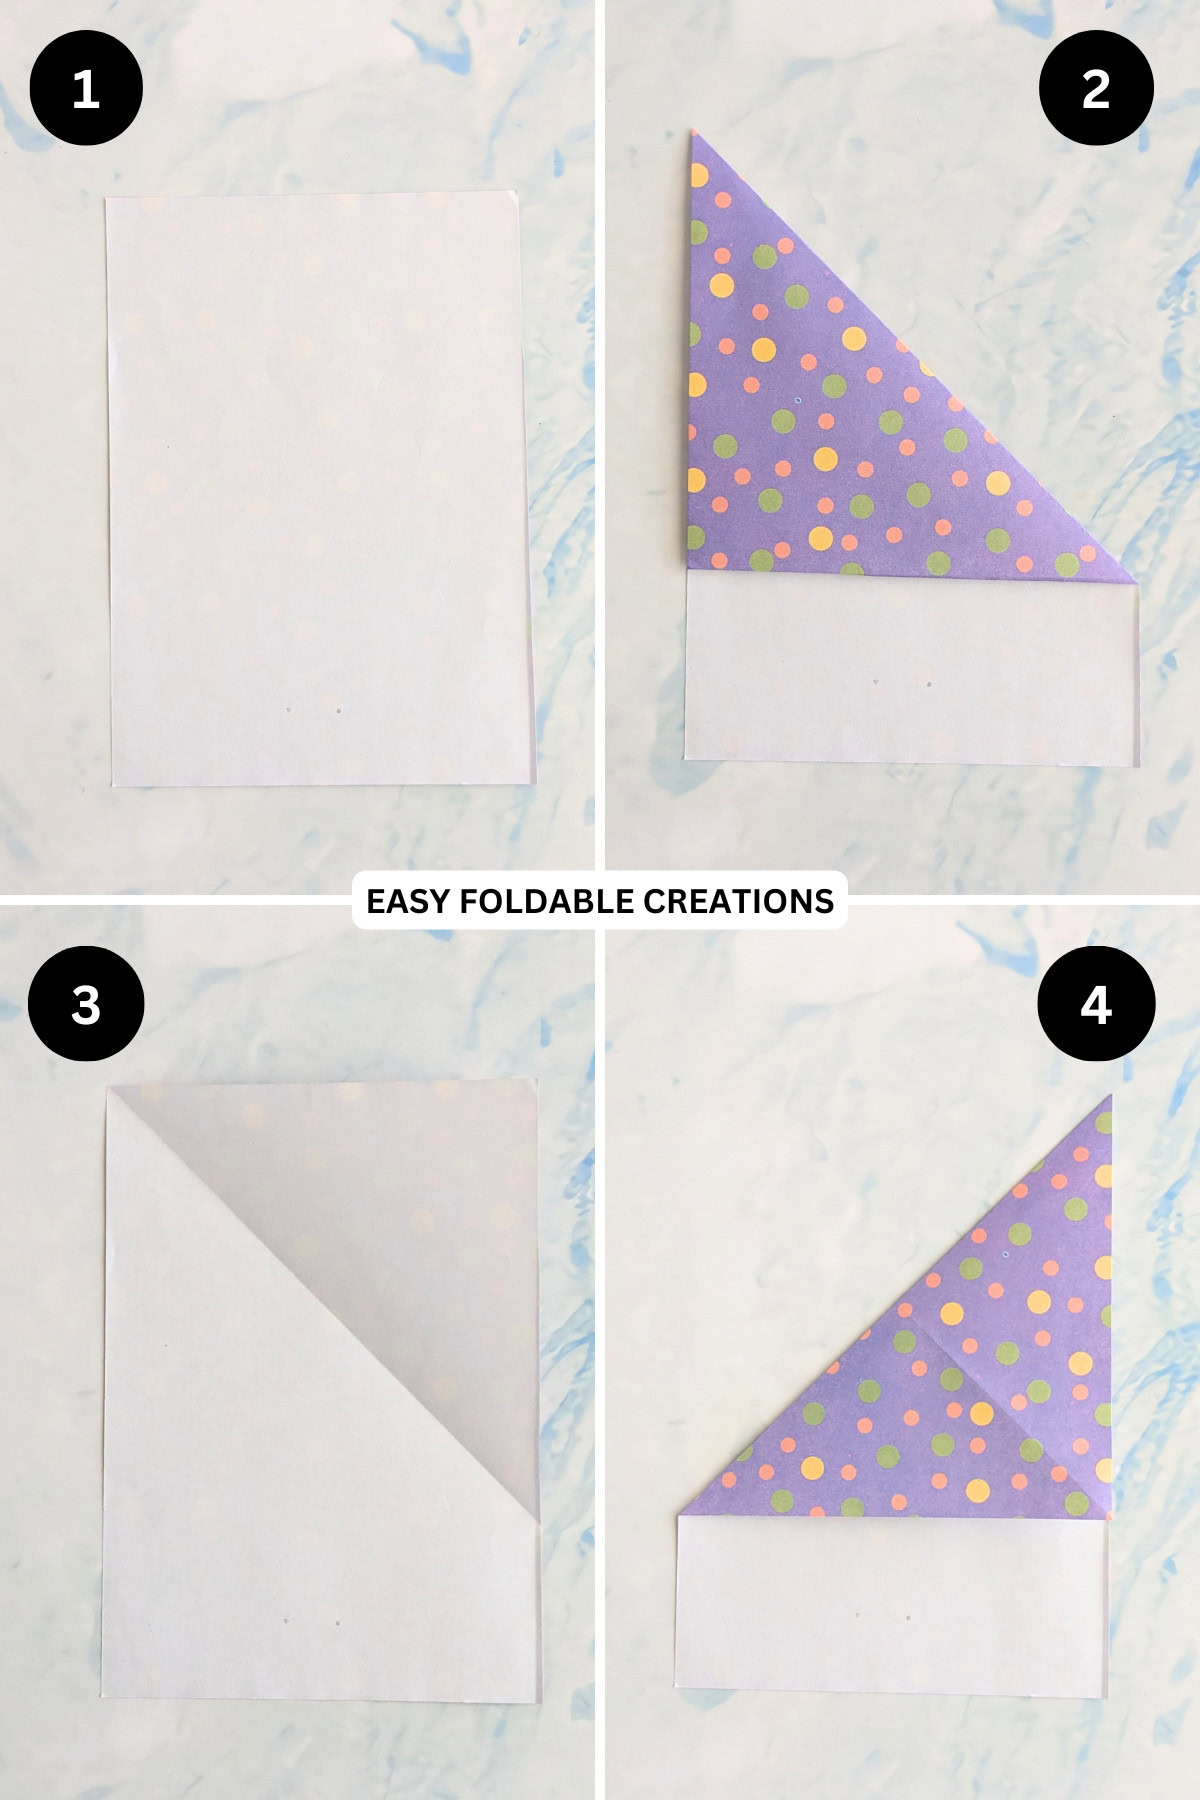
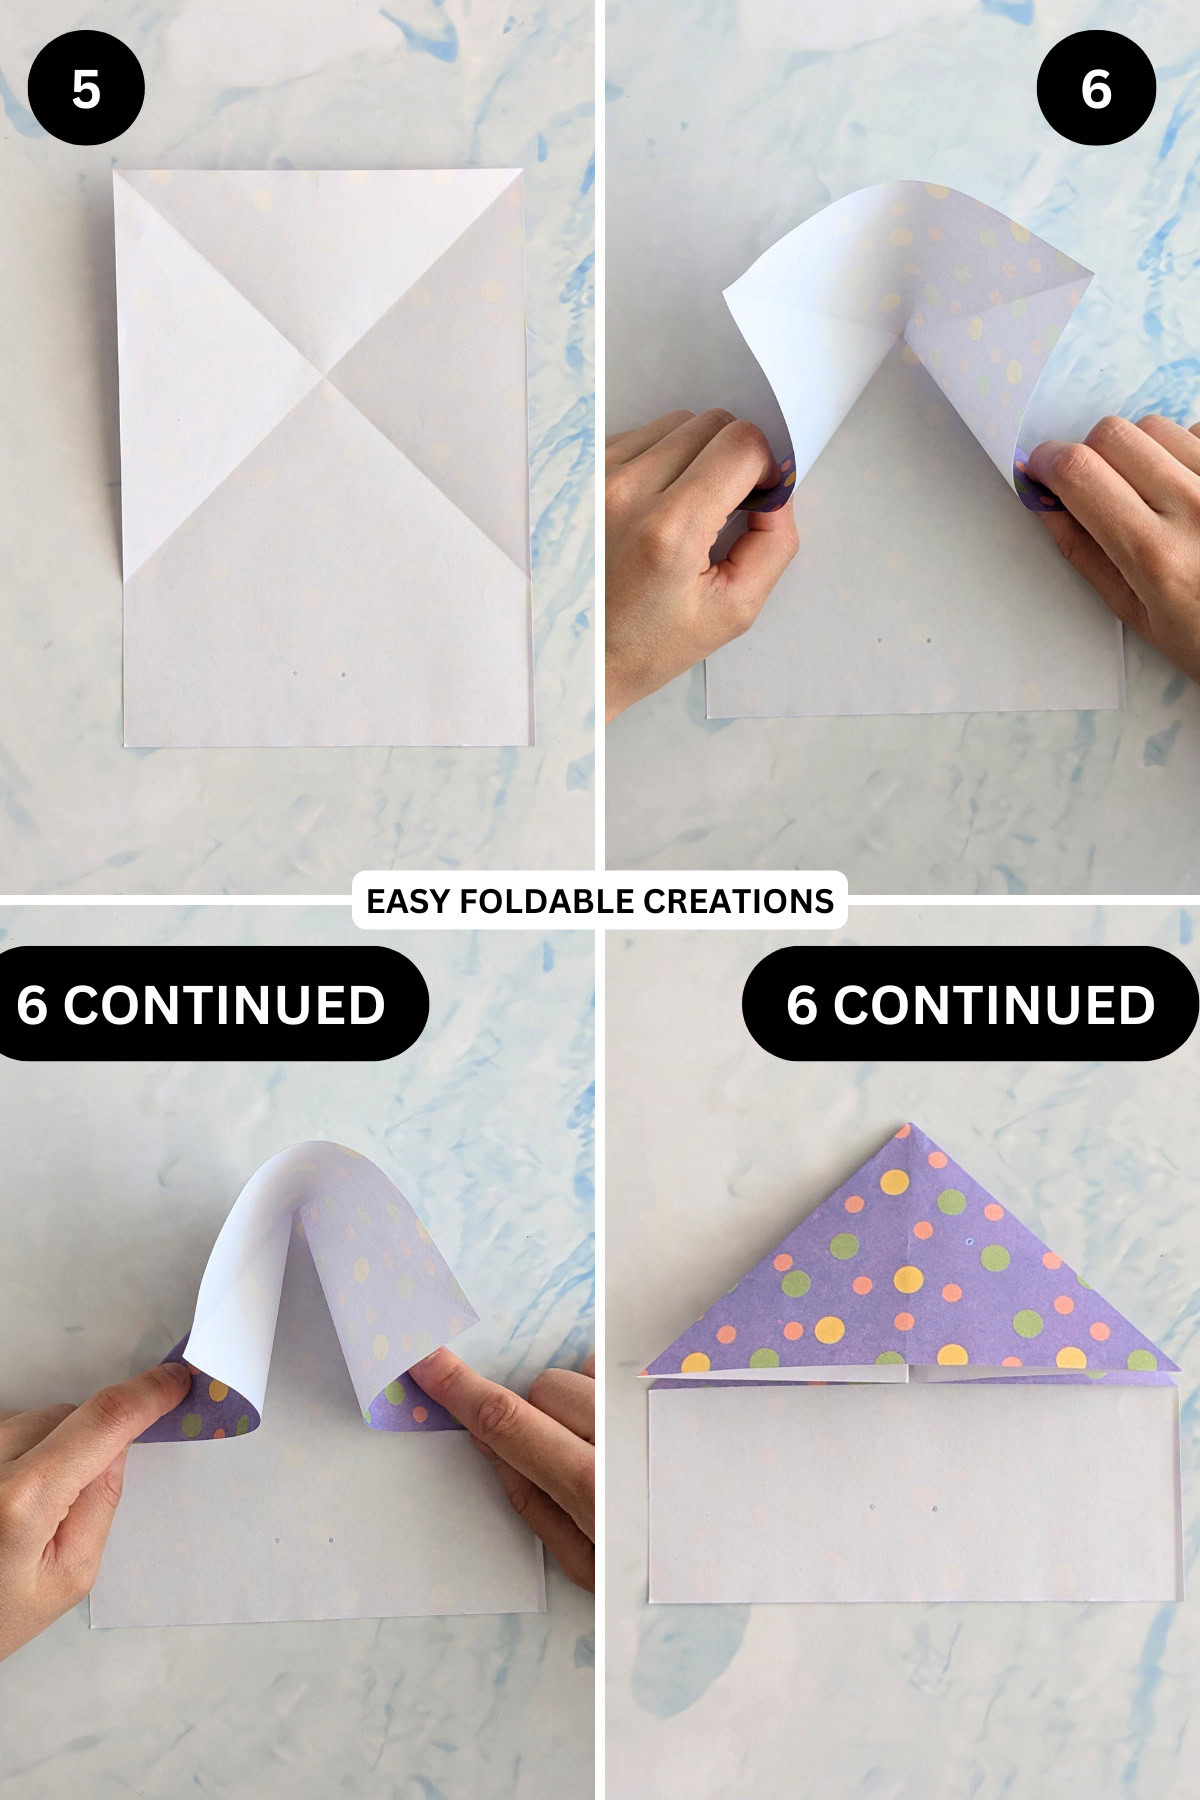
Step 5: Unfold previous step.
Step 6: Using the creases you just made, collapse the paper onto itself. This will form a triangle on the top part of your paper. Crease well.
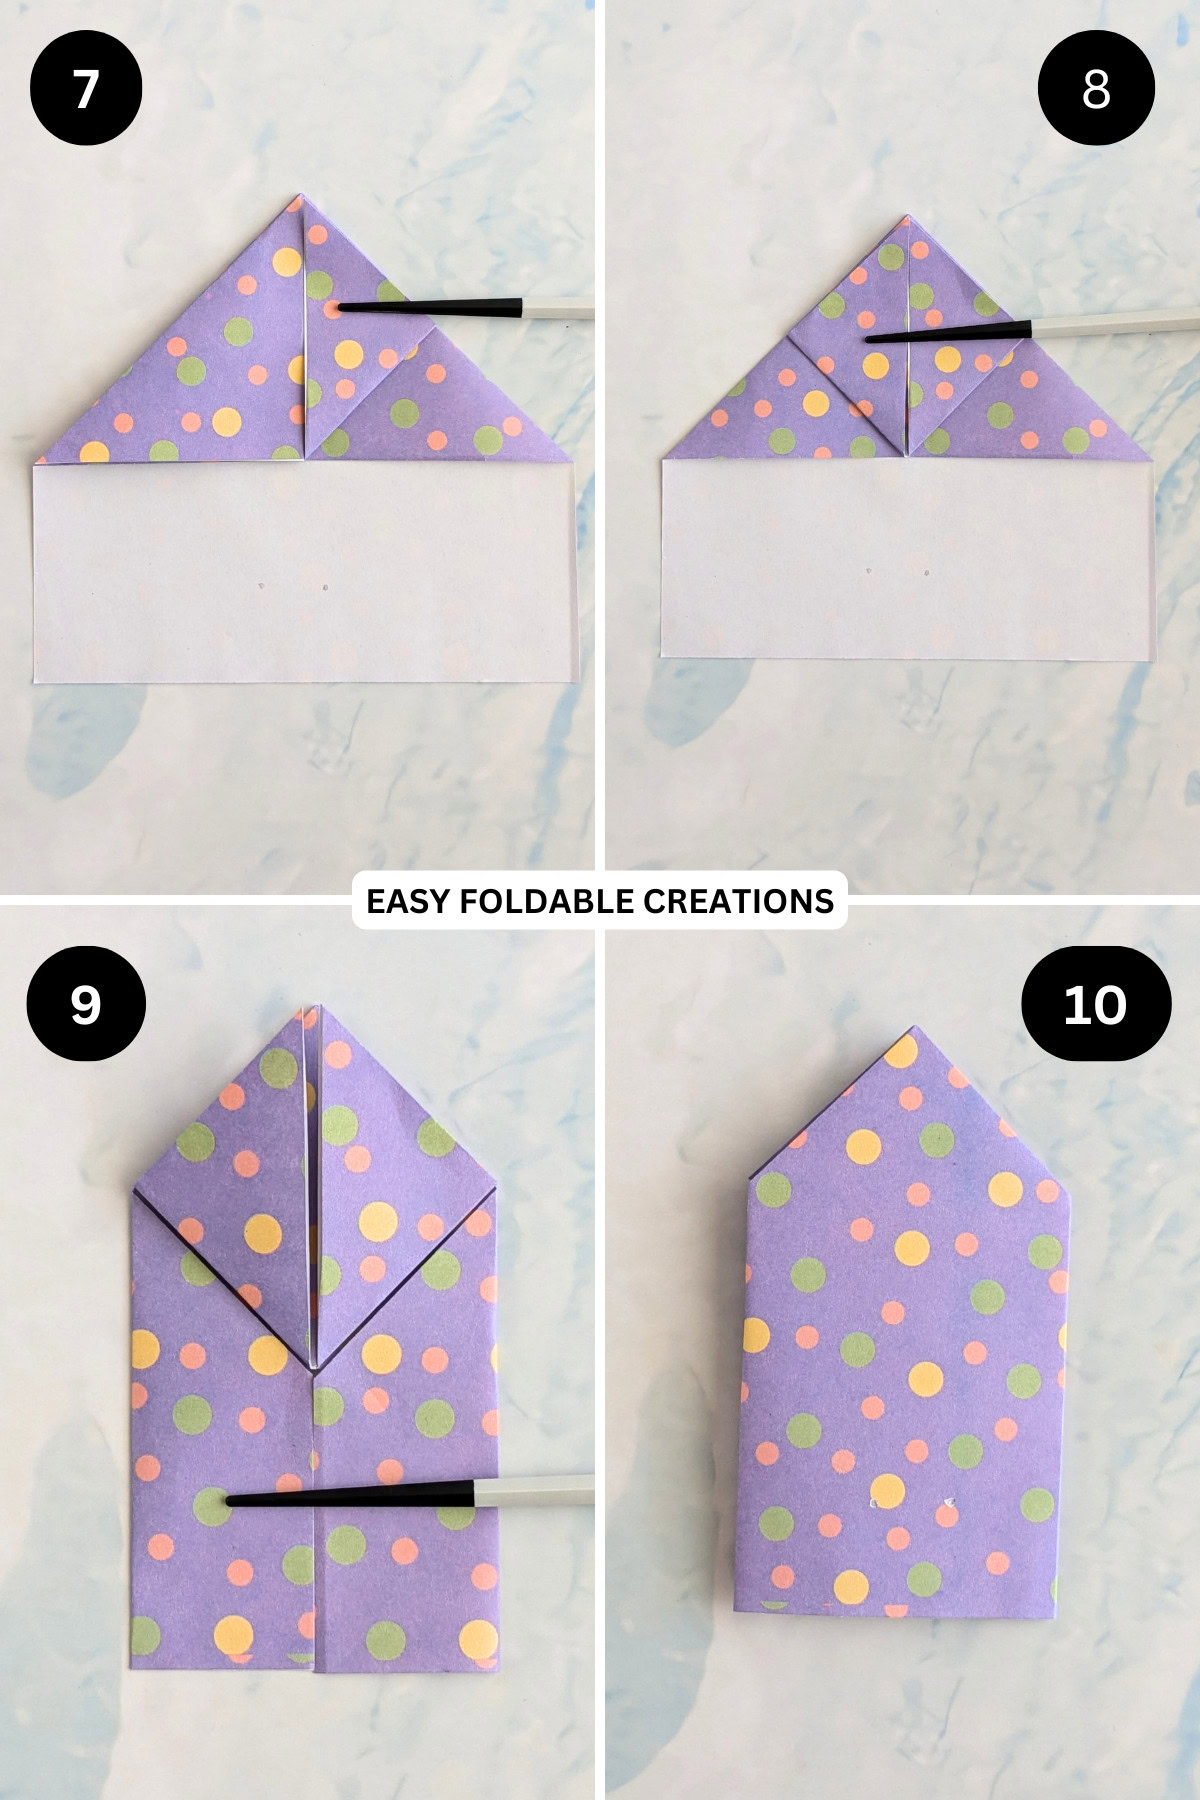
Step 7: Fold the bottom right corner (top layer only) of the triangle up to meet the top point.
Step 8: Fold the bottom left corner (top layer only) of the triangle to meet the top point.
Step 9: Fold both the left and right edges of the paper inward to the centre.
Step 10: Flip your paper over from left to right. The point should still be at the top.
✨ You're almost there! ✨
To unlock the final steps of the photo tutorial and complete your pattern, create a free account with Grow.me. below.
Make sure you tick the box to subscribe to our newsletter and stay up to date with the latest patterns, tips, and more!
Once you're signed up, you'll get instant access to finish your project with the photo tutorial and enjoy exclusive content in the future.
Already signed up? Hit the button below and select 'Switch to Log In' to pick up where you left off and finish your project!
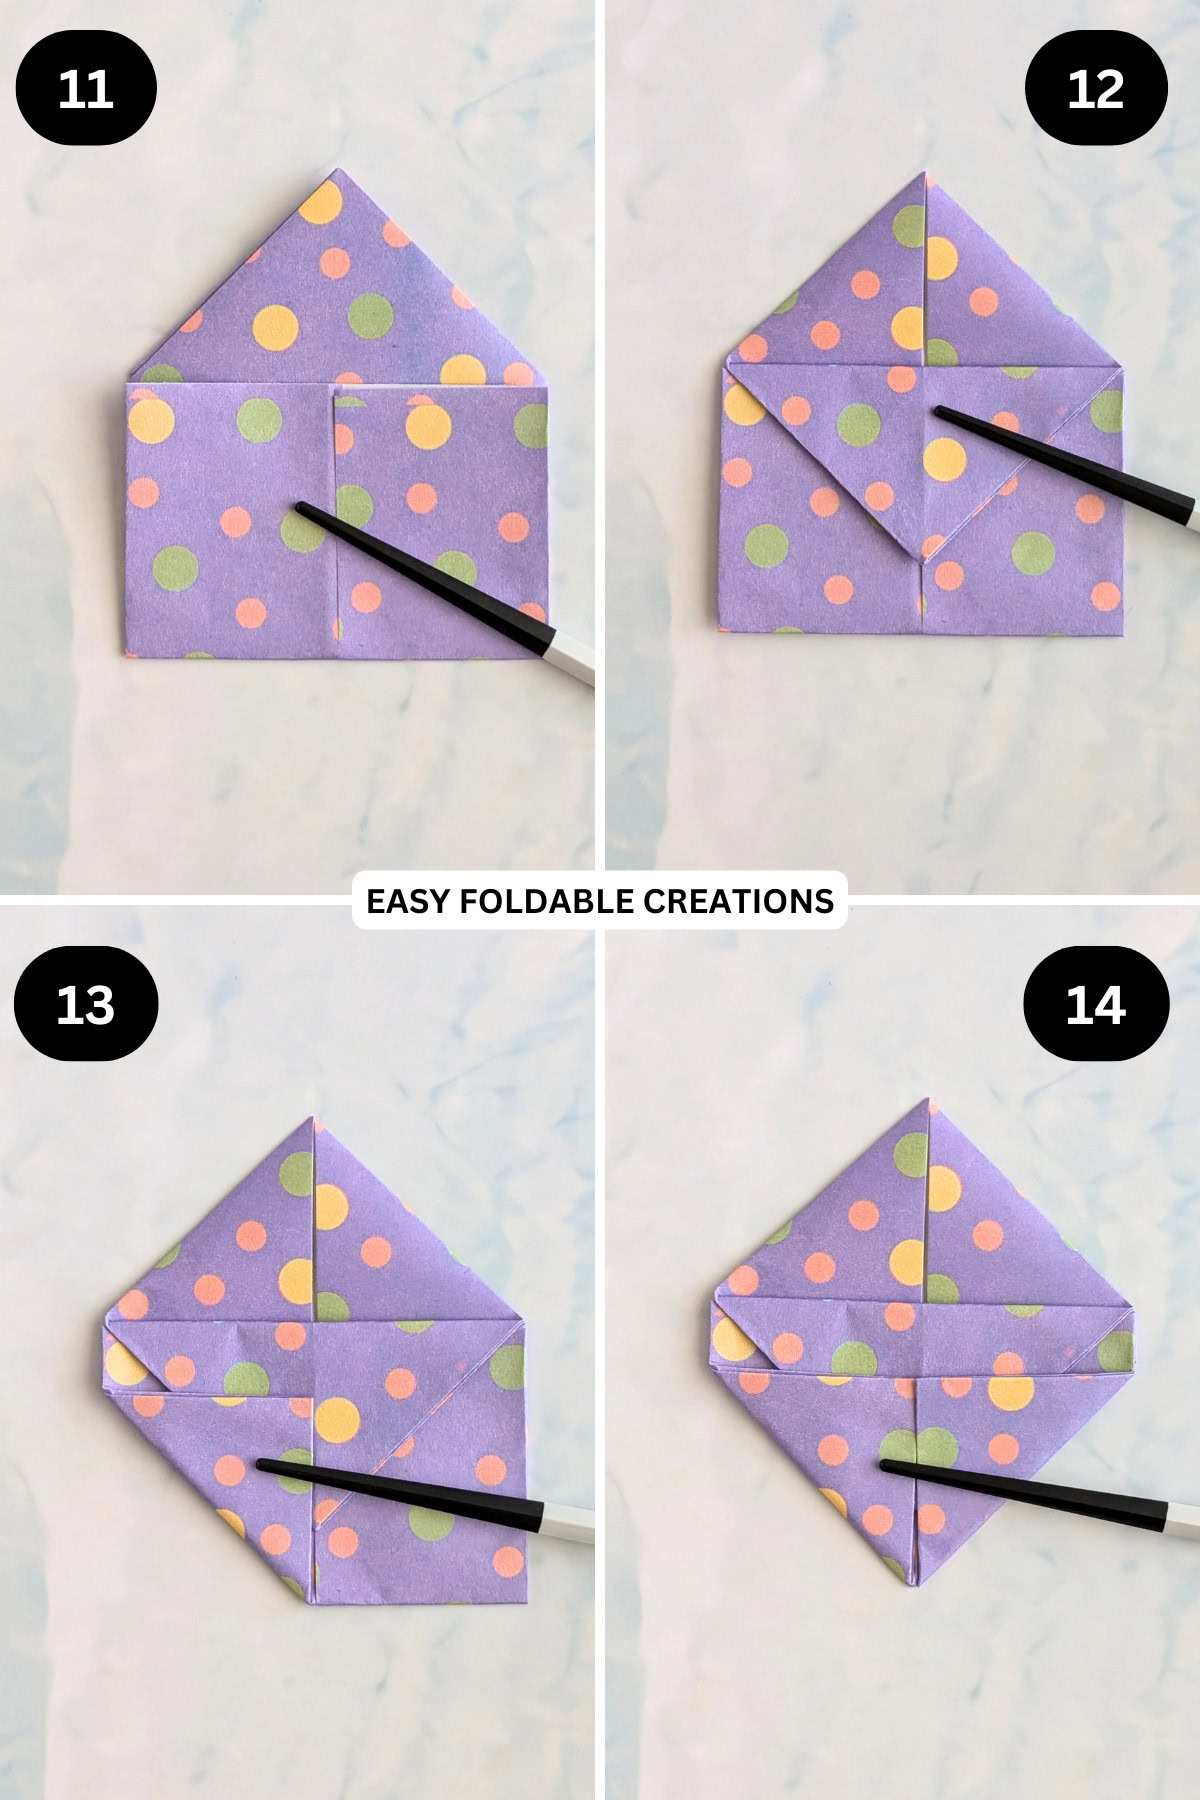
Step 11: Fold the bottom edge up to meet the base of the triangle.
Step 12: Fold the top point down (top layer only) along the crease you made in the previous step.
Step 13: Fold the bottom left corner to meet the centre. You don't want the small flap found underneath to fold over to this side.
Step 14: Fold the bottom right corner to meet the centre.
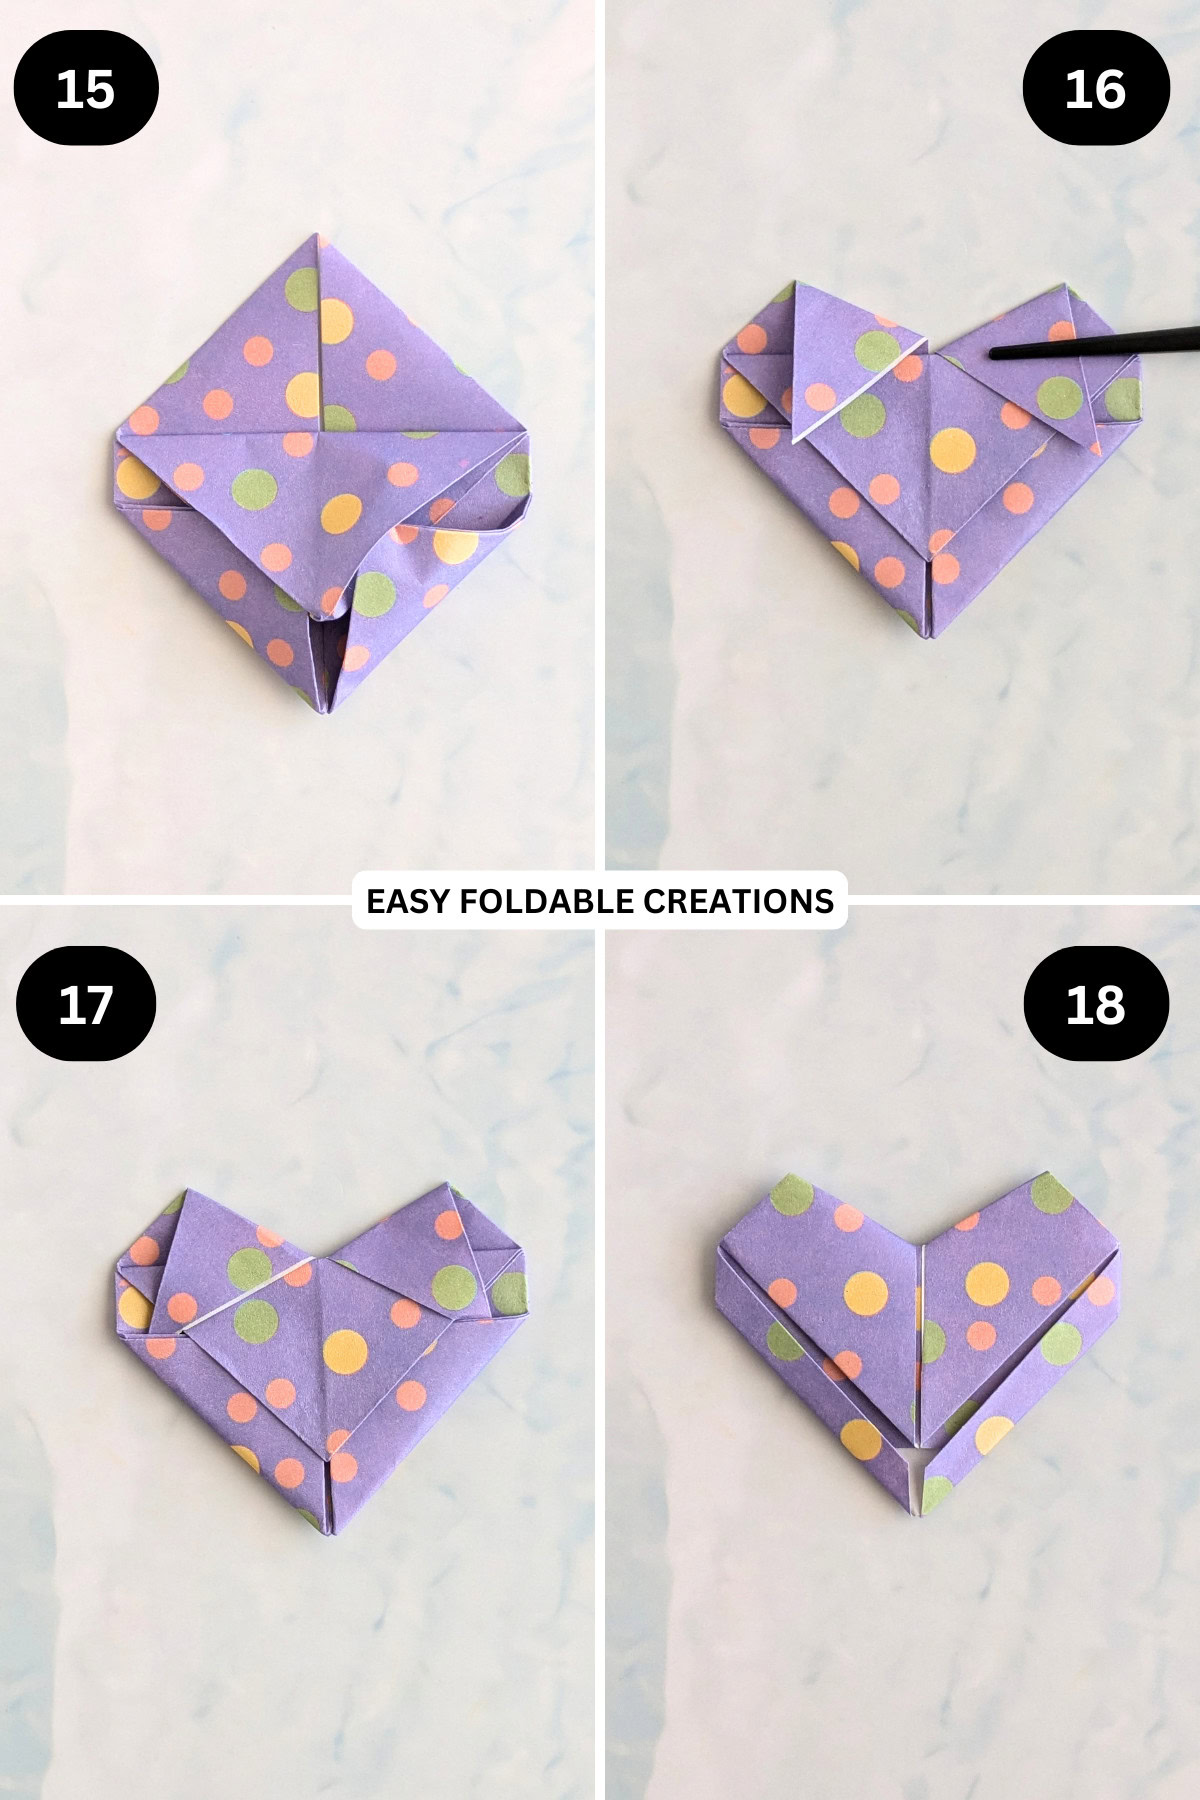
Step 15: Gently tuck in the 2 corners you just folded to the middle into the triangle pocket.
Step 16: Fold the top left and top right corner down on a slight angle.
Step 17: Tuck in the 2 corners you just folded down into the pocket.
Step 18: Flip your paper over. Completed A4 paper heart.
Tips For Success
- Make crisp folds for better results.
- Use a bone folder to press down on the folds for a neater finish.
- Experiment with different colors and patterns to create a variety of hearts.

Common Mistakes & How To Avoid Them
- Uneven folds: Always take your time when folding to ensure symmetry.
- Using too thick paper: This can make the heart difficult to fold; stick to lightweight paper.
Color, Paper Ideas, and Variations
- Use patterned paper for a fun twist.
- Create a gradient effect by using several shades of the same color.
- Experiment with different sizes by adjusting the dimensions of the paper.
FAQ
Yes! You can use any size paper, such as A4, A3, A5, or U.S. letter paper.
Absolutely! It's a simple craft that's great for kids with adult supervision.
Other Paper Crafts You Might Like To Try:
Helpful Origami Tips
If you're curious to learn more about origami, you might like to look at our basic guides on how to make some common origami folds.
Start with the valley fold and mountain fold-these are the foundation of most origami models.
Once you're comfortable, you might like to try the petal fold for 3D shapes, and explore the bird base and square base for more complex designs.
The water bomb base is also great for creating inflatable or geometric models, like this inflatable origami rabbit.
Useful Paper Craft Terms
Want to learn a little more about paper crafts and origami?
We've made this helpful printable just for you. It explains common terms and helpful tips you might come across when you are folding origami or making a paper craft project.
You can download the useful paper craft terms printable PDF here.
Stay Connected
Made this pattern? Let us know how it went in the comments below!
Pin this post - Pin now to take your paper crafting skills to the next level.
Share on Instagram or Facebook - Capture the beauty of your finished paper craft project and share it on Instagram or Facebook! Tag us @easyfoldablecreations so we can see your work!

Looking for more easy paper crafts to make?
Then you just have to try this blossom origami heart, 3D origami Christmas tree card, self closing triangle DIY gift bag, origami reindeer, origami lily, lotus napkin fold, origami insects, heart origami bookmark, or easy paper wreath.
Other Patterns You Might Like To Try:
Looking for other easy patterns like this? Try these:
- Beautiful Wedding Gift Wrapping Ideas
- Creative Origami Ideas For Weddings
- DIY Paper Flowers for Wedding Decorations
- DIY Paper Wedding Favor Ideas Guests Will Love
- Easy Paper Crafts for Weddings
- DIY Wedding Favor Boxes and Bags
- DIY Paper Wedding Decorations for Your Big Day
- Wedding Napkin Folding Ideas For Elegant Tables


Tamara says
I thought making a paper heart would be hard but this was so easy
Wanda says
Made these! This tutorial was so easy to follow. I can't wait to make some more later