
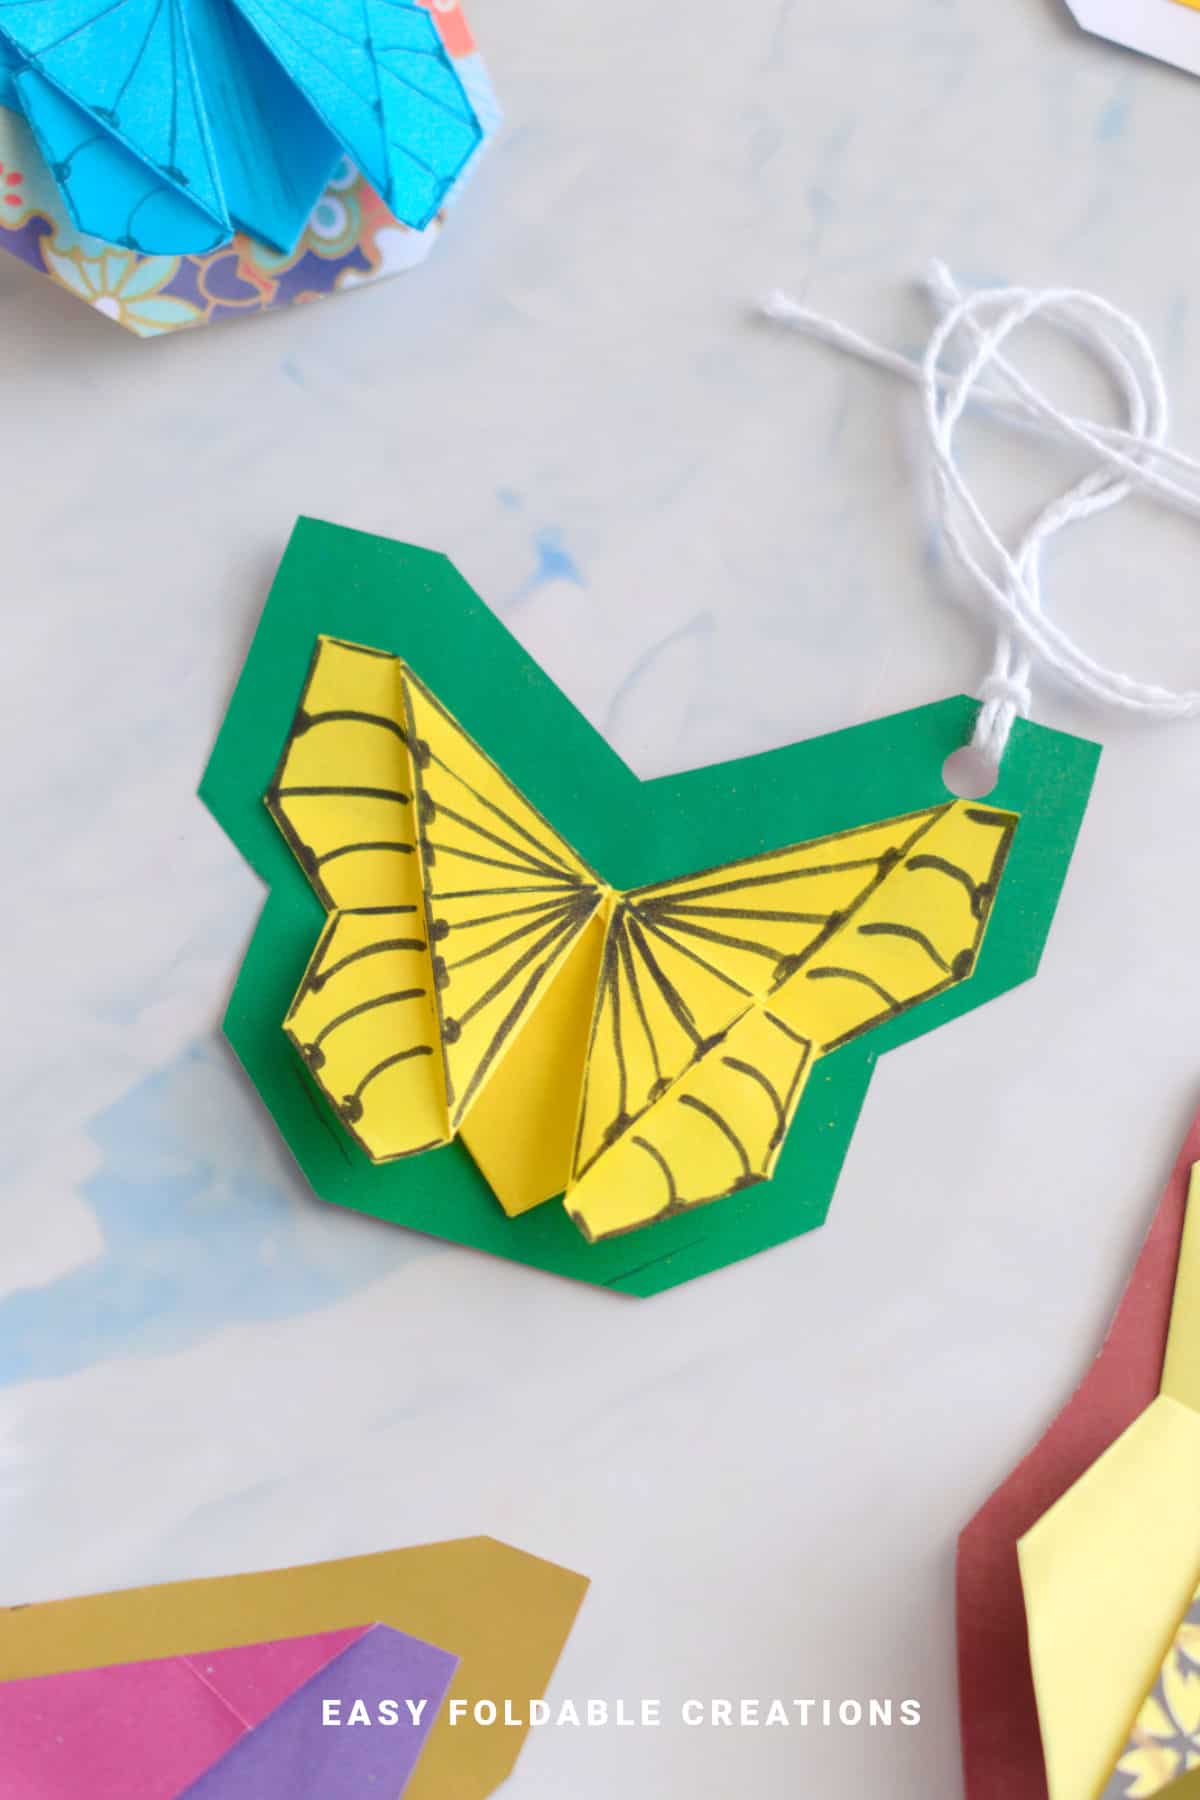
Add a special touch to your gifts with this DIY butterfly gift tag.
Perfect for spring, Easter, or any celebration, this simple yet beautiful tag is easy to make and a great way to personalize your presents.
Jump to:
Looking for a quick and easy way to make your gifts stand out?
This DIY butterfly gift tag is the perfect solution.
It's a great way to add a personal touch to your presents and makes an excellent addition to any gift, whether it's for Easter, spring celebrations, Valentine's Day, or even a birthday.
This craft is easy to create with just a few basic materials, and the best part is that it's totally customizable.
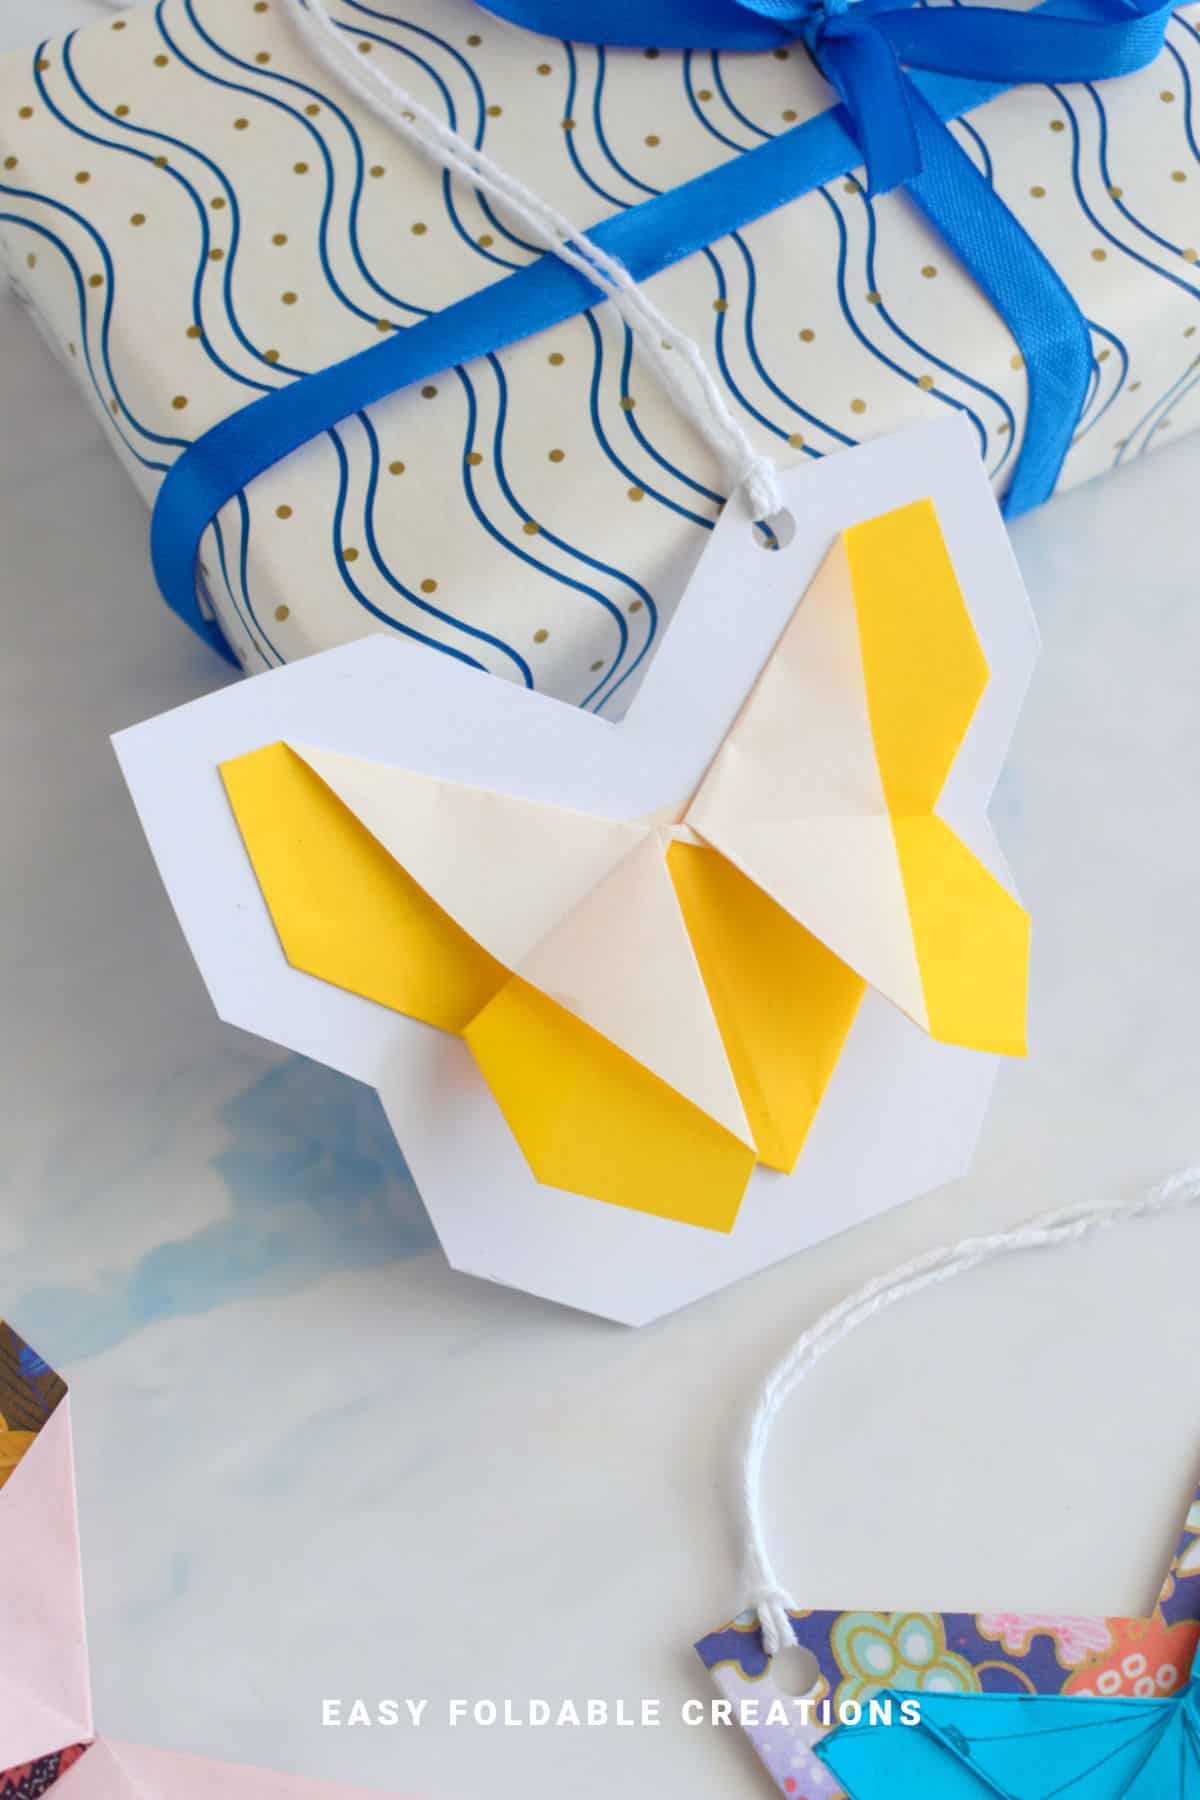
The tag is made using an origami butterfly glued onto sturdy cardstock, creating a durable and charming gift tag that you can personalize with colors, patterns, and a special message.
The butterfly shape itself symbolizes new beginnings and growth, which makes it ideal for spring holidays like Easter and Mother's Day, or for any occasion where you want to add a thoughtful and homemade touch to your gifts.
This butterfly gift tag is incredibly versatile. Attach it to a gift box, treat bag, or even use it for party favors or Easter baskets.
It's perfect for adding a unique touch to homemade treats, decorative items, or as a swing tag on a floral arrangement.
Making your own gift tags is a fun way to show someone you care, and this butterfly tag can be created in a matter of minutes.
Whether you're attaching it to a gift bag, treat box, or homemade goodies, this tag makes your gift extra special.
All you need are some basic supplies-scissors, glue, cardstock, hole punch, and string-and you'll have a beautiful, handmade tag ready to go.
Let's get started!

Why You'll Love This Pattern
- Quick and Easy: This project doesn't take much time to complete, making it perfect for last-minute gift-giving. It's a simple way to add a personal touch without spending hours crafting.
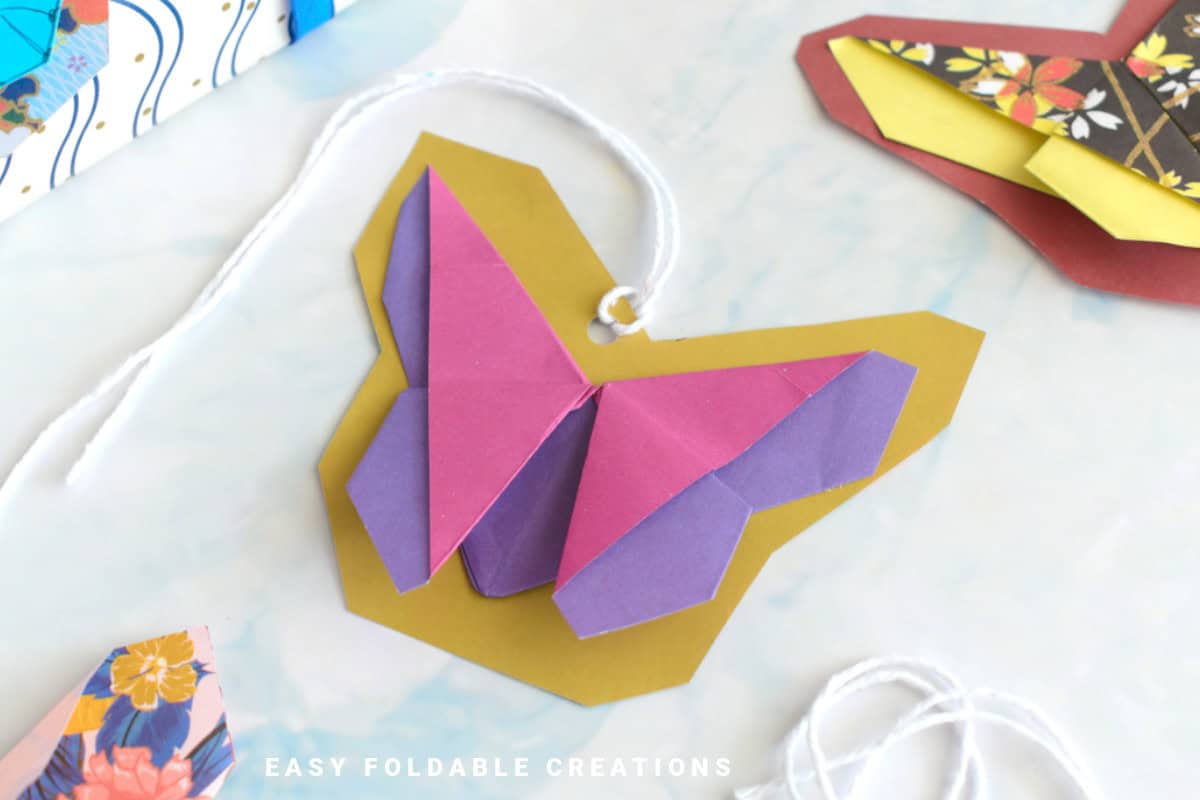
- Customizable: The beauty of this craft is how easily it can be personalized. You can choose any color of paper for the butterfly and cardstock, tailoring it to the recipient's preferences or the occasion.
- Perfect for Any Occasion: Whether you're preparing gifts for Easter, Mother's Day, Valentine's Day, or just a regular birthday, this butterfly gift tag works for any occasion. You can even adjust the colors to fit the holiday theme.
- Eco-Friendly: Using lightweight paper and cardstock makes this a sustainable craft project. It's a great way to repurpose scrap paper, and you can even choose eco-friendly materials.
- Practical and Beautiful: This tag doesn't just look great-it's also functional. The string makes it easy to attach to any gift, and the origami butterfly gives the tag a handmade charm that adds value to your present.
Skill Level
Difficulty: ★☆☆☆☆ (Easy)
Materials Needed
- 1 sheet of lightweight rectangular paper (e.g. origami paper) for the butterfly. Here are some example paper sizes:
- Small: 3.5 inches x 2 inches (9 cm x 6 cm).
- Medium: 3 inches x 4 inches (8 cm x 12 cm).
- Large: 4 inches x 6 inches (10 cm x 15 cm).
- Cardstock to make your swing tag.
- Pencil
- String or ribbon
- Scissors and glue
- Markers, optional. If you want to decorate your butterfly or swing tag.
Instructions
You will need to use a rectangle sheet of paper for the butterfly. If you have square paper, you can trim it down so that it is 1 ½ times longer than it is wide.
E.g. If you have 6 inch x 6 inch (15cm x 15cm) square origami paper, trim it down by 2 inches (5 cm). You will end up with a sheet that is 6 inches x 4 inches (15 cm x 10 cm).
Step 1: Start with the main color you want your butterfly to be facing down. Arrange your paper to sit vertically.
Step 2: Fold the top edge to meet the bottom edge.
Step 3: Fold the left edge to meet the right edge.
Step 4: Unfold previous step.

Step 5: Fold the right edge (top layer only) to the left edge and press flat. You will end up with a triangle on the top and a rectangle shape on the bottom.
Step 6: Flip your paper over from left to right.
Step 7: Again, fold the right edge (top layer only) to the left edge, along the existing middle crease, and press flat. You will end up with a triangle on the top and a rectangle shape on the bottom.

Step 8: Fold the left inner corner towards the left on a diagonal. Make sure that its point overlaps the top triangle.
Step 9: Repeat previous step for the right inner corner, keeping it as symmetrical as possible.
Step 10: Unfold previous 2 steps.
Step 11: Open out the right side of the paper slightly, and reverse fold the inner corner along the existing crease line. Then press flat.

Step 12: Repeat previous step for the left side.
Step 13: Rotate your paper 180 degrees, so that the point of the triangle is facing you.

Step 14: Fold both top points down (top layer only) as far as they can go. This will form the wings.
Step 15: Completed butterfly. Optional: Decorate your butterfly with markers.

✨ You're almost there! ✨
To unlock the final steps and complete your pattern, create a free account with Grow.me. below.
Make sure you tick the box to subscribe to our newsletter and stay up to date with the latest patterns, tips, and more!
Once you're signed up, you'll get instant access to finish your project and enjoy exclusive content in the future.
Already signed up? Hit the button below and select 'Switch to Log In' to pick up where you left off and finish your project!
Putting It Together
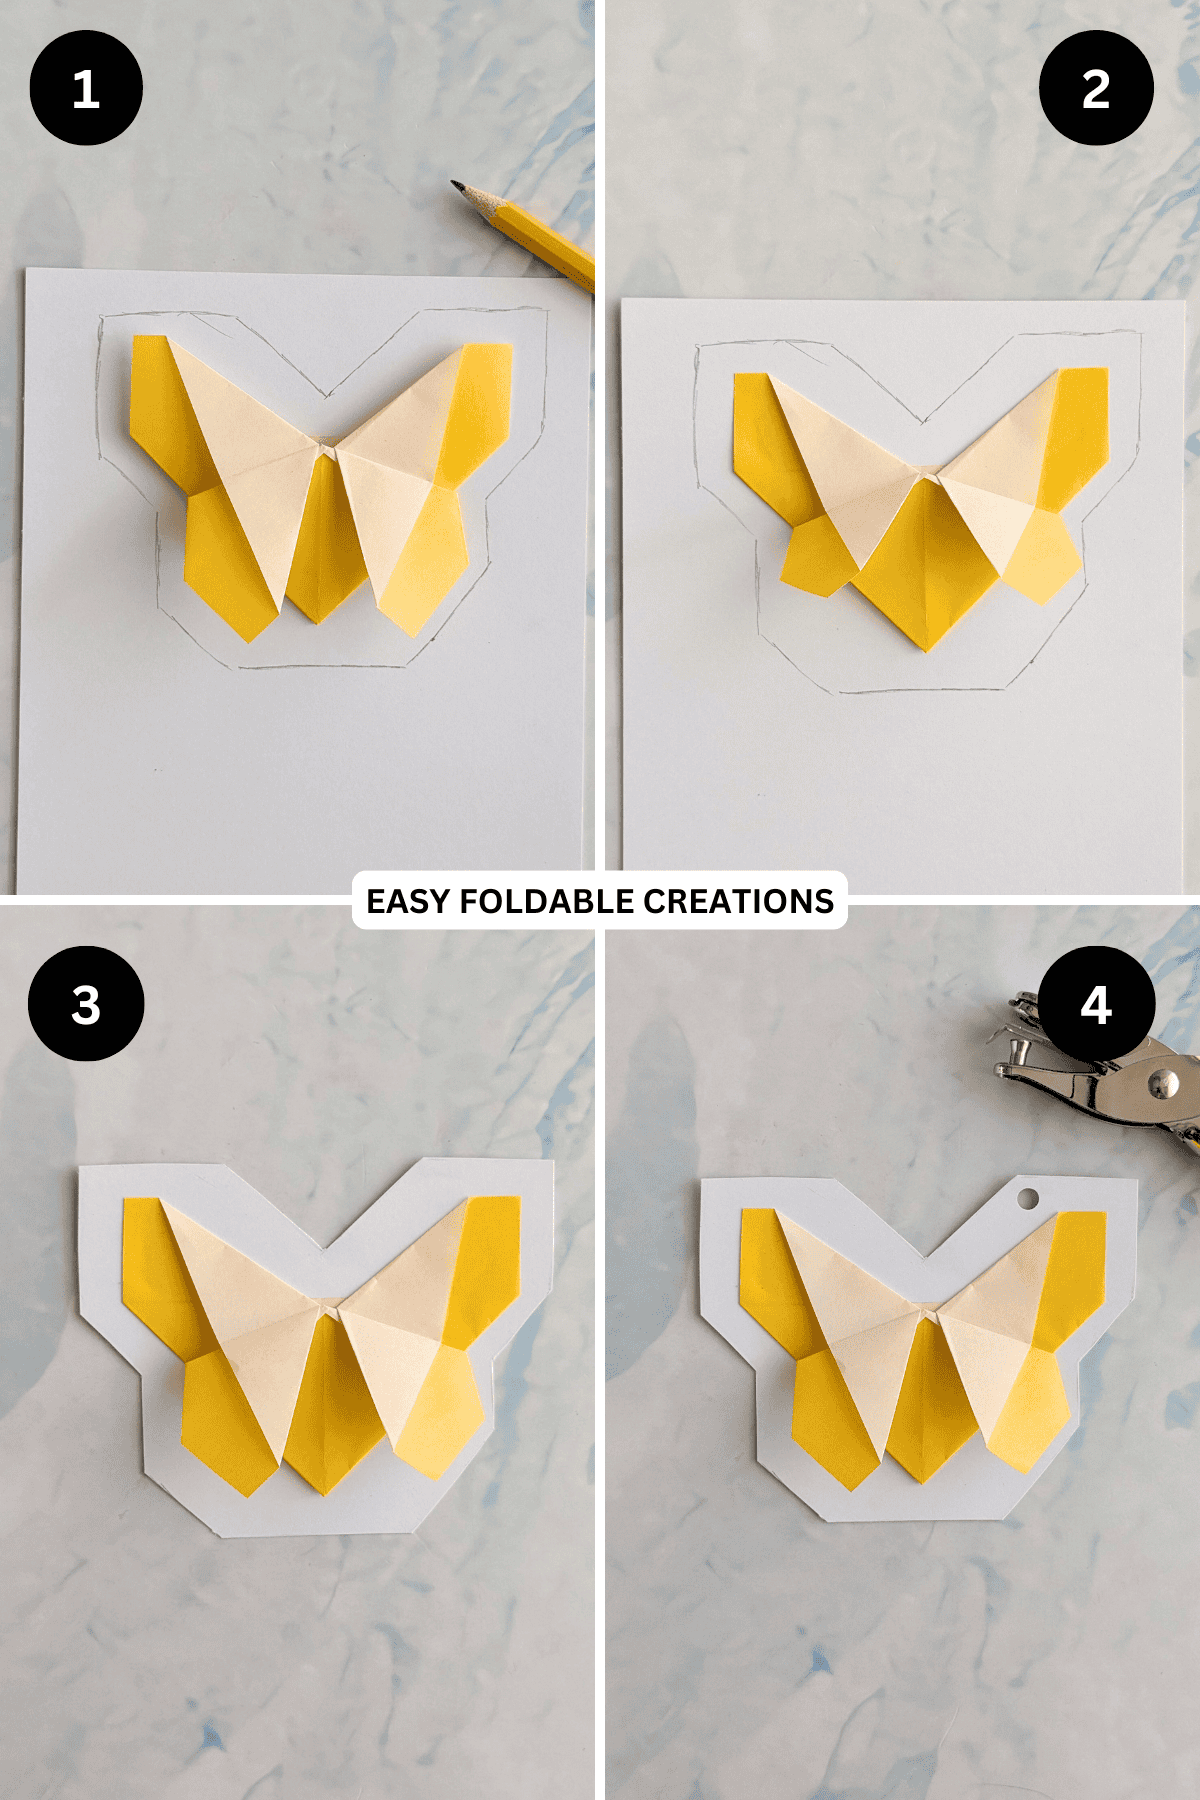
Step 1: Place your butterfly on a piece of cardstock and trace around it (using a pencil) so that it has about 0.40 inches (1cm) border around the butterfly. Leave a bit more of a border along the top (this is where you will punch a hole later).
Step 2: Glue the back of your butterfly onto the cardstock. You can choose to glue all of the wings down or just the back ones.
Step 3: Cut around the lines you traced in step 1. Erase any pencil lines that might still be showing.
Step 4: Using your hole punch, punch a hole on the top edge of the cardstock. The position of this hole is up to you.
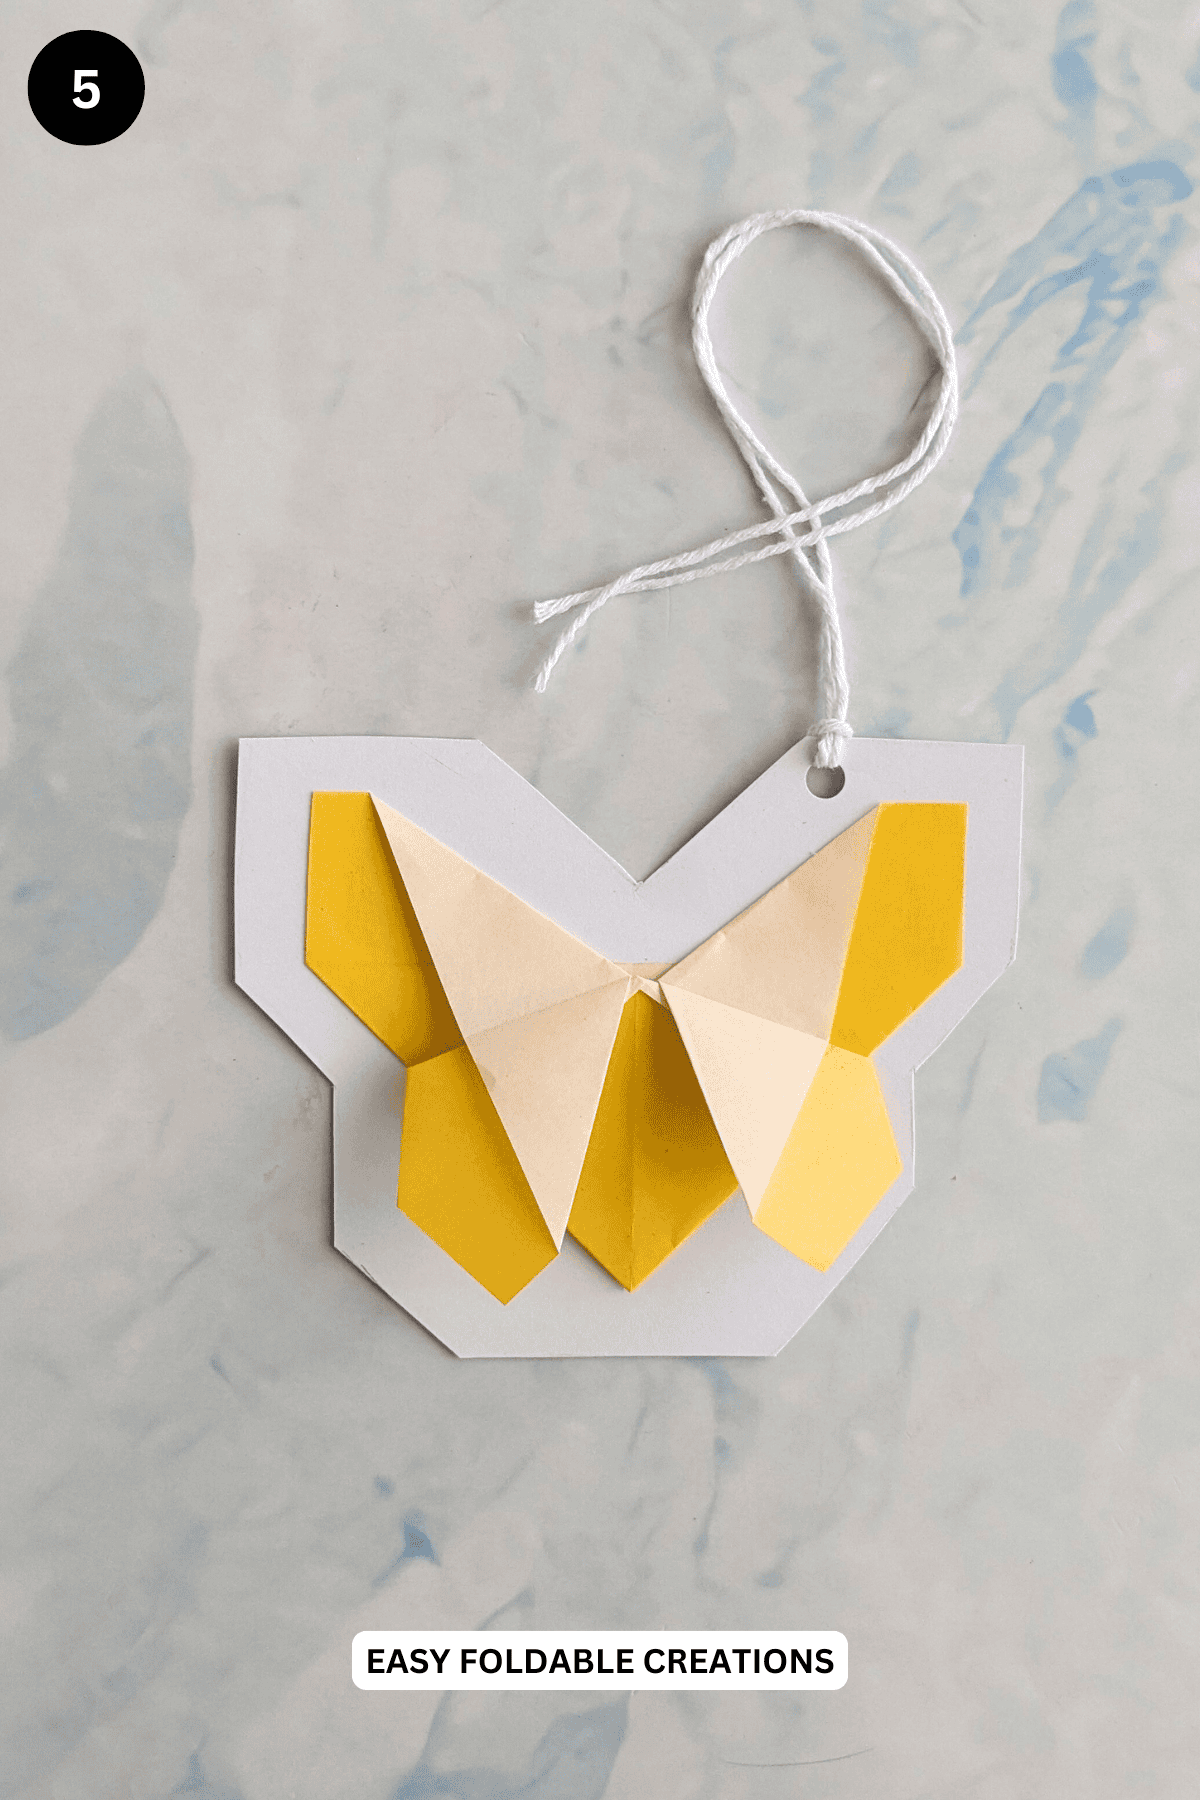
Step 5: Thread some string through the hole. Completed butterfly swing tag.
Color, Paper Ideas, and Variations
- Spring/Easter: Pastels like pink, lavender, and mint green are perfect for fresh, seasonal vibes.
- Special Occasions: Use red or gold for Valentine's Day, or peach and blush for Mother's Day.
- Neutral Tones: Ivory, gray, or soft blue work well for all occasions like birthdays or thank-yous.
- Patterned or Textured Paper: Floral prints for a fresh look or textured papers like linen for elegance.
- Add glitter, rhinestones, or hand-painted details.
Other Paper Crafts You Might Like To Try:
Helpful Origami Tips
If you're curious to learn more about origami, you might like to look at our basic guides on how to make some common origami folds.
Start with the valley fold and mountain fold-these are the foundation of most origami models.
Once you're comfortable, you might like to try the petal fold for 3D shapes, and explore the bird base and square base for more complex designs.
The water bomb base is also great for creating inflatable or geometric models, like this inflatable origami rabbit.
Stay Connected
Made this pattern? Let us know how it went in the comments below!
Pin this post - Pin now to take your paper crafting skills to the next level.
Share on Instagram or Facebook - Capture the beauty of your finished paper craft project and share it on Instagram or Facebook! Tag us @easyfoldablecreations so we can see your work!
Other Patterns You Might Like To Try:
Looking for other easy patterns like this? Try these:


Comments
No Comments