
Keep your gift cards organized and stylish with this simple paper card holder!
It's a practical and thoughtful way to present gifts.

Jump to:
- Why You'll Love This Pattern
- Exclusive Content Just For You
- Skill Level
- Materials Needed
- Instructions
- Tips For Success
- Common Mistakes & How To Avoid Them
- Color, Paper Ideas, and Variations
- FAQ
- Other Crafts You Might Like To Try:
- Helpful Origami Tips
- Useful Paper Craft Terms
- Stay Connected
- Other Patterns You Might Like To Try:
- Comments
The paper card holder is a functional yet stylish solution for organizing and presenting gift cards.
With the rise in popularity of gift cards for birthdays, holidays, and special occasions, having a dedicated holder can enhance the gift-giving experience.
This homemade craft idea is easy to make and allows for personalization, making it a wonderful way to show your thoughtfulness.
Crafting your own card holder offers an opportunity to unleash your creativity. You can choose the colors and designs that reflect the personality of the recipient or the occasion.
For instance, a vibrant floral pattern could be perfect for a birthday, while elegant gold and silver designs might suit a wedding or anniversary.
The ability to customize the card holder adds a special touch to your gifts, making them even more meaningful.
This paper craft is not just limited to gift cards; it can also hold business cards, loyalty cards, and other small items.
Its versatility makes it a useful accessory for any home or office. You can keep one on your desk, in your purse, or even in your car for easy access to essential cards.
Additionally, the paper card holder is a fantastic project for beginners and can be completed quickly, making it perfect for last-minute gifts.
Gather some colorful paper and you'll have a beautiful card holder ready in no time.
In this guide, we'll cover everything you need to know to create your very own paper card holder.
Let's get started on these super cute paper card holders!

Why You'll Love This Pattern
- Quick and easy to make, perfect for beginners.
- Customizable with various colors and designs.
- Versatile for holding different types of cards.
- A thoughtful addition to gift-giving.
Exclusive Content Just For You
Not sure what you want to make next, but feeling a bit creative? Or maybe you've been searching for a pattern that sparks something new. We've got a few ideas waiting for you.
The Fold Collective, Easy Foldable Creations' community, provides you with a growing library of exclusive ad-free video tutorials, printable PDF patterns and more so you can improve your skills and enjoy crafting in your own time.
Skill Level
★★☆☆☆ (Easy)
Materials Needed
- Colored Paper - Your choice of colors for personalization.
- Optional: Stickers or Decorative Items - To embellish your holder.
- Scissors and string to close your paper card holder.
Paper Size Options
Origami paper 9 inches x 9 inches (22 cm x 22cm) - Ideal for creating a standard-sized card holder.
Paper Type & GSM
A medium-weight paper (around 120-160 GSM) is recommended for durability while remaining easy to fold.
Choose colorful or patterned paper to make your card holder visually appealing.
Instructions
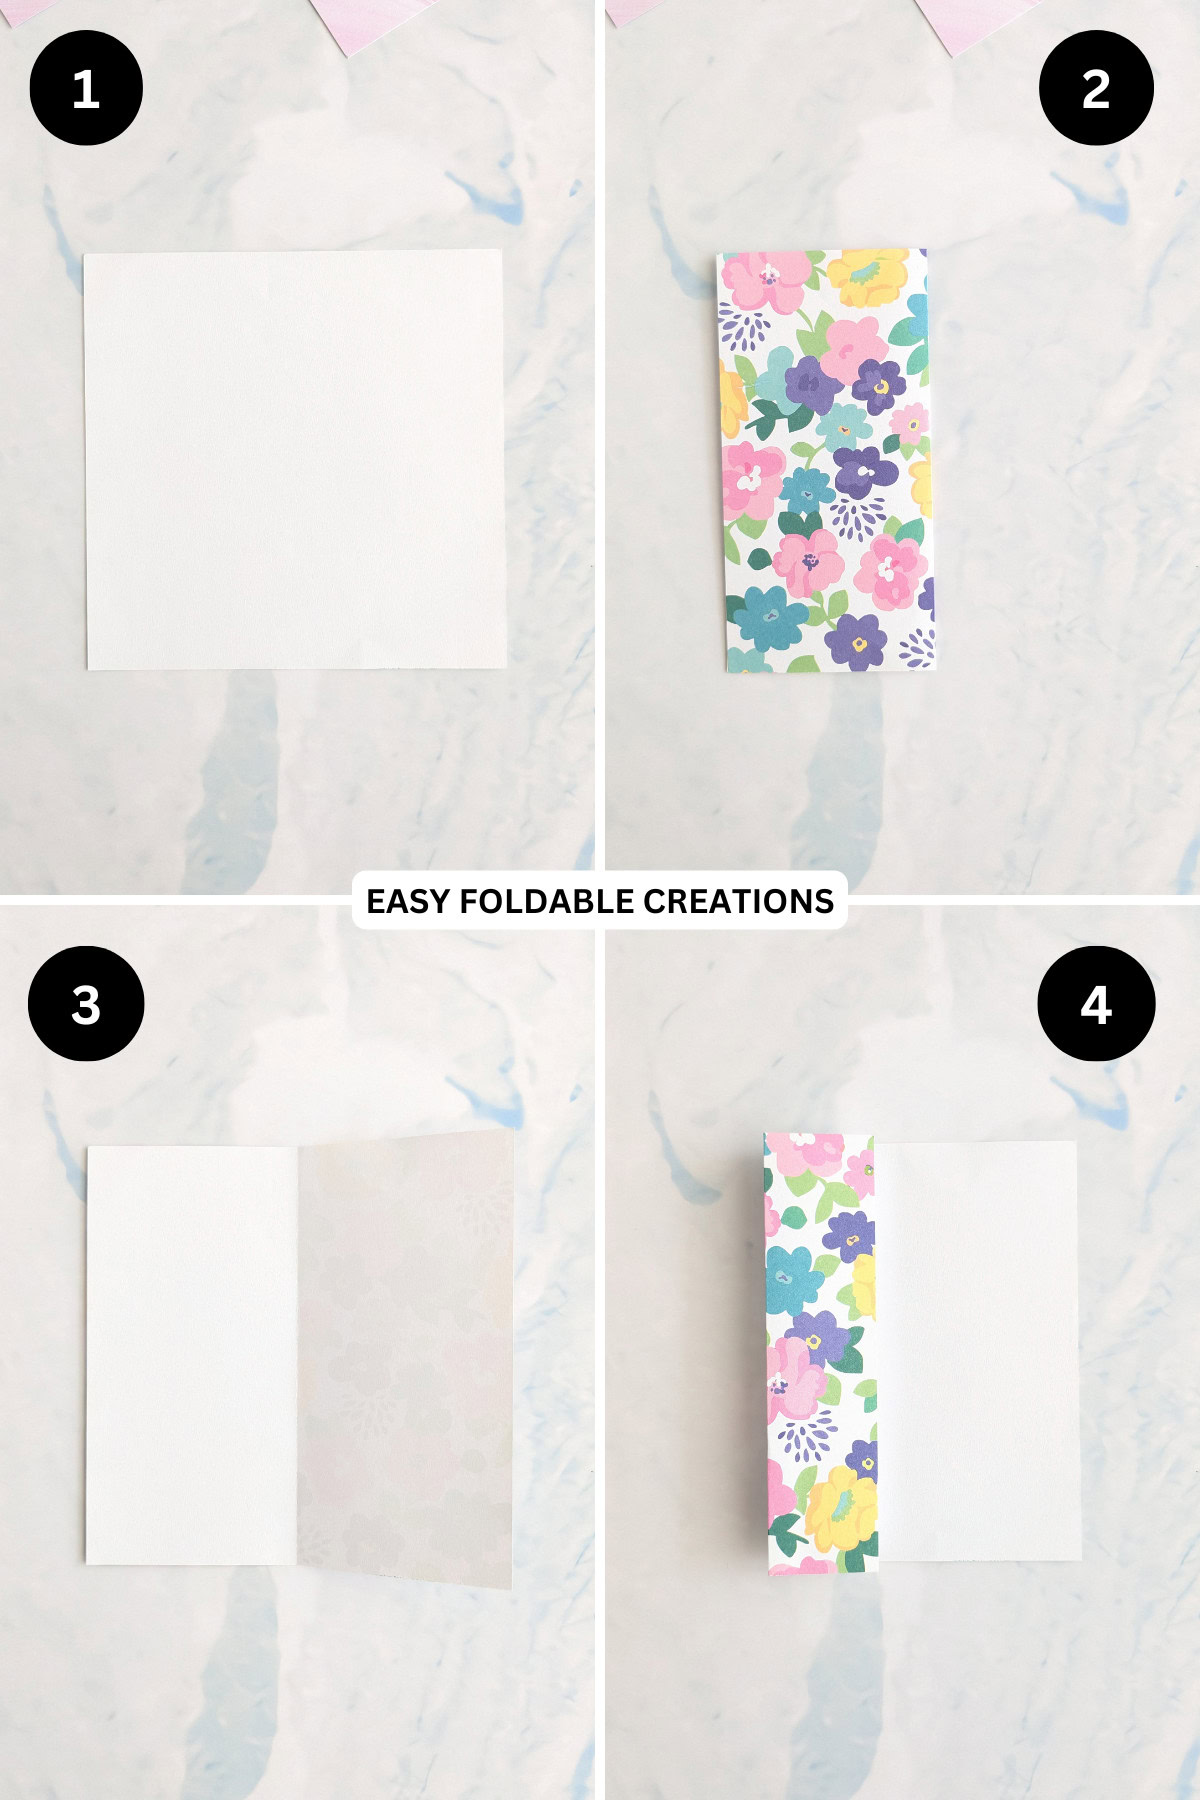
Step 1: Start with the color you want your card holder to be facing down. If you are using patterned paper, make sure the pattern runs from left to right.
Step 2: Fold the paper in half from right to left.
Step 3: Unfold previous step.
Step 4: Fold the left edge of the paper to the middle crease.
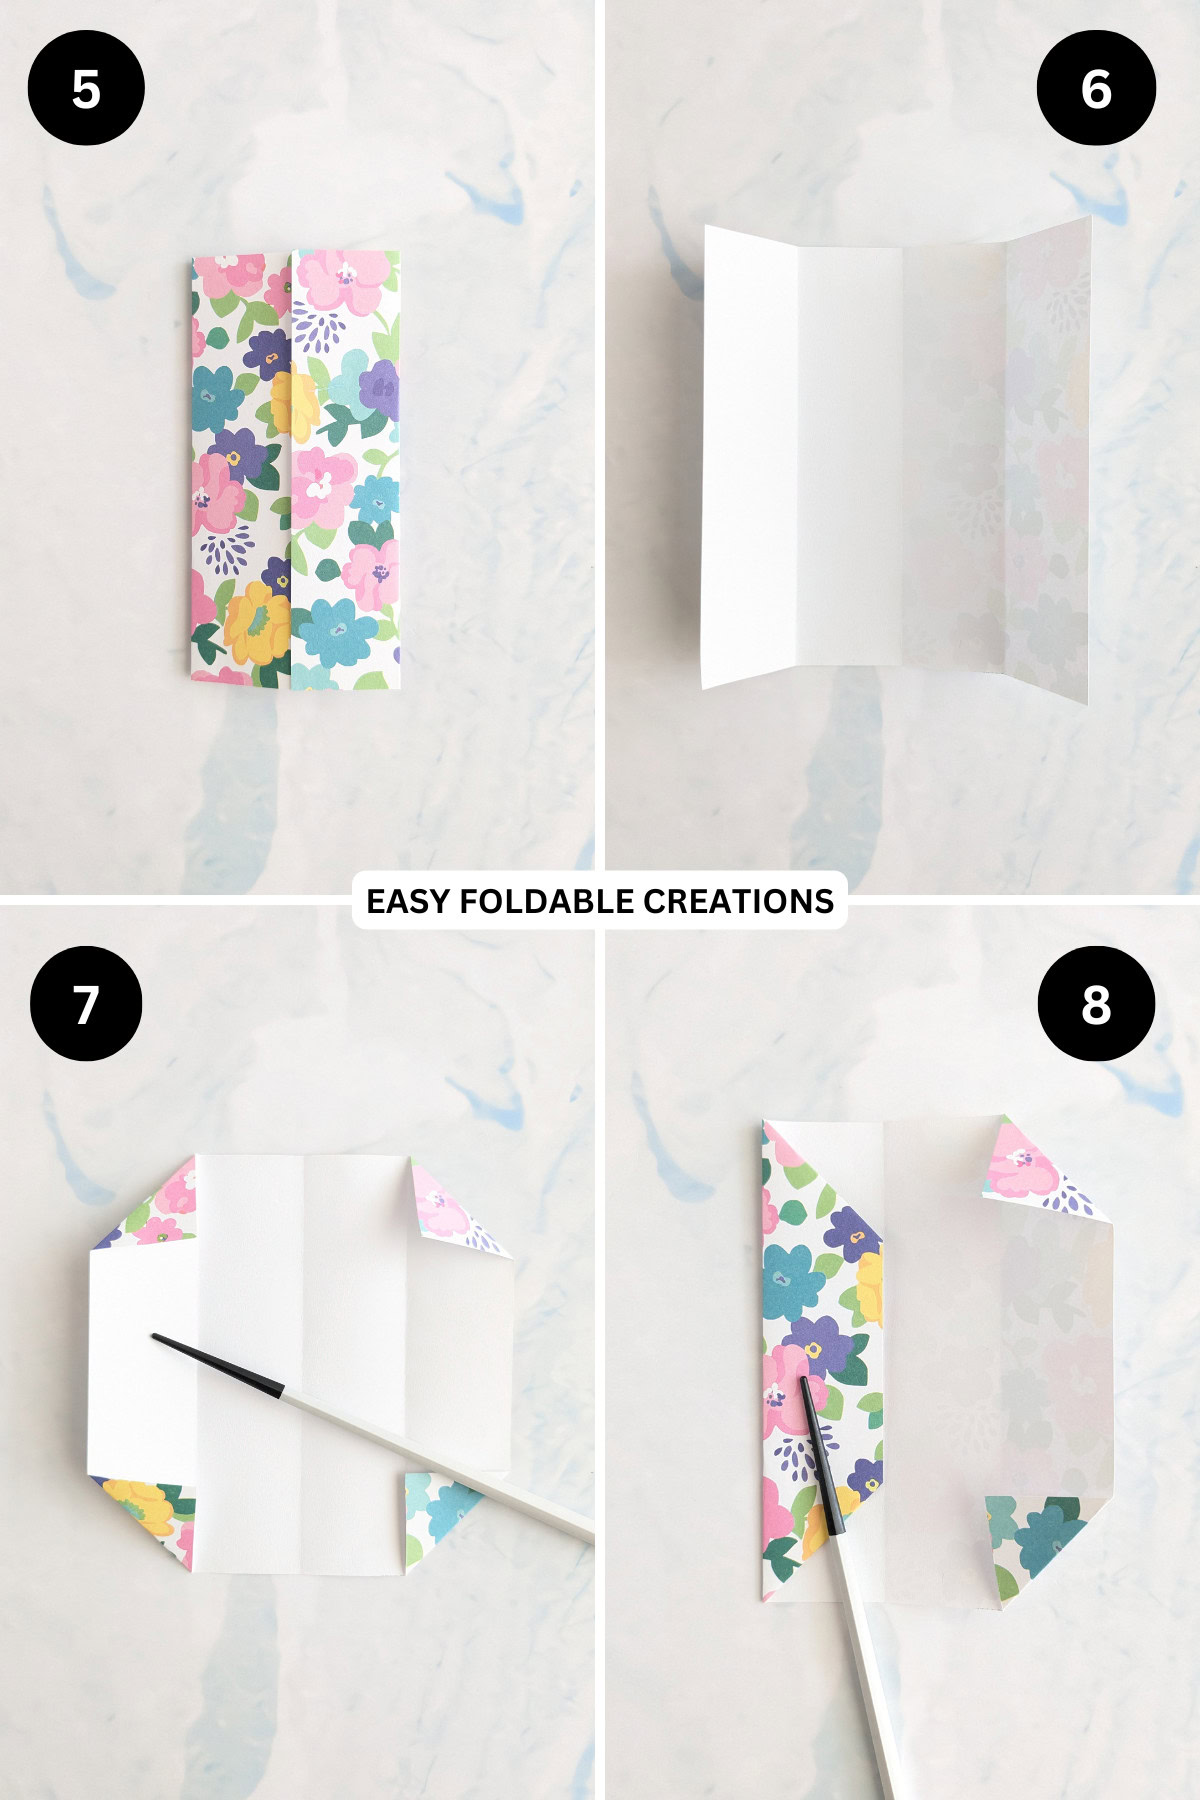
Step 5: Fold the right edge of the paper to the middle crease.
Step 6: Unfold previous 2 steps.
Step 7: Fold each of the corners of the paper in to meet the nearest crease.
Step 8: Fold the left flap in to meet the centre crease.
✨ You're almost there! ✨
To unlock the final steps of the photo tutorial and complete your pattern, create a free account with Grow.me. below.
Make sure you tick the box to subscribe to our newsletter and stay up to date with the latest patterns, tips, and more!
Once you're signed up, you'll get instant access to finish your project with the photo tutorial and enjoy exclusive content in the future.
Already signed up? Hit the button below and select 'Switch to Log In' to pick up where you left off and finish your project!
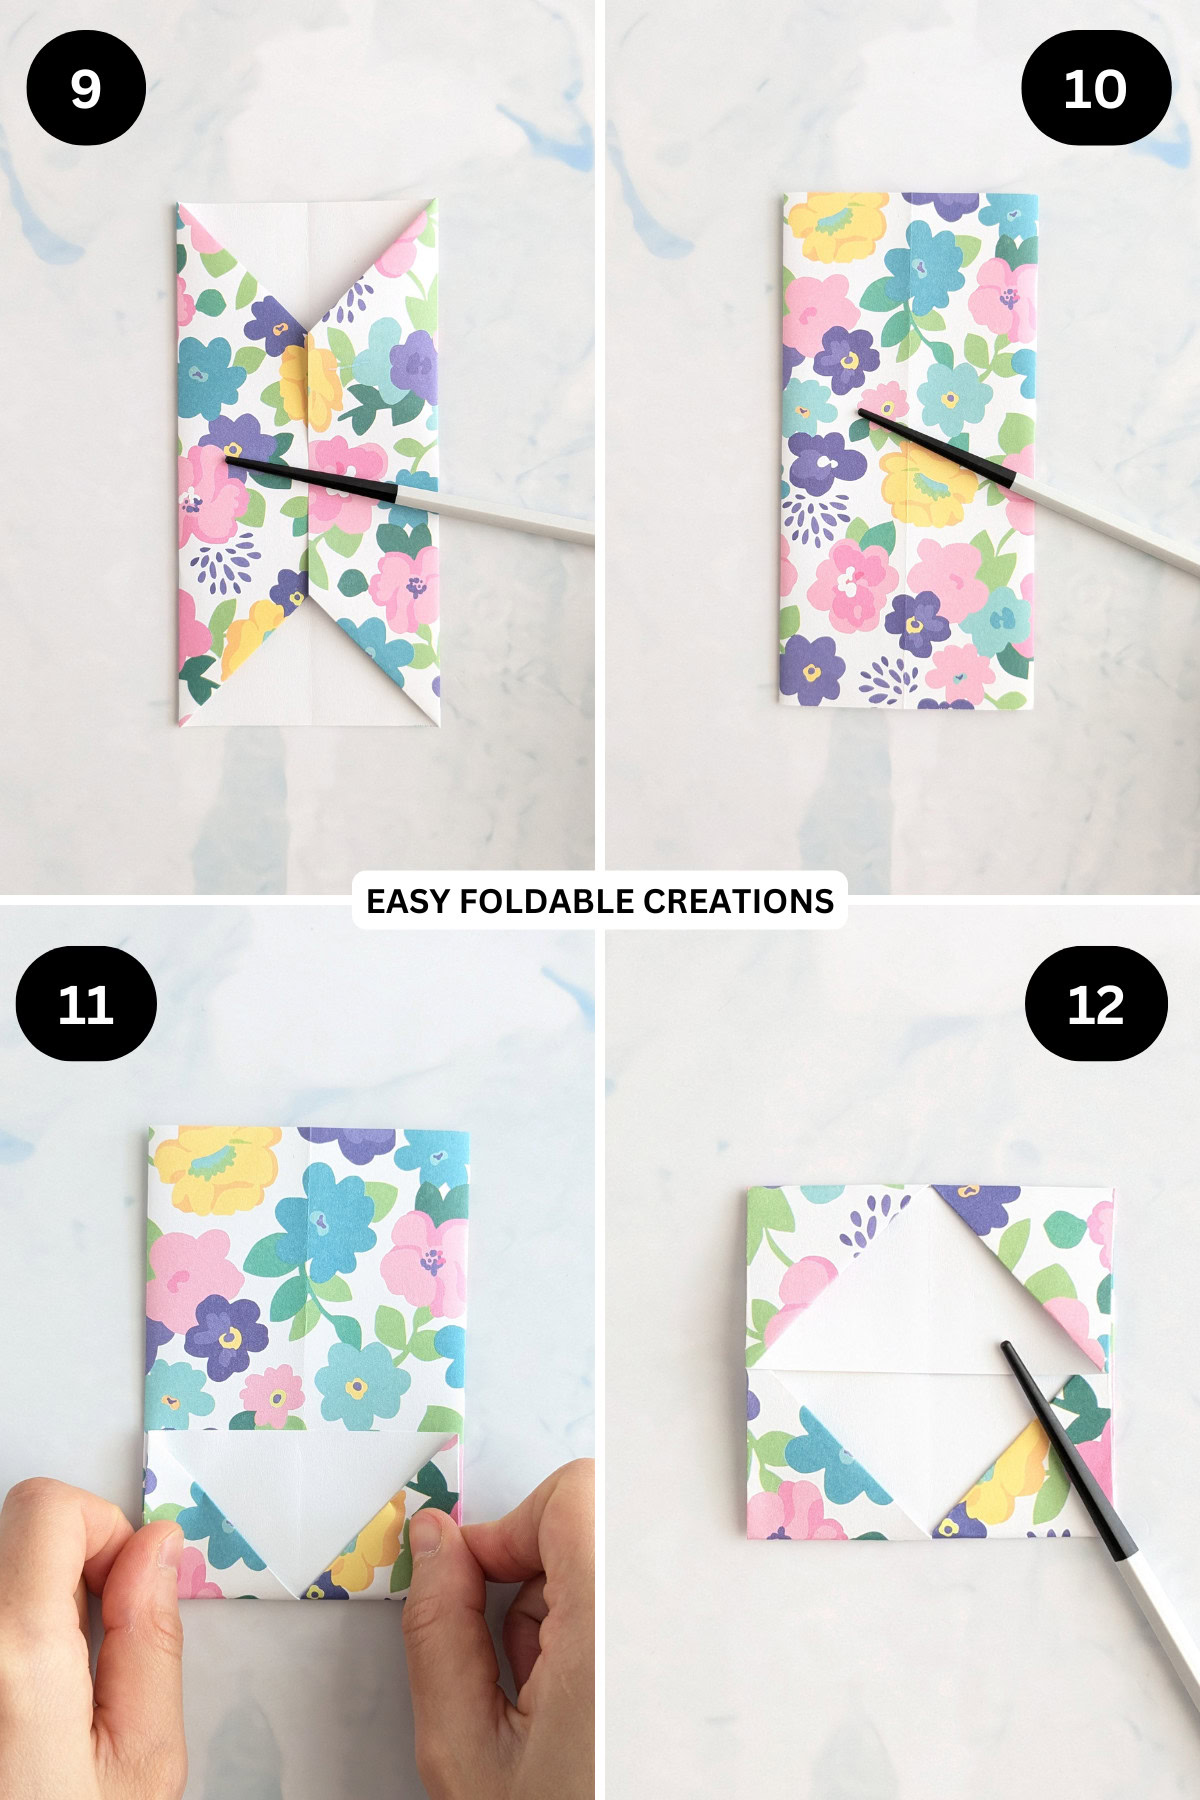
Step 9: Fold the right flap in to meet the centre crease.
Step 10: Flip your paper over from left to right.
Step 11: Fold the bottom edge up until the point of the diagonal edges meet at the fold. After this fold you should be able to see a triangle.
Step 12: Repeat previous step for top edge.
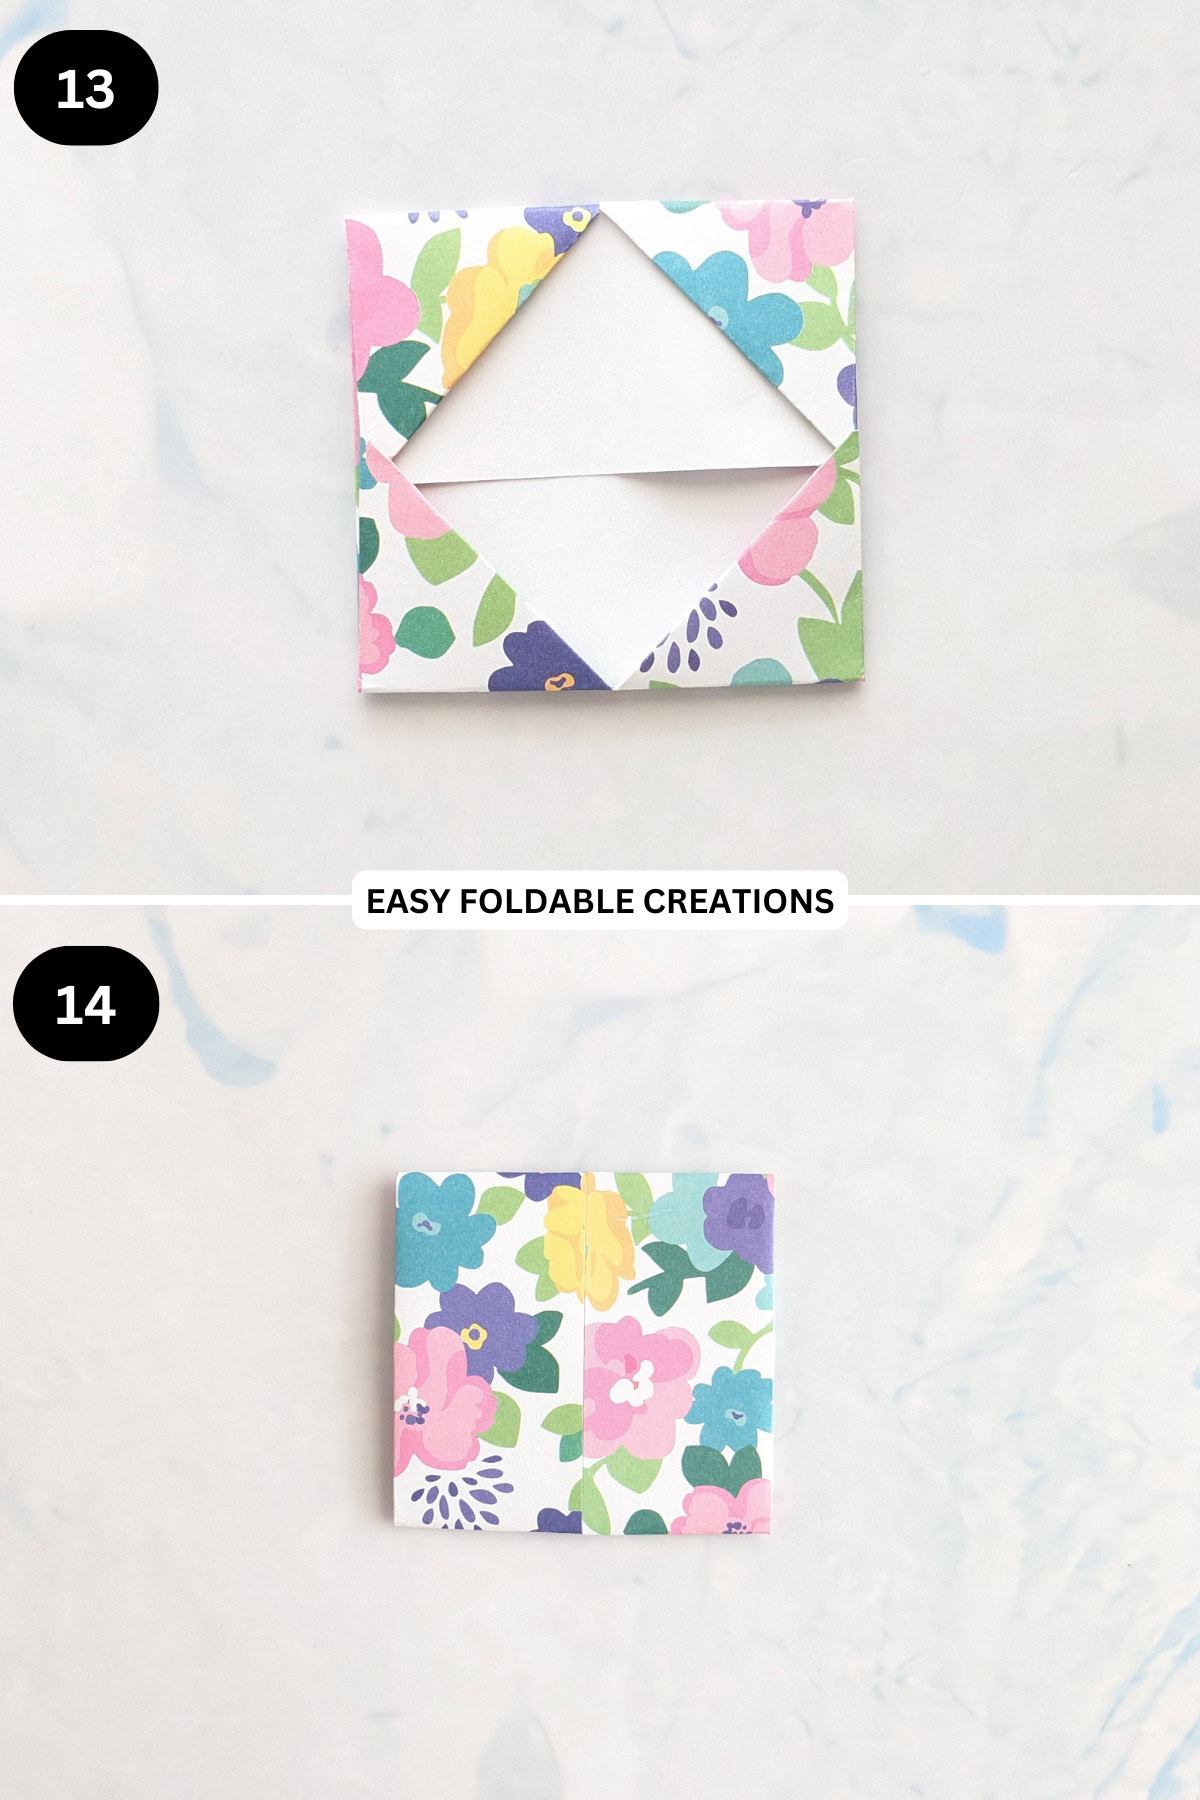
Step 13: Tuck the top edge you just folded inside the bottom edge. They should slightly overlap.
Step 14: Completed card holder. To use, slide in a gift card until it sits along the bottom edge, then fold in half. Tie with some string to hold it closed.
Tips For Success
- Smooth Folds - Ensure your folds are crisp and neat for a professional finish.
- Personalization - Consider decorating your holder with stickers or drawings for a unique touch.
- For a more durable paper card holder, use thicker paper like cardstock.

Common Mistakes & How To Avoid Them
Incorrect Measurements - Measure your paper accurately to ensure a proper fit for the cards.
Color, Paper Ideas, and Variations
Feel free to mix and match colors and patterns.
For special occasions, consider using themed paper. You can also create a holder that matches the gift card's design for a coordinated look.
FAQ
Yes! It's versatile enough for business cards and loyalty cards as well.
Other Crafts You Might Like To Try:
Helpful Origami Tips
If you're curious to learn more about origami, you might like to look at our basic guides on how to make some common origami folds.
Start with the valley fold and mountain fold-these are the foundation of most origami models.
Once you're comfortable, you might like to try the petal fold for 3D shapes, and explore the bird base and square base for more complex designs.
The water bomb base is also great for creating inflatable or geometric models, like this inflatable origami rabbit.
Useful Paper Craft Terms
Want to learn a little more about paper crafts and origami?
We've made this helpful printable just for you. It explains common terms and helpful tips you might come across when you are folding origami or making a paper craft project.
You can download the useful paper craft terms printable PDF here.
Stay Connected
Made this pattern? Let us know how it went in the comments below!
Pin this post - Pin now to take your paper crafting skills to the next level.
Share on Instagram or Facebook - Capture the beauty of your finished paper craft project and share it on Instagram or Facebook! Tag us @easyfoldablecreations so we can see your work!

Other Patterns You Might Like To Try:
Looking for other easy patterns like this? Try these:


Comments
No Comments