
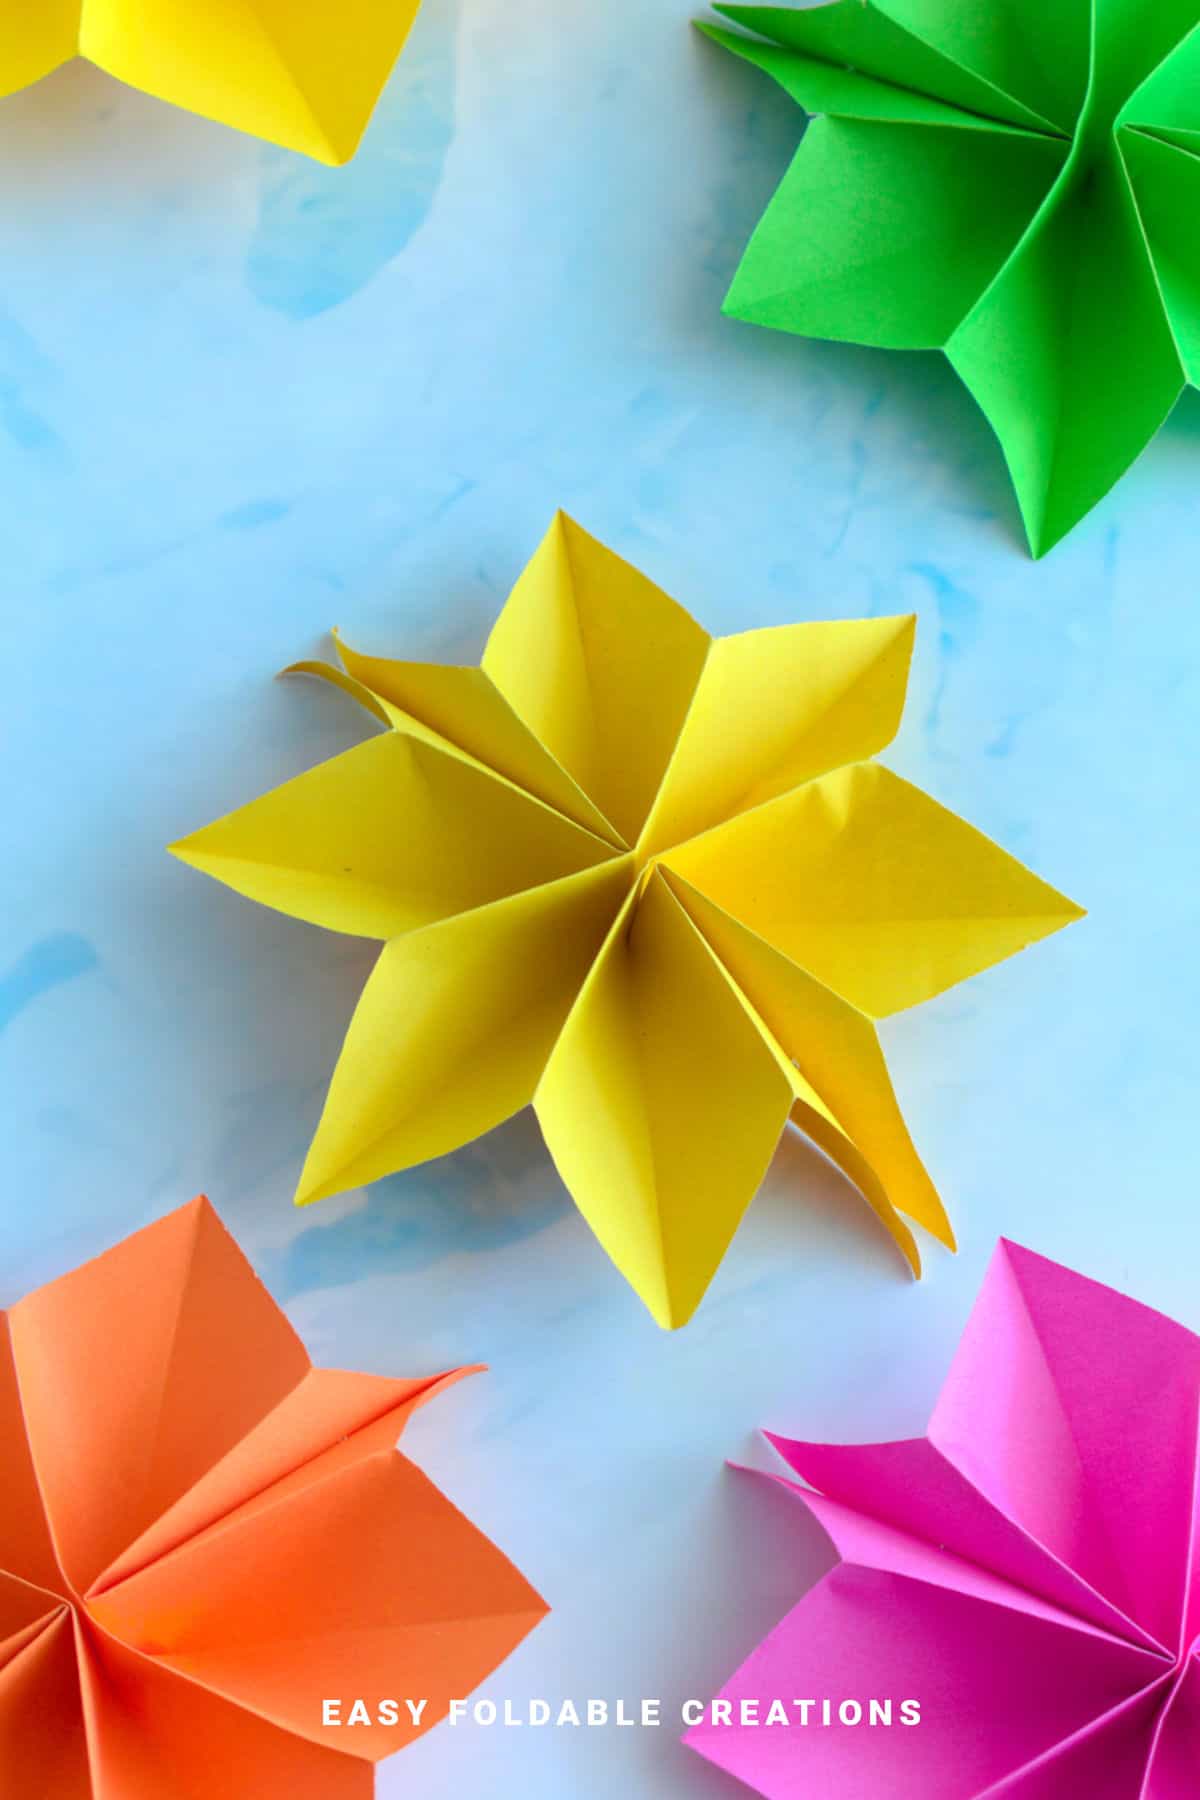
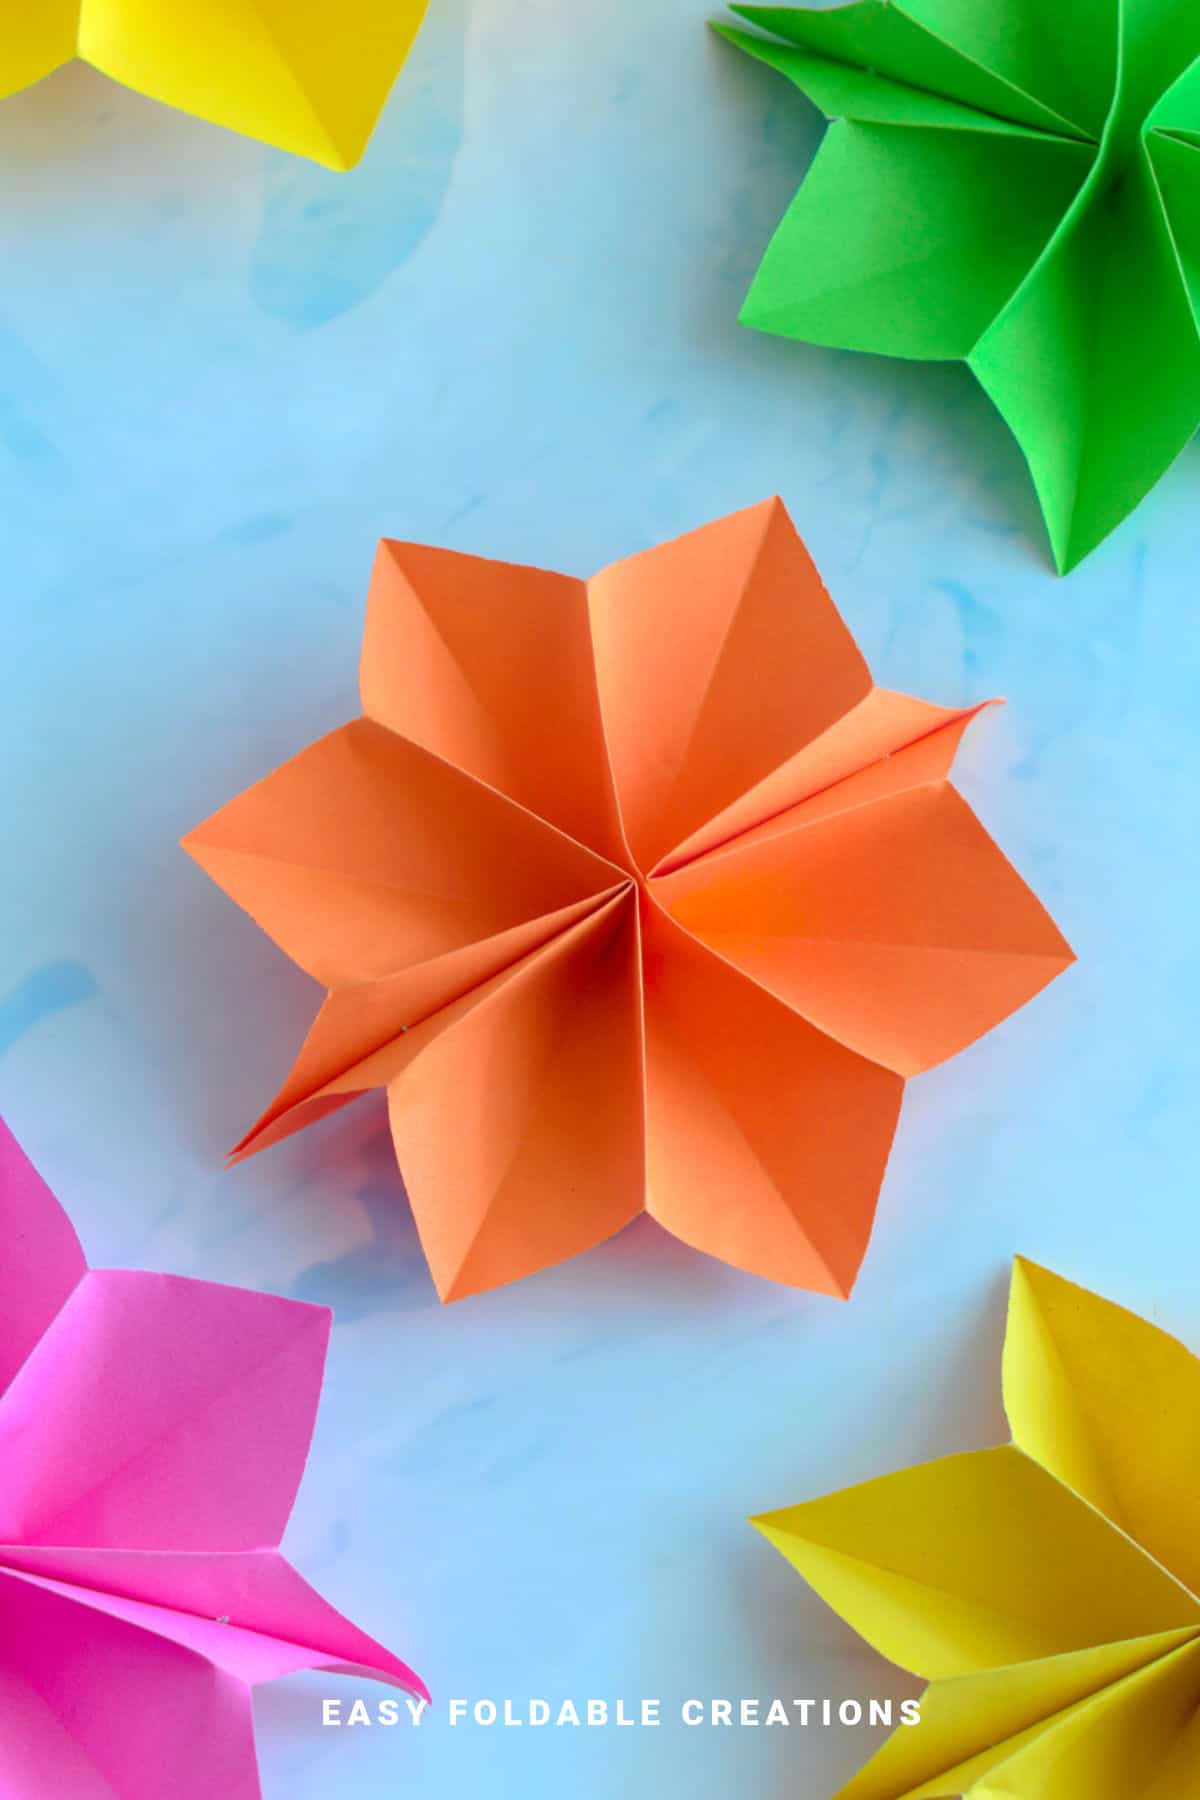
If you've ever wanted to make a classic paper star without having to cut lots of strips or use special tools, this is the tutorial for you!
This easy DIY tutorial uses just one standard sheet of paper - A4, A5, or U.S. letter size - and turns it into a crisp, beautiful pointed star with a bit of folding, cutting, and shaping.
Jump to:
- Why You'll Love This Pattern
- Exclusive Content Just For You
- Skill Level
- Materials Needed
- Instructions
- Tips For Success
- Common Mistakes & How To Avoid Them
- Color, Paper Ideas, and Variations
- FAQ
- Other Crafts You Might Like To Try:
- Helpful Origami Tips
- Useful Paper Craft Terms
- Stay Connected
- Other Patterns You Might Like To Try:
- Comments
Perfect for holiday decorating, school projects, DIY garlands, or just adding a fun paper craft to your weekend, this star is versatile and beginner-friendly.
It's a great project for all ages, whether you're decorating for Christmas, celebrating the New Year, or simply looking for a cute origami project that makes a big impact.
You can make your star from plain white paper, patterned paper, or metallic cardstock for extra sparkle.
Hang them as ornaments, string several together for a starry garland, or use them to top wrapped gifts.
Why You'll Love This Pattern
- No need for origami paper or special materials
- Quick to make and ideal for beginners
- Great for all seasons and occasions
- Uses just a few easy folds and cuts
- Can be made in different sizes
Exclusive Content Just For You
Not sure what you want to make next, but feeling a bit creative? Or maybe you've been searching for a pattern that sparks something new. We've got a few ideas waiting for you.
The Fold Collective, Easy Foldable Creations' community, provides you with a growing library of exclusive ad-free video tutorials, printable PDF patterns and more so you can improve your skills and enjoy crafting in your own time.
Skill Level
★☆☆☆☆ (Easy)
Materials Needed
- 1 sheet of paper (A4, A5, or U.S. letter size)
- Stapler
- Scissors
Optional:
- String or ribbon (for hanging)
- Glue or tape (for attaching to gifts or cards)
| Paper Size | Final Paper Star Size (approx.) | |
| Small Paper Star | A5 | 6 inches x 6 inches (15 cm x 15 cm) |
| Large Paper Star | A4 | 8.5 inches x 8.5 inches (22 cm x 22 cm) |
Instructions
Step 1: Start with the color you want your star to be on top facing down. Arrange your paper to sit vertically.
Step 2: Fold the bottom edge up to meet the top edge.
Step 3: Unfold previous step.
Step 4: Fold both the bottom edge and top edge in to meet the middle crease.
Step 5: Unfold previous step.
Step 6: Once again, fold both the bottom edge and top edge in but this time to meet their nearest creases (the ones you made in step 4).
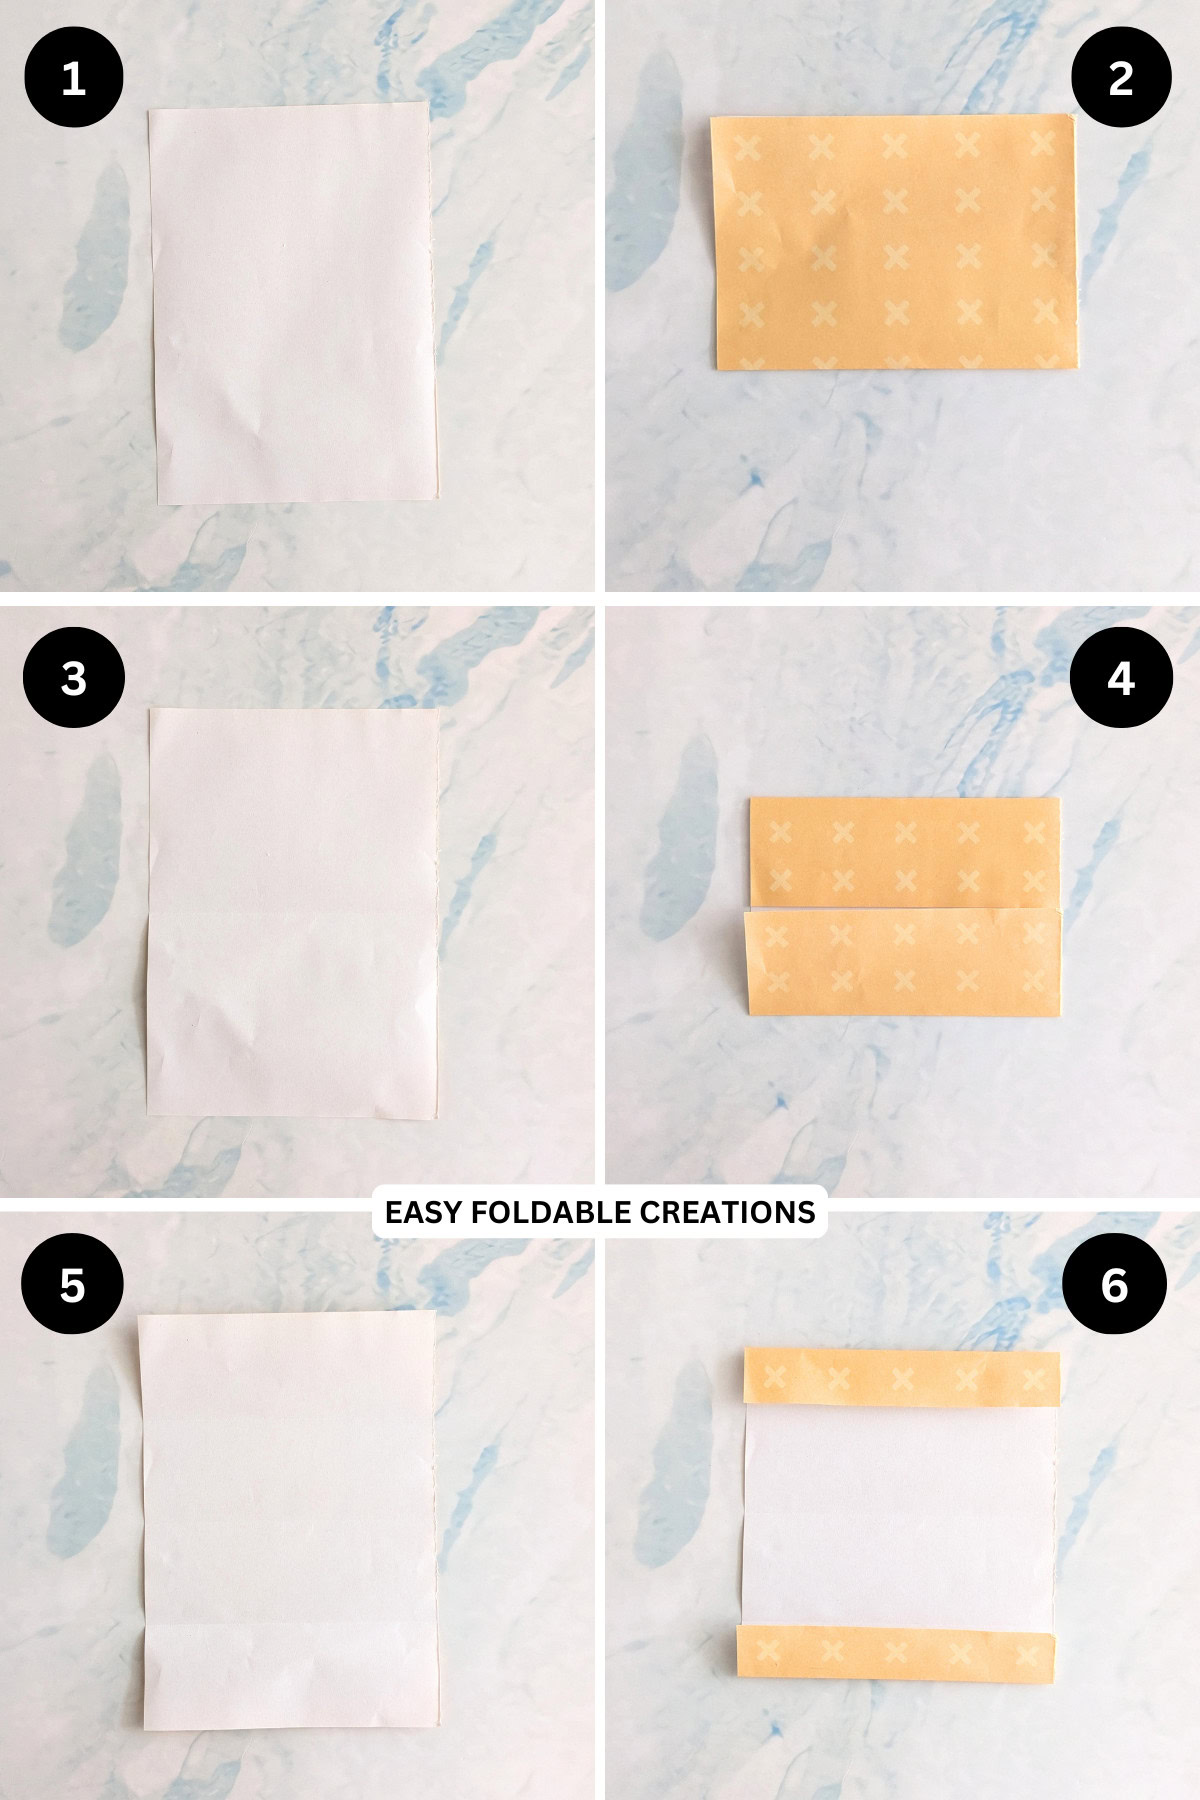
Step 7: Unfold the top edge.
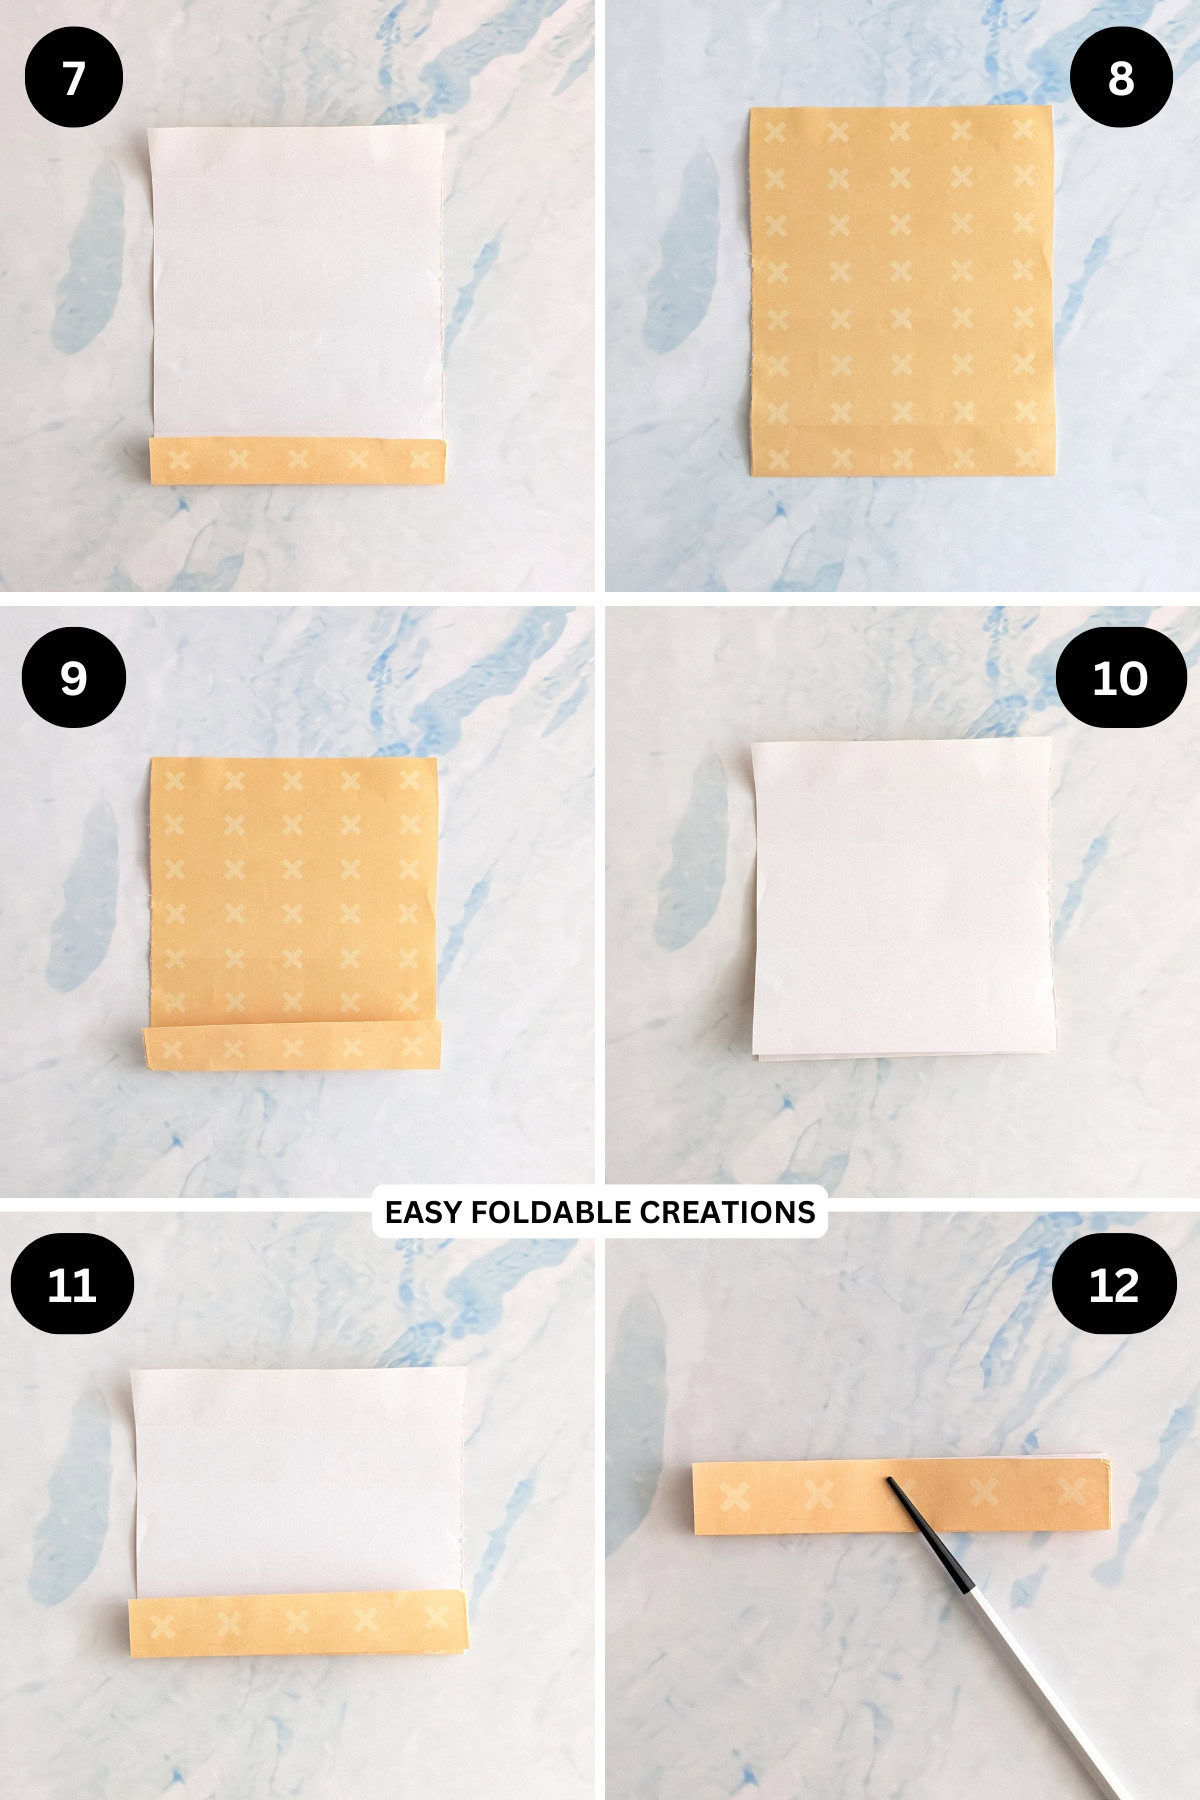
Step 8: Flip your paper over from left to right, keeping the folded edge at the bottom.
Step 9: Fold the bottom edge up along the existing crease line.
Step 10: Flip your paper over from left to right.
Step 11: Once again, fold the bottom edge up along the existing crease line.
Step 12: Repeat flipping and folding the bottom edge until you reach the top.
✨ You're almost there! ✨
To unlock the final steps of the photo tutorial and complete your pattern, create a free account with Grow.me. below.
Make sure you tick the box to subscribe to our newsletter and stay up to date with the latest patterns, tips, and more!
Once you're signed up, you'll get instant access to finish your project with the photo tutorial and enjoy exclusive content in the future.
Already signed up? Hit the button below and select 'Switch to Log In' to pick up where you left off and finish your project!
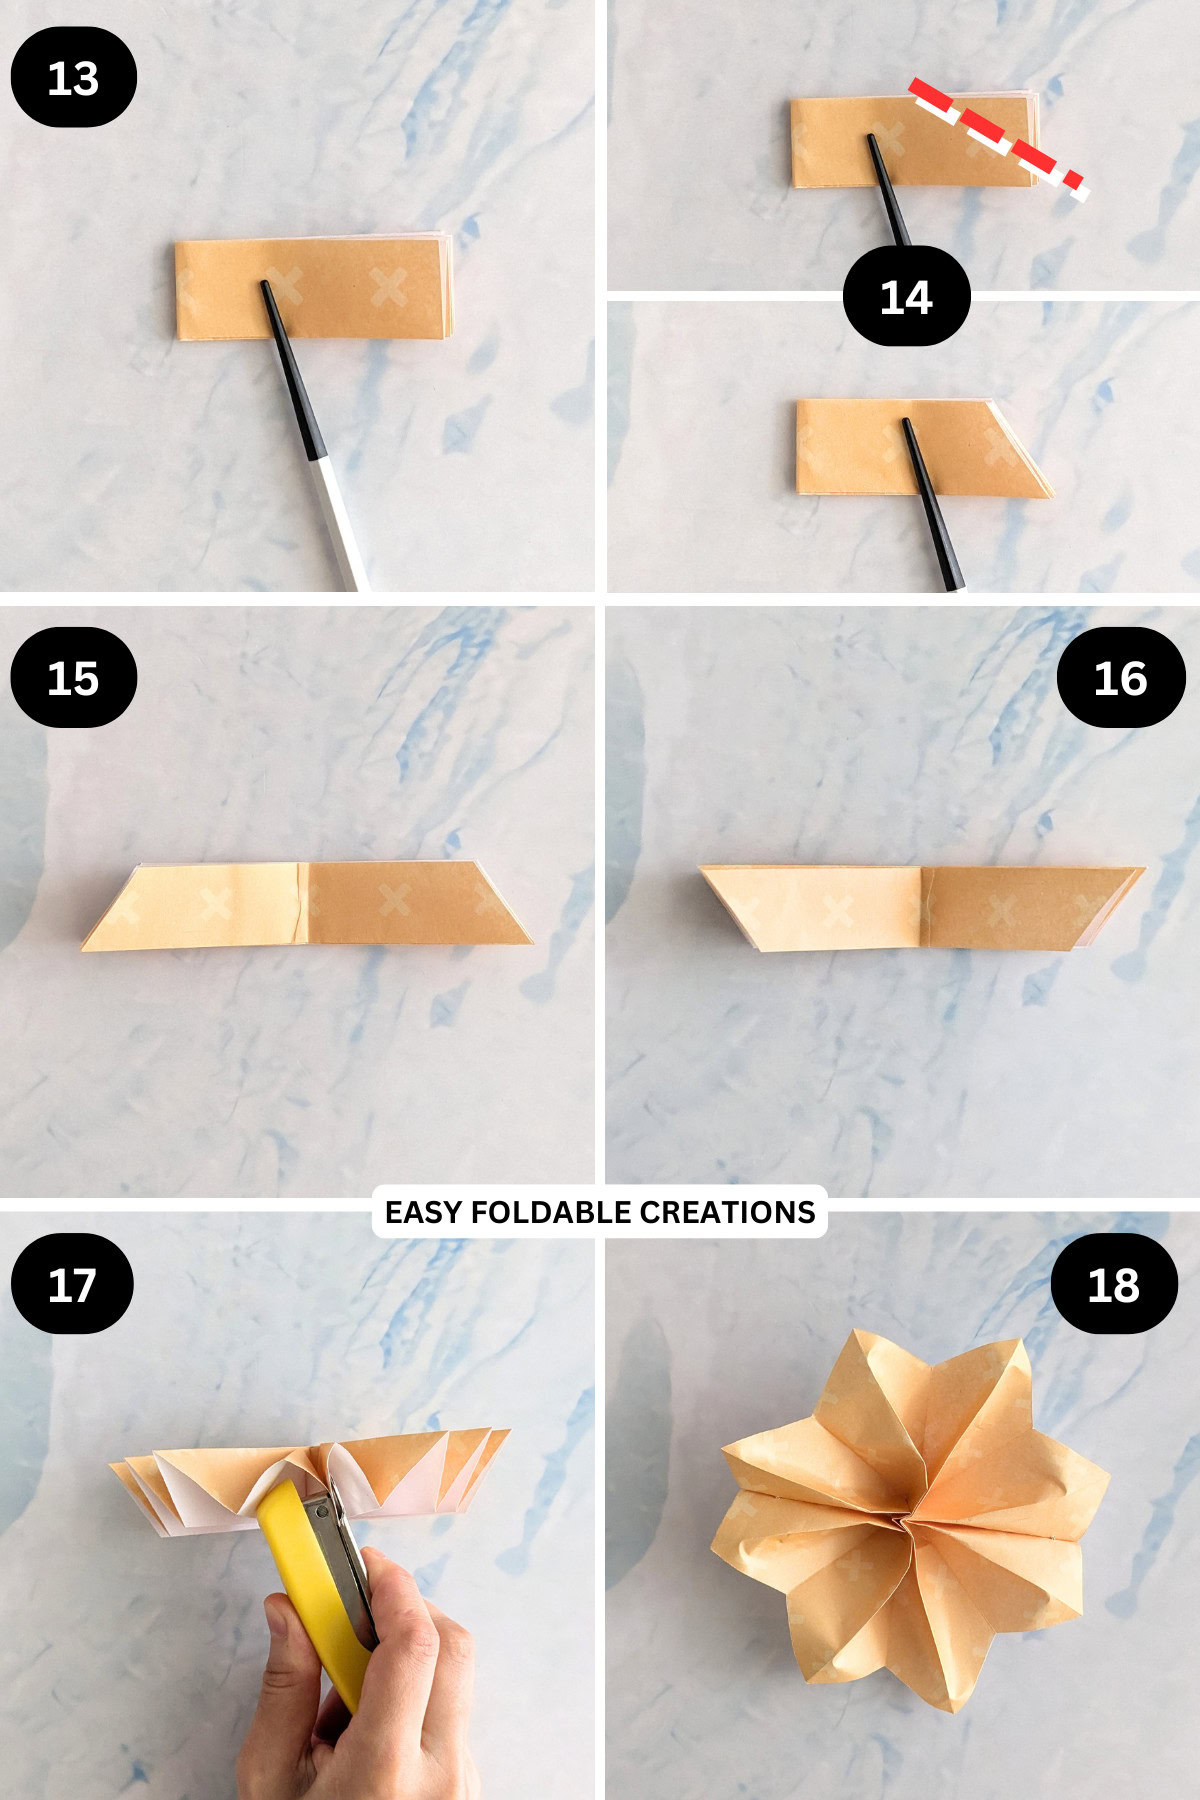
Step 13: Fold the left edge to meet the right edge.
Step 14: Holding all layers together firmly, cut along the line shown.
Step 15: Unfold step 13
Step 16: Rotate your paper 180 degrees.
Step 17: Hold the top edges together so that it stands as shown. Then, use a stapler to join the two layers together. Then, repeat previous step for the other side.
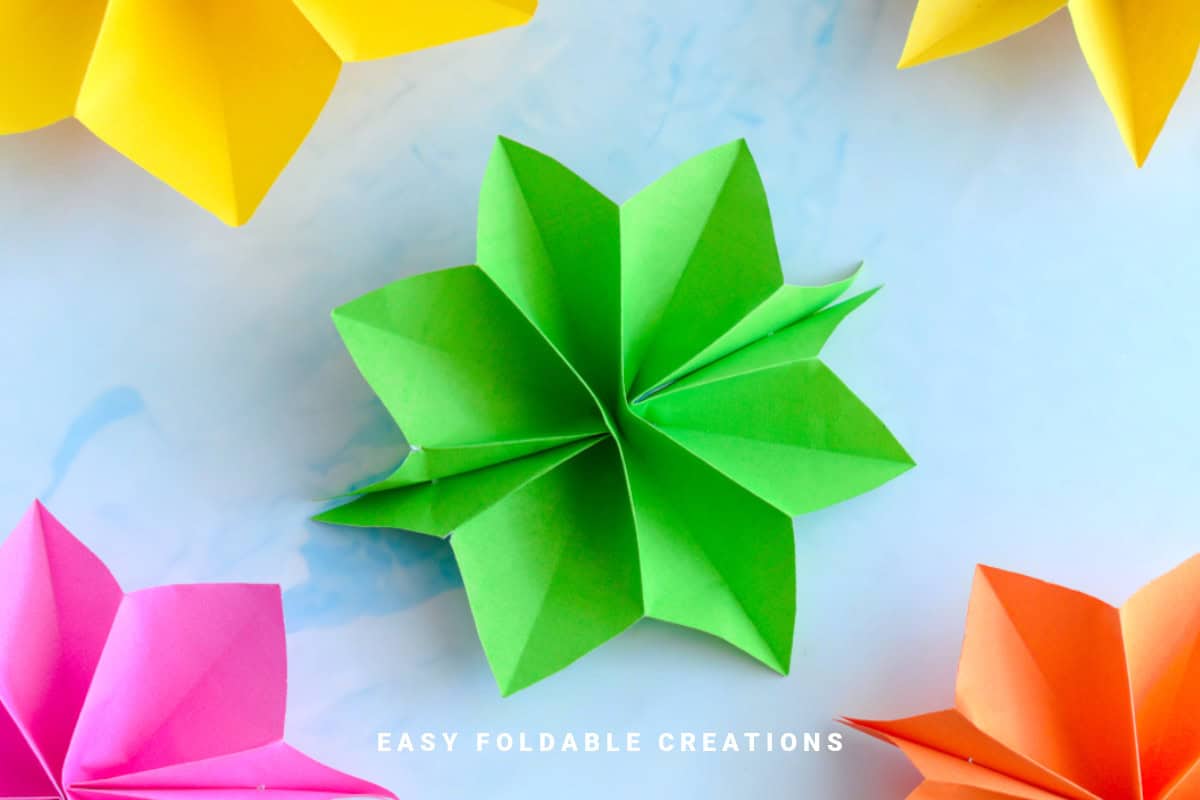
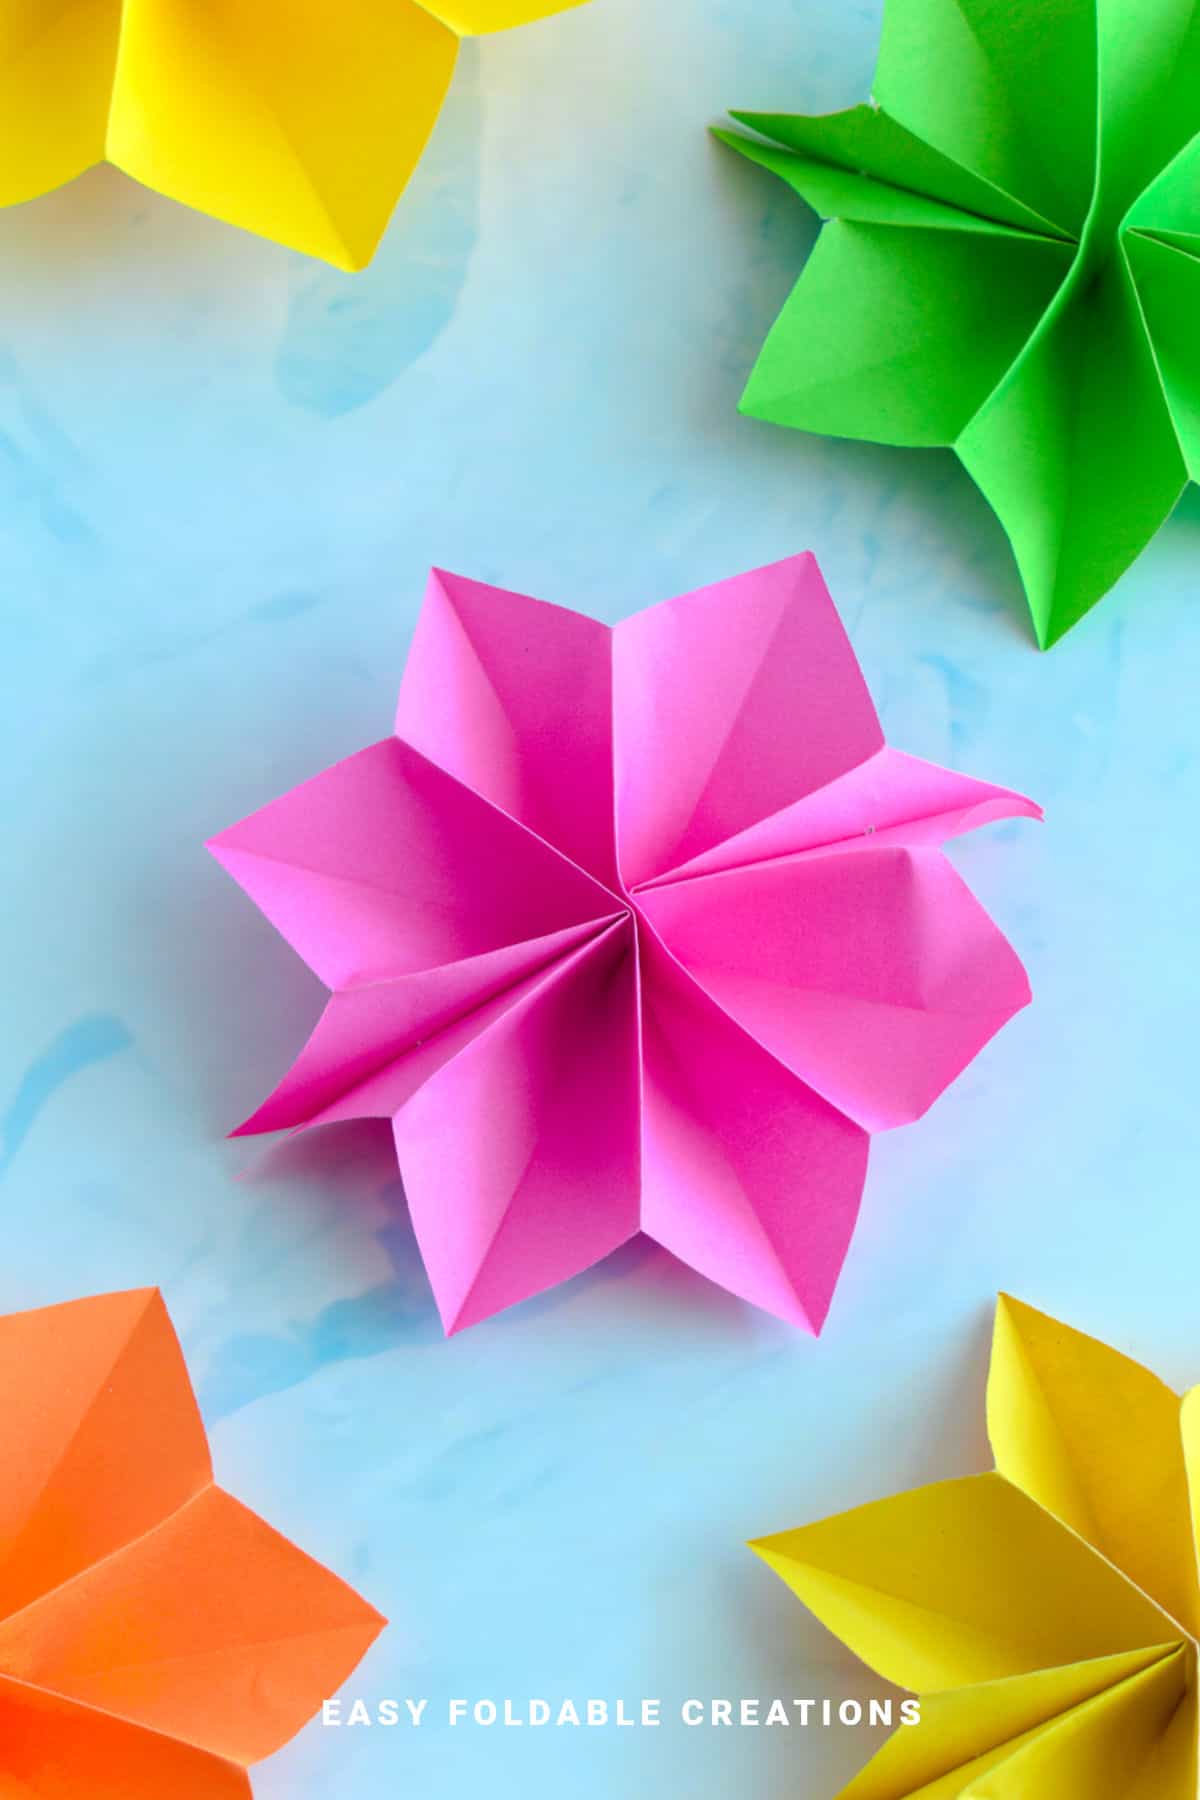
Step 18: Completed star.
Tips For Success
- Use lighter-weight paper for crisper folds
- Try metallic or glitter paper for a festive holiday look
- If you want a sturdier star, use cardstock and press your folds firmly
Common Mistakes & How To Avoid Them
- Uneven points - Make sure your initial folds are accurate before cutting
- Paper tearing - Use clean scissors and avoid over-folding the same crease
- Wobbly center - Keep folds symmetrical to ensure a balanced shape
Color, Paper Ideas, and Variations
- Gold or silver foil paper - Stunning for New Year's Eve decorations
- Patterned paper - Adds fun visual texture for birthday or party decor
- Classic white - Understated and elegant for a winter theme
- Pastels - Beautiful for Easter or springtime crafts
- Red and green - A must for Christmas garlands and ornaments
FAQ
Definitely! Just punch a small hole in one point and string several stars together.
Standard printer paper works well. For a more durable star, try thin cardstock.
Hang them on the tree, tape them to walls or windows, decorate gifts, or even use them as party favors.
Other Crafts You Might Like To Try:
Helpful Origami Tips
If you're curious to learn more about origami, you might like to look at our basic guides on how to make some common origami folds.
Start with the valley fold and mountain fold-these are the foundation of most origami models.
Once you're comfortable, you might like to try the petal fold for 3D shapes, and explore the bird base and square base for more complex designs.
The water bomb base is also great for creating inflatable or geometric models, like this inflatable origami rabbit.
Useful Paper Craft Terms
Want to learn a little more about paper crafts and origami?
We've made this helpful printable just for you. It explains common terms and helpful tips you might come across when you are folding origami or making a paper craft project.
You can download the useful paper craft terms printable PDF here.
Stay Connected
Made this pattern? Let us know how it went in the comments below!
Pin this post - Pin now to take your paper crafting skills to the next level.
Share on Instagram or Facebook - Capture the beauty of your finished paper craft project and share it on Instagram or Facebook! Tag us @easyfoldablecreations so we can see your work!
Other Patterns You Might Like To Try:
Looking for other easy patterns like this? Try these:
- Beautiful Wedding Gift Wrapping Ideas
- Creative Origami Ideas For Weddings
- DIY Paper Flowers for Wedding Decorations
- DIY Paper Wedding Favor Ideas Guests Will Love
- Easy Paper Crafts for Weddings
- DIY Wedding Favor Boxes and Bags
- DIY Paper Wedding Decorations for Your Big Day
- Wedding Napkin Folding Ideas For Elegant Tables


Comments
No Comments