
This easy origami ghost is a fun and simple paper craft that's perfect for Halloween.
With just one square sheet of paper and a few folds, you can create a friendly ghost that's ideal for cards, decorations, or spooky garlands.

Jump to:
Looking for a quick and adorable Halloween craft?
This easy origami ghost is the perfect paper project for kids and adults to enjoy together.
With only one square sheet of paper and no scissors or glue required, you can fold a cute little ghost in minutes.
Whether you're decorating for a Halloween party, making DIY treat bag toppers, or crafting a garland to hang across the mantel, this origami ghost adds a handmade touch to your spooky celebrations.
This step by step origami tutorial is beginner-friendly, making it great for classrooms, family craft nights, or even a relaxing autumn afternoon activity.
Paper crafts like this are not only fun but also a fantastic way to get creative using materials you already have at home.
Once you've mastered this ghost, try making a whole family of them with different expressions for extra Halloween charm!

Why You'll Love This Pattern
- A quick and easy origami ghost tutorial perfect for beginners
- No scissors or glue needed-just a square sheet of paper
- Great for kids and adults to make together
- Perfect as Halloween décor, party favors, or card embellishments
- A relaxing paper craft you can finish in minutes
Skill Level
★★☆☆☆ (Easy)
Materials Needed
- 1 square sheet of origami paper (or cut regular paper into a square)
- Black marker (for drawing the ghost's face)
- Optional: String or tape if you want to hang it up
Instructions
Step 1: Start with the color you want your ghost to be facing down. The color facing up will be on the inside. Arrange your paper to sit like a diamond shape. Our ghost will be white since we are using paper that is white on one side and orange on the other.
Step 2: Fold the left point to meet the right point.
Step 3: Unfold previous step.
Step 4: Fold the bottom point up to meet the top point.
Step 5: Unfold previous step.
Step 6: Fold both the top left and top right edges in to meet the middle crease.

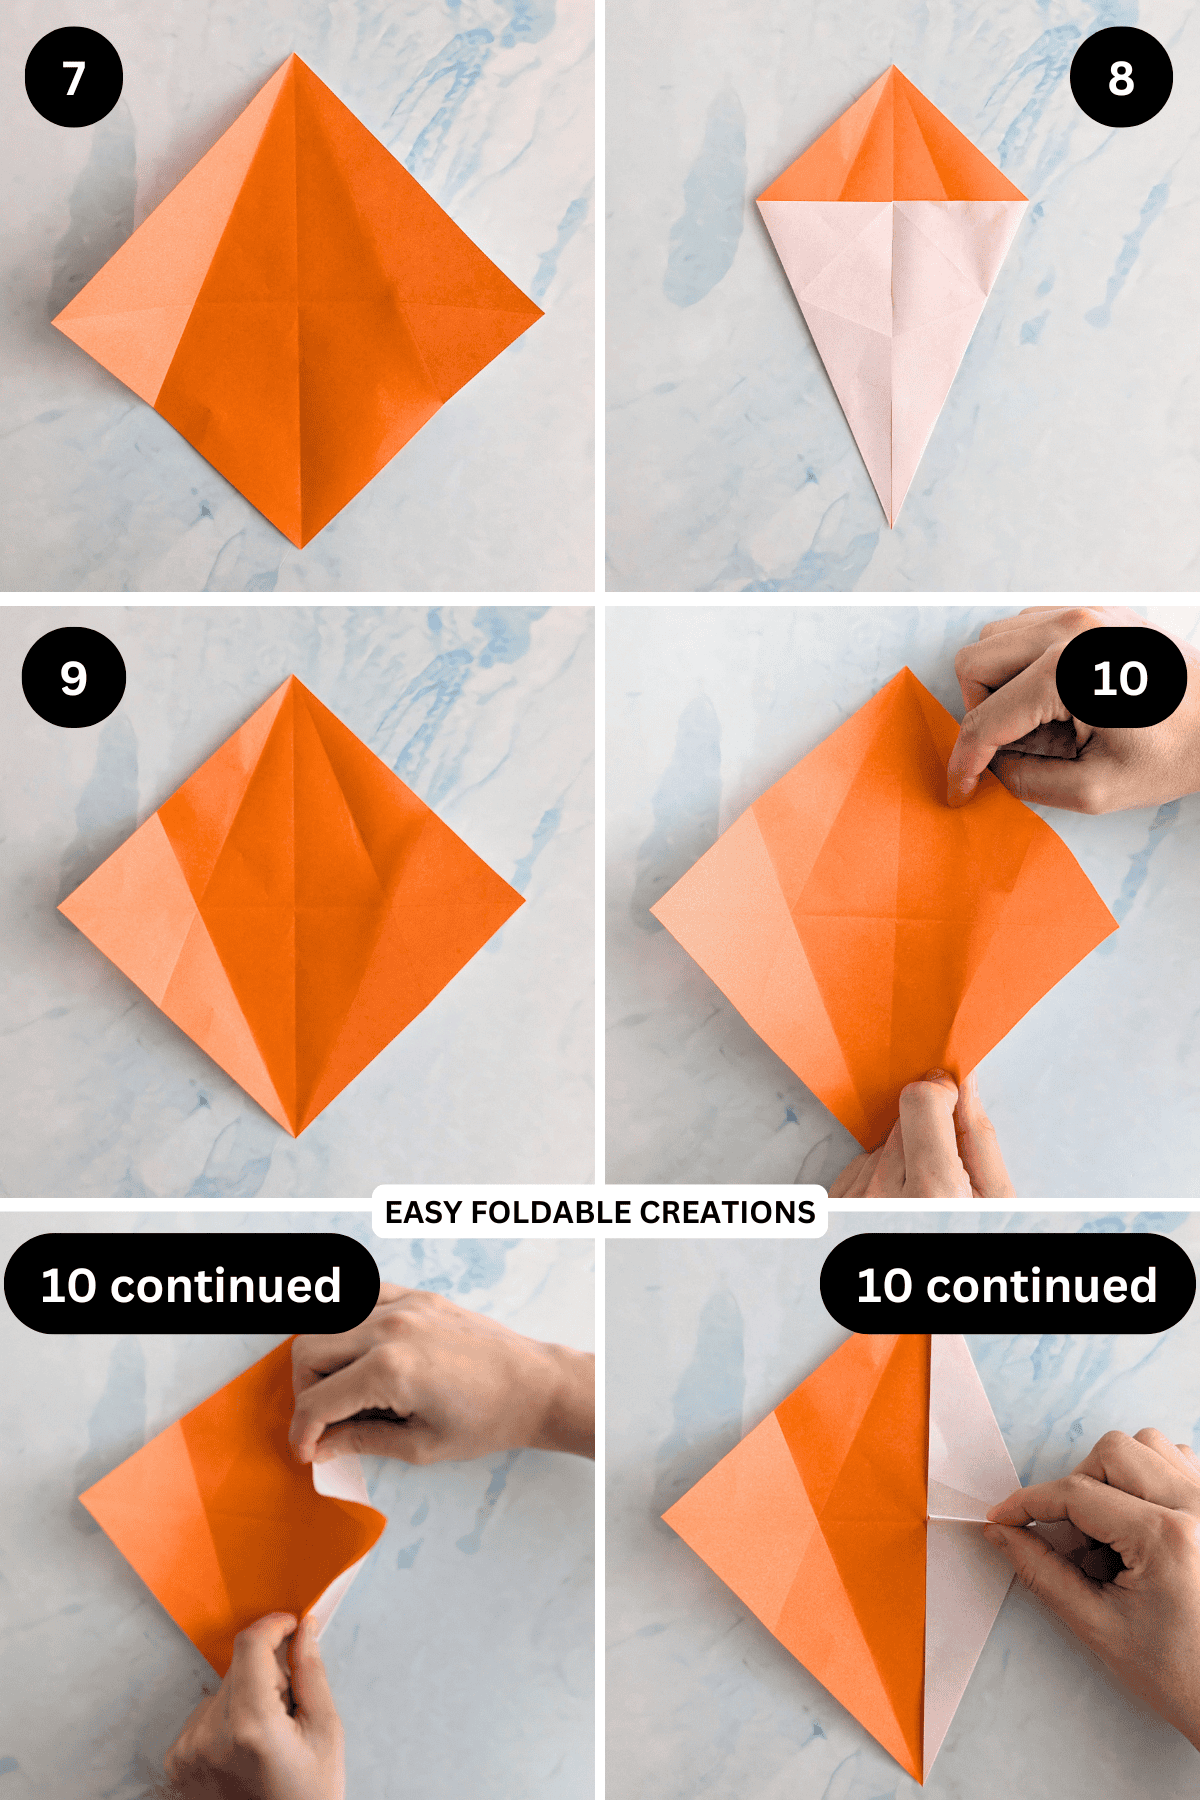
Step 7: Unfold previous step.
Step 8: This time, fold both the bottom left and bottom right edges in to meet the middle crease.
Step 9: Unfold previous step.
Step 10: Hold the upper right and lower right edges as shown. Then, lift them along the creases you made in the previous steps. The paper will start to collapse on itself as shown. Bring both edges together as shown.
✨ You're almost there! ✨
To unlock the final steps and complete your pattern, create a free account with Grow.me. below.
Make sure you tick the box to subscribe to our newsletter and stay up to date with the latest patterns, tips, and more!
Once you're signed up, you'll get instant access to finish your project and enjoy exclusive content in the future.
Already signed up? Hit the button below and select 'Switch to Log In' to pick up where you left off and finish your project!
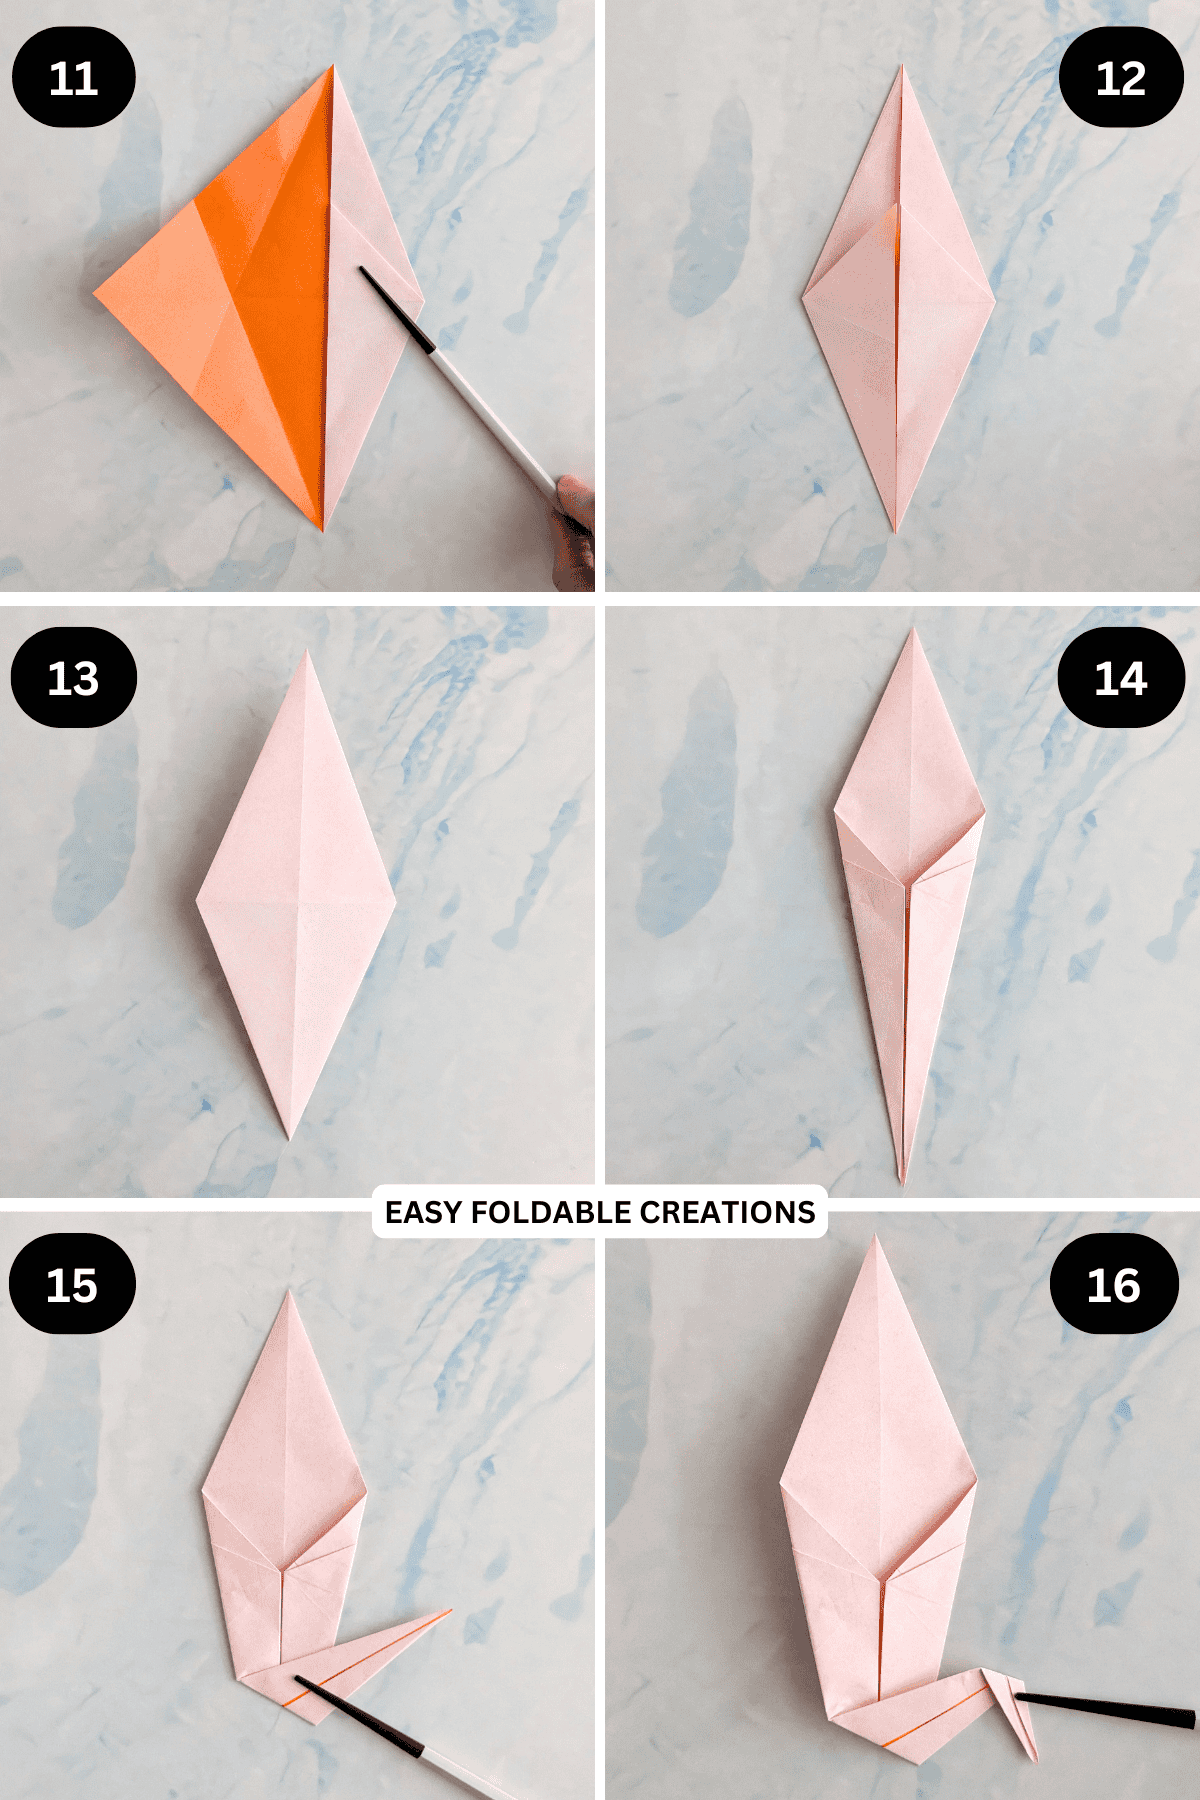
Step 11: Fold the upper flap that you formed in the previous step up so that it now lies flat.
Step 12: Repeat steps 10 and 11 for the left side.
Step 13: Flip your paper over from left to right.
Step 14: Fold the bottom left and bottom right edges in to meet the middle crease.
Step 15: Fold the bottom point up on a diagonal as shown.
Step 16: Fold that same point down slightly at the tip.
Step 17: Fold the top point down slightly.
Step 18: Flip your paper over from left to right.
Step 19: Fold the top flaps in the middle down slightly to form your ghosts hands. Then, draw a face on your ghost.
Step 20: Completed origami ghost.

Tips For Success
- Use lightweight paper for crisper folds and smoother results.
- Add different expressions to give each ghost its own personality-happy, surprised, or spooky!
- Make a garland by folding several ghosts and attaching them to twine.
- Try glow-in-the-dark paper for a fun effect at night.

Color, Paper Ideas, and Variations
- Classic ghost: White paper with black eyes and mouth for a traditional look.
- Pastel version: Use light pink or blue paper for a softer, cute ghost.
- Mini ghosts: Create tiny versions to use as table scatter or cupcake toppers.
- Garland idea: Make a string of ghosts to hang across windows or doorways for a festive touch.
FAQ
Yes! It's a very easy design that's great for children, though younger kids may need help with the folds.
Definitely. Just cut it into a perfect square for best results.
No, this is a flat design that's perfect for hanging or gluing onto cards and bags.
Other Paper Crafts You Might Like To Try:
Helpful Origami Tips
If you're curious to learn more about origami, you might like to look at our basic guides on how to make some common origami folds.
Start with the valley fold and mountain fold-these are the foundation of most origami models.
Once you're comfortable, you might like to try the petal fold for 3D shapes, and explore the bird base and square base for more complex designs.
The water bomb base is also great for creating inflatable or geometric models, like this inflatable origami rabbit.
Stay Connected
Made this pattern? Let us know how it went in the comments below!
Pin this post - Pin now to take your paper crafting skills to the next level.
Share on Instagram or Facebook - Capture the beauty of your finished paper craft project and share it on Instagram or Facebook! Tag us @easyfoldablecreations so we can see your work!

Other Patterns You Might Like To Try:
Looking for other easy patterns like this? Try these:


Comments
No Comments