
This pocket leaf napkin folding idea is a beautiful yet practical touch for your holiday or special occasion table, from Christmas and Thanksgiving to weddings and birthdays.
Use double-sided or two layered napkins for a stylish contrast.
Jump to:
- Why You'll Love This Pattern
- Exclusive Content Just For You
- Skill Level
- Materials Needed
- Instructions
- Tips For Success
- Common Mistakes & How To Avoid Them
- Color, Paper Ideas, and Variations
- FAQ
- Other Crafts You Might Like To Try:
- Helpful Origami Tips
- Useful Paper Craft Terms
- Stay Connected
- Other Patterns You Might Like To Try:
- Comments
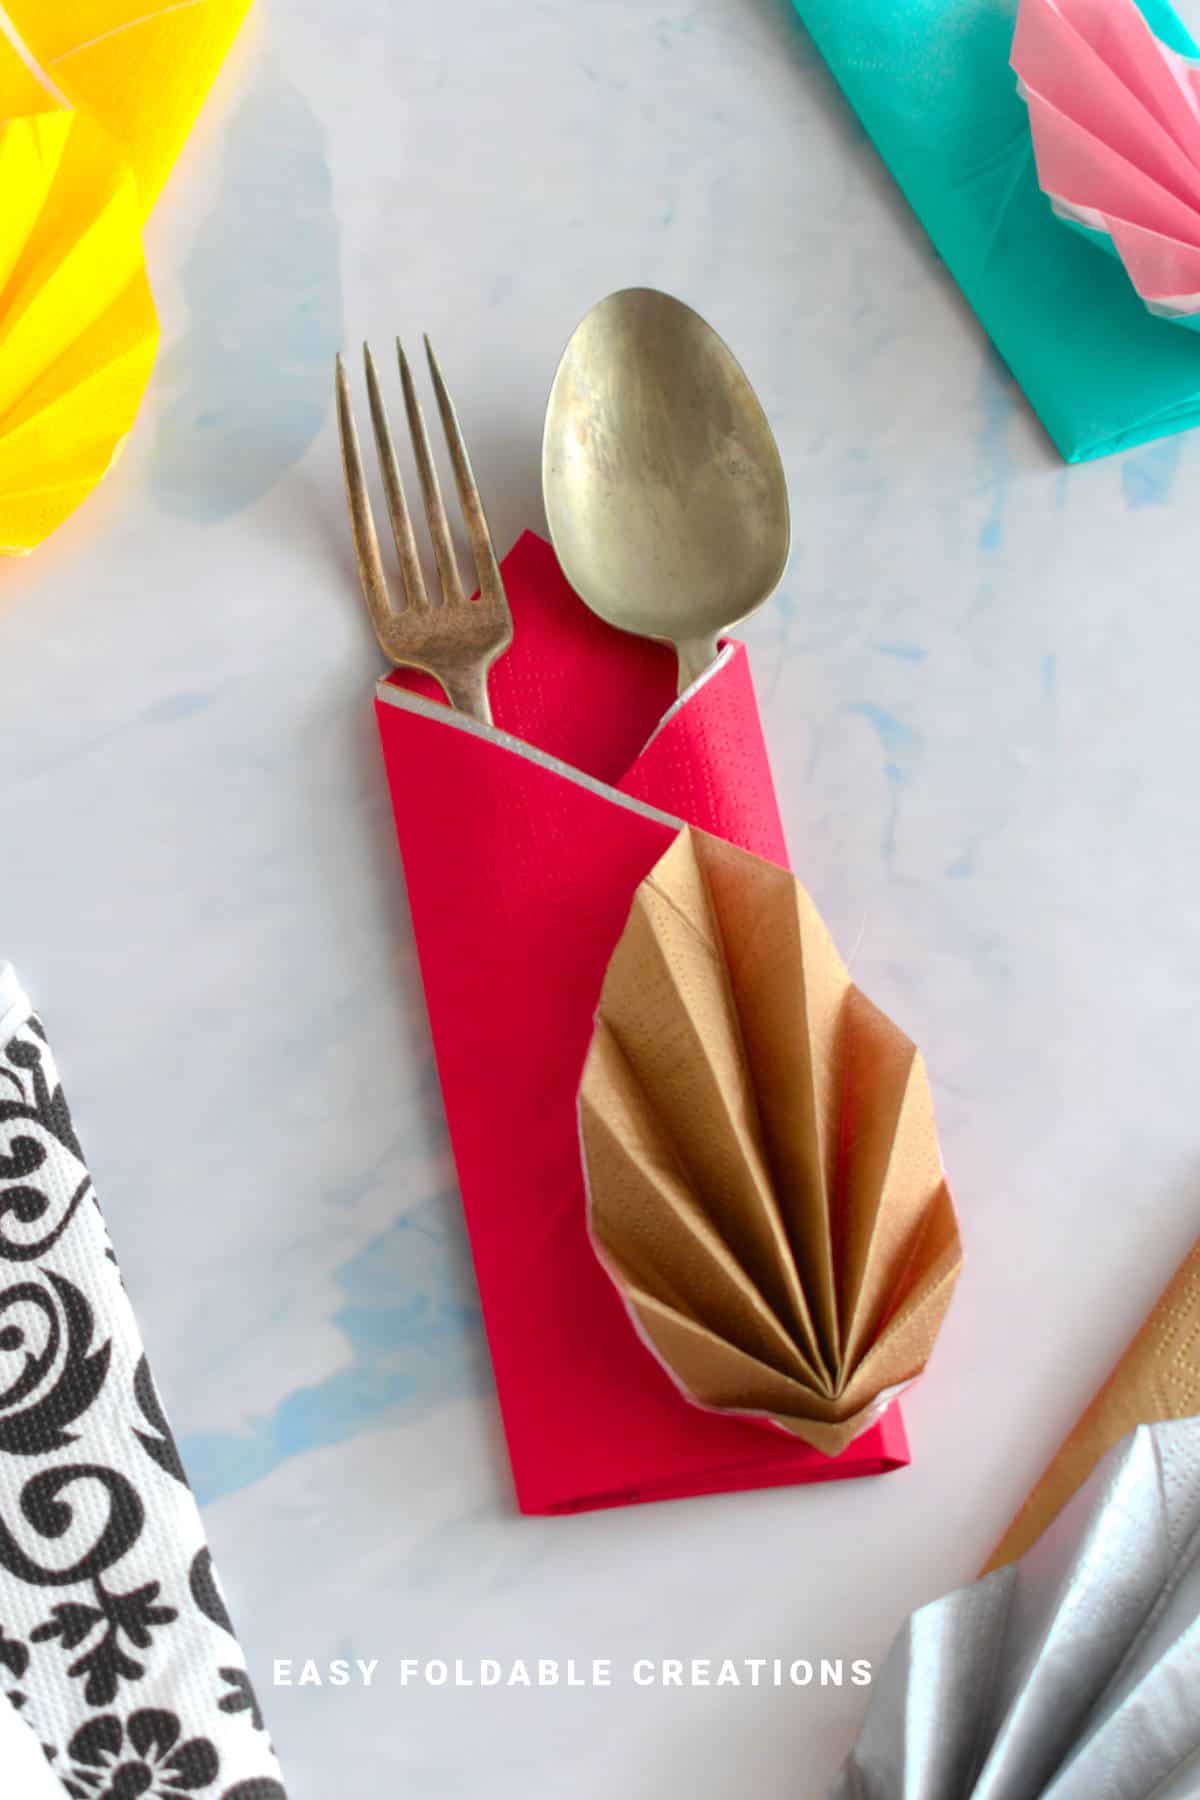
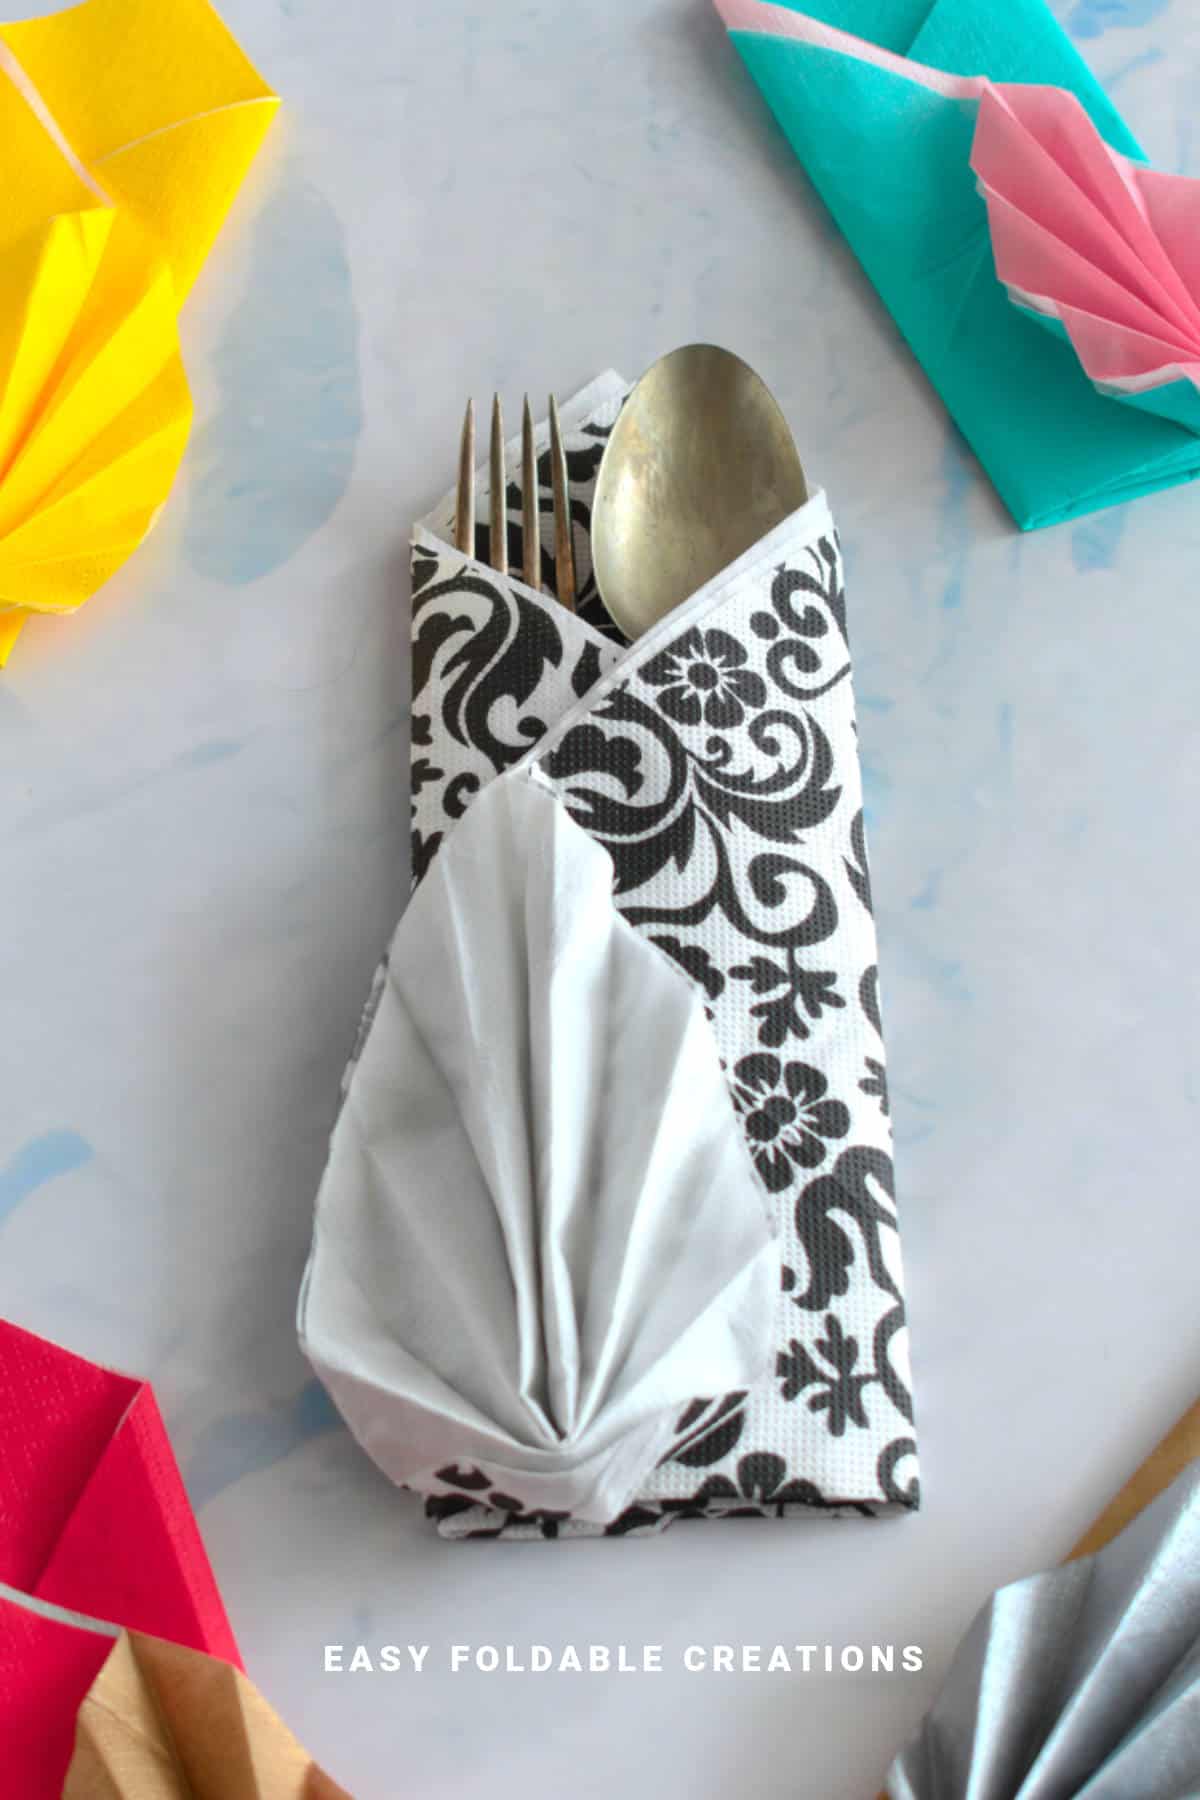
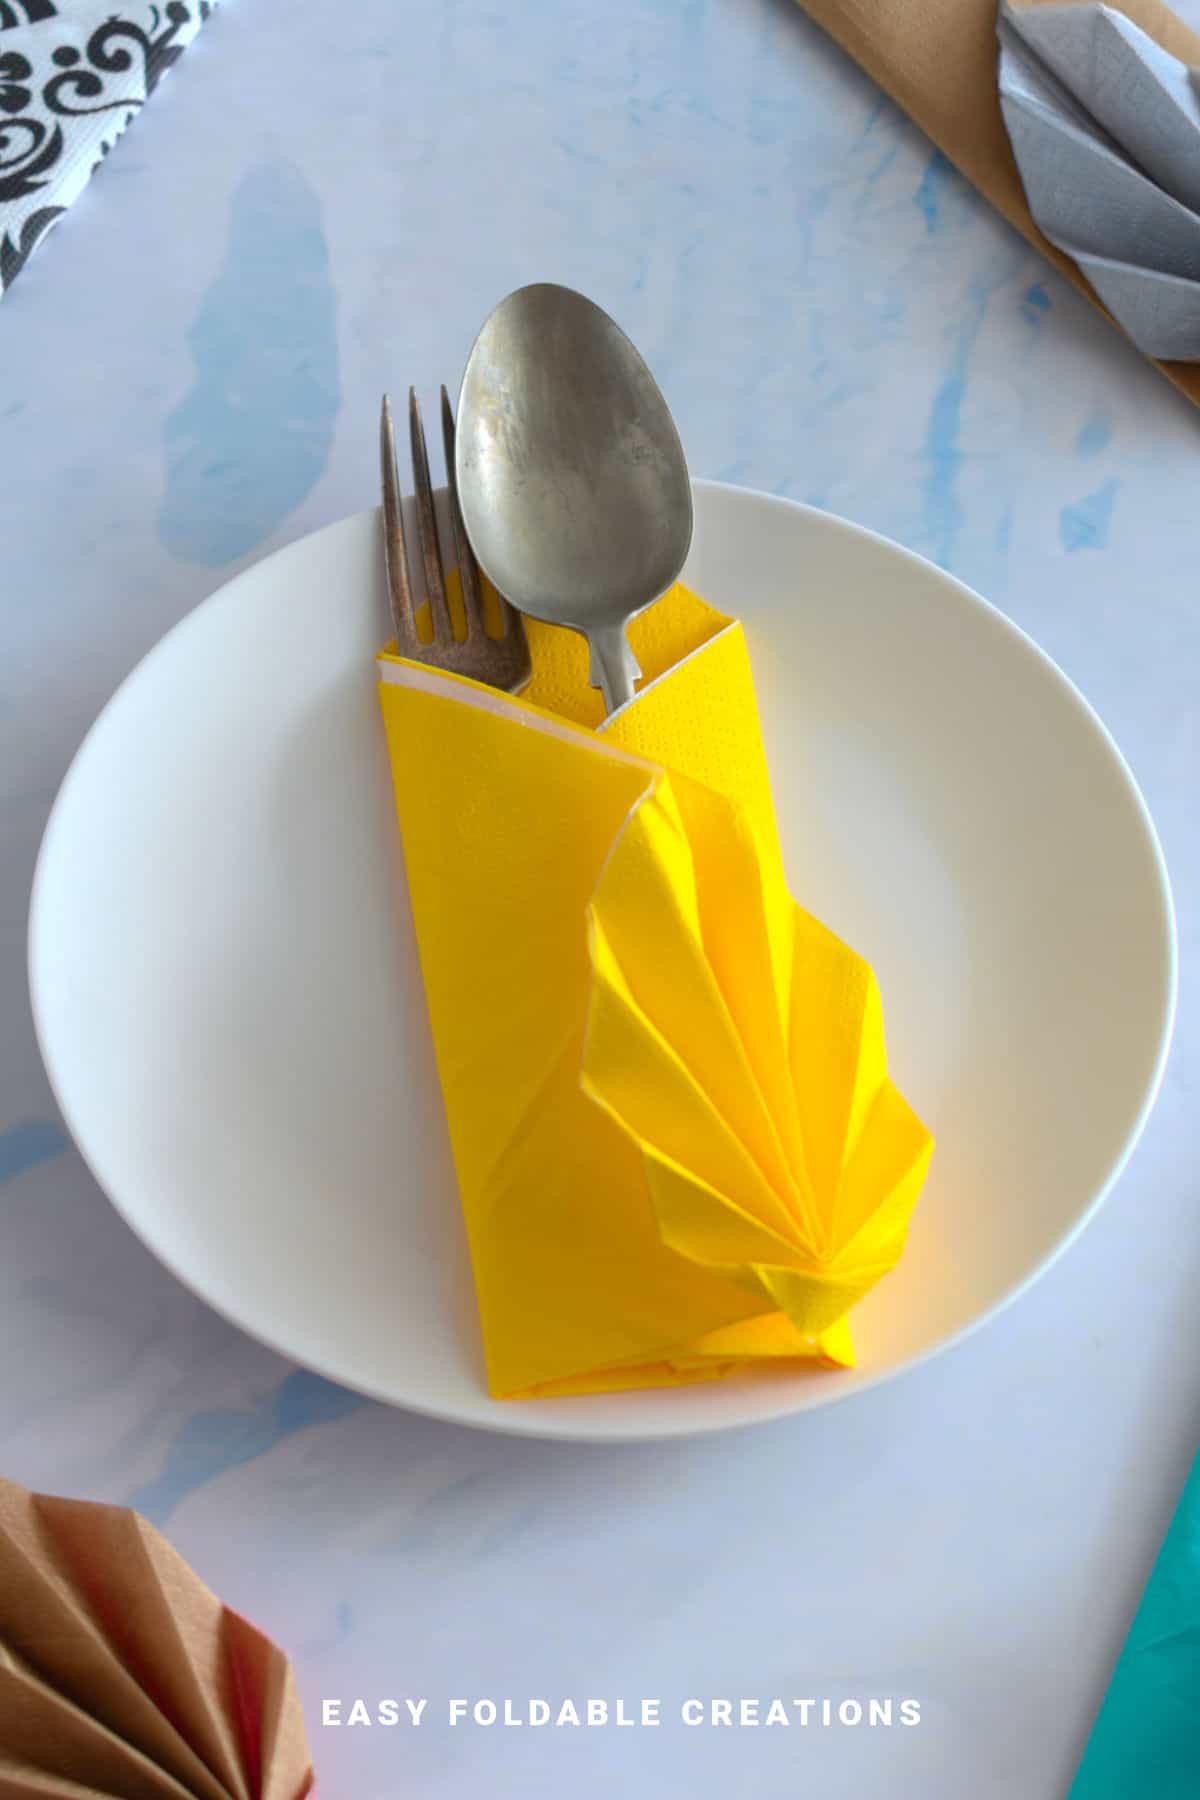
If you're looking to add a charming, natural touch to your table setting, this pocket leaf napkin fold is a simple and stylish option.
It combines the shape of a folded napkin base with a layered leaf motif on top, making it perfect for displaying cutlery, small place cards, or a sprig of greenery.
Ideal for Christmas, Thanksgiving, Easter, wedding napkin folds, and even birthdays, this fold is surprisingly easy to make but delivers a polished, thoughtful look to your table. It's a great way to tie your color palette together and bring a touch of nature to your place settings.
If you're using paper napkins, double-sided options work beautifully.
You can also place two napkins together with the colored or patterned sides facing out before you start folding, this not only makes the fold a little sturdier, but it also allows you to create a contrasting effect between the leaf detail and the body of the napkin.
Whether you're planning a formal event or a cozy family party, this folding technique is a lovely and easy way to enhance your décor.
Why You'll Love This Pattern
- Perfect for holding cutlery or a name card
- Works for any season or celebration
- Looks elegant but only takes minutes to make
- No special tools required - just napkins
- Adds a natural, festive touch to your tablescape
Exclusive Content Just For You
Not sure what you want to make next, but feeling a bit creative? Or maybe you've been searching for a pattern that sparks something new. We've got a few ideas waiting for you.
The Fold Collective, Easy Foldable Creations' community, provides you with a library of exclusive ad-free video tutorials, printable PDF patterns, helpful tips, and more so you can improve your skills and enjoy crafting in your own time.
Skill Level
★☆☆☆☆ (Easy)
Materials Needed
Standard square paper napkins
Note: You can use a single napkin if you are using double sided napkins.
If not, you might like to use 2 napkins - open the napkins out and place them on each other, aligning the edges and having the colored/patterned sides facing out.
A pocket leaf napkin fold made with a napkin that is 5 inches x 5 inches (13 cm x 13 cm) will make a napkin fold that is about 7.5 inches x 3 inches (19 cm x 6.5 cm).
Instructions
Step 1: Open out your paper napkin. Typically, paper napkins come folded into quarters.
Start with the color you want your fan section to be facing down. The color facing up will be the body of your napkin (the rectangle section).
Note: Before you start you could place a different colored napkin (color side facing up) on another napkin (color side facing down) to get a two toned napkin fold.
Arrange your napkin to side like a diamond shape.
Step 2: Fold the top point down to meet the middle.
Step 3: Fold the same point up again, leaving a gap from the top edge as shown. This will become the width of your fan folds.
Step 4: We will now accordion fold the same point we were just working on. If you know how to accordin fold, do so.
To accordion fold: Fold the same point down so that its edge matches the top edges of the napkin.
Then, fold the same point back up again, matching its edge with the layers below. Repeat folding up and down until you have folded the entire top flap.

✨ You're almost there! ✨
To unlock the final steps of the photo tutorial and complete your pattern, create a free account with Grow.me. below.
Make sure you tick the box to subscribe to our newsletter and stay up to date with the latest patterns, tips, and more!
Once you're signed up, you'll get instant access to finish your project with the photo tutorial and enjoy exclusive content in the future.
Already signed up? Hit the button below and select 'Switch to Log In' to pick up where you left off and finish your project!
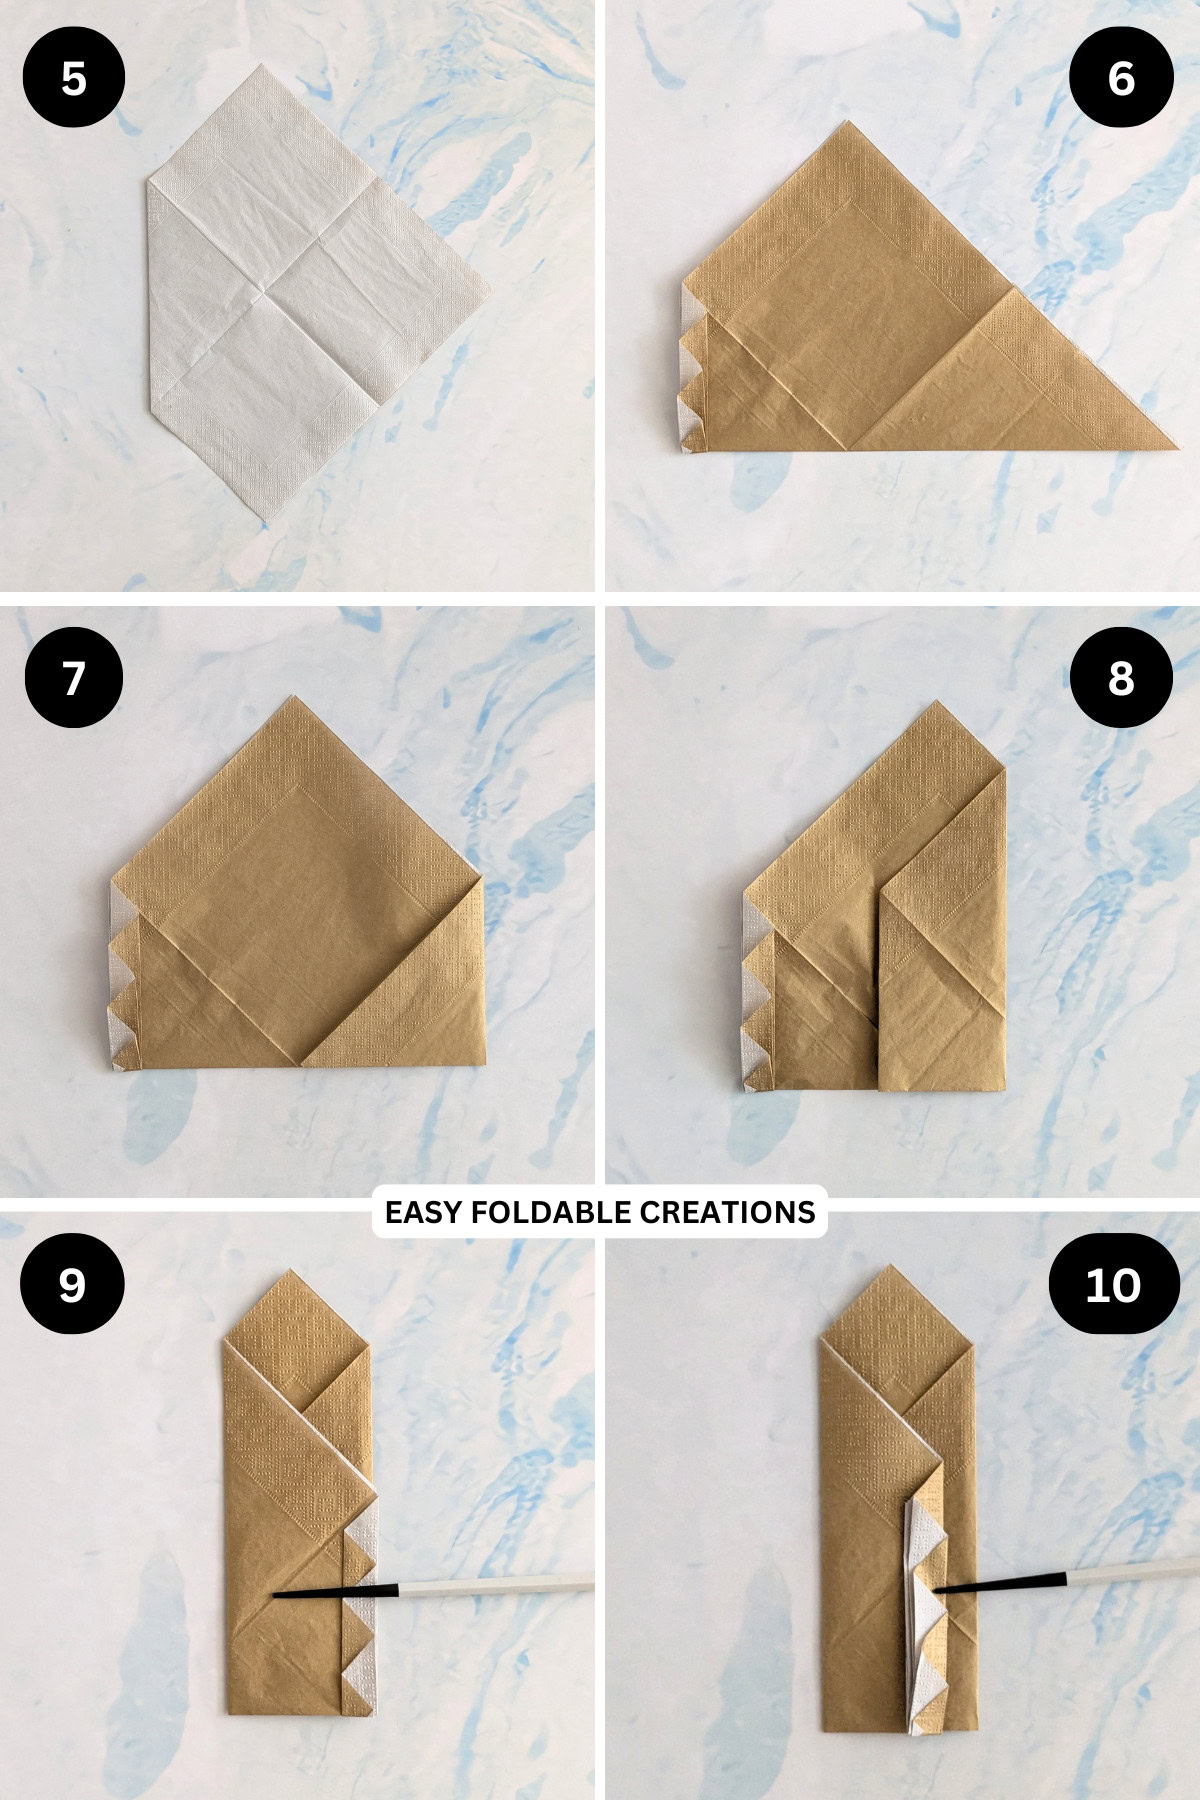
Step 5: Flip your napkin over and arrange it so the accordion folds are on the left.
Step 6: Fold the napkin in half from bottom to top.
Step 7: Fold the bottom right point in to meet the middle.
Step 8: Fold the right edge towards the left slightly so that sits past the half-way mark (for a more polished look, use a ruler to divide the napkin into thirds, then fold).
Step 9: Fold the left section over to the right.
Step 10: Fold the accordion folds to the left along their edge.
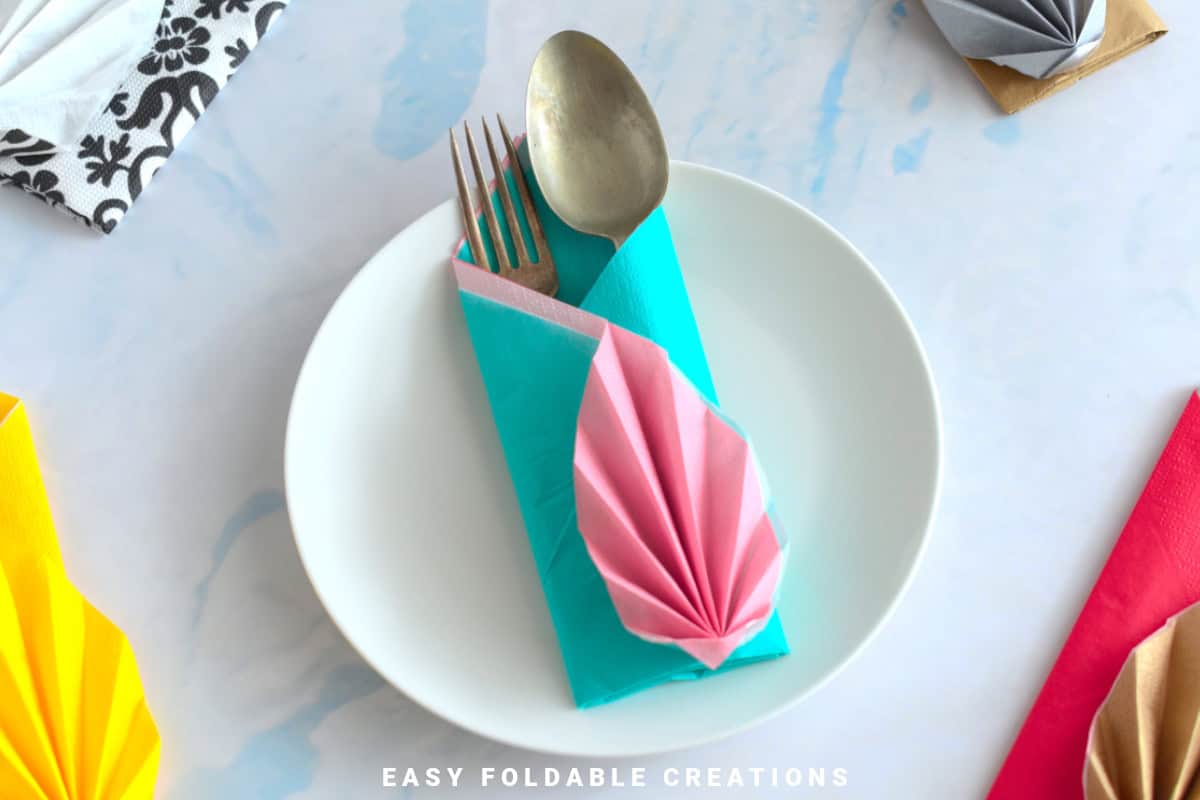
Step 11: Stand the accordion folds up, then adjust the folds to open out your fan.
Step 12: Completed napkin fold.
Note: If you want your fan to be on the left side instead of the right side; when you flip your napkin over in step 5, arrange the accordion folds to side on the right. Then continue the steps doing the opposite sides.

Tips For Success
Fold ahead of time and store until setting the table
Common Mistakes & How To Avoid Them
- Napkins not square - Make sure to start with a true square for even folding. Sometimes napkins from the packet don't come out evenly. You may need to trim them slightly.
- Layering misaligned - If using two napkins, line them up carefully before you begin
- Floppy leaf detail - Press down on creases for better structure
Color, Paper Ideas, and Variations
- Green + cream combo - Classic for Christmas or Thanksgiving
- Blush pink + white - Perfect for spring weddings or Easter
- Navy + gold - Elegant and modern for evening events
- Rustic neutrals - Ideal for outdoor or fall-themed gatherings
- Bright tones - Make birthdays or summer parties more festive
FAQ
Absolutely - they work beautifully and hold their shape well, especially if lightly pressed beforehand. You will need to iron between folds if using cloth napkins.
Yes! You can fold them earlier in the day and stack them carefully until it's time to set the table.
Other Crafts You Might Like To Try:
Helpful Origami Tips
If you're curious to learn more about origami, you might like to look at our basic guides on how to make some common origami folds.
Start with the valley fold and mountain fold-these are the foundation of most origami models.
Once you're comfortable, you might like to try the petal fold for 3D shapes, and explore the bird base and square base for more complex designs.
The water bomb base is also great for creating inflatable or geometric models, like this inflatable origami rabbit.
Useful Paper Craft Terms
Want to learn a little more about paper crafts and origami?
We've made this helpful printable just for you. It explains common terms and helpful tips you might come across when you are folding origami or making a paper craft project.
You can download the useful paper craft terms printable PDF here.
Stay Connected
Made this pattern? Let us know how it went in the comments below!
Pin this post - Pin now to take your paper crafting skills to the next level.
Share on Instagram or Facebook - Capture the beauty of your finished paper craft project and share it on Instagram or Facebook! Tag us @easyfoldablecreations so we can see your work!
Other Patterns You Might Like To Try:
Looking for other easy patterns like this? Try these:


Comments
No Comments