
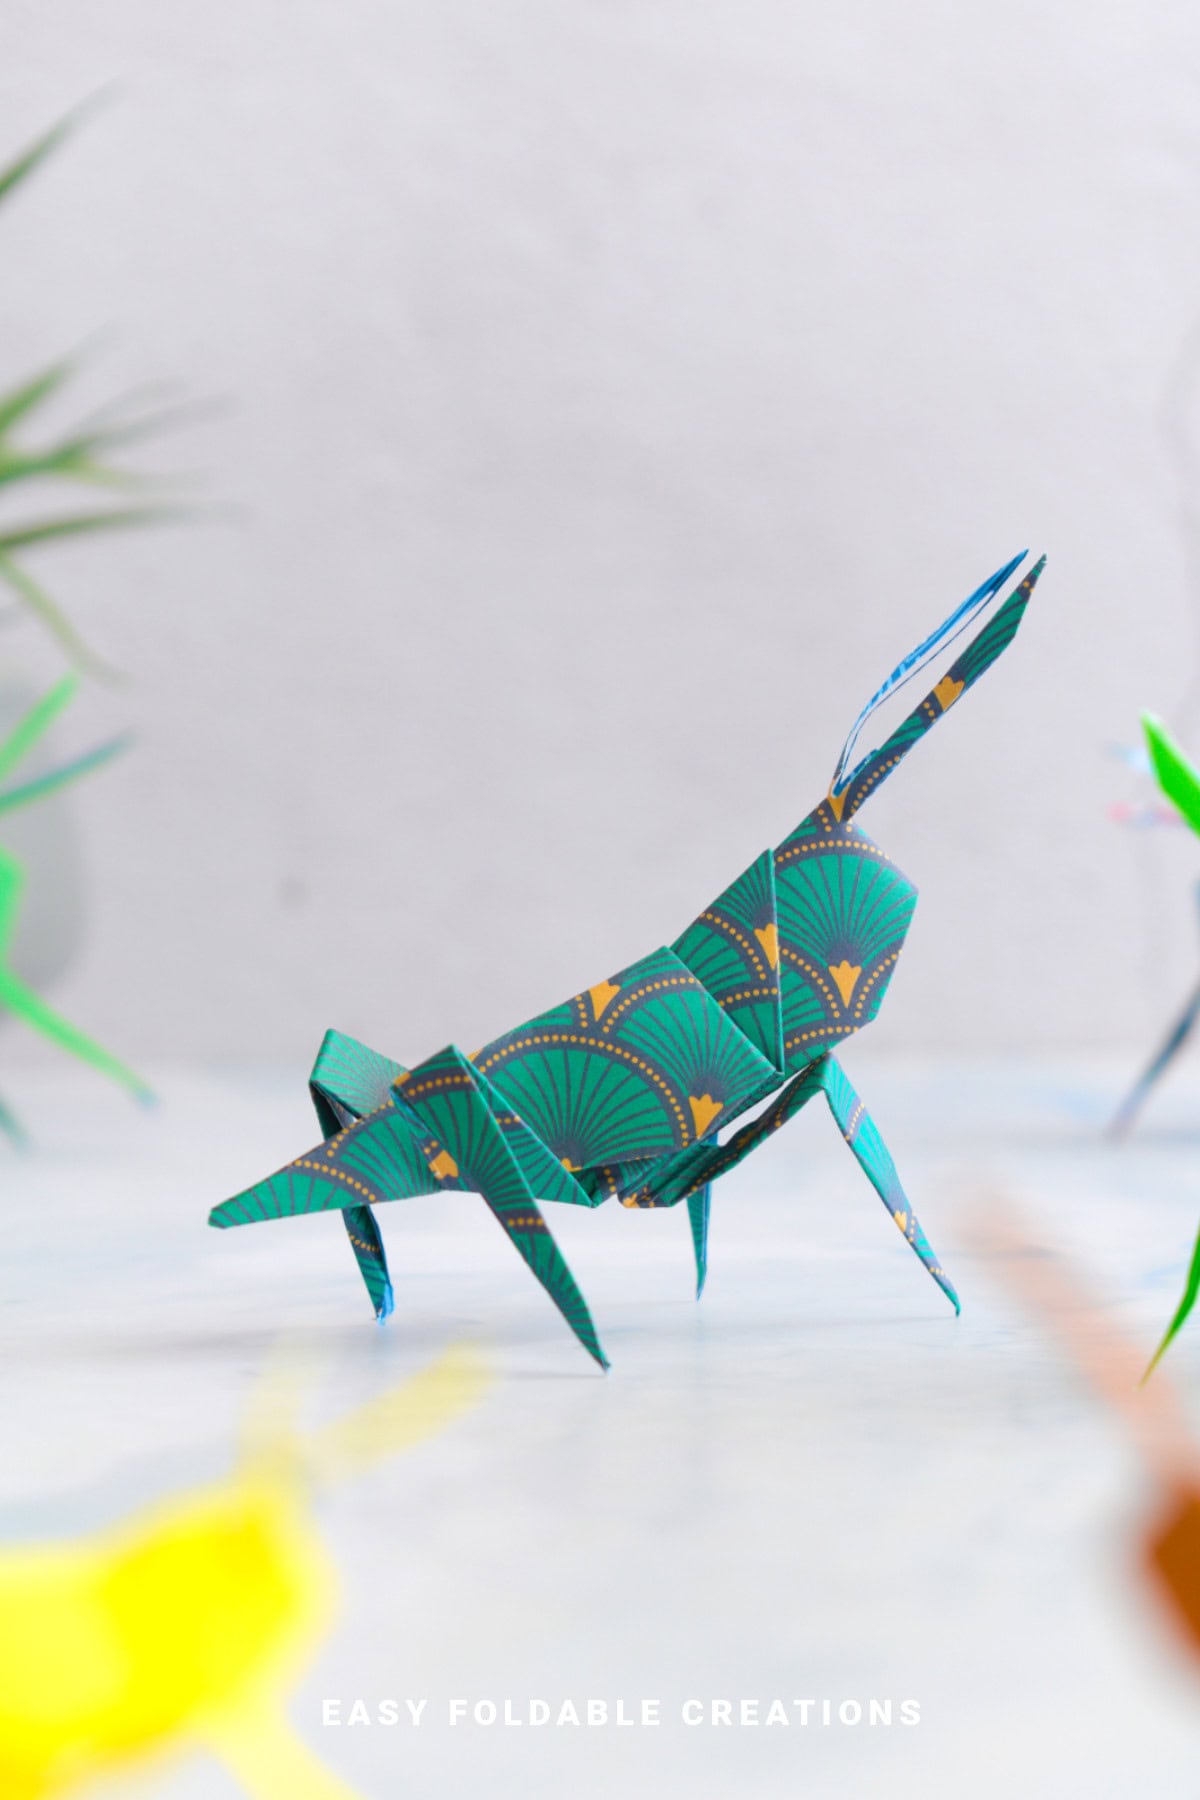
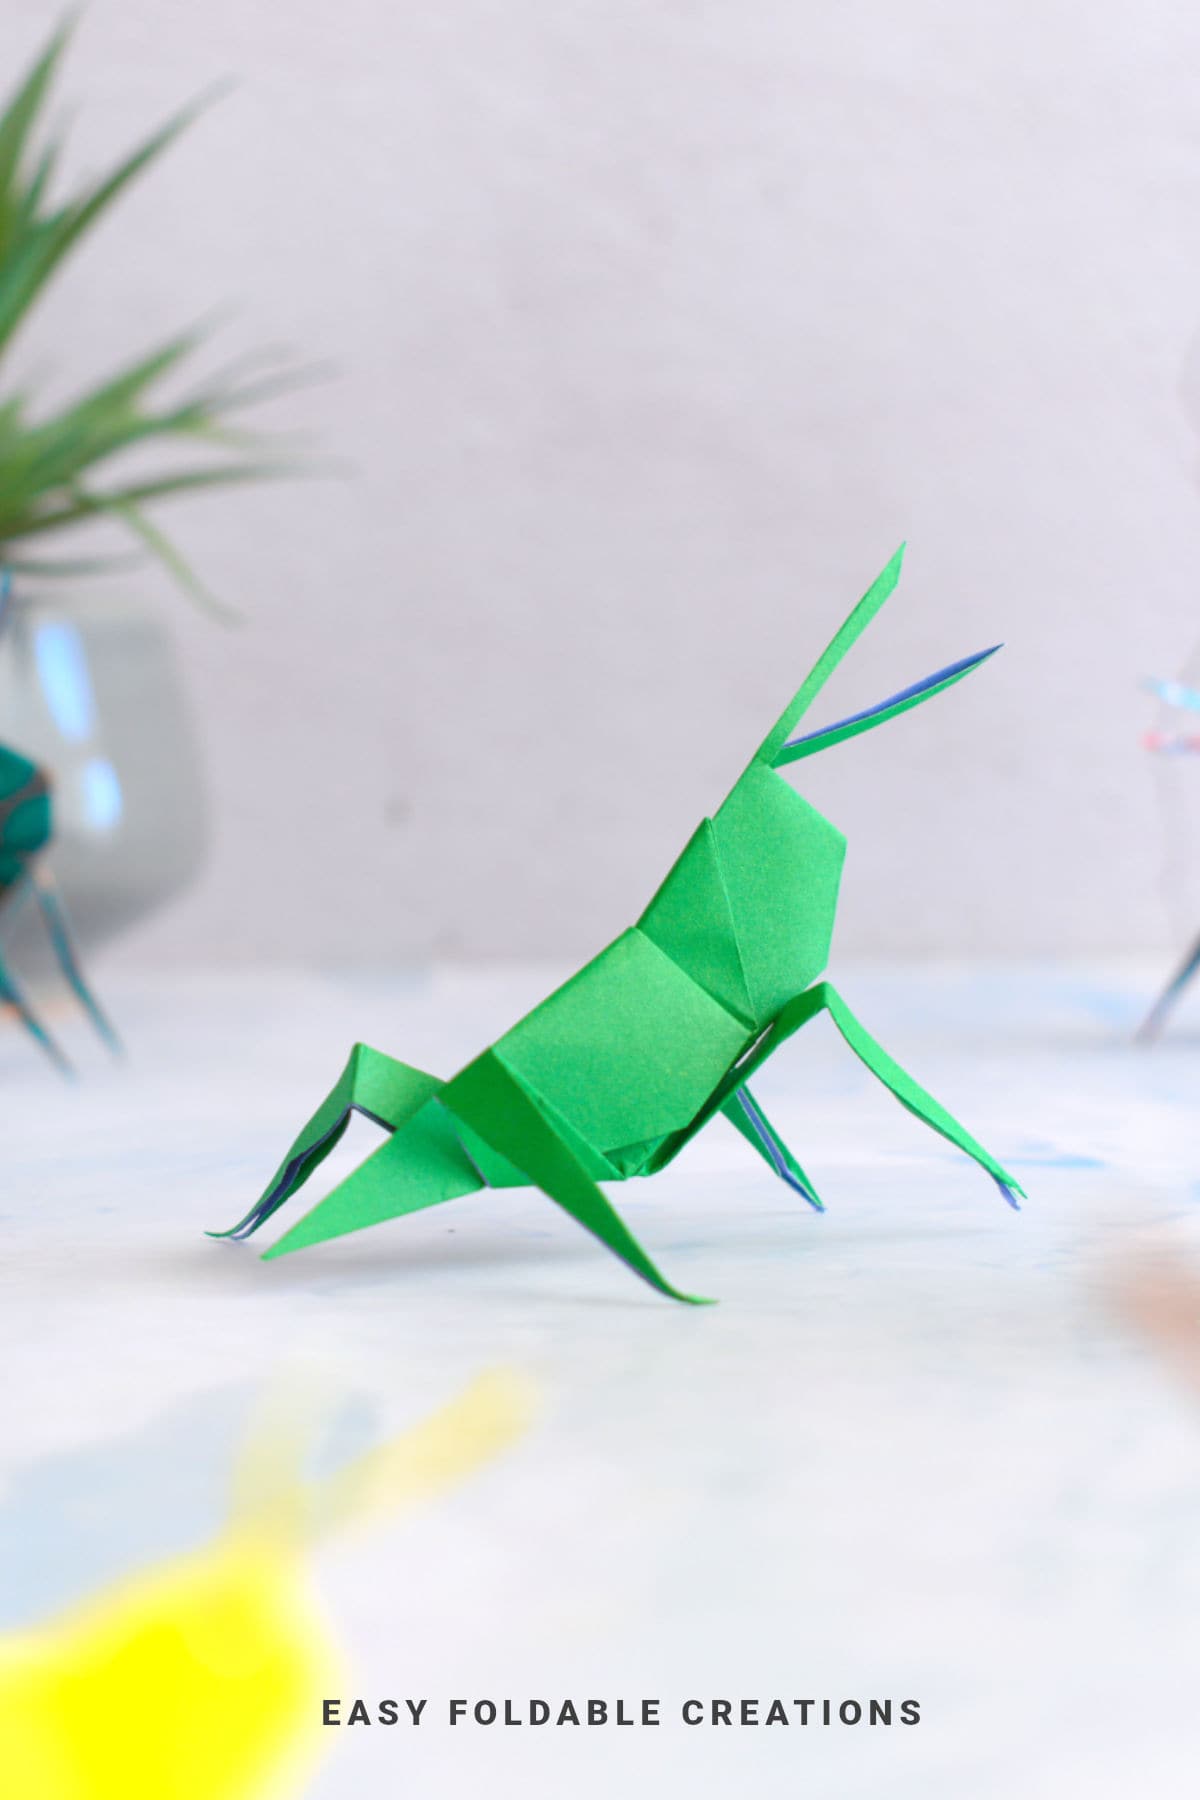
Make your own paper origami grasshopper with just one sheet of paper and a quick snip of the scissors!
This fun origami project is perfect for bug-loving kids, classroom crafts, or just for fun.
Jump to:
If you're after a playful and creative paper craft, this origami grasshopper is such a fun one to try.
It uses just a single sheet of paper, plus one small scissor cut to shape the legs.
It's a great insect-themed craft for spring, summer, nature units at school, or just as a simple boredom buster at home.
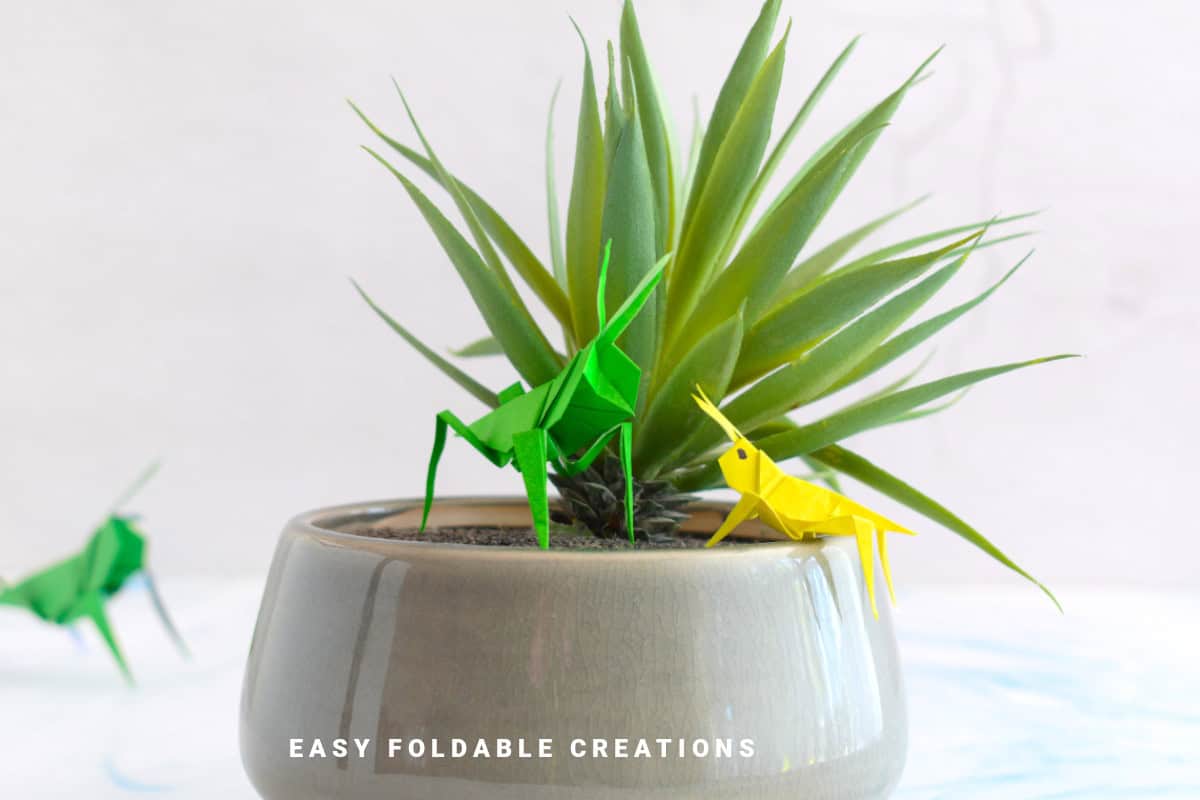
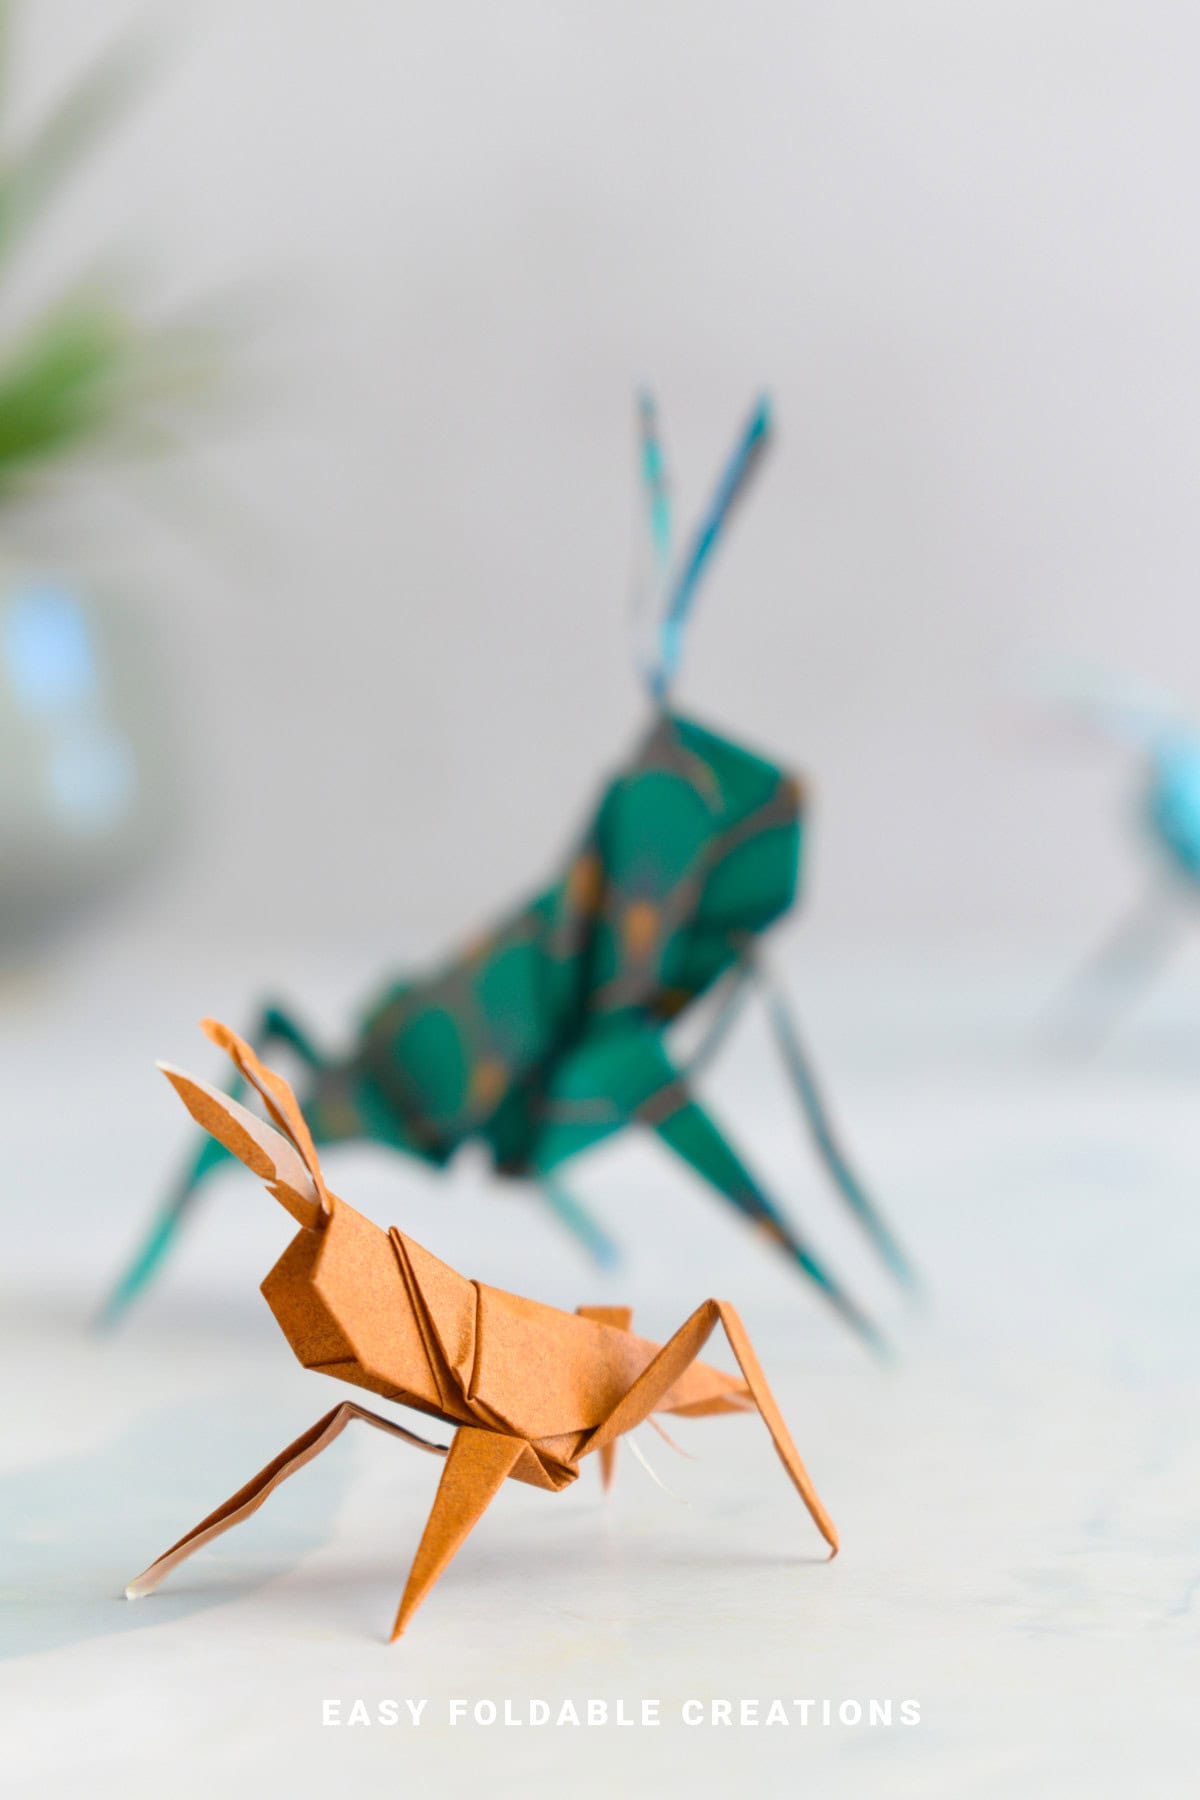
You can use plain green paper for a classic grasshopper look, or try fun patterns or neon colors for a more imaginative version.
This origami grasshopper is also a great pick for insect-themed activities, bug-loving kids, or even a spring or summer craft afternoon.
Whether you're using it for a school project, party table decor, or just to pass the time, this little hopper brings a playful touch to any occasion.
Why You'll Love This Pattern
- Great for bug-themed crafts or learning units
- Requires just one sheet and minimal cutting
- Easy enough for kids and beginners
- Great for springtime or summer nature crafts
- Don't be put off by the amount of steps in this tutorial - we have broken it down little by little to make it easier for you to understand!
Skill Level
★★★☆☆ (Easy to Intermediate)
Materials Needed
- 1 square sheet of paper (any size, but 6 inches x 6 inches [15 cm x 15 cm] works well)
- Scissors (for one small cut to shape the back legs)
- Optional: markers or pens for decorating
Note: an origami grasshopper made with 6 inches x 6 inches (15 cm x 15 cm) paper makes a grasshopper that is about 3 inches x 3.5 inches (7 cm x 9 cm).
Use smaller paper for mini hopping grasshoppers
Instructions
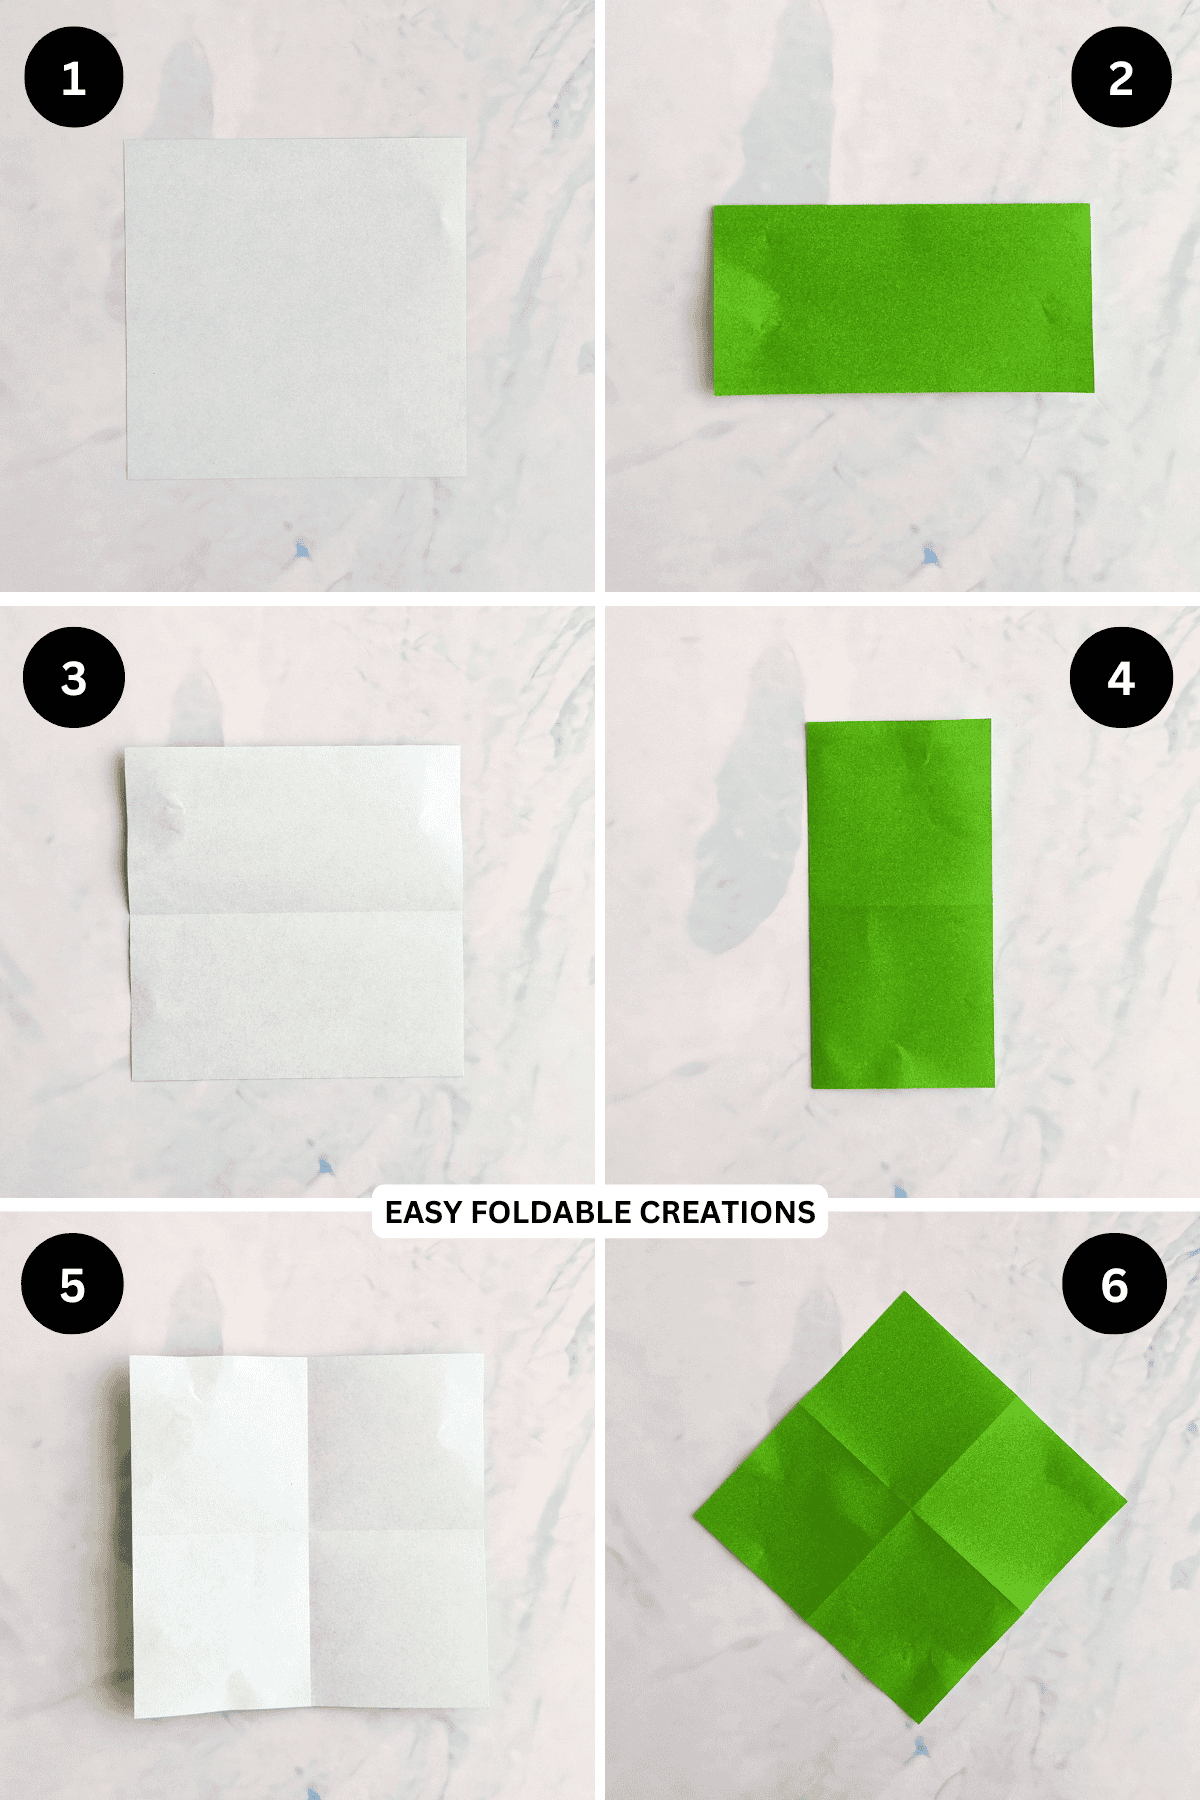
Step 1: Start with the color you want on the outside facing down.
Step 2: Fold the top edge down to meet the bottom edge.
Step 3: Unfold previous step.
Step 4: Fold the left edge to meet the right edge.
Step 5: Unfold previous step.
Step 6: Flip your paper over and arrange it so it sits like a diamond shape as shown.
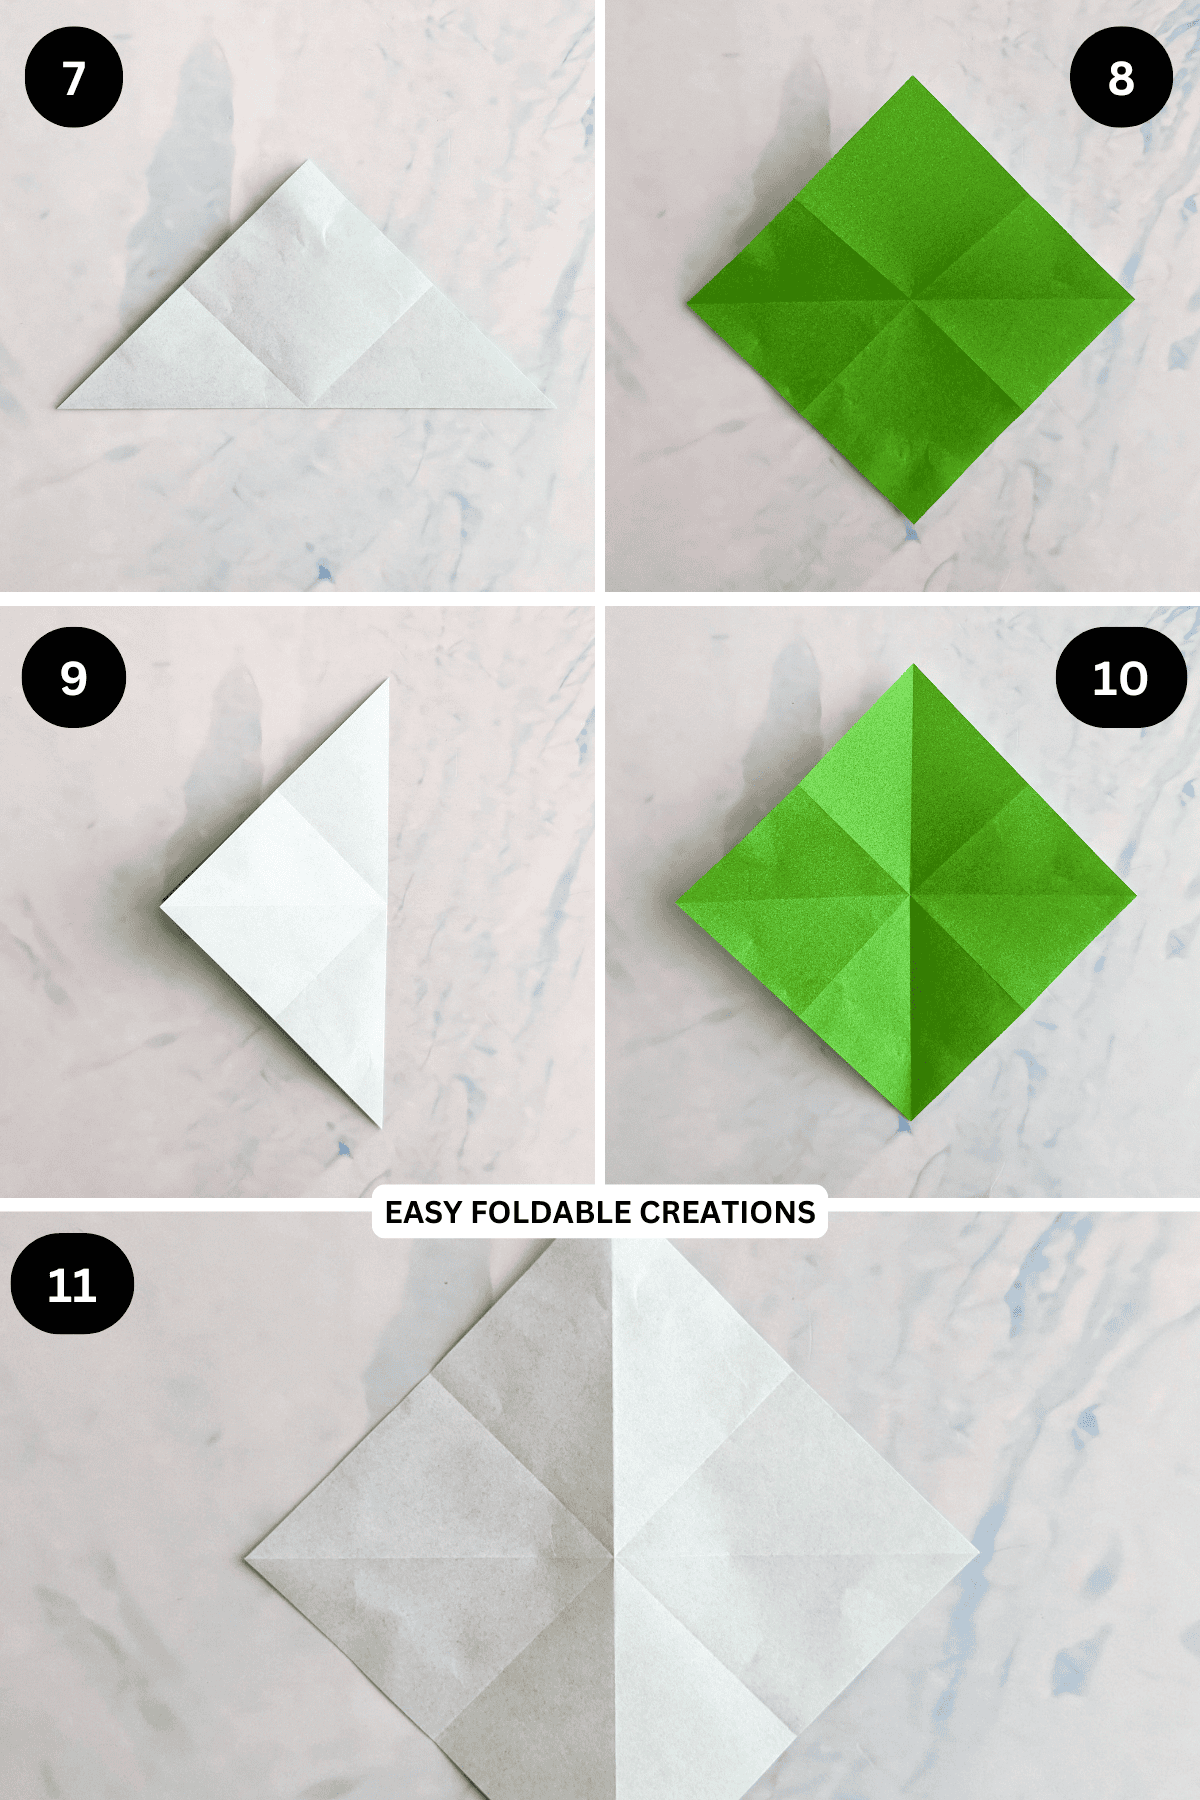
Step 7: Fold the bottom point up to meet the top point.
Step 8: Unfold previous step.
Step 9: Fold the right point to meet the left point.
Step 10: Unfold previous step.
Step 11: Flip your paper over from left to right (make sure it still sits like a diamond shape).
Step 12: Hold both the left and right points as shown and gently push in the centre where all the creases meet. Then bring the corners inward and toward the bottom point. You will find the paper starts to collapse on itself to form a square.
Step 13: Fold the bottom right diagonal edge (top layer only) towards the left to meet the middle crease.
Step 14: Repeat previous step for the bottom left diagonal edge.
Step 15: Fold the top point down along the top edge of the flaps you just made.
Step 16: Unfold previous three steps.
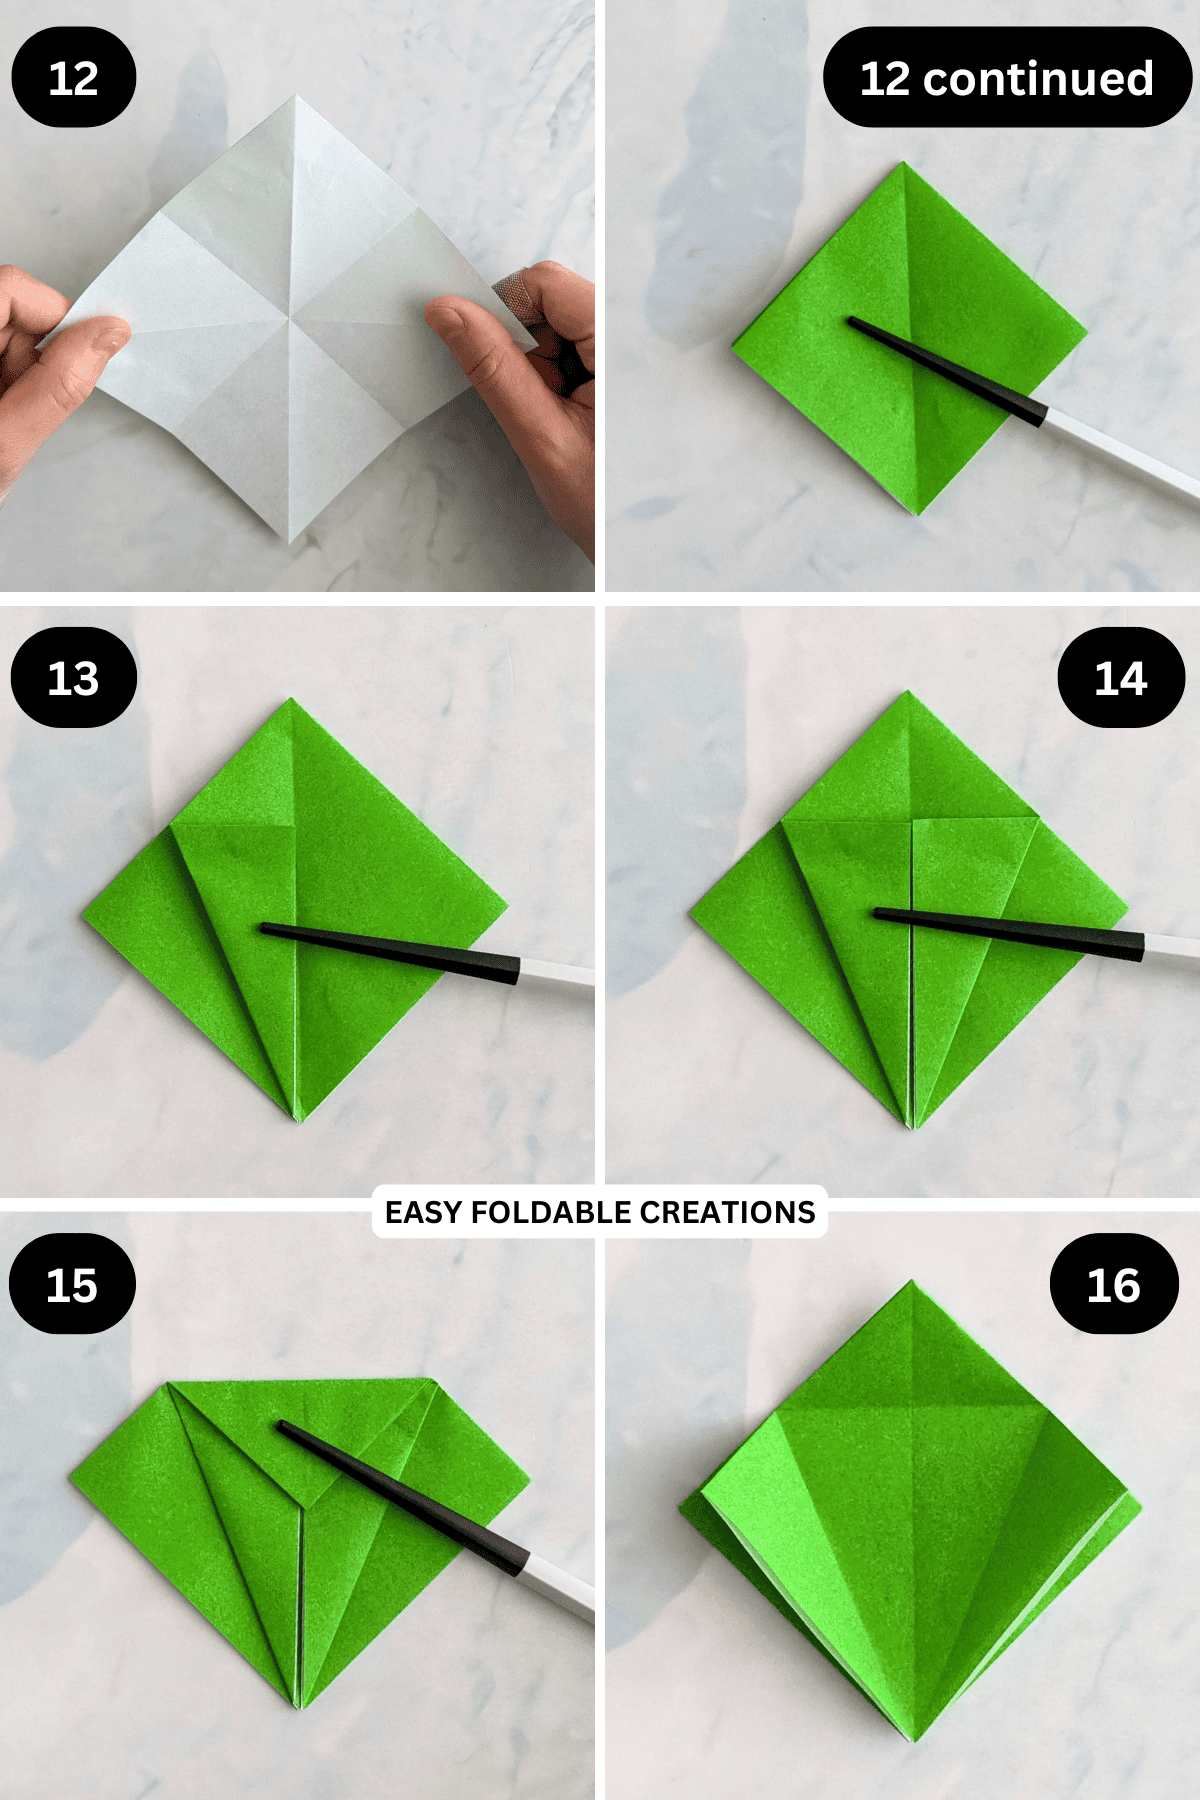
Step 17: Fold the bottom point (top layer only) up along the creases you just made.
Step 18: Continue to lift the point up and at the same time, push the sides in along the creases you made before. Then flatten everything along the existing creases.
Step 19: Flip your paper over from left to right and repeat steps 13 to 18.
Step 20: Fold both the bottom left and bottom right edges of the paper (top layer only) in to meet the middle.
Step 21: Flip your paper over and repeat previous step.
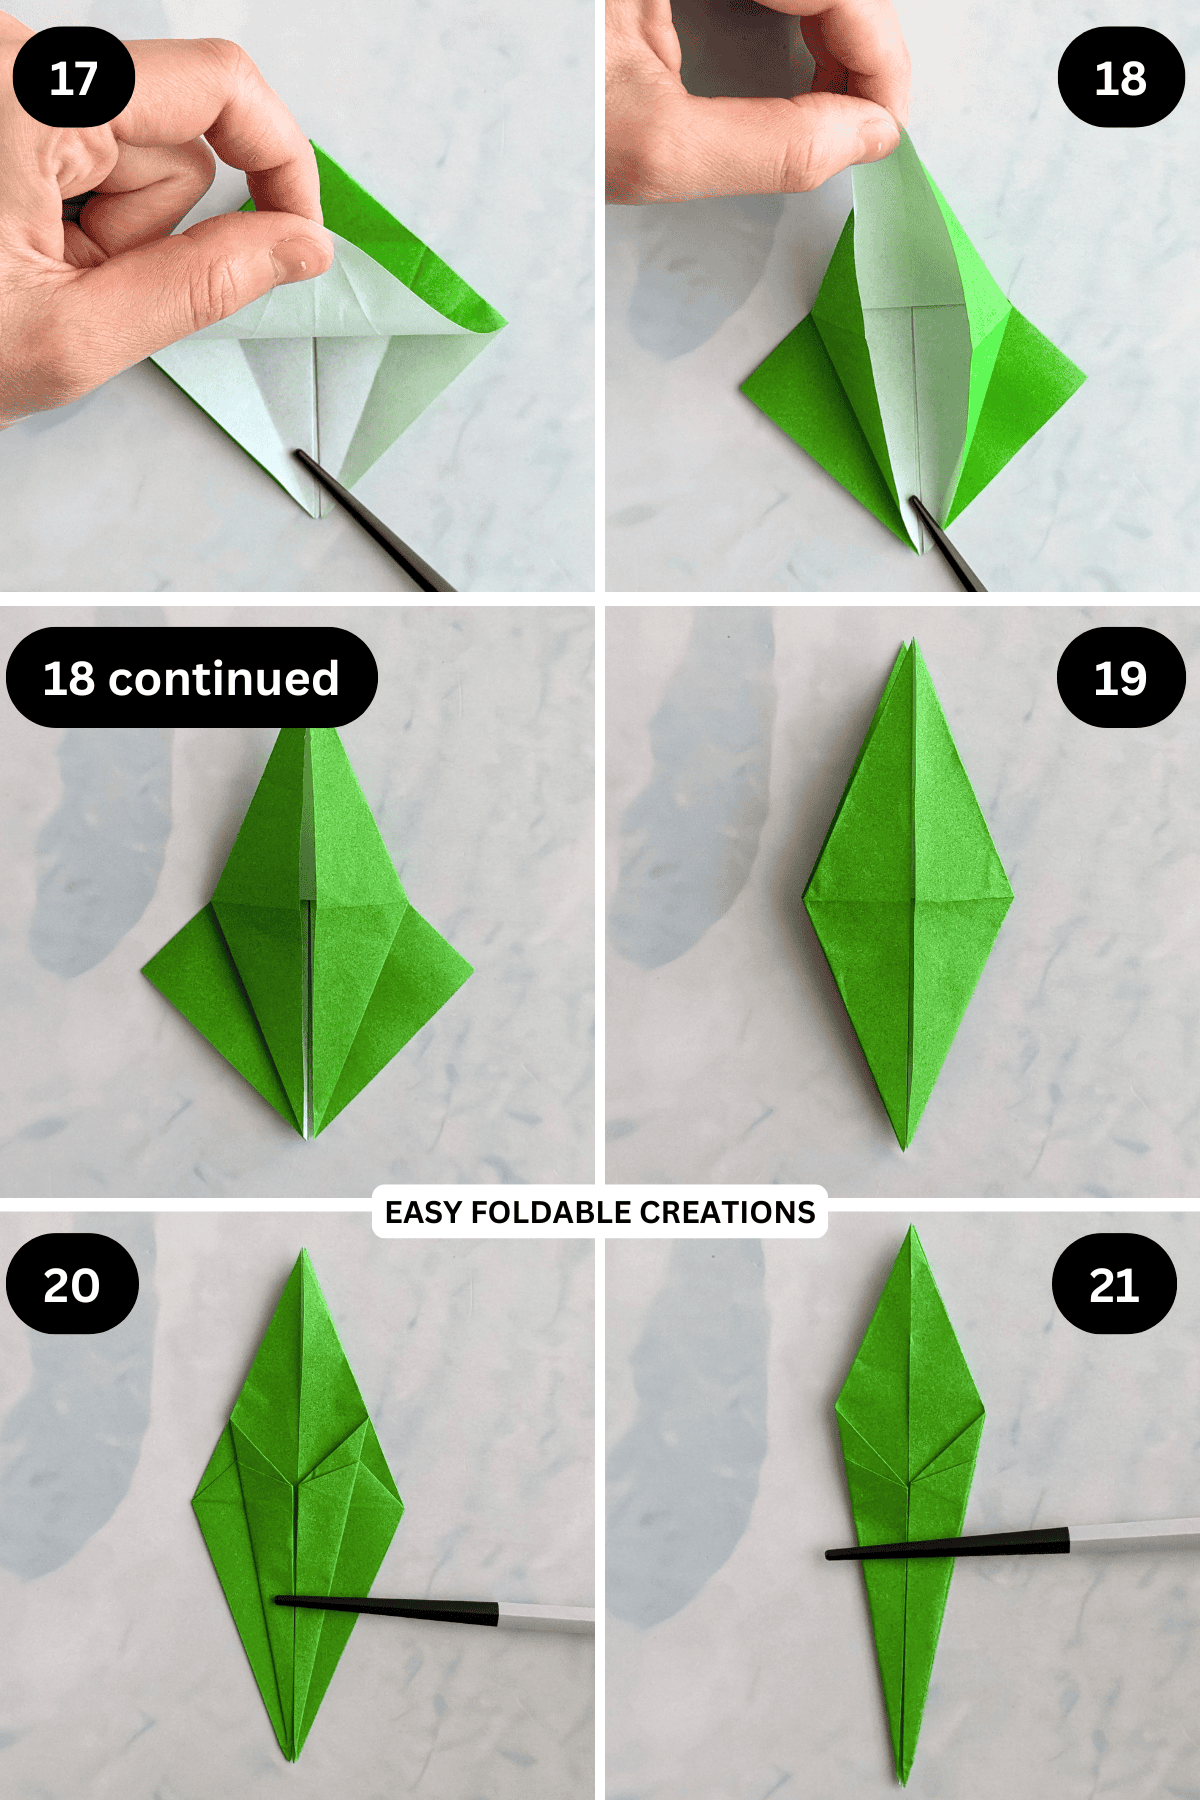
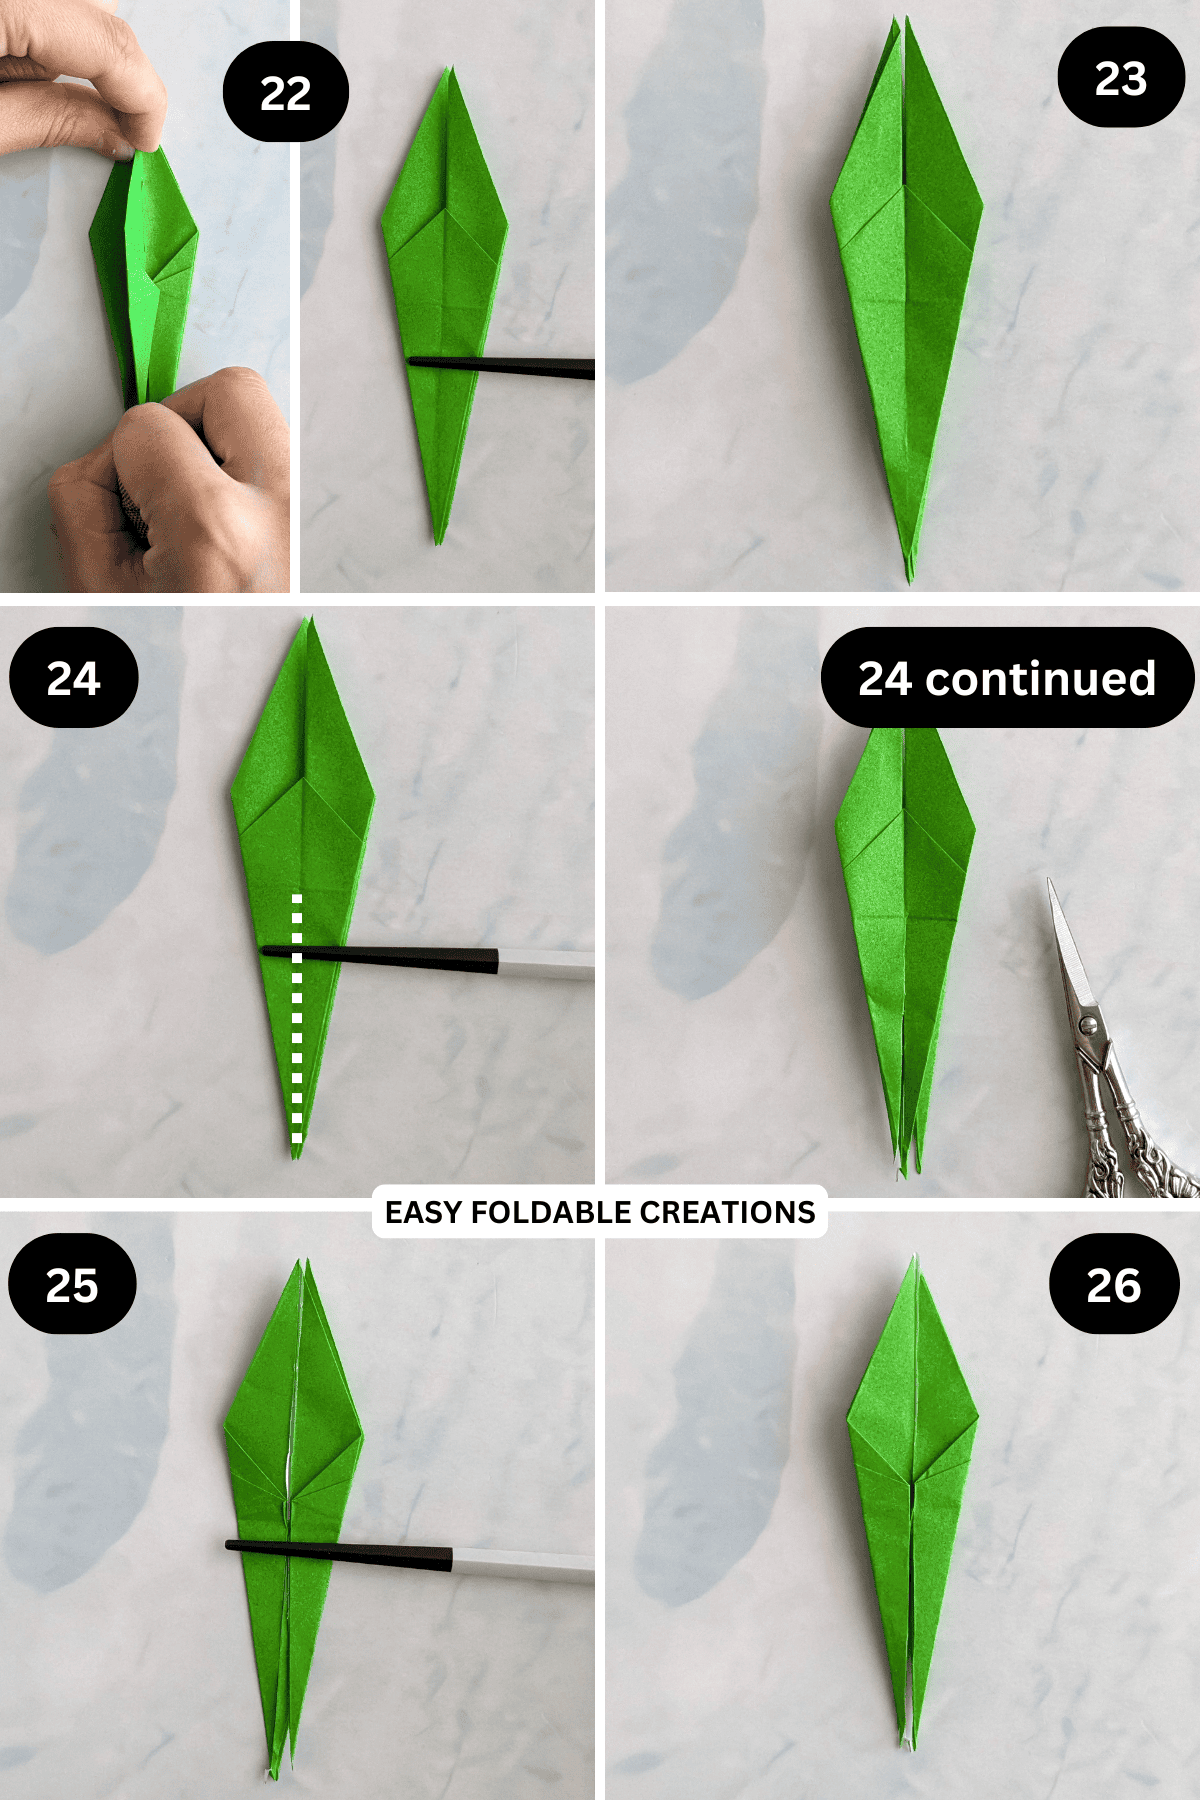
Step 22: Fold the left side of the paper (top layer only) towards the right like turning a page in a book.
Step 23: Flip your paper over and repeat previous step.
Step 24: Holding your paper firmly (and making sure the bottom points are in line), cut along the line shown.
Step 25: Once again, fold the left side of the paper (top layer only) towards the right like turning a page in a book.
Step 26: Repeat previous step for the other side.
✨ You're almost there! ✨
To unlock the final steps and complete your pattern, create a free account with Grow.me. below.
Make sure you tick the box to subscribe to our newsletter and stay up to date with the latest patterns, tips, and more!
Once you're signed up, you'll get instant access to finish your project and enjoy exclusive content in the future.
Already signed up? Hit the button below and select 'Switch to Log In' to pick up where you left off and finish your project!
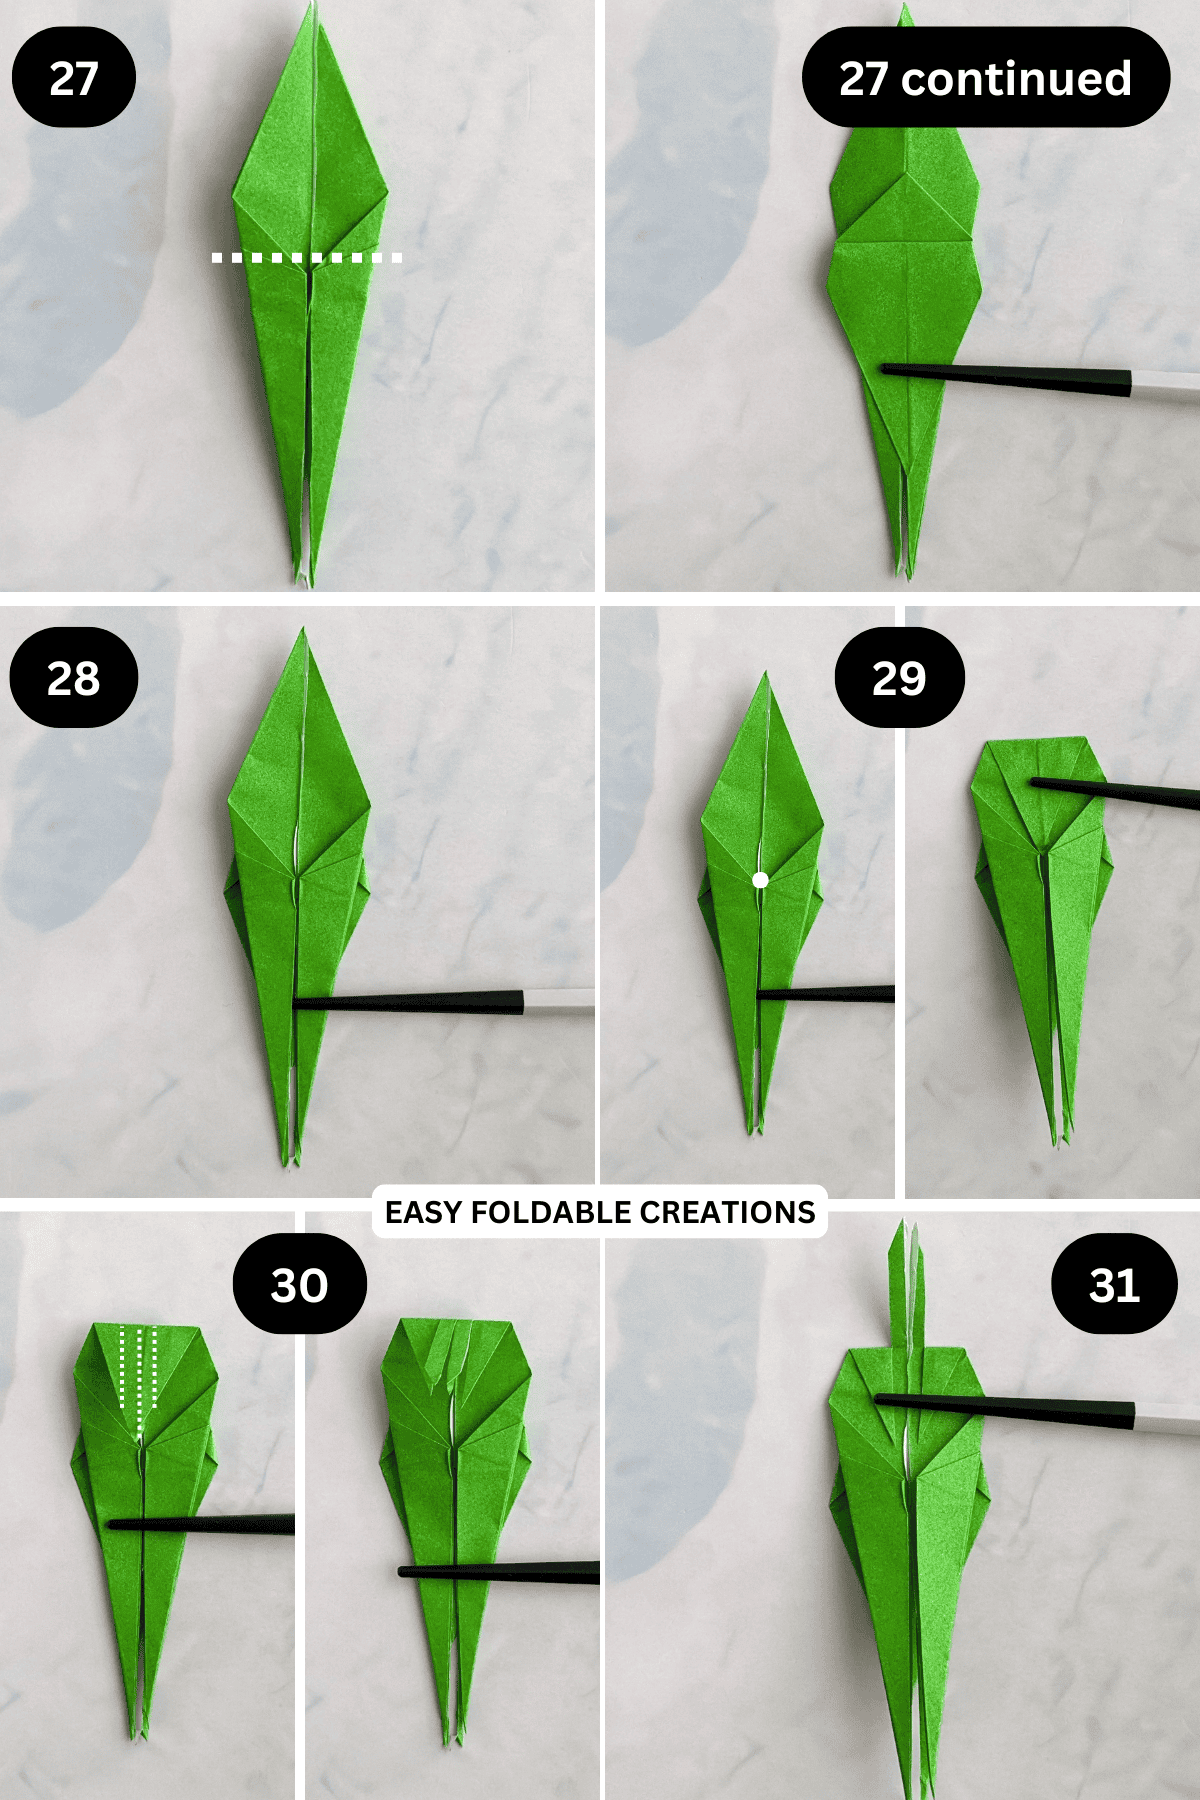
Step 27: Fold the top point down (top layer only) along the line shown.
Step 28: Flip your paper over from left to right.
Step 29: Fold the top point down so that the tip matches the point shown.
Step 30: On the flap you just folded down (single layer), cut along the lines shown.You will end up with 2 thin strips in the middle of the flap.
Step 31: Fold the 2 thin strips (that you made in the previous step) up as shown.
Step 32: Fold the bottom left and bottom right (top layer only) strips up as shown, keeping it as symmetrical as possible.
Step 33: Fold your paper in half from right to left.
Step 34: Arrange your paper to sit as shown.
Step 35: Gently pull on the upper right flap as shown.
Step 36: Working on the bottom thin strip on the left (top layer only): Fold it up as shown.
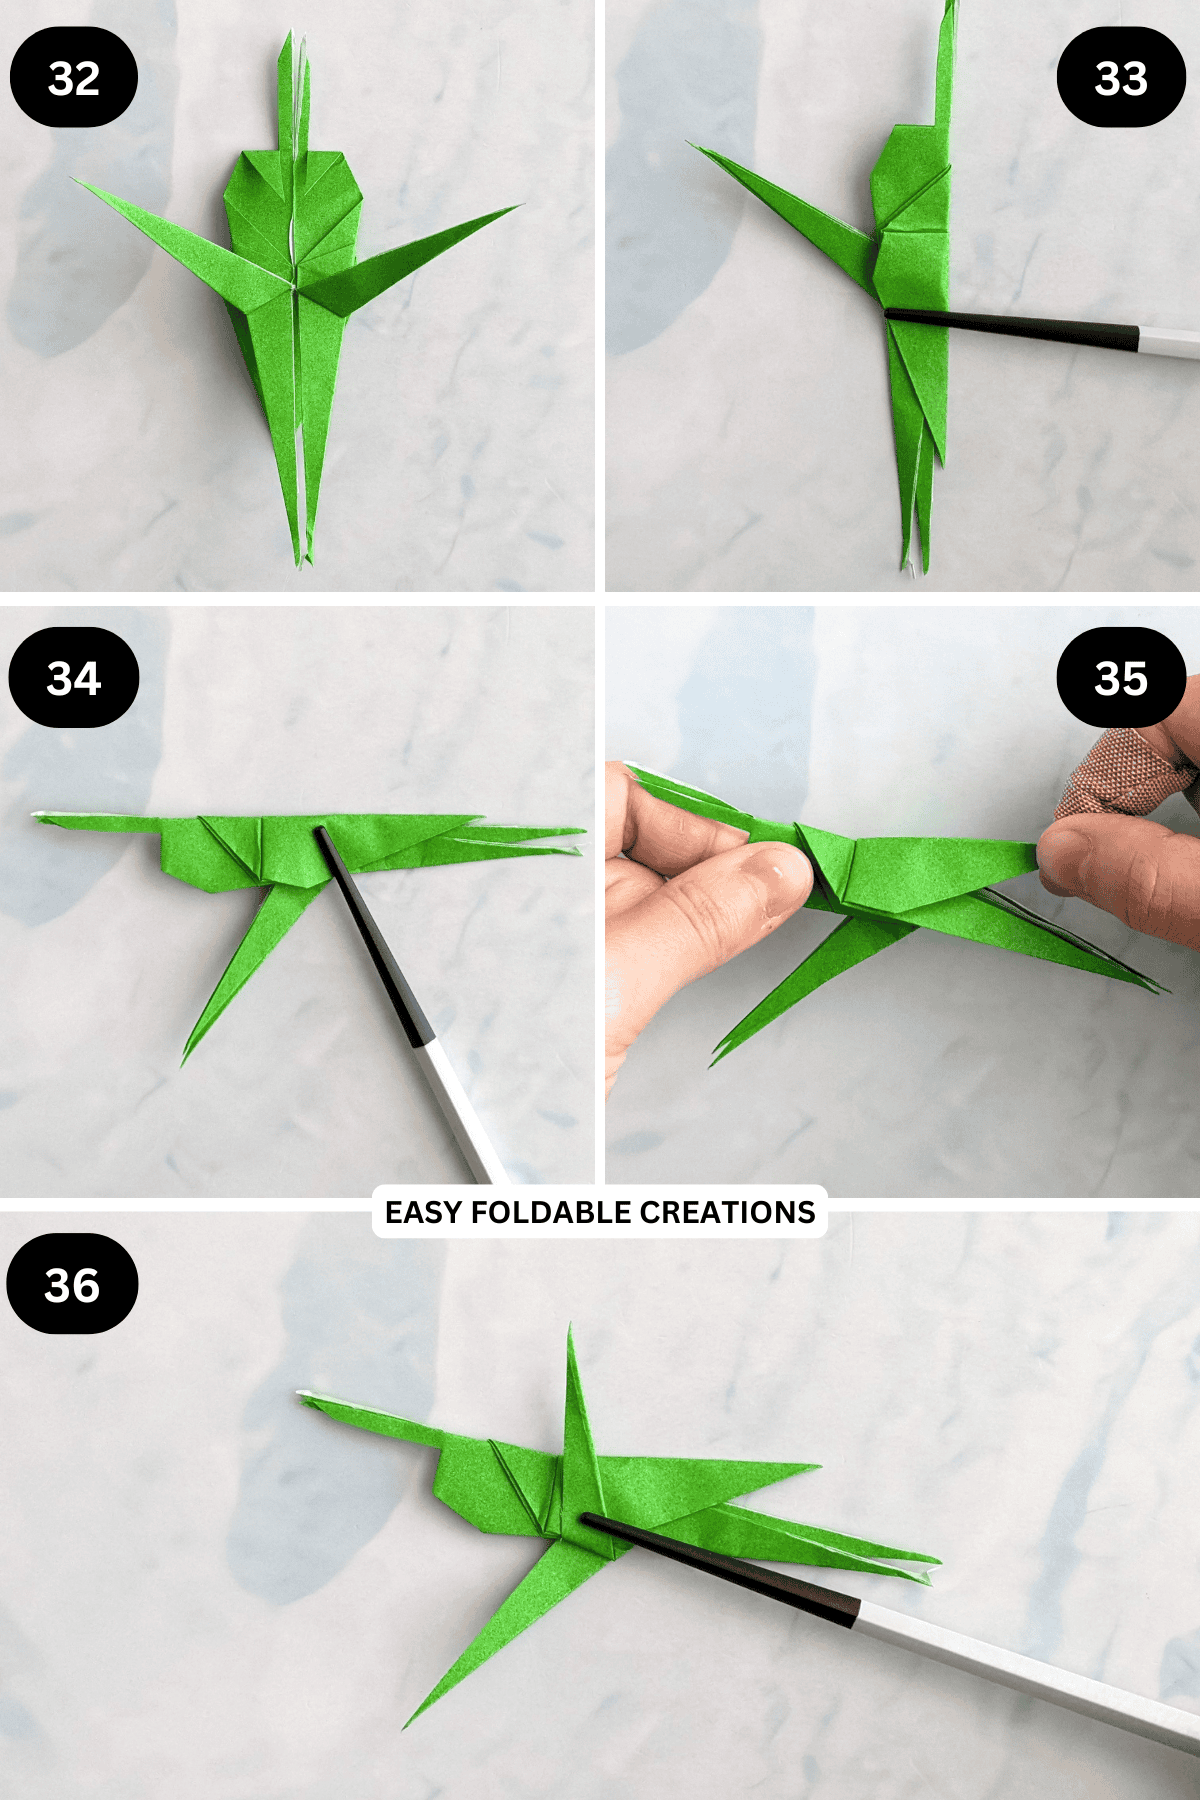
Step 37: Working on that same strip: Fold it down slightly as shown.
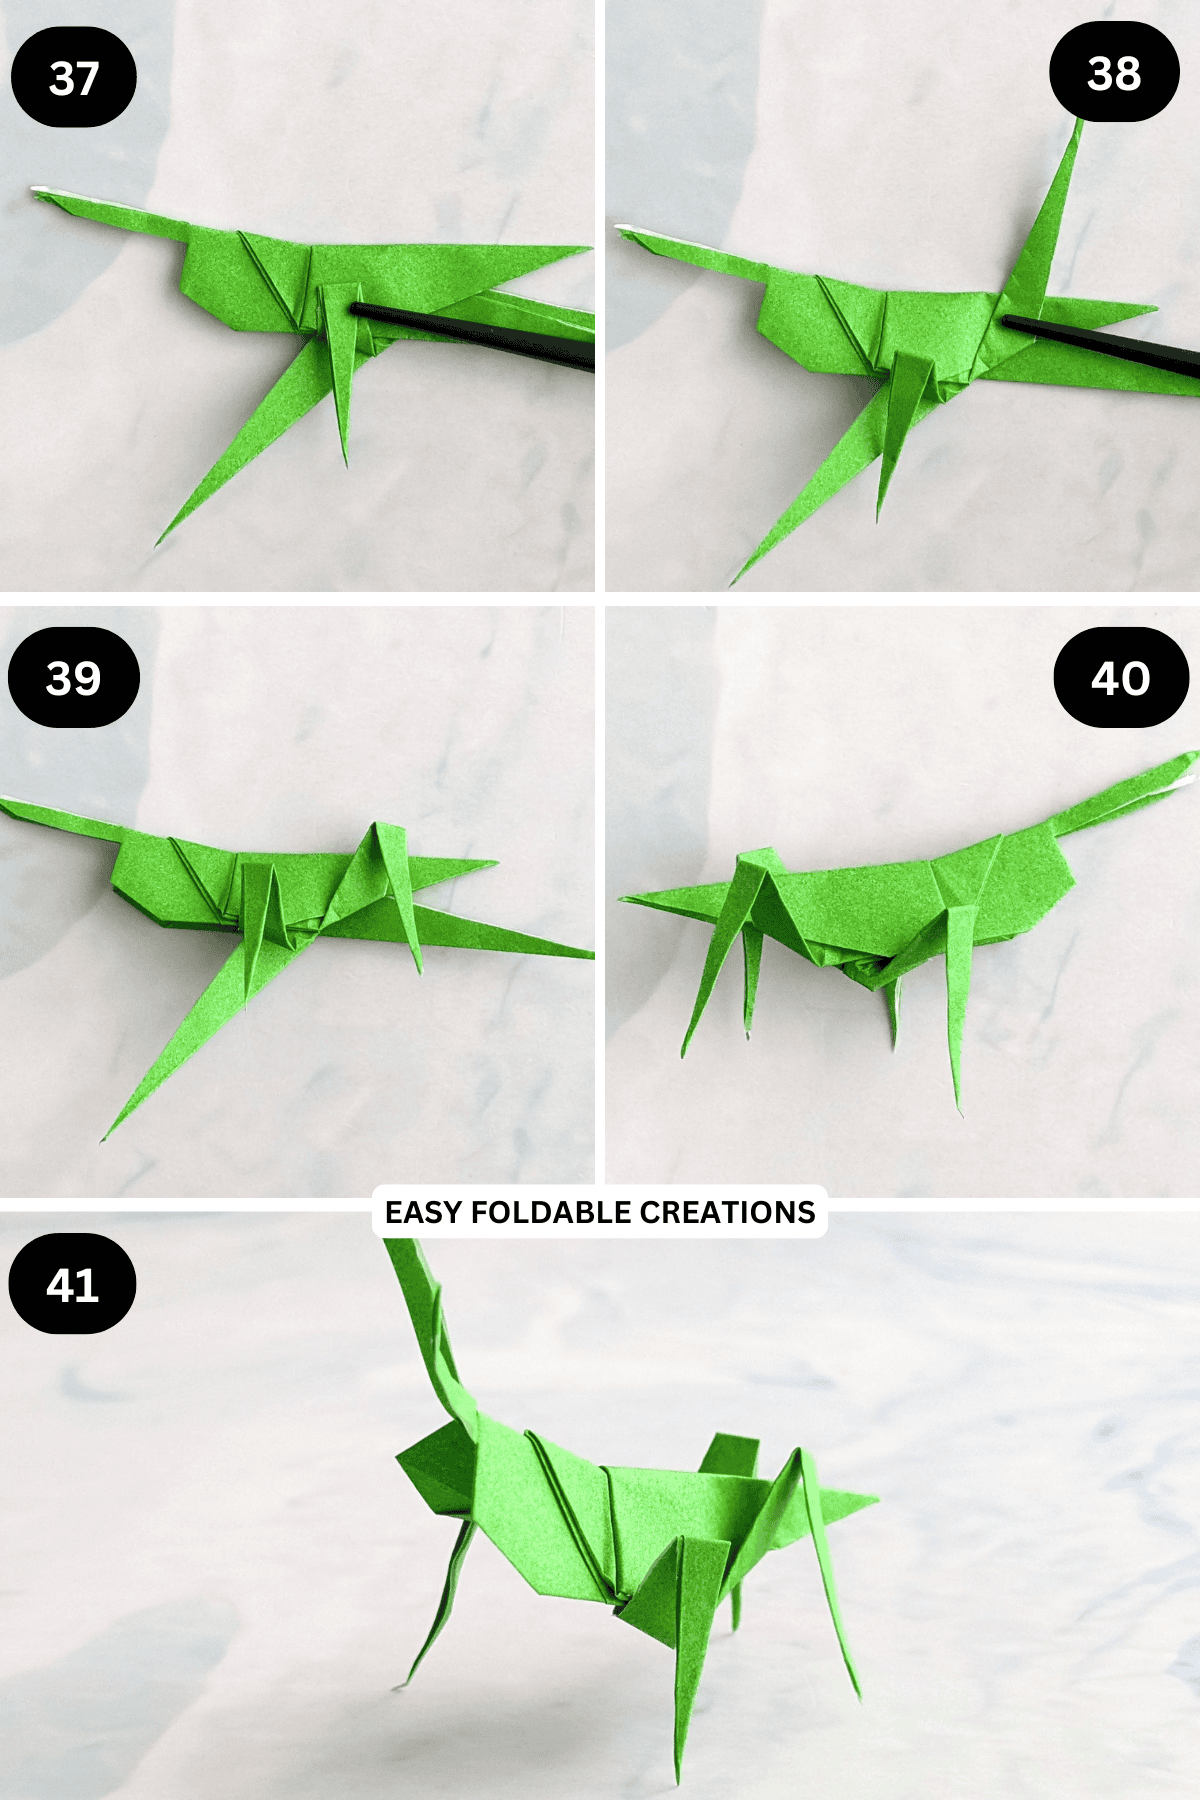
Step 38: Now, working on the bottom thin strip on the right (top layer only): Fold it up as shown.
Step 39: Working on that same strip: Fold it down as shown. sure that once it is folded down, it's tip is in line with the bottom thin strip on the left (this will help it stand later). It's also important for looks that the top of the back leg over laps the top of the body slightly.
Step 40: Flip your paper over from left to right and repeat steps 36 to 39, keeping the legs as symmetrical as possible.
Step 41: Gently open out your grasshopper, adjusting it as you like. Completed grasshopper.
Tips For Success
Press down lightly at the back to make it bounce
Common Mistakes & How To Avoid Them
- Legs too floppy? Make sure you use firm enough paper and fold tightly
- Paper tears? Avoid over-folding and use a fresh sheet if needed
Color, Paper Ideas, and Variations
- Classic green: Perfect for a realistic grasshopper
- Bright colors: Neon or patterned paper for a playful twist
- Decorate it: Add little eyes, antennae, or stripes with markers
- Make a whole bunch: Try different colors and sizes and have grasshopper races
- Pair with other bug crafts: Combine with origami butterflies, bees, or ladybugs for a full insect collection
FAQ
Definitely. Just help them with the scissor part and they're good to go.
Absolutely. Just cut it into a square first and give it a go.
Other Paper Crafts You Might Like To Try:
Helpful Origami Tips
If you're curious to learn more about origami, you might like to look at our basic guides on how to make some common origami folds.
Start with the valley fold and mountain fold-these are the foundation of most origami models.
Once you're comfortable, you might like to try the petal fold for 3D shapes, and explore the bird base and square base for more complex designs.
The water bomb base is also great for creating inflatable or geometric models, like this inflatable origami rabbit.
Stay Connected
Made this pattern? Let us know how it went in the comments below!
Pin this post - Pin now to take your paper crafting skills to the next level.
Share on Instagram or Facebook - Capture the beauty of your finished paper craft project and share it on Instagram or Facebook! Tag us @easyfoldablecreations so we can see your work!
Other Patterns You Might Like To Try:
Looking for other easy patterns like this? Try these:


Comments
No Comments