
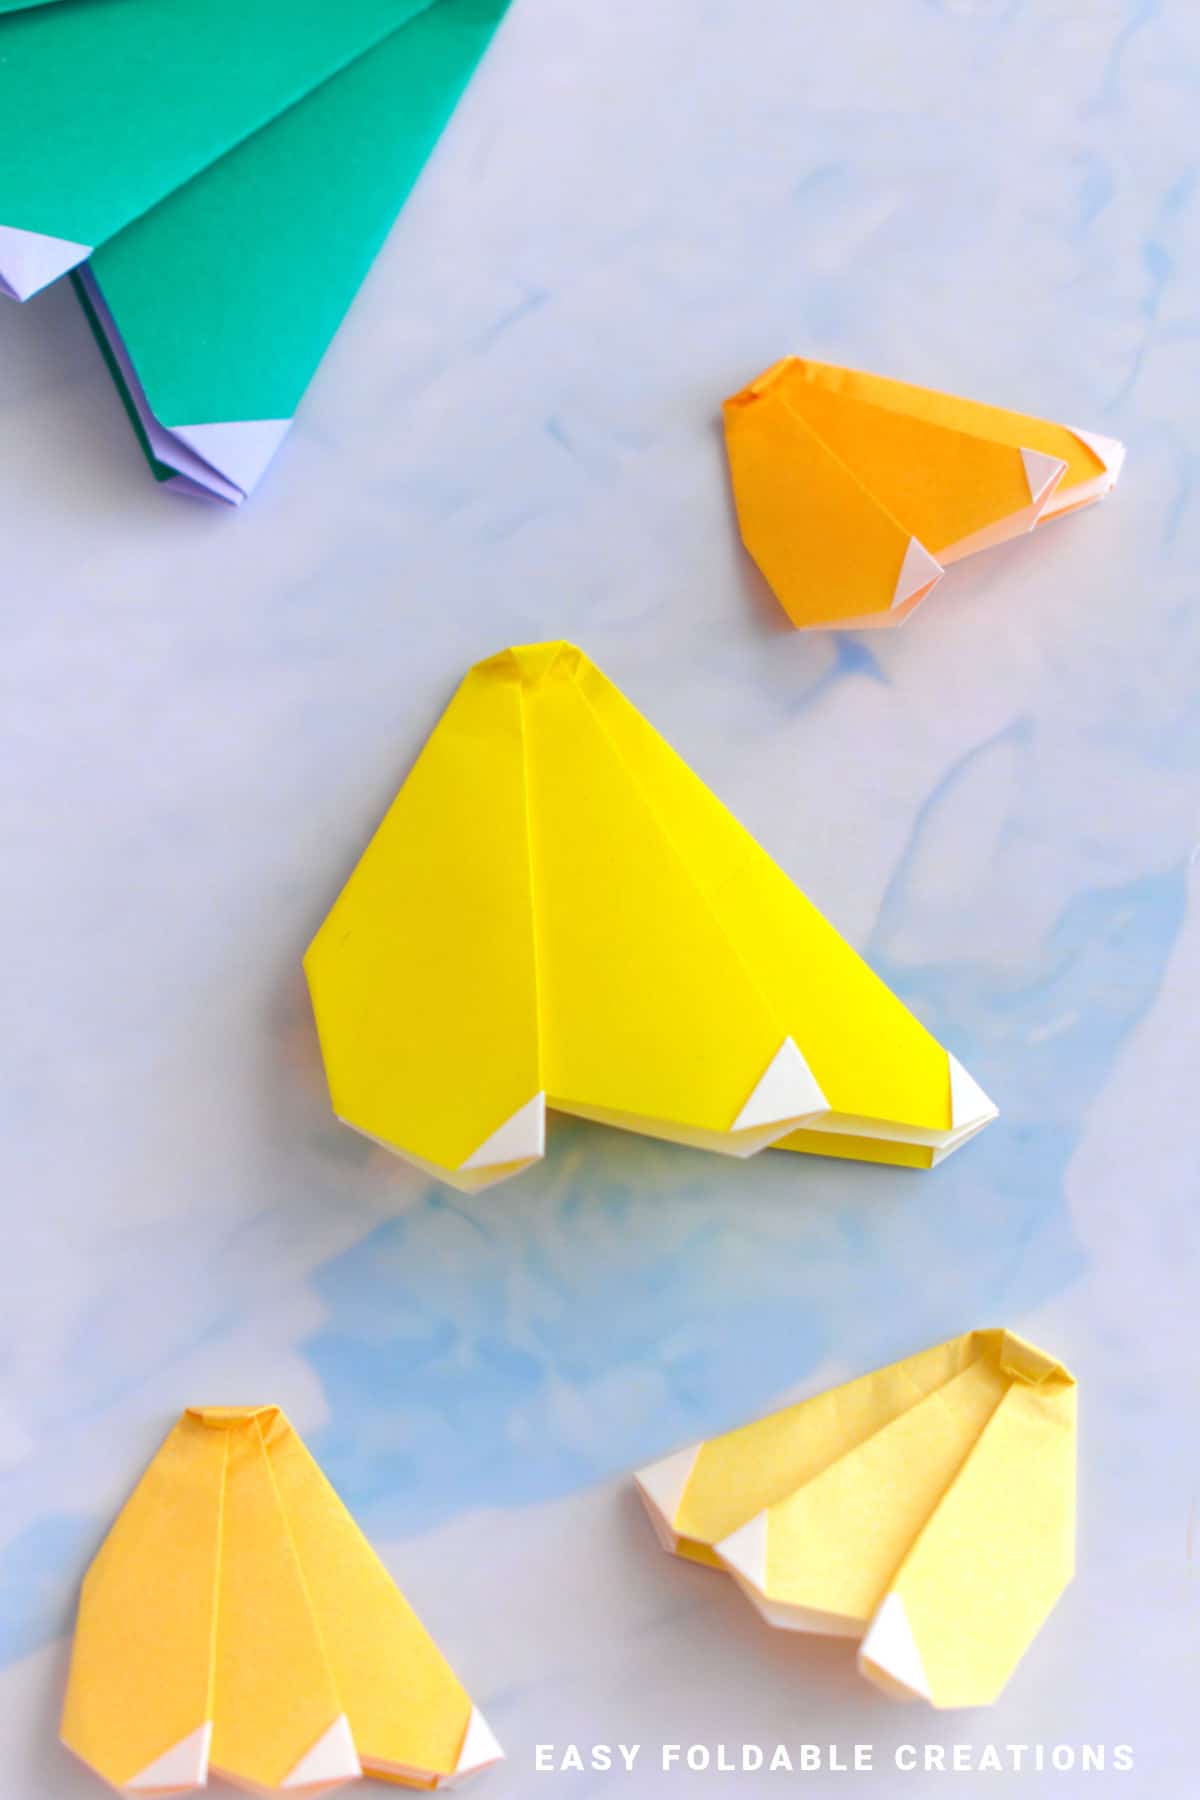
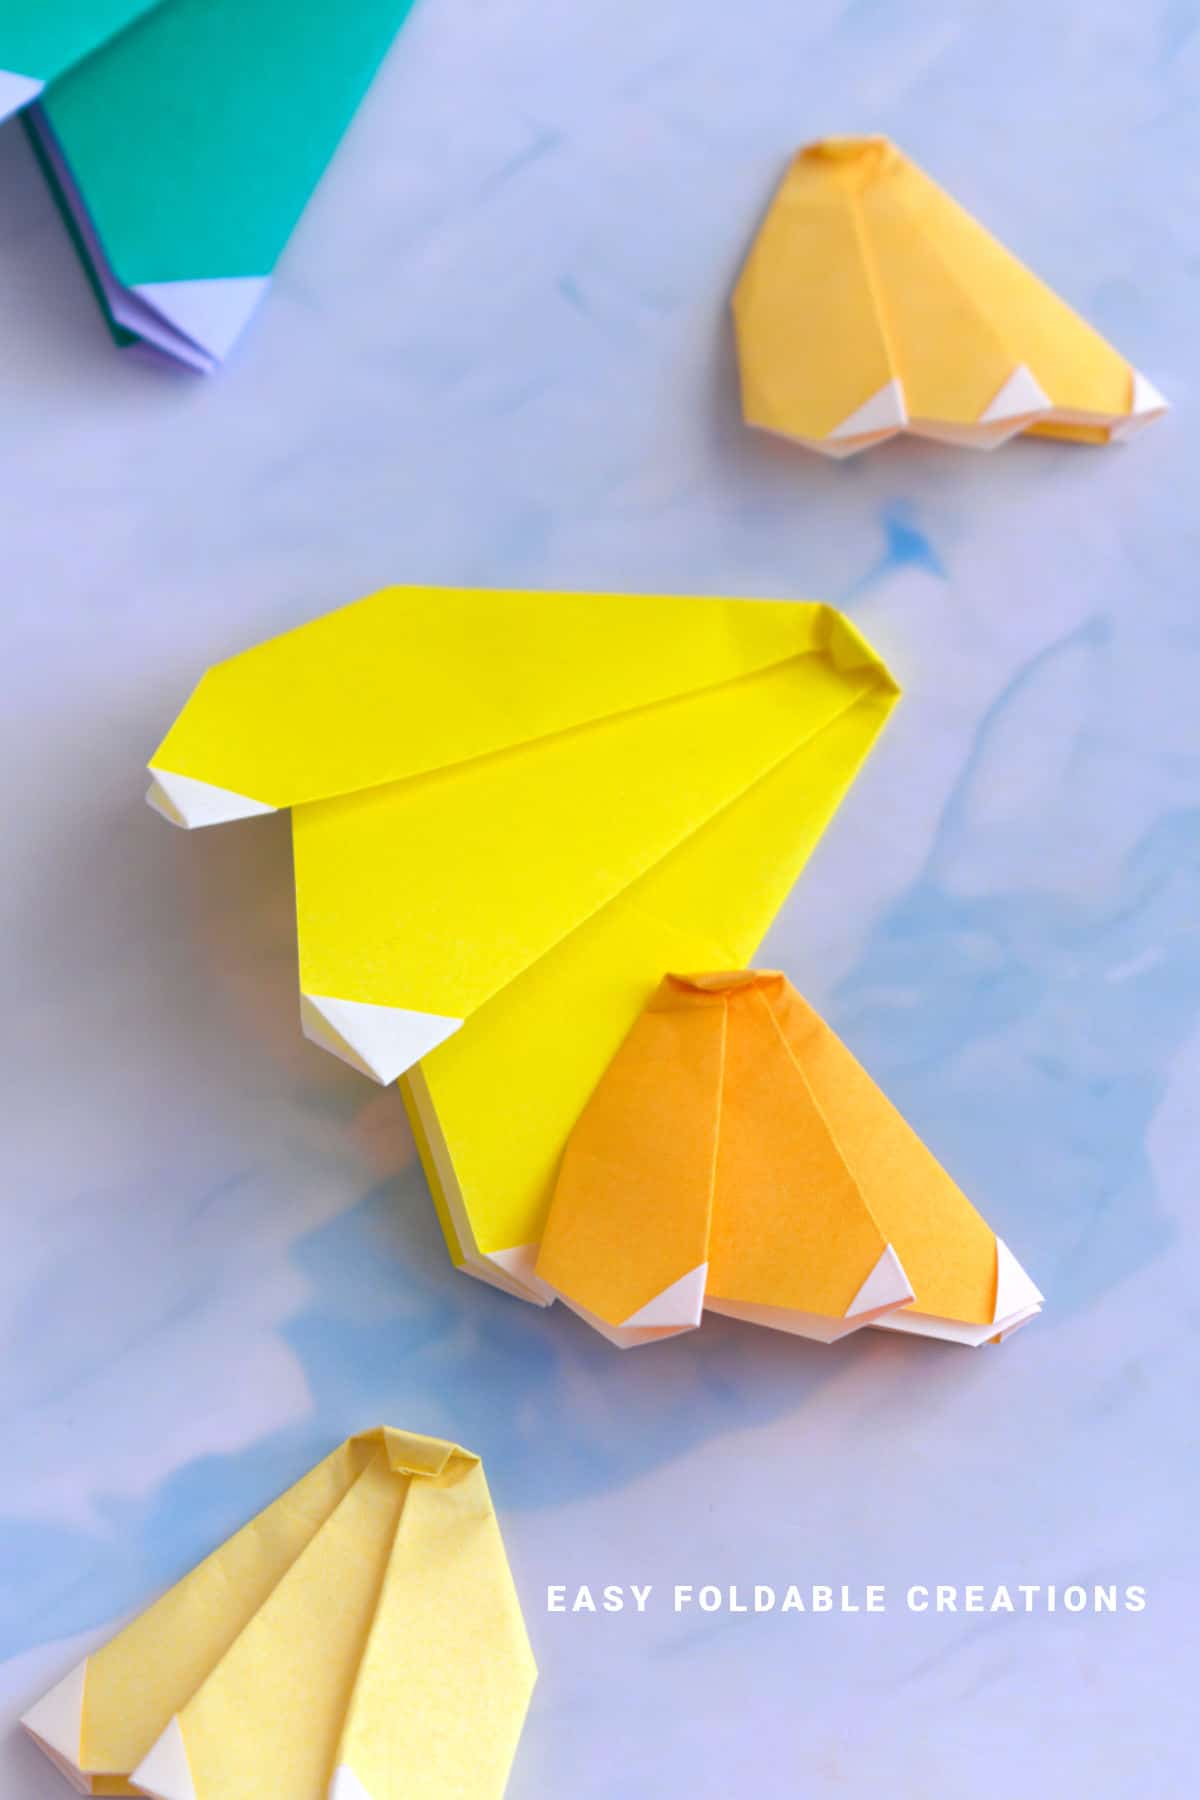
Add a splash of fun to your paper crafts with this quirky origami banana!
All you need is one square sheet of yellow paper-no scissors, no glue. Great for kids, fruit-themed decor, or just a quick, cheerful fold.
Jump to:
If you're looking for a lighthearted, quick paper craft, this origami banana is a great pick.
It's simple to fold, uses only one square sheet of paper, and doesn't require any special tools-just your hands and a flat surface.
It's the perfect project for a classroom craft session, fruit-themed party, or even to liven up a homemade card or kitchen noticeboard.
The final shape has a gentle curve and a clear banana silhouette, especially if you use yellow paper.
It's great for kids to try, and adults will enjoy adding this to a fruit bowl of paper apples, pears, or strawberries.
Because it's not a complex fold, it's perfect if you're looking for something quick and satisfying.
Want to take it a step further?
Draw a cheeky face on your banana, fold a bunch of them and attach them to a garland, or glue one onto a gift tag or notebook for a handmade touch.
You can even experiment with different paper sizes for mini or jumbo bananas.
Why You'll Love This Pattern
- Quick and beginner-friendly
- Just one sheet of square paper, no cutting or glue
- Great for fruit-themed crafts or classroom activities
- Can be turned into decor, cards, garlands, or gift tags
- Fun for all ages!
Skill Level
★☆☆☆☆ (Easy)
Materials Needed
- 1 square sheet of yellow paper
- Optional: brown or green marker for stem or spots
Lightweight origami paper or craft paper (around 70-90 GSM).
Choose yellow paper for the most recognizable look.
Double-sided paper is not necessary but can be fun if the back side is white for contrast.
Instructions
Step 1: Start with the color you want your banana to be facing down. The color facing up will become the tips of the banana. Arrange your paper to sit like a diamond shape.
Step 2: Fold the bottom point up to meet the top point.
Step 3: Unfold previous step.
Step 4; Fold the left point to meet the right point.
Step 5: Unfold previous step.
Step 6: Flip your paper over from left to right.
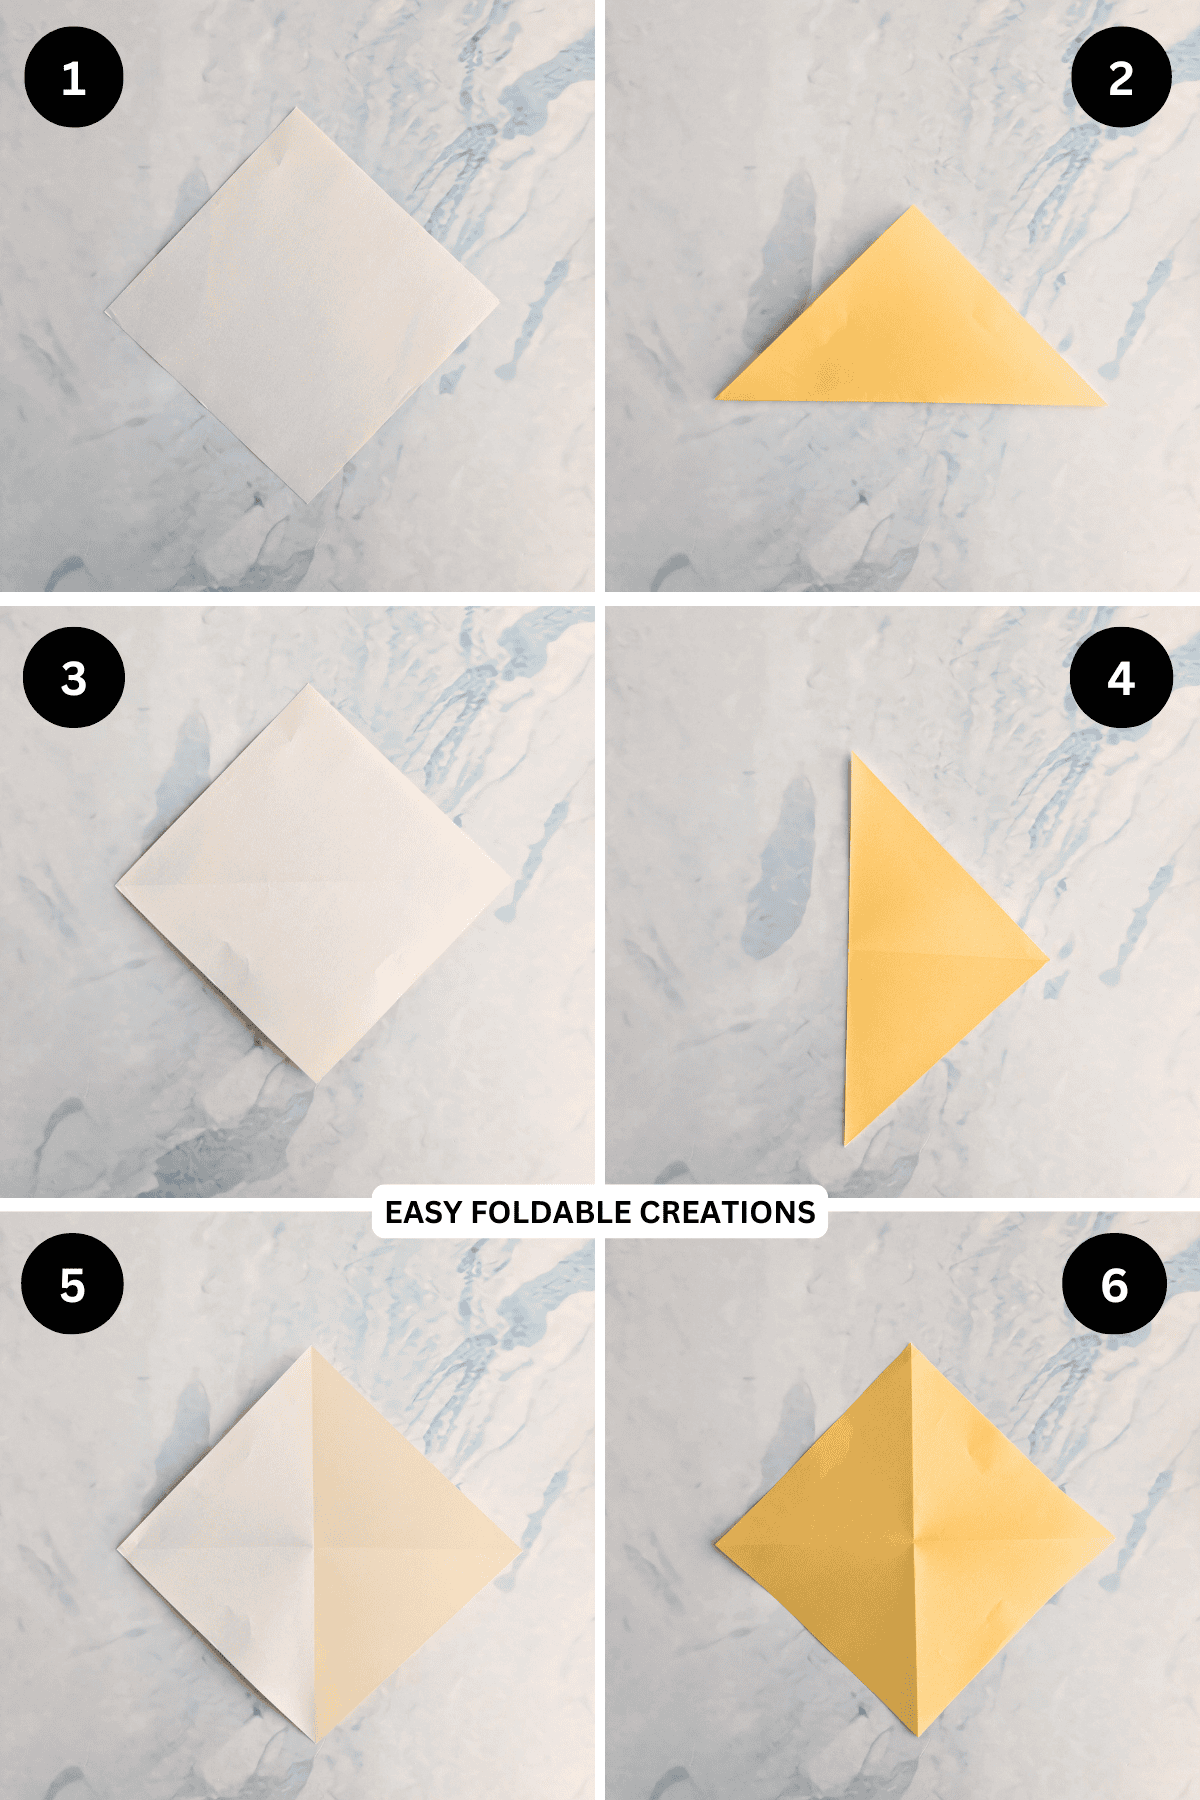
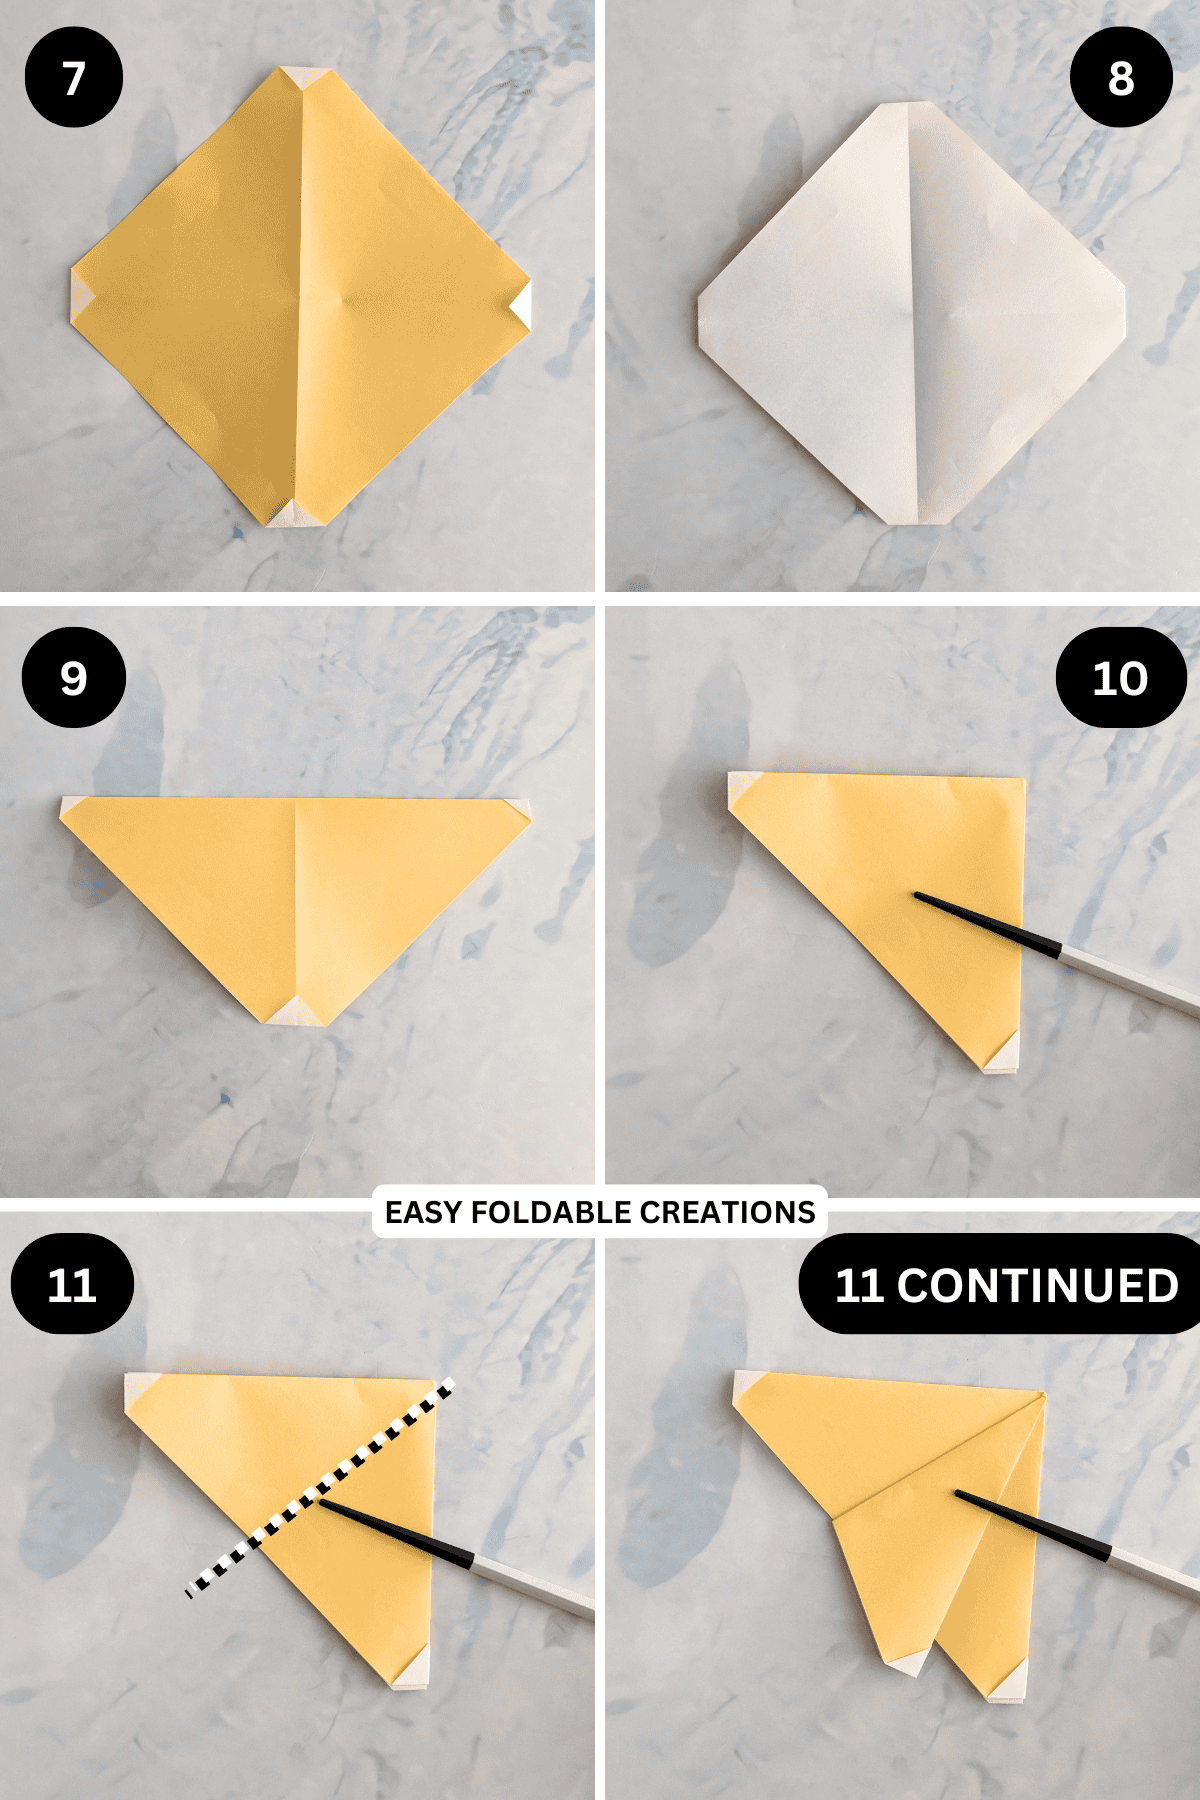
Step 7: Fold all of the corners in slightly. Keeping it as symmetrical as possible.
Step 8: Flip your paper over from left to right.
Step 9: Fold the top down to meet the bottom.
Step 10: Fold the right side to meet the left side, along the existing crease line.
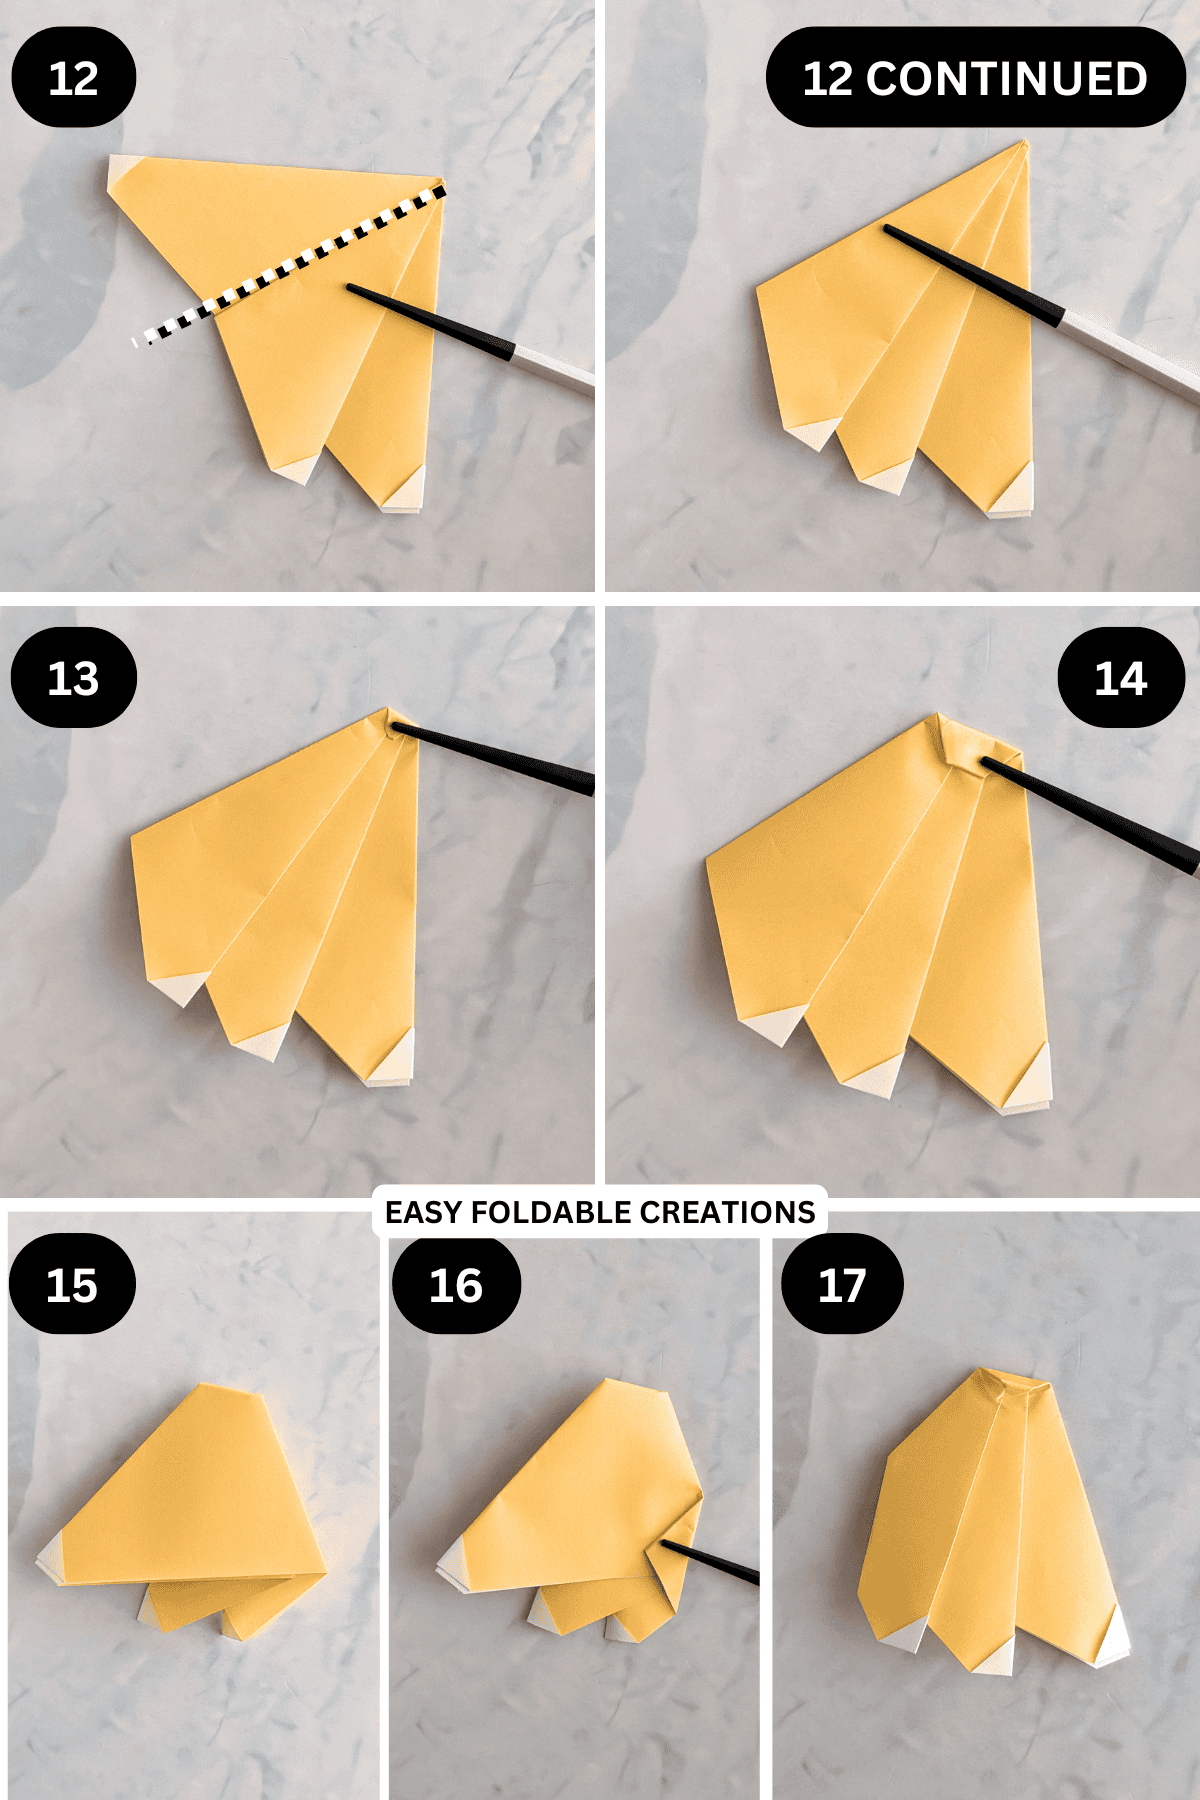
Step 11: Fold the top edge (top layer only) down along the line shown.
✨ You're almost there! ✨
To unlock the final steps and complete your pattern, create a free account with Grow.me. below.
Make sure you tick the box to subscribe to our newsletter and stay up to date with the latest patterns, tips, and more!
Once you're signed up, you'll get instant access to finish your project and enjoy exclusive content in the future.
Already signed up? Hit the button below and select 'Switch to Log In' to pick up where you left off and finish your project!
Step 12: Next, fold the top edge down along the line shown.
Step 13: Fold the top corner down slightly as shown.
Step 14: Fold the same top corner down once again.
Step 15: Flip your paper over from left to right.
Step 16: Fold the right corner towards the left slightly.
Step 17: Flip your paper over, completed banana.
Tips For Success
- Press down folds firmly so the banana holds its shape.
- Don't worry about making it look perfect-bananas in nature aren't either!
- Note: if you want your bananas to be curving the other way, instead of folding the paper from right to left in step 10, fold the paper from left to right and complete the remaining steps.

Color, Paper Ideas, and Variations
- Classic yellow: The go-to for a true banana look.
- Green paper: Make an unripe banana for a playful touch.
- Brown spots: Add freckles or shading with markers for realism.
- Kawaii banana: Draw eyes and a smile on one end for a cute cartoon style.
- Mini banana bunch: Make several in smaller sizes and display together!
FAQ
Yes, just cut it into a square and color it yellow or decorate it after folding.
Absolutely! Tape or glue bananas onto a string for a fun, fruity garland-perfect for parties or classrooms.
Yes! There are no scissors or glue needed, making it ideal for kids with adult supervision.
Definitely! Just press the curved part flat, or skip the curling step entirely.
Other Paper Crafts You Might Like To Try:
Helpful Origami Tips
If you're curious to learn more about origami, you might like to look at our basic guides on how to make some common origami folds.
Start with the valley fold and mountain fold-these are the foundation of most origami models.
Once you're comfortable, you might like to try the petal fold for 3D shapes, and explore the bird base and square base for more complex designs.
The water bomb base is also great for creating inflatable or geometric models, like this inflatable origami rabbit.
Stay Connected
Made this pattern? Let us know how it went in the comments below!
Pin this post - Pin now to take your paper crafting skills to the next level.
Share on Instagram or Facebook - Capture the beauty of your finished paper craft project and share it on Instagram or Facebook! Tag us @easyfoldablecreations so we can see your work!

Other Patterns You Might Like To Try:
Looking for other easy patterns like this? Try these:


Comments
No Comments