
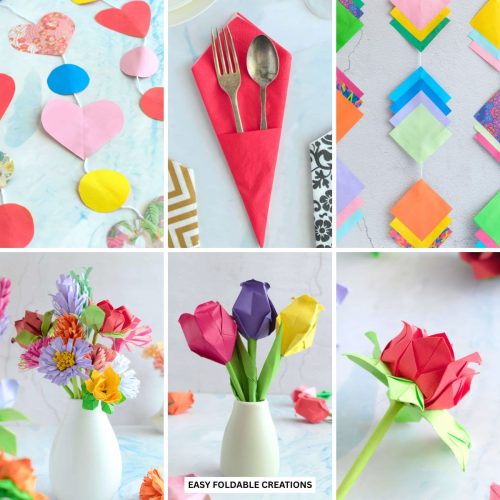
Looking for a quick and charming way to brighten up your space for Valentine's Day, anniversaries, or other celebrations?
This DIY heart paper garland is simple, customizable, and makes a heartfelt addition to your décor!

Jump to:
- Why You'll Love This Pattern
- Exclusive Content Just For You
- Skill Level
- Materials Needed
- Instructions
- Tips For Success
- Common Mistakes & How To Avoid Them
- Color, Paper Ideas, and Variations
- FAQ
- Other Paper Crafts You Might Like To Try:
- Helpful Origami Tips
- Useful Paper Craft Terms
- Stay Connected
- Other Patterns You Might Like To Try:
- Comments
Looking for an easy, budget-friendly way to add a personal touch to your celebrations?
This DIY heart paper garland is perfect for any occasion where love is in the air.
Whether you're decorating for Valentine's Day, Christmas, Mother's Day, celebrating an anniversary, or just want to add a little extra cheer to your space, this simple project will make a huge impact.
Plus, it's an enjoyable activity for all ages, making it a great crafting session for kids, friends, or family.
Creating this garland is easy, and you'll only need a few supplies to get started.
You can customize the garland to suit your style, choosing colors that match the theme of your celebration or home decor.
Whether you go for traditional reds and pinks or opt for metallics or pastels, you'll be left with a beautiful piece of decor in no time!

Why You'll Love This Pattern
- Perfect for All Occasions: This DIY paper heart garland is ideal for Valentine's Day, anniversaries, or any celebration of love.
- Simple Yet Stunning: With just a few materials and easy steps, you'll have a charming decoration that makes a big impact.
- Customizable Colors: Choose from classic red, pink, and white, or mix in your favorite shades to match your event or home decor.
- Great for Crafting with Loved Ones: A fun activity to do with kids or friends, creating sweet memories as you craft.
- Budget-Friendly: A beautiful way to add festive flair to any room or celebration without breaking the bank.
- Easy To Make
Exclusive Content Just For You
Not sure what you want to make next, but feeling a bit creative? Or maybe you've been searching for a pattern that sparks something new. We've got a few ideas waiting for you.
The Fold Collective, Easy Foldable Creations' community, provides you with a growing library of exclusive ad-free video tutorials, printable PDF patterns and more so you can improve your skills and enjoy crafting in your own time.
Skill Level
★☆☆☆☆ (Very Easy)
Materials Needed
- Square colored paper (choose your favorite colors like red, pink, white, or even gold and silver)
- Scissors
- Craft Glue
- String or twine (for hanging the garland)
- Pencil
The amount of paper and string will depend on how long you want to make your garland.
Instructions
Step 1: Let's start with making the hearts. Take one of your square sheets and arrange it so the color you want your heart is facing up.
Step 2: Fold the square in half from left to right.
Step 3: Along the folded edge, draw a curve as shown.
Step 4: Cut along the curve.
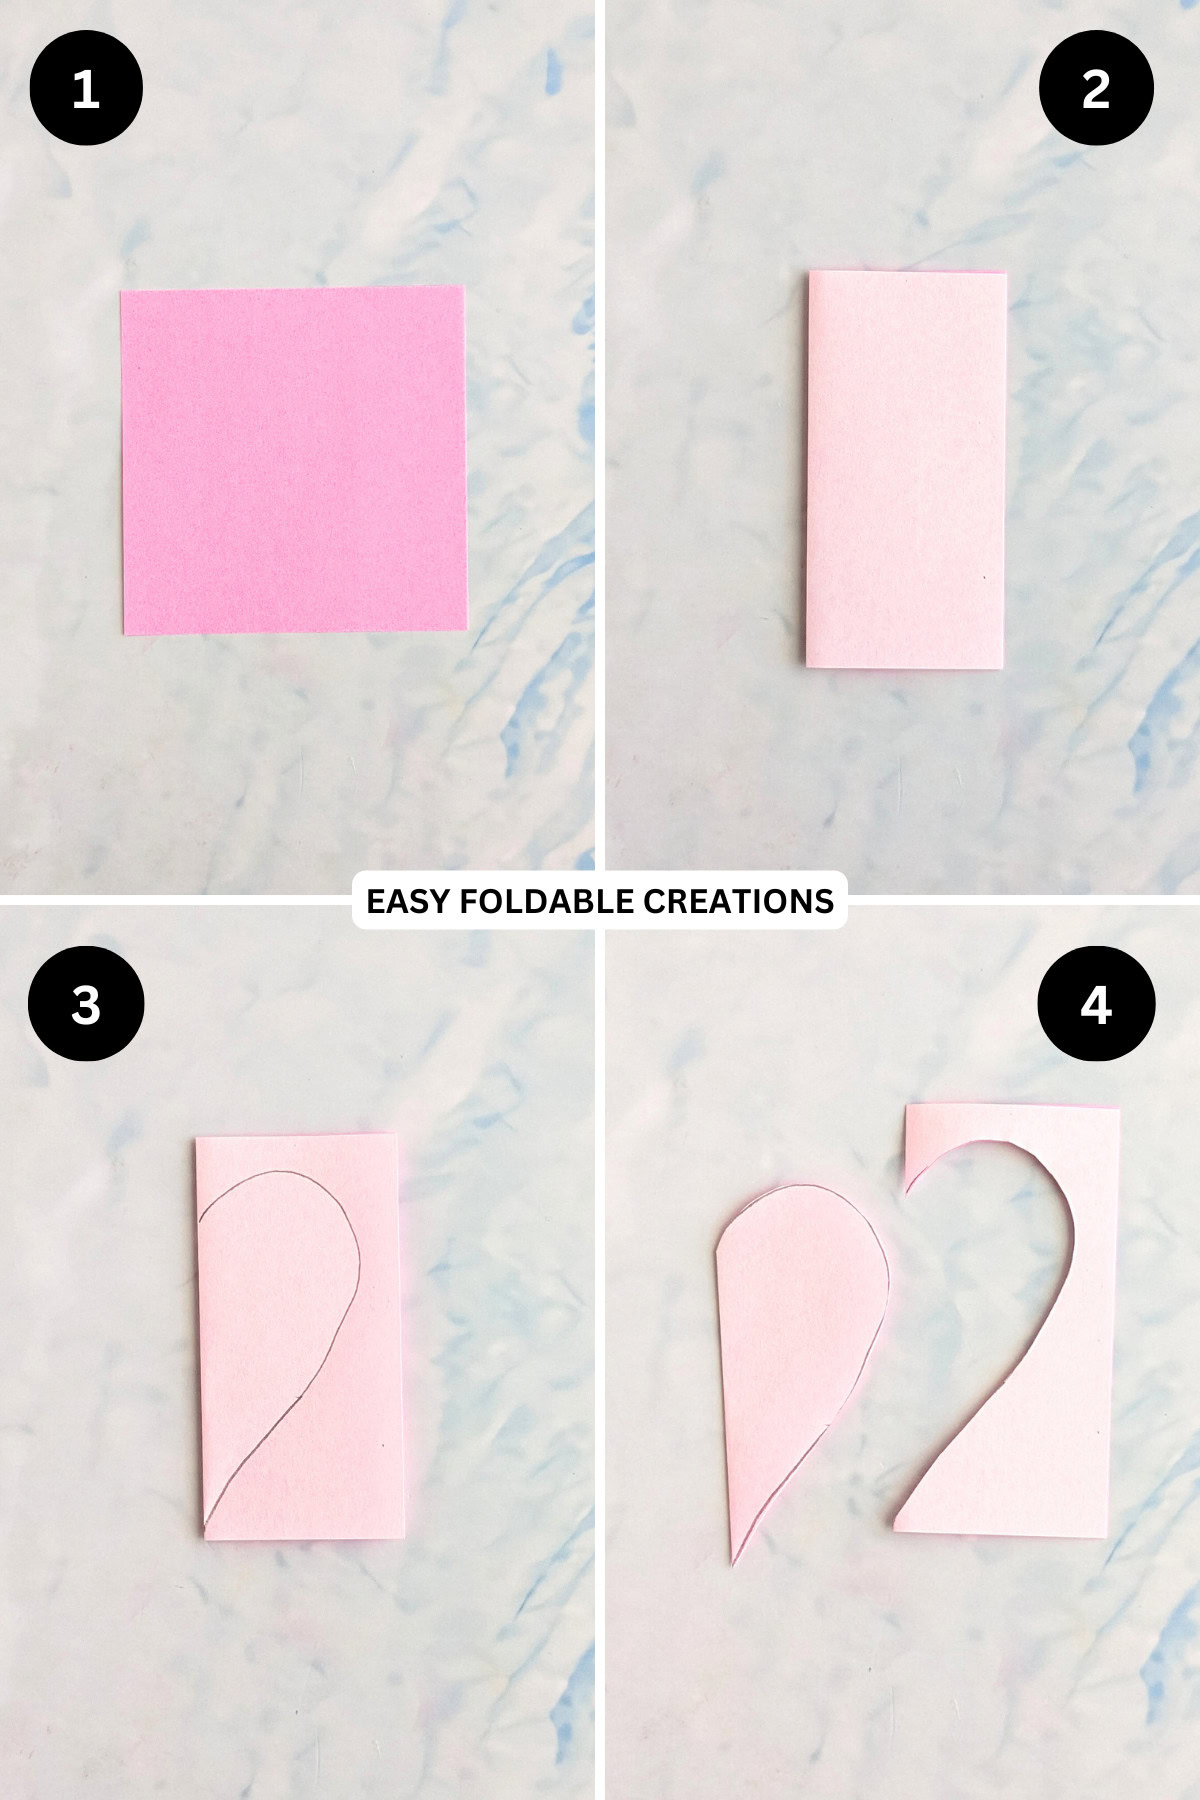
Step 5: Open out the cut piece. You will now have a heart shape.
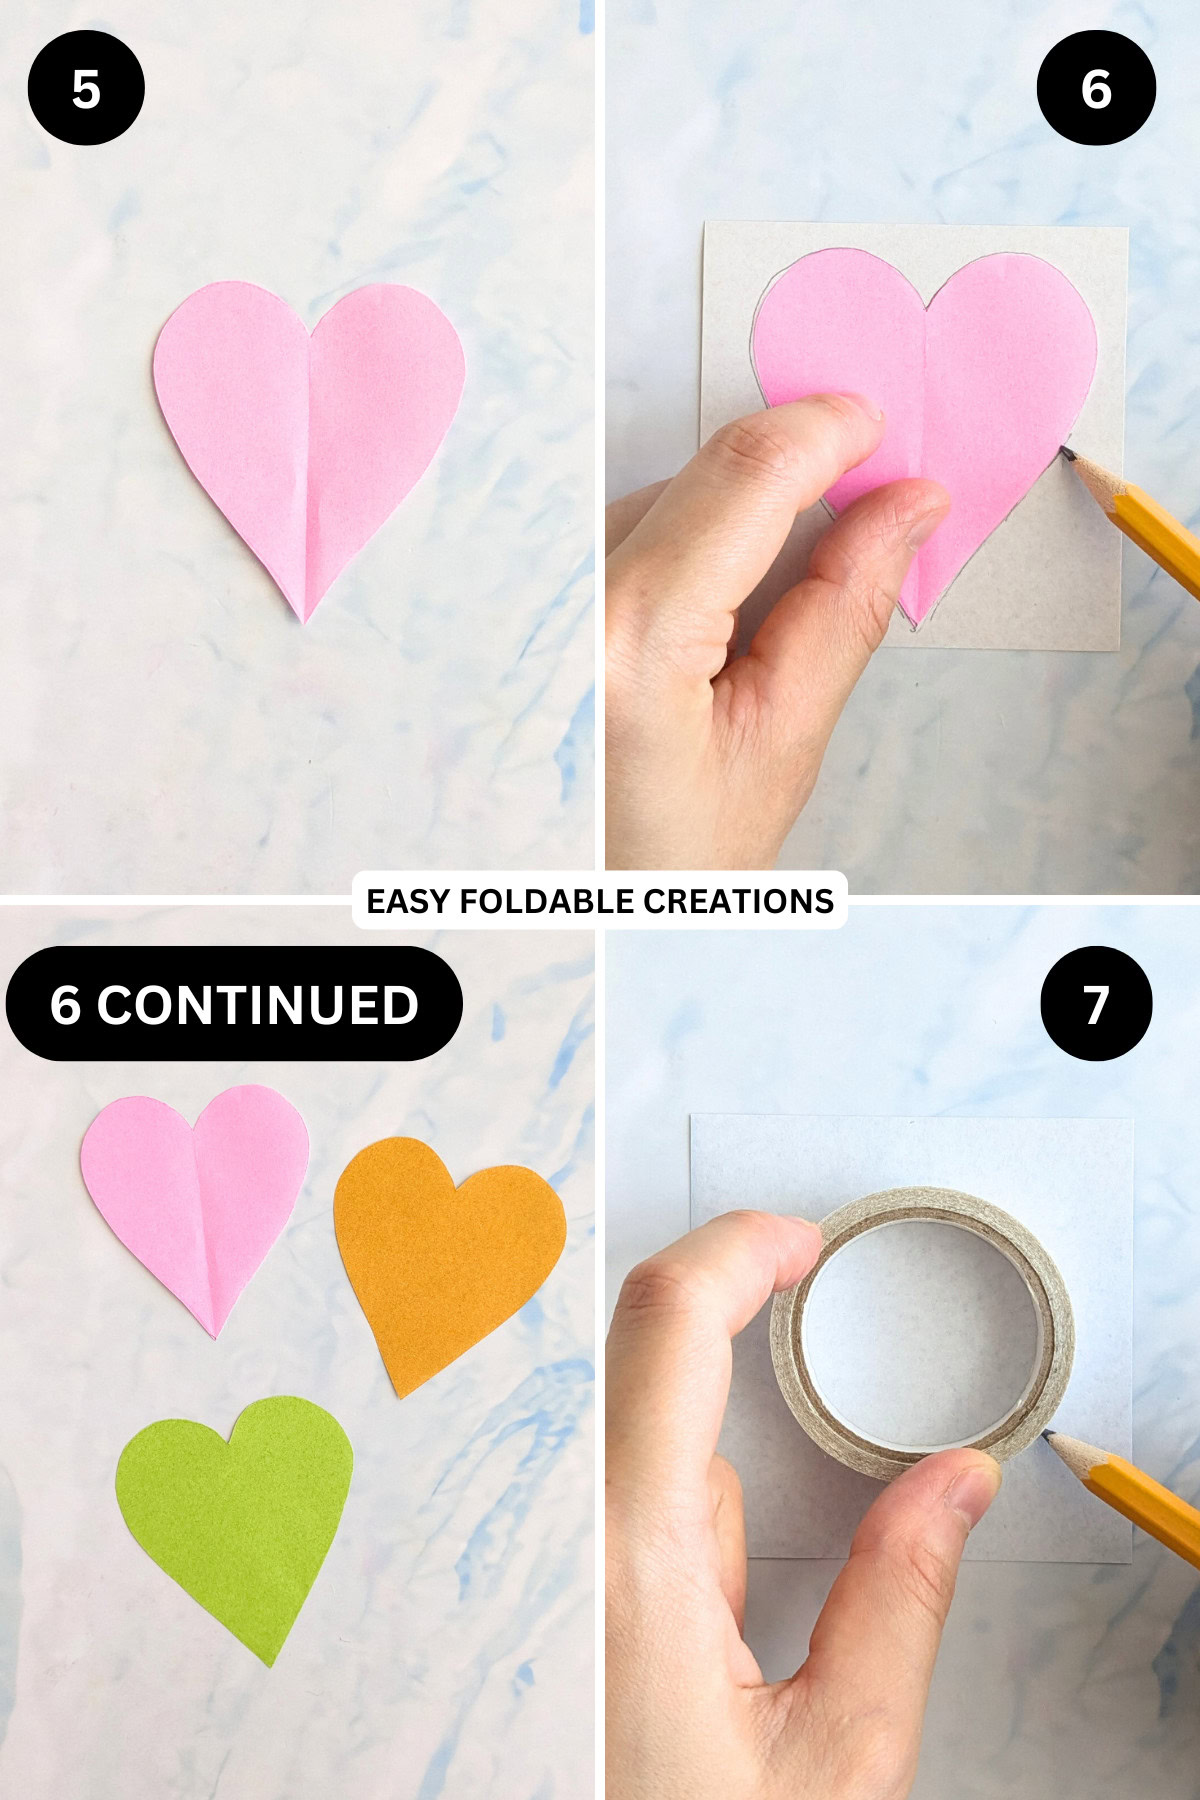
Step 6: To make more hearts, place the heart you just made on your other square sheets and trace around it. Then cut around the traced heart. Repeat as many times as you need.
Step 7: To make the circles, place something round, like a cup, on one of your square sheets. Then trace around it with a pencil.
✨ You're almost there! ✨
To unlock the final steps of the photo tutorial and complete your pattern, create a free account with Grow.me. below.
Make sure you tick the box to subscribe to our newsletter and stay up to date with the latest patterns, tips, and more!
Once you're signed up, you'll get instant access to finish your project with the photo tutorial and enjoy exclusive content in the future.
Already signed up? Hit the button below and select 'Switch to Log In' to pick up where you left off and finish your project!
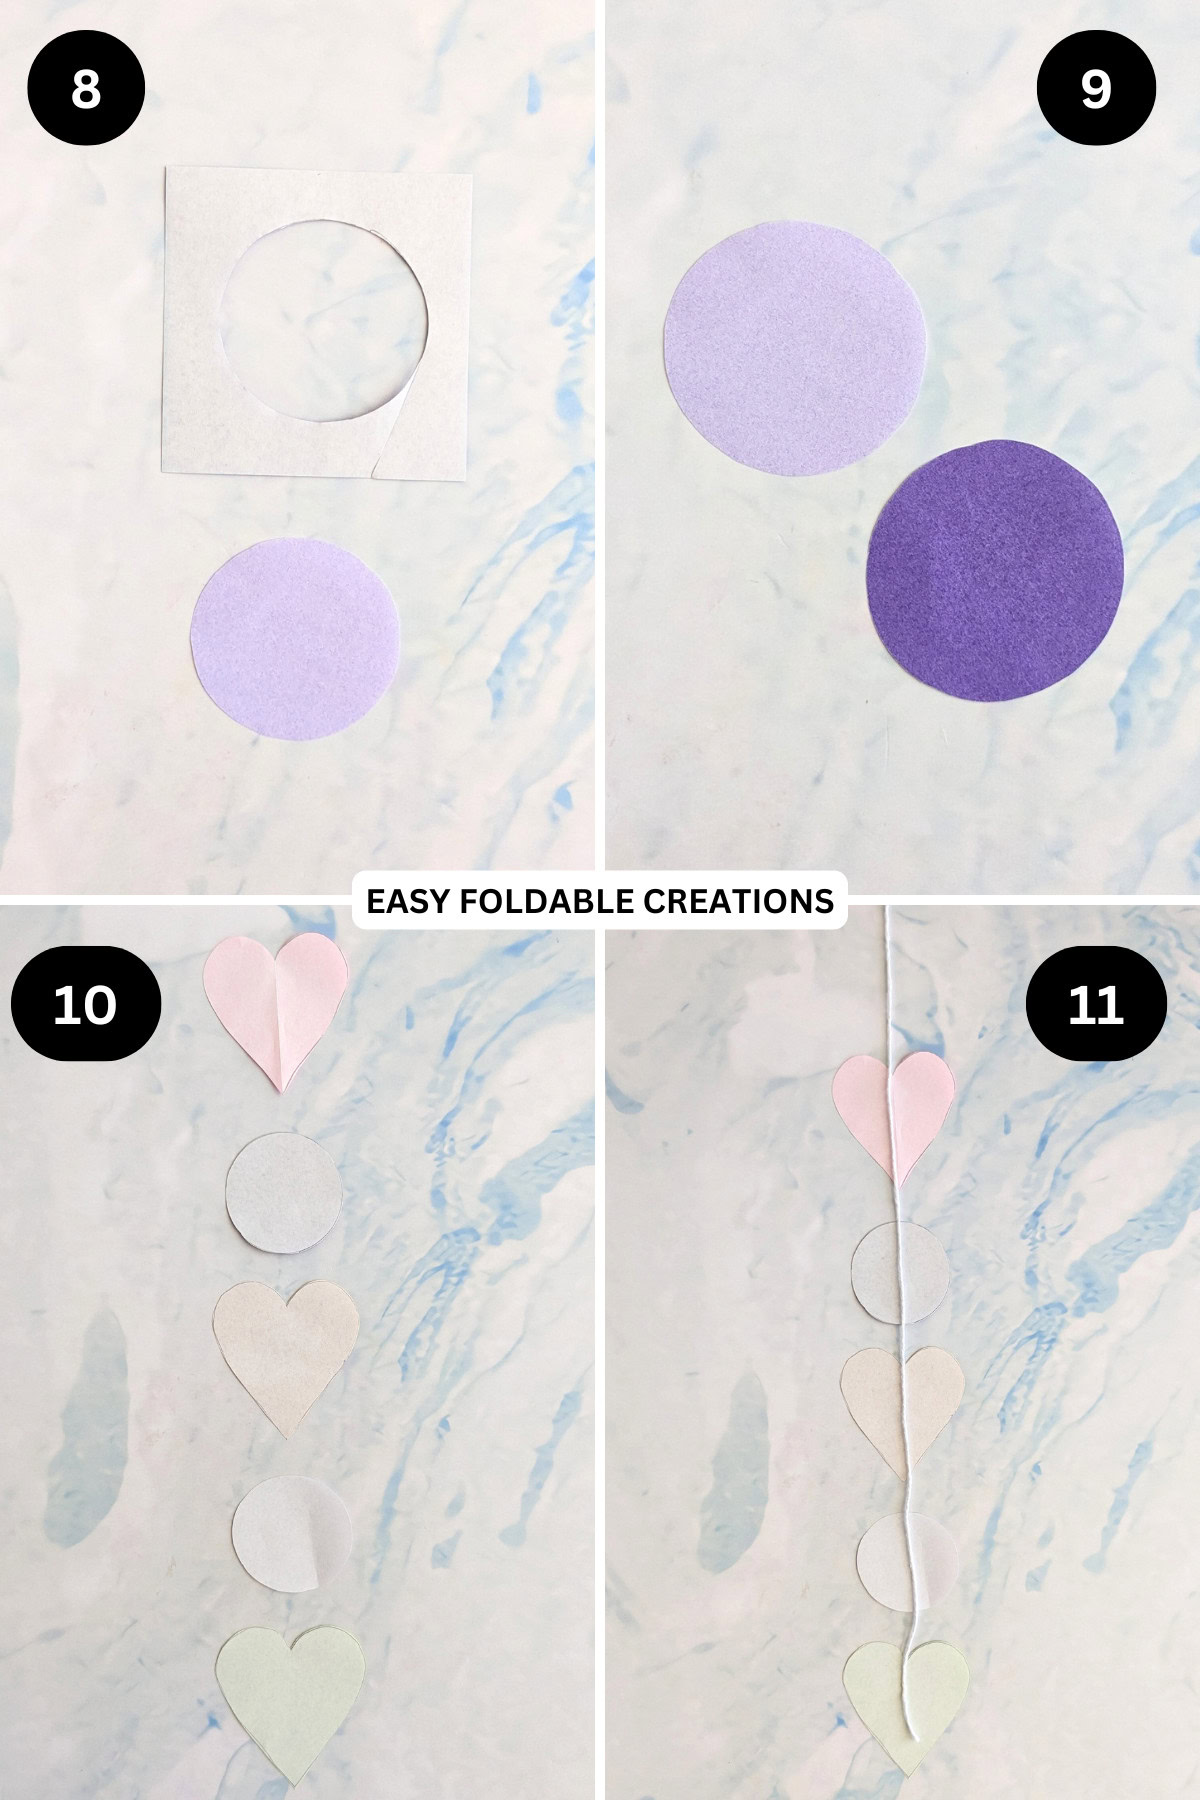
Step 8: Cut along the circle you just traced.
Step 9: Repeat steps 7 to 8 for as many circles you want to make.
Step 10: Arrange your hearts and circles in a line, leaving a small gap between them. Make sure that the side you want on the outside of your garland is facing down. The side facing up will be where you glue your string.
Step 11: Cut your string to the length of the line of hearts and circles. Note: If you want to hang your garland straight down, leave a minimum of 11 inches (30 cm) of string on one end.
This will be used to tie your garland up.
However, if you want to hang your garland across something, like a mantle or doorway, leave a minimum of 11 inches (30 cm) of string on BOTH ends. This way you can tie your garland up on both ends.
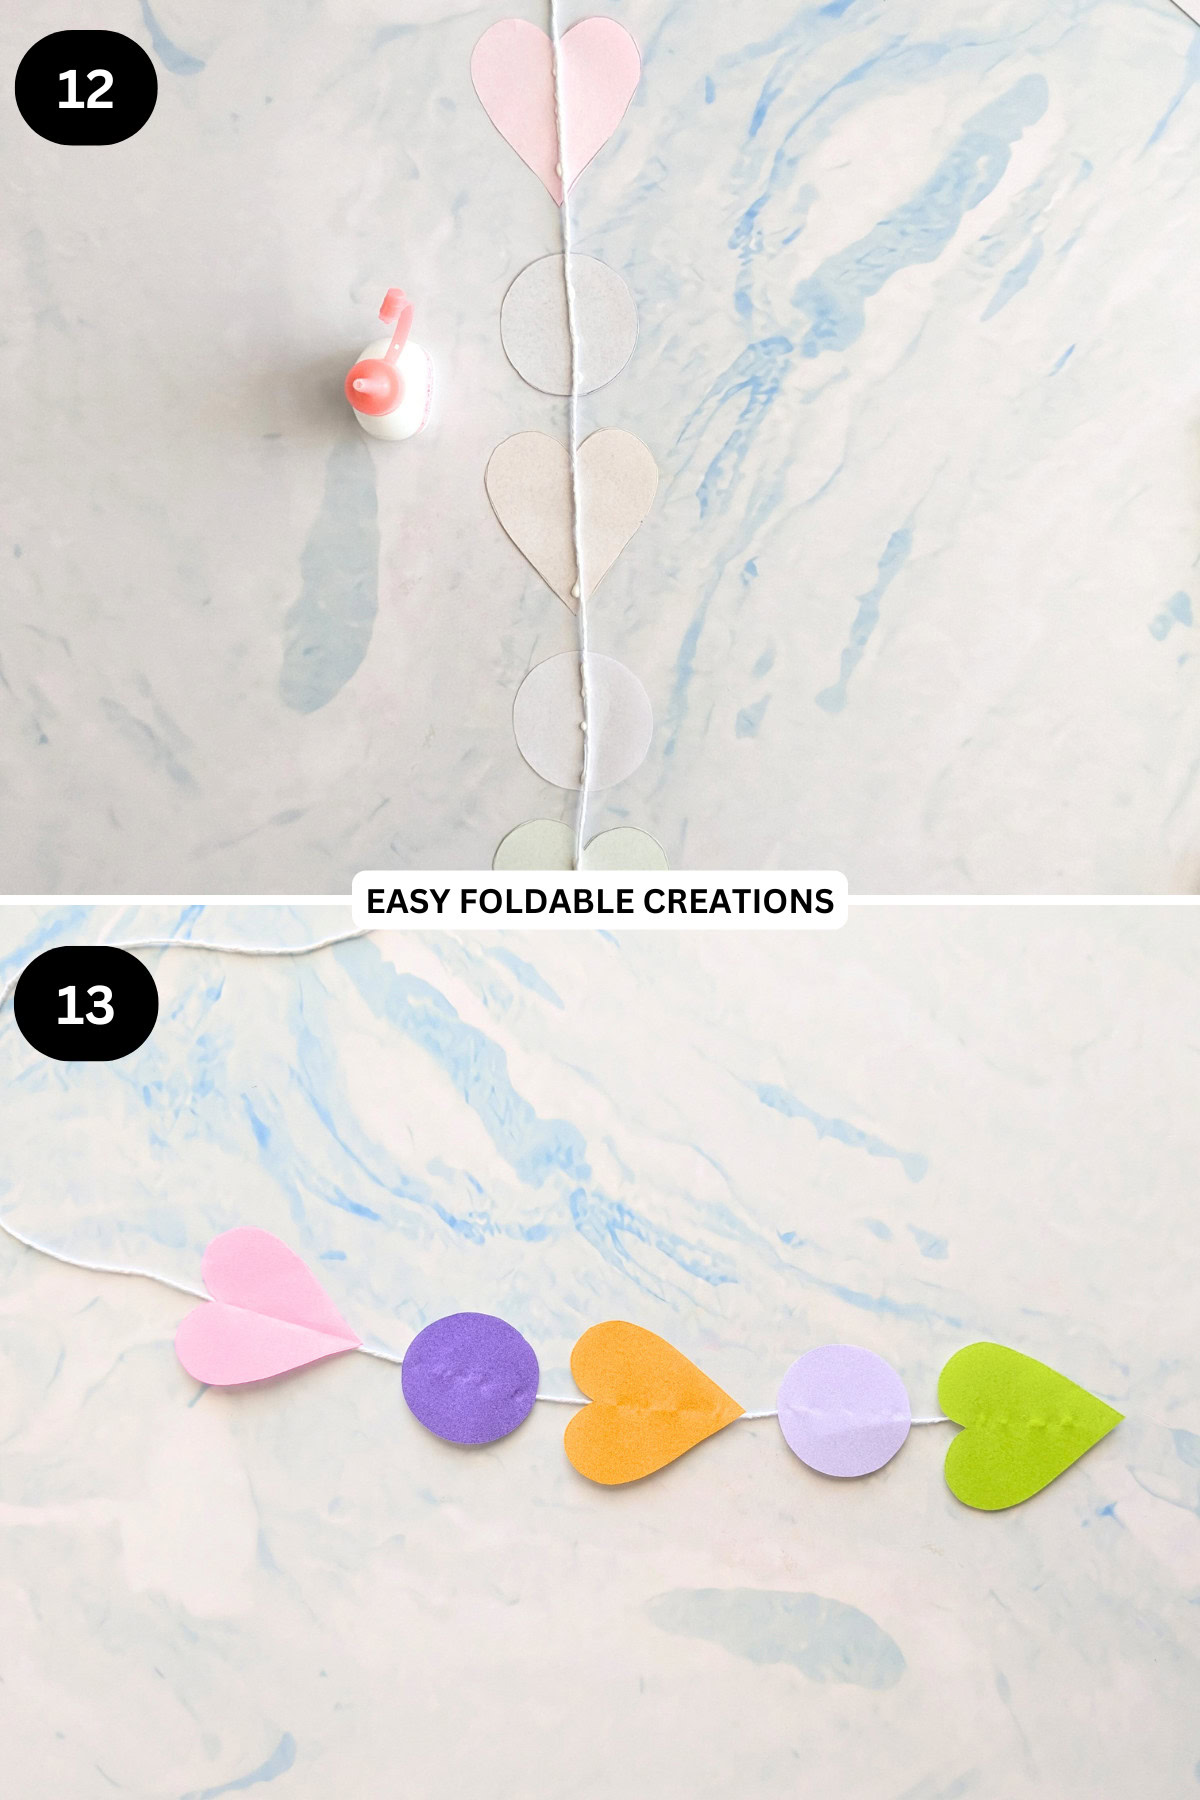
Step 12: Glue the string to the back of the shapes, leaving a small gap between the hearts and cricles. Allow to dry.
Step 13: Completed DIY heart paper garland.
Tips For Success
- Try mixing different shades of one color (like different shades of pink) for a more subtle, layered effect.
- For extra depth, consider cutting smaller hearts and layering them on top of larger ones.
- Make some hearts larger and others smaller for a playful, varied look.
- You can make this garland with just hearts only.

Common Mistakes & How To Avoid Them
- Uneven Spacing: Be mindful of how far apart your hearts are spaced on the string. Try laying them out first before gluing them down to get the right look.
- Paper Too Thin: If you're using thinner paper, it might tear easily or you may be able to see the glue on the other side. Cardstock is a stronger option, especially if you plan on hanging the garland for a longer time.
Color, Paper Ideas, and Variations
- Classic Color Scheme: Red, pink, and white are the go-to colors for a traditional Valentine's Day look. These colors work perfectly for romantic occasions, but you can mix it up based on your theme.
- Metallic & Sparkle: For a more festive look, try metallic papers or glittered cardstock. Gold and silver hearts will add a glamorous touch to your garland.
- Spring and Easter: Use pastel-colored hearts for a soft, springtime vibe. Light pink, lavender, and mint green are beautiful choices for a spring-themed garland.
- Add Personalization: Write sweet messages or names on the hearts using a fine-tip marker or calligraphy for an added personal touch.
- Patterns & Prints: Try using patterned scrapbook paper, like floral prints or polka dots, to create a fun contrast with the solid-colored hearts.
FAQ
Yes! This is a fantastic craft project for kids. They can cut out the hearts, glue them together, and string them up to make their own garland.
This garland is light and easy to store, so you can keep it up for as long as you like.
If it's for a special event, consider reusing it for the next celebration.
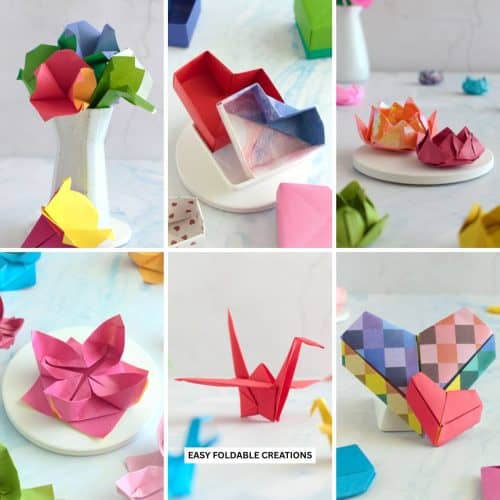
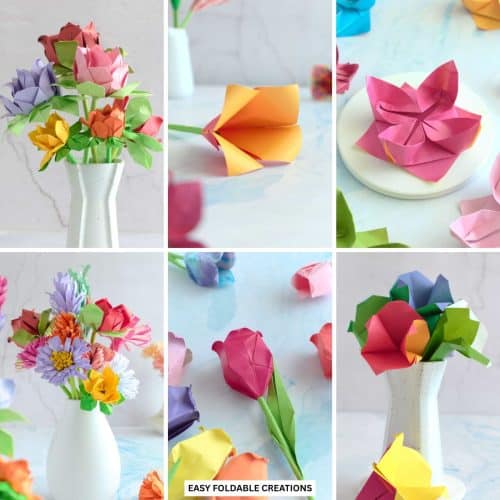
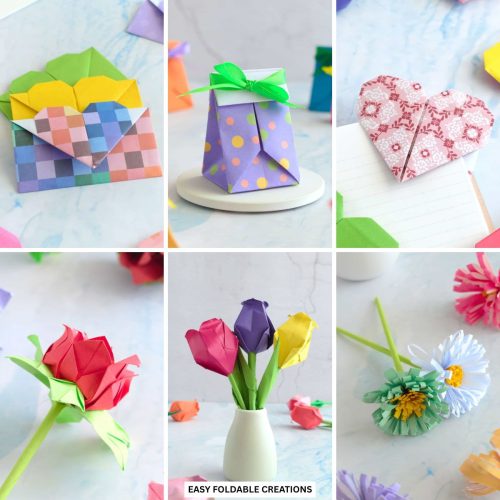
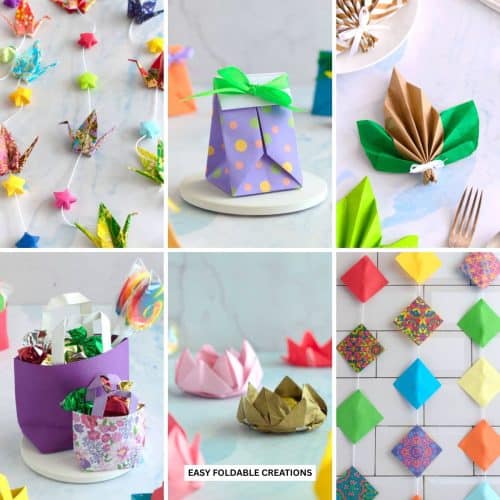
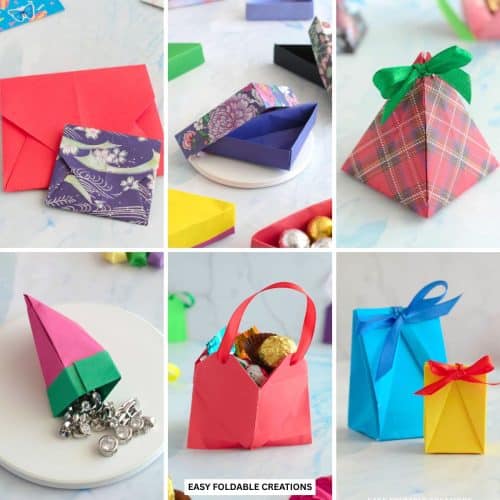
Other Paper Crafts You Might Like To Try:
Helpful Origami Tips
If you're curious to learn more about origami, you might like to look at our basic guides on how to make some common origami folds.
Start with the valley fold and mountain fold-these are the foundation of most origami models.
Once you're comfortable, you might like to try the petal fold for 3D shapes, and explore the bird base and square base for more complex designs.
The water bomb base is also great for creating inflatable or geometric models, like this inflatable origami rabbit.
Useful Paper Craft Terms
Want to learn a little more about paper crafts and origami?
We've made this helpful printable just for you. It explains common terms and helpful tips you might come across when you are folding origami or making a paper craft project.
You can download the useful paper craft terms printable PDF here.
Stay Connected
Made this pattern? Let us know how it went in the comments below!
Pin this post - Pin now to take your paper crafting skills to the next level.
Share on Instagram or Facebook - Capture the beauty of your finished paper craft project and share it on Instagram or Facebook! Tag us @easyfoldablecreations so we can see your work!

Other Patterns You Might Like To Try:
Looking for other easy patterns like this? Try these:
- Beautiful Wedding Gift Wrapping Ideas
- Creative Origami Ideas For Weddings
- DIY Paper Flowers for Wedding Decorations
- DIY Paper Wedding Favor Ideas Guests Will Love
- Easy Paper Crafts for Weddings
- DIY Wedding Favor Boxes and Bags
- DIY Paper Wedding Decorations for Your Big Day
- Wedding Napkin Folding Ideas For Elegant Tables


Comments
No Comments