
Make your Christmas gifts stand out this year with a festive Santa Christmas gift wrapping idea.
Using classic red wrapping paper, a black paper belt, and a simple buckle accent, this easy Christmas gift wrapping idea brings holiday cheer and a fun twist to your presents.
Perfect for family gatherings, office parties, or holiday gift exchanges, this DIY Santa belt gift wrap is both charming and simple to create.
Jump to:
- Why You'll Love This Pattern
- Exclusive Content Just For You
- Skill Level
- Materials Needed
- Instructions
- Tips For Success
- Common Mistakes & How To Avoid Them
- Color, Paper Ideas, and Variations
- FAQ
- Other Paper Crafts You Might Like To Try:
- Helpful Origami Tips
- Useful Paper Craft Terms
- Stay Connected
- Other Patterns You Might Like To Try:
- Comments
This Santa Claus inspired gift wrap combines traditional Christmas colors in a playful way that anyone can recreate.
The vibrant red wrapping paper serves as the base, while the black belt and buckle add an eye-catching contrast that mimics Santa's iconic outfit.
Whether you're wrapping small boxes or larger presents, this festive design adds a creative, personal touch without needing complicated techniques.
Ideal for Christmas gift wrapping, this project works well for a variety of gift shapes and sizes, and it fits right into holiday parties, Christmas morning surprises, or even as part of your seasonal home décor display.
Following a step by step origami tutorial for the belt and buckle accents can help keep your paper craft neat and polished.
This Santa-themed holiday wrapping also makes an excellent way to engage kids in festive crafting or to add a uniform look to all your Christmas gifts.
Why You'll Love This Pattern
- Simple and fun Christmas gift wrapping idea anyone can do
- Uses basic materials: red wrapping paper, black paper belt, and buckle accent
- Adds a festive, personal touch to your holiday presents
- Great for family, office parties, and holiday gift exchanges
- Step by step paper craft tutorial available for belt and buckle details
Exclusive Content Just For You
Not sure what you want to make next, but feeling a bit creative? Or maybe you've been searching for a pattern that sparks something new. We've got a few ideas waiting for you.
The Fold Collective, Easy Foldable Creations' community, provides you with a growing library of exclusive ad-free video tutorials, printable PDF patterns and more so you can improve your skills and enjoy crafting in your own time.
Skill Level
★☆☆☆☆ (Very Easy)
Materials Needed
- Red or green wrapping paper (or any other neutral Christmas themed wrapping paper)
- Black paper or cardstock for the belt (or you could use a thick satin ribbon)
- Gold, white or silver paper/cardstock for the buckle
- Scissors
- Tape or double-sided tape
Instructions
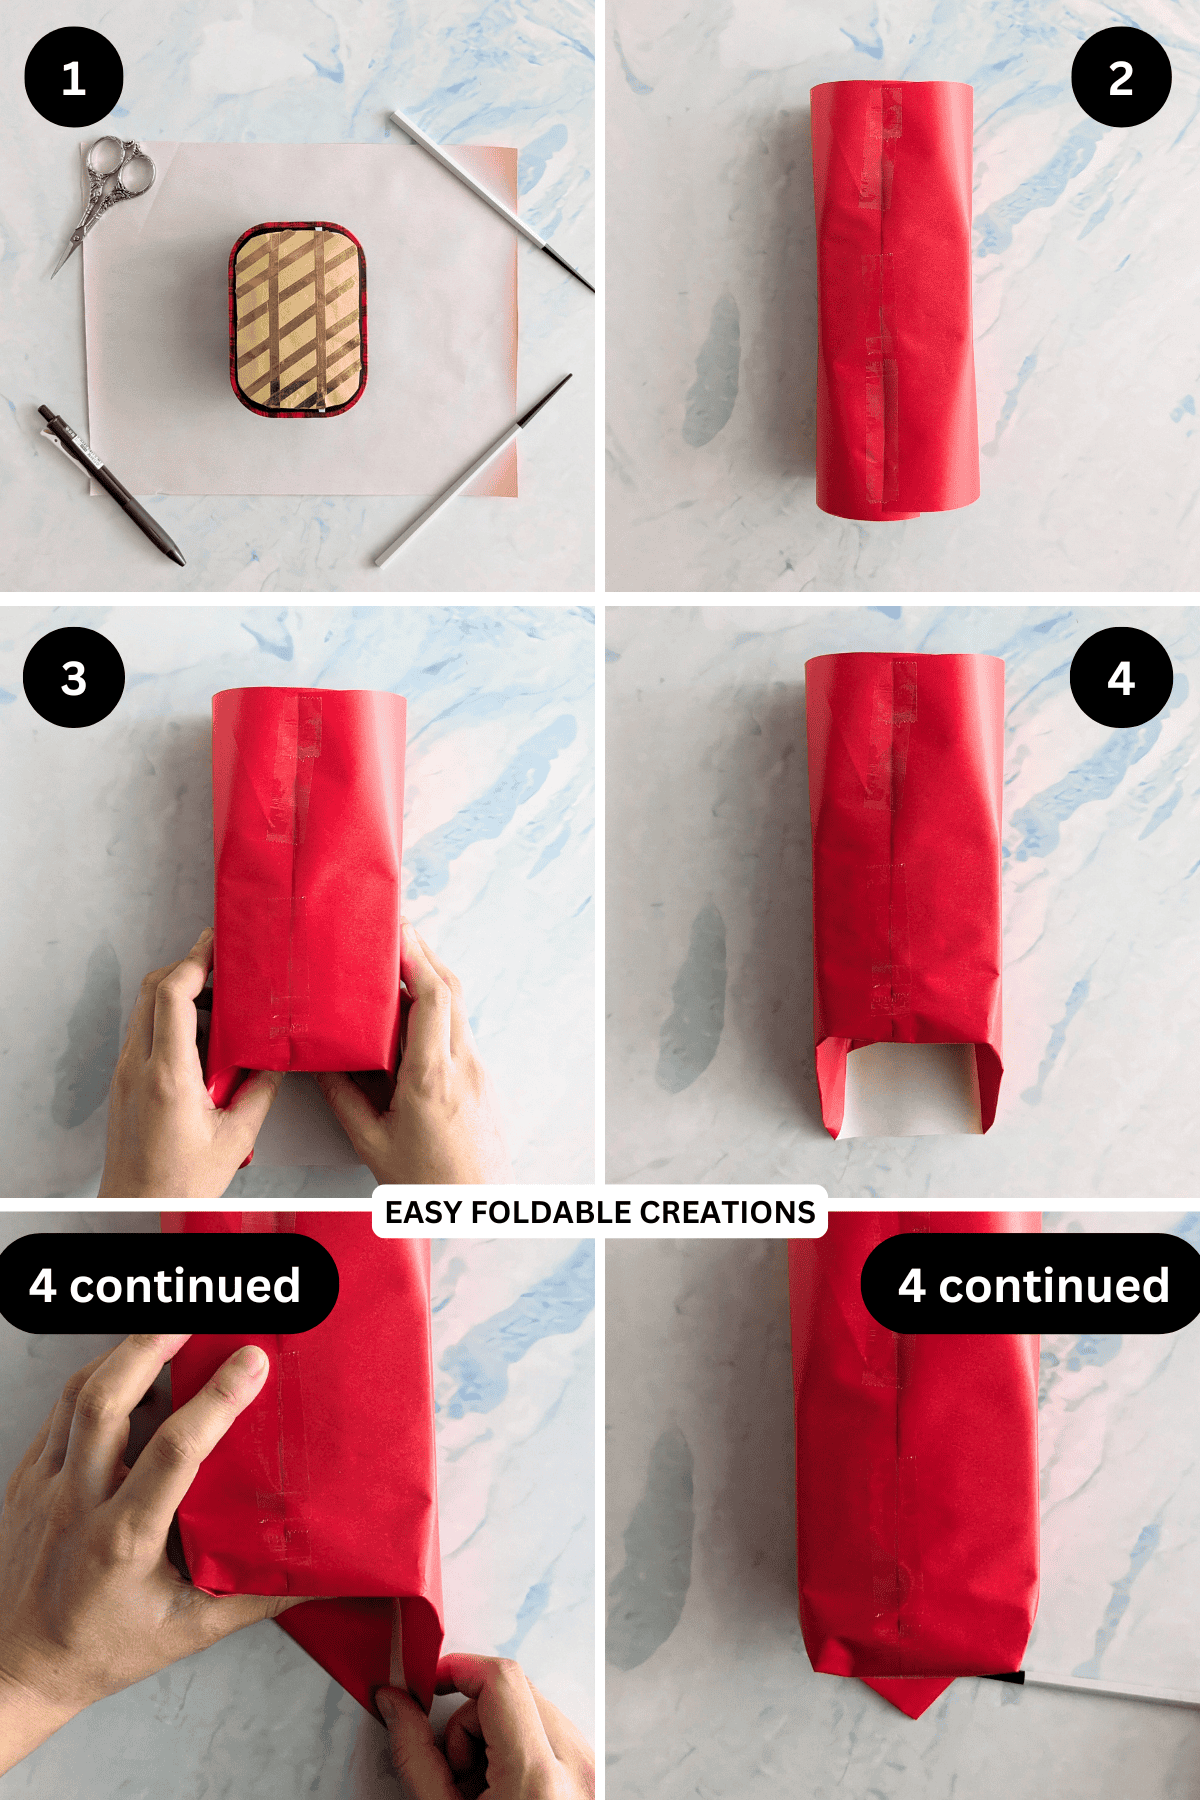
Step 1: Let's start by using the paper you want for the main color of your Santa. Cut your wrapping paper to size. You want both the bottom and top edges to have enough that it can fold up just about a quarter of the gift.
The sides of the gift should have enough to cover the gift (e.g. 1 ¼ times the width of the gift on either side). It's best to cut a bit more than you think as you can always trim it down if it's too much later.
Step 2: Fold the left edge over to cover your gift, making sure it sits against the left side. Then fold the right edge over your gift, so that it overlaps the left.
Once you have positioned the paper, tape along the middle of the gift as well as the top and bottom sections (this makes it easier to fold the edges in the next steps). If you want to hide the tape, you could use double sided tape.
Step 3: Using your fingers, run them along the bottom edge of your gift. Then bring the paper down as shown.
Step 4: Straighten out the bottom left and right sides of the paper as shown. Make sure they align with the sides of the gift.Then, fold both the left and right sides of the bottom edge in.
✨ You're almost there! ✨
To unlock the final steps of the photo tutorial and complete your pattern, create a free account with Grow.me. below.
Make sure you tick the box to subscribe to our newsletter and stay up to date with the latest patterns, tips, and more!
Once you're signed up, you'll get instant access to finish your project with the photo tutorial and enjoy exclusive content in the future.
Already signed up? Hit the button below and select 'Switch to Log In' to pick up where you left off and finish your project!
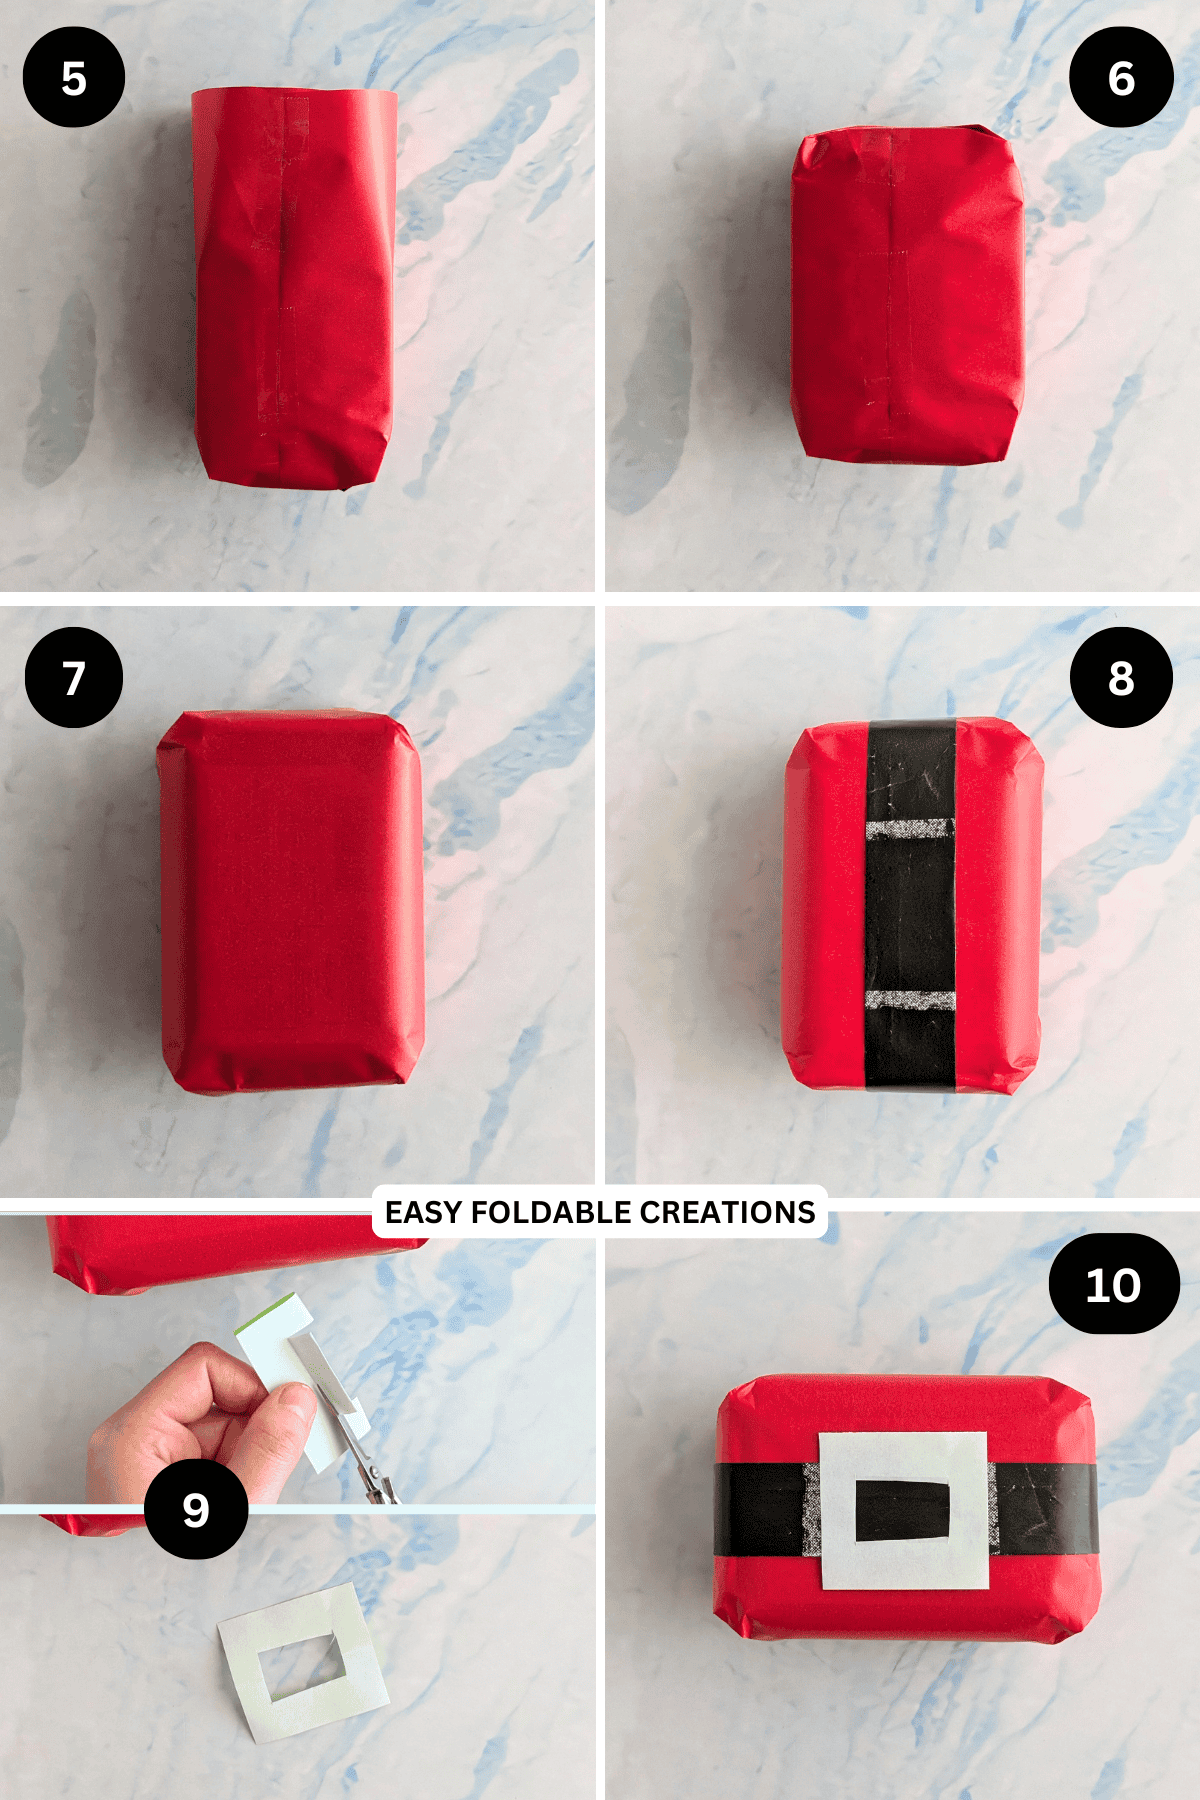
Step 5: Fold the bottom edge up (note; if you think your bottom edge is a bit too long, you can trim it down slightly) and secure it with tape. You don't want the bottom edge to go over the top of the gift.
Step 6: Repeat steps 3 to 5 for the top edge.
Step 7: Flip your gift over.
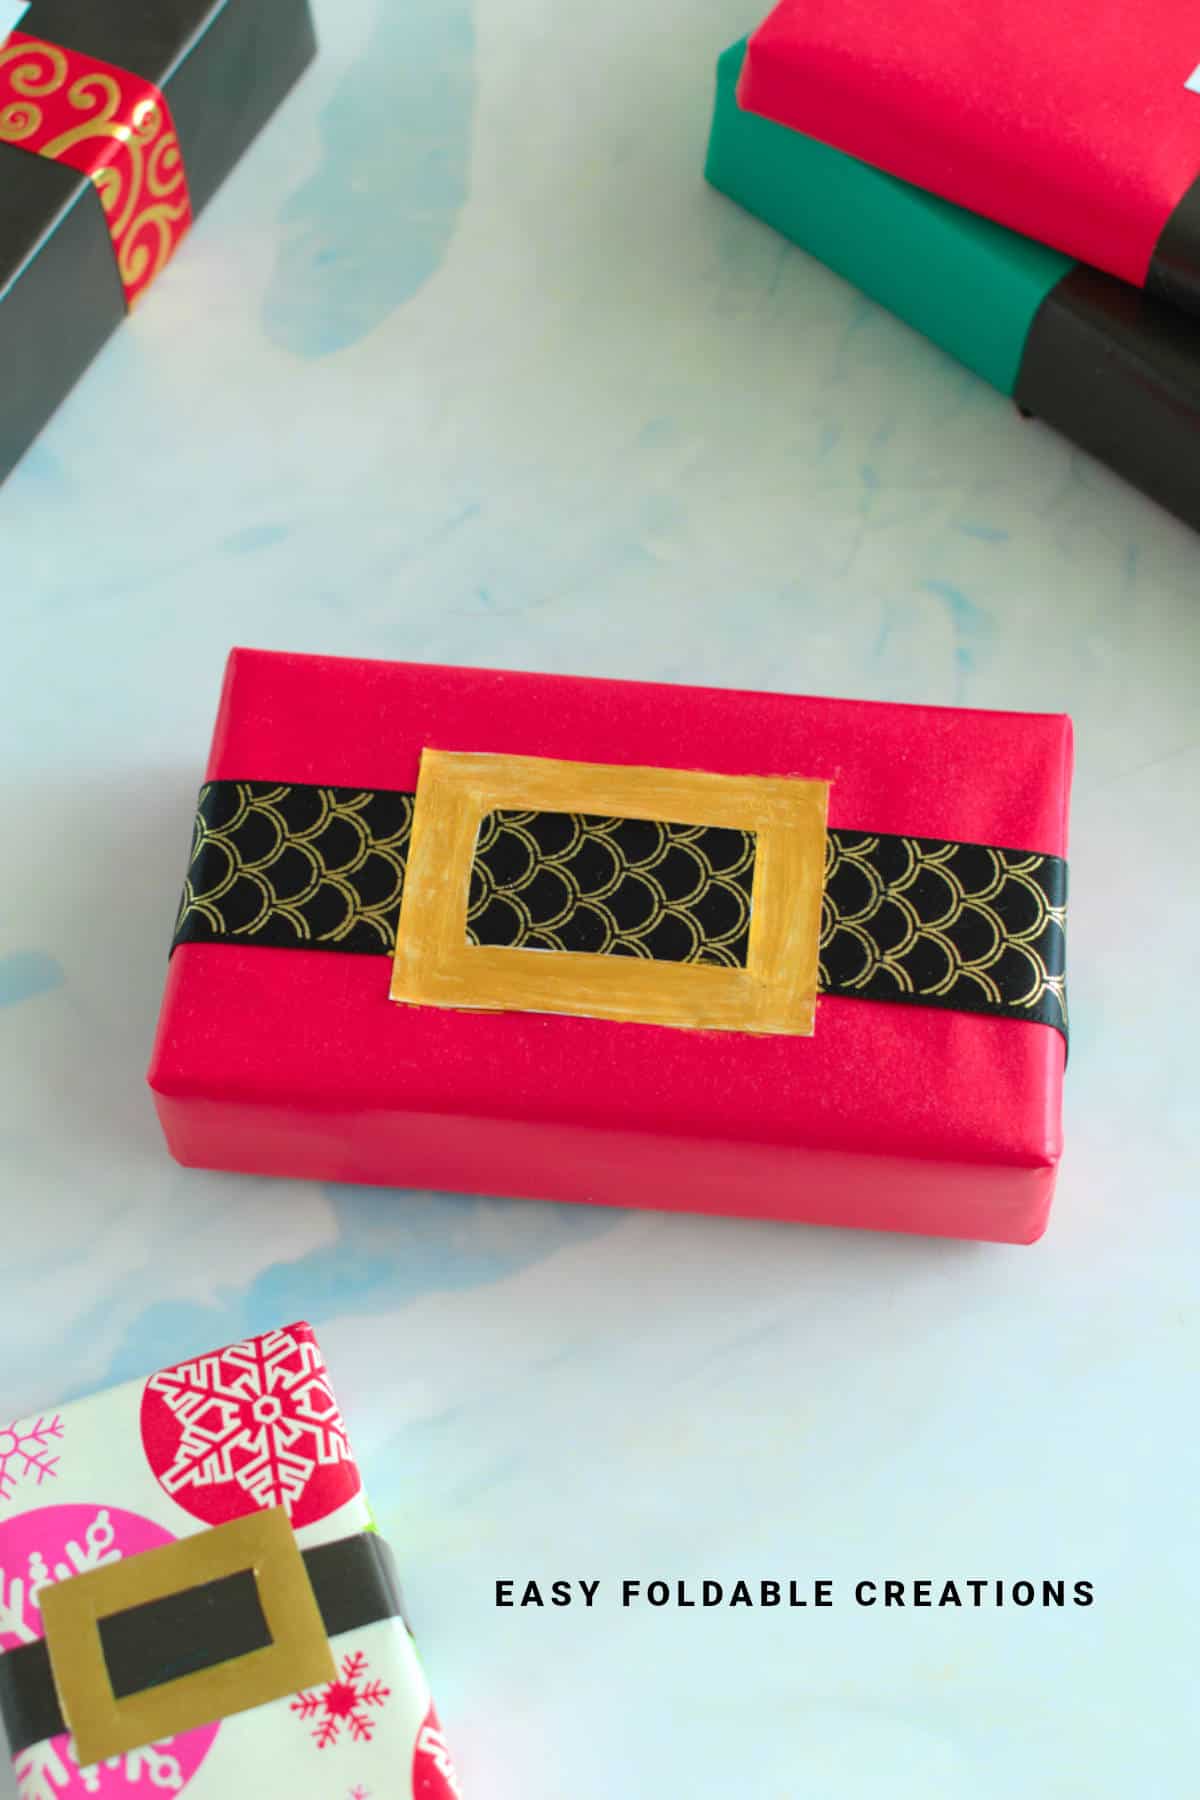
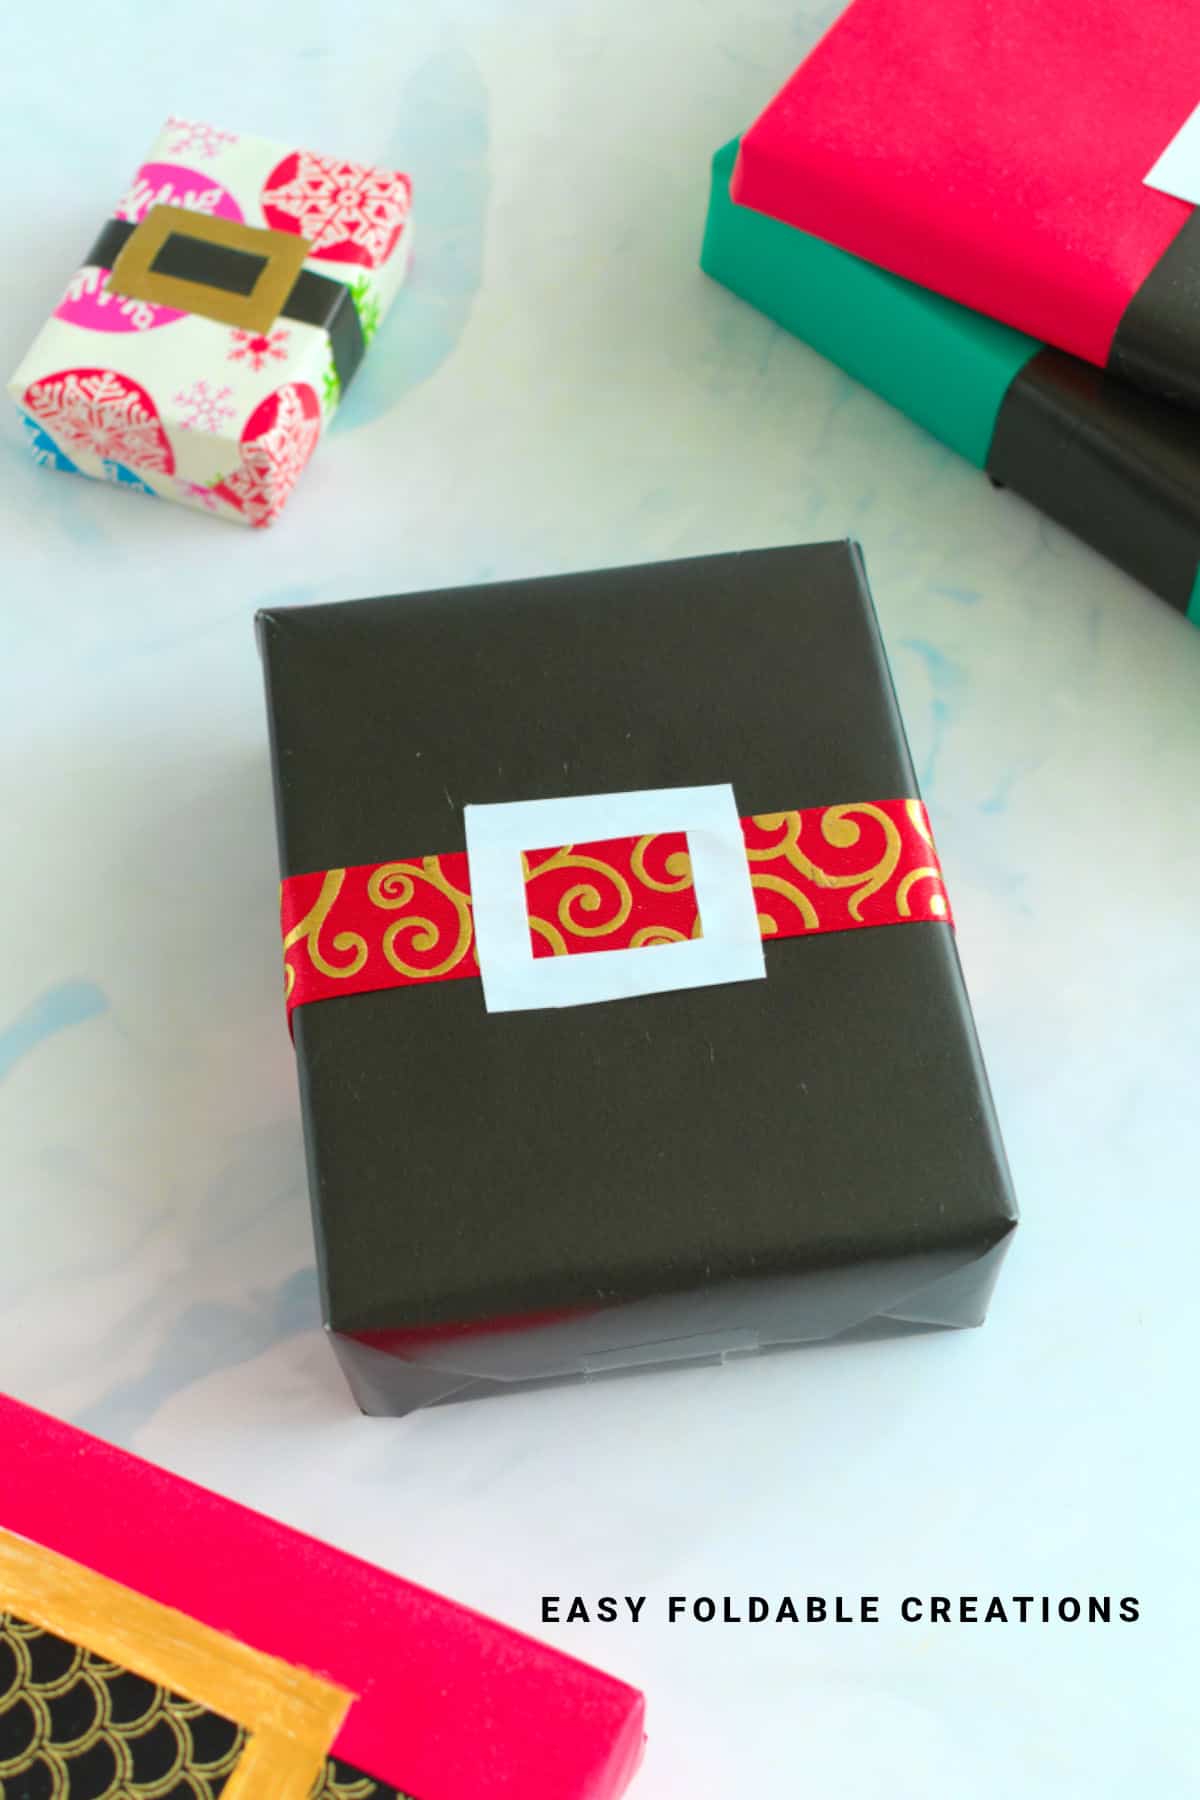
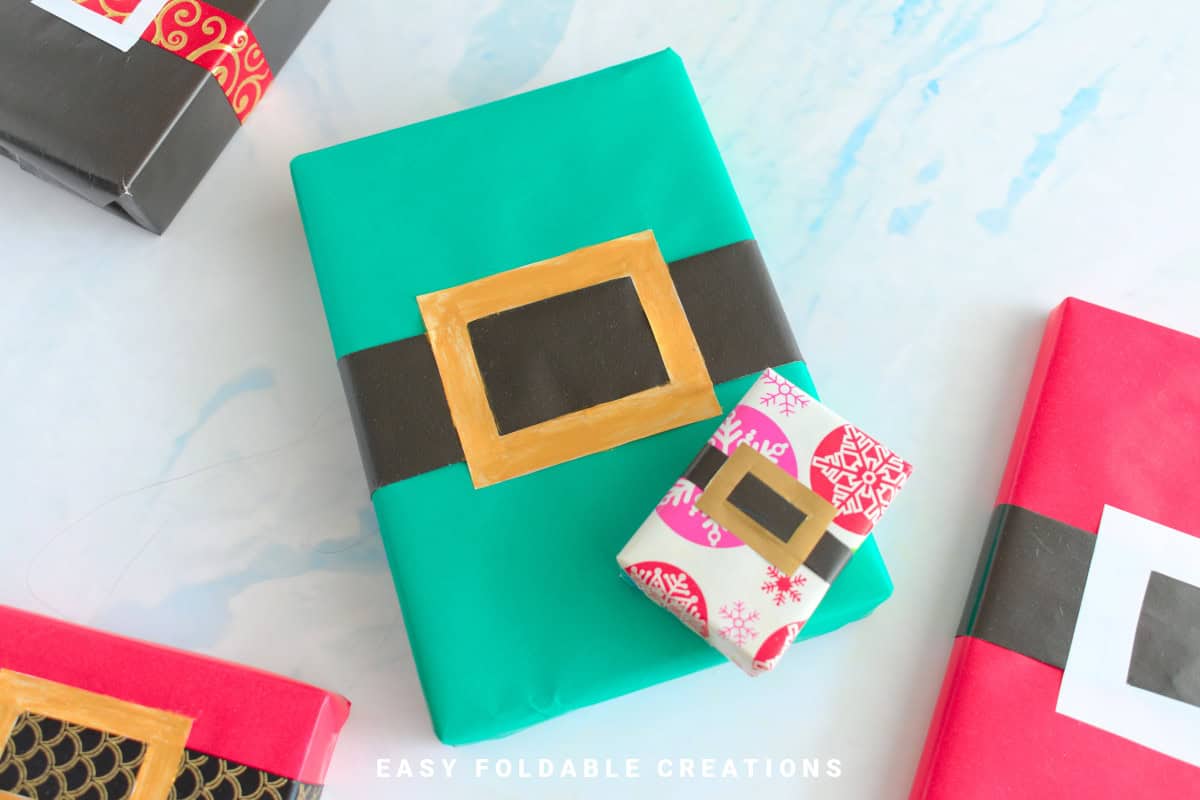
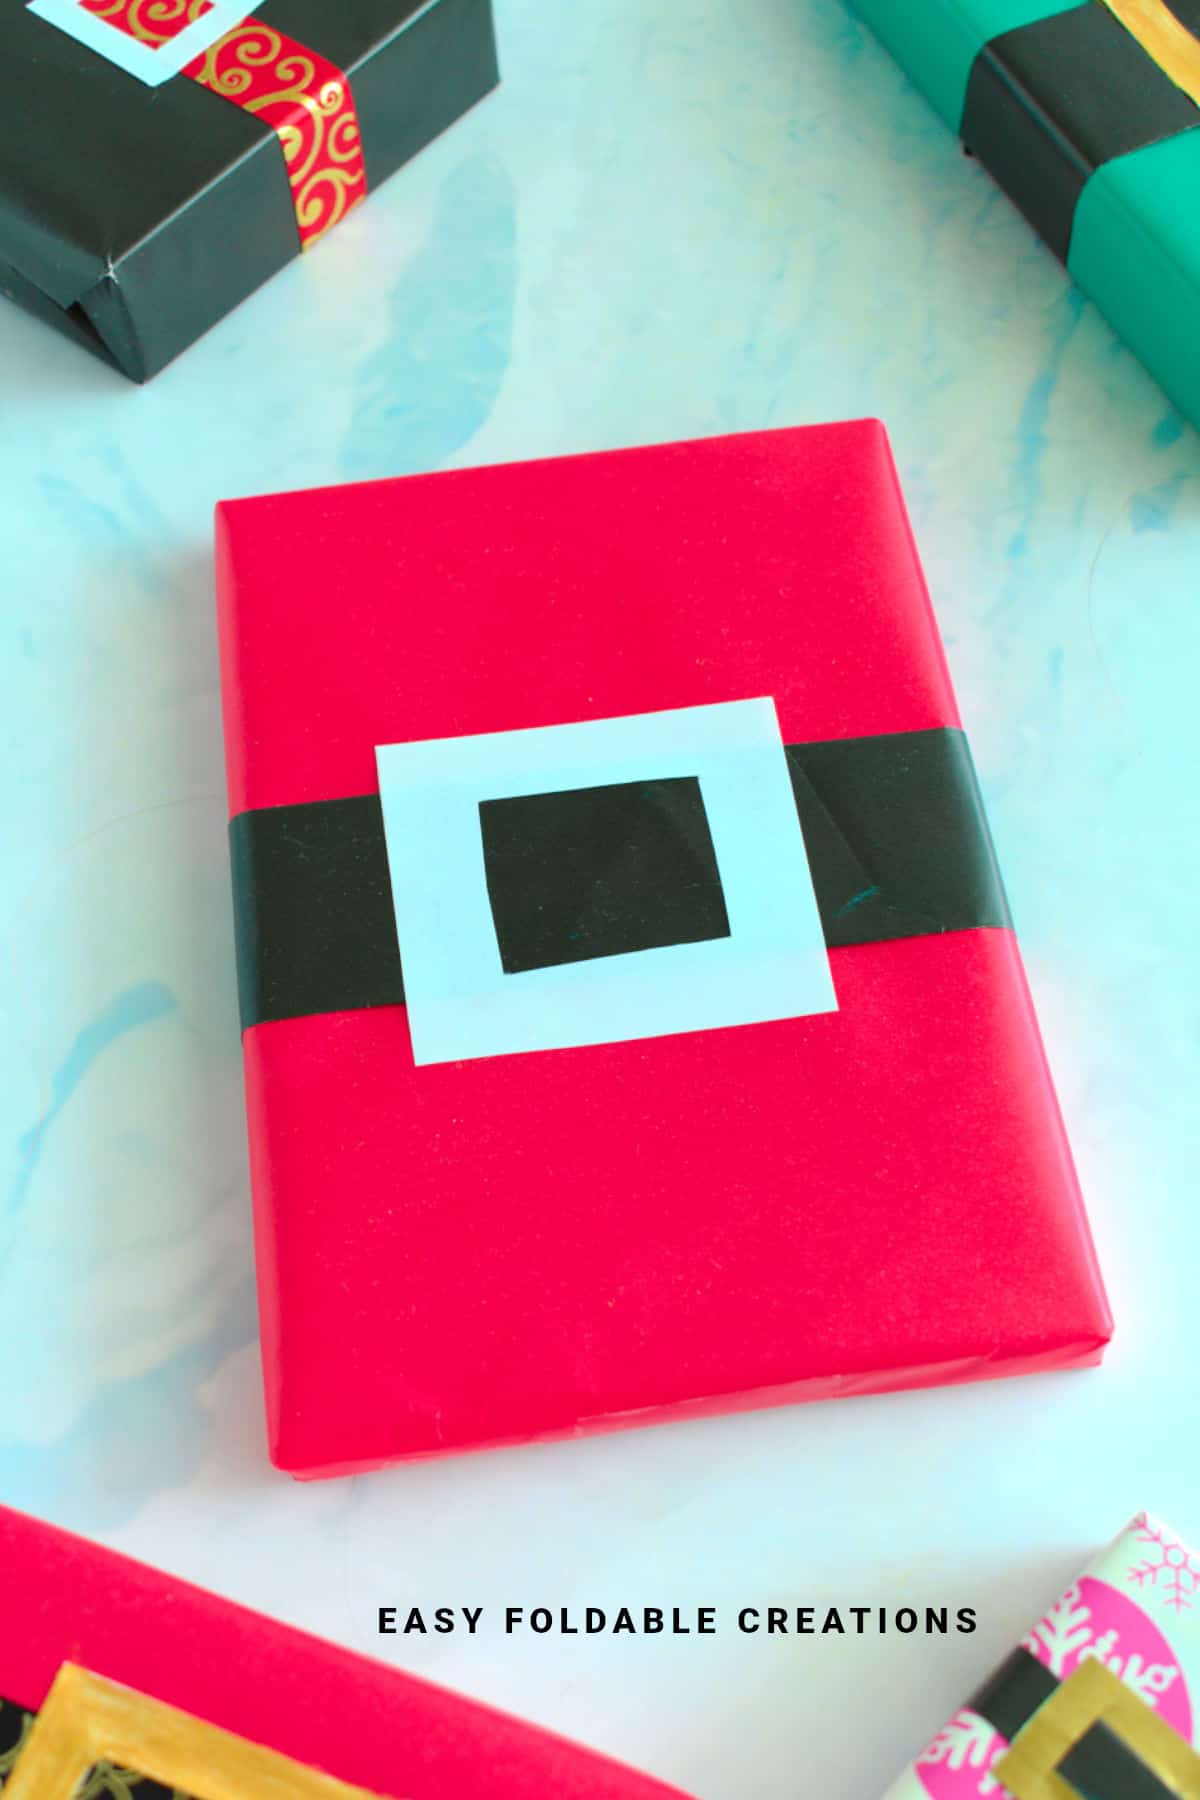
Step 8: Take your belt wrapping paper and cut it into a strip that is as wide you want the belt to be.
It must be long enough to wrap all the way around the middle of the gift from front to back. Alternatively, you could use a ribbon for your belt. Then, tape the belt around your gift in the position you'd like.
Step 9: For the belt buckle, cut a piece of wrapping paper into a square or rectangle shape that is wider than your belt width. Then cut a hole in the middle of the square.
Step 10: Glue or tape the belt buckle on top of your belt. Completed Santa wrapping.
Tips For Success
- Use matte or glossy red paper depending on your desired look
- Cut the belt slightly wider than the gift for a bold statement.
- Create a simple buckle using metallic paper or add a real buckle for texture.
- For small gifts, use a thinner belt to keep proportions balanced.
- Add a small sprig of holly or a gift tag for extra festive flair.
Common Mistakes & How To Avoid Them
- Belt too loose or tight: Measure your gift first and cut the belt accordingly for a snug fit.
- Buckling crooked: Use a ruler and pencil to mark the buckle placement before attaching.
- Tape showing: Use double-sided tape or place tape under the belt for a cleaner finish.
Color, Paper Ideas, and Variations
- Classic Santa red and black with gold or silver buckle for traditional flair.
- Use patterned red paper with polka dots or stripes for a modern twist.
- Try a velvet or textured black belt for added luxury.
- Add faux fur trim along the edges of the wrapping for a cozy effect.
- Create matching gift tags shaped like Santa hats or boots to complete the set.
FAQ
Yes, fabric belts add texture and a unique look but may require glue or stitching.
It works best on boxes or rectangular gifts but can be adapted with some creativity.
Definitely! It's a fun and simple craft that kids can enjoy making with supervision.
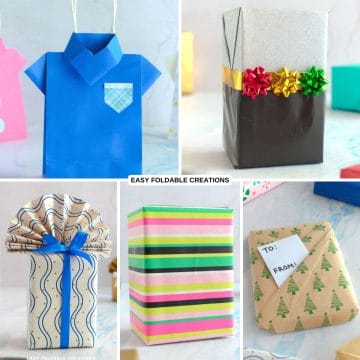
Other Paper Crafts You Might Like To Try:
Helpful Origami Tips
If you're curious to learn more about origami, you might like to look at our basic guides on how to make some common origami folds.
Start with the valley fold and mountain fold-these are the foundation of most origami models.
Once you're comfortable, you might like to try the petal fold for 3D shapes, and explore the bird base and square base for more complex designs.
The water bomb base is also great for creating inflatable or geometric models, like this inflatable origami rabbit.
Useful Paper Craft Terms
Want to learn a little more about paper crafts and origami?
We've made this helpful printable just for you. It explains common terms and helpful tips you might come across when you are folding origami or making a paper craft project.
You can download the useful paper craft terms printable PDF here.
Stay Connected
Made this pattern? Let us know how it went in the comments below!
Pin this post - Pin now to take your paper crafting skills to the next level.
Share on Instagram or Facebook - Capture the beauty of your finished paper craft project and share it on Instagram or Facebook! Tag us @easyfoldablecreations so we can see your work!
Other Patterns You Might Like To Try:
Looking for other easy patterns like this? Try these:


Comments
No Comments