
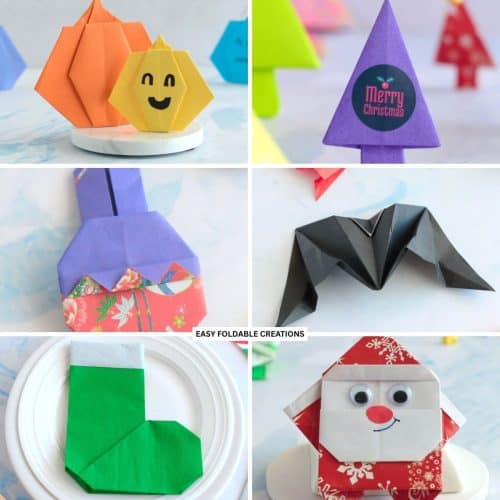
Get into the holiday spirit with this adorable origami Santa hat!
Festive, fun, and easy to fold, the origami Santa hat is perfect for holiday crafts. Use it as a decoration, gift topper, or playful DIY project.
Perfect as a festive decoration or a fun gift, this design adds a playful touch to your celebrations.

Jump to:
- Why You'll Love This Pattern
- Exclusive Content Just For You
- Skill Level
- Materials Needed
- Instructions
- Tips For Success
- How to Turn It Into a Garland
- How to Turn It Into an Ornament
- Common Mistakes & How To Avoid Them
- Other Paper Crafts You Might Like To Try:
- Helpful Origami Tips
- Useful Paper Craft Terms
- Stay Connected
- Other Patterns You Might Like To Try:
- Comments
This origami Santa hat is a delightful project that brings festive cheer to any holiday gathering.
An origami Santa hat is a folded paper design shaped into a festive Santa hat for Christmas-themed crafts. It is commonly used for holiday decorations, classroom activities, and seasonal paper projects, and is created using simple folding steps.
With its classic shape, the Santa hat embodies the spirit of the season and is a great way to engage in paper craft during the holidays.
Not only is this simple origami pattern accessible for all skill levels, but it also serves multiple purposes.
You can use it as a festive table decoration, hang it on your Christmas tree, or even attach it to holiday cards for a personalized touch.
This hat can be made from a variety of paper types, including plain colored paper, festive wrapping paper, or even sparkly craft paper.
Additionally, this origami project can be transformed into a garland, making it a unique way to adorn your home during the holiday season.
You can string multiple Santa hats together to create a beautiful decoration for your mantle, walls, or windows.
Plus, with a little creativity, these hats can also be turned into ornaments that can be hung on your Christmas tree or given as gifts.
Let's dive into the step-by-step instructions on how to make an origami Santa hat!
Other easy Christmas paper crafts you might like to make include this Christmas tree napkins fold, cute reindeer, easy paper Santa, and easy origami wreath.

Why You'll Love This Pattern
- Easy to fold, making it perfect for all skill levels.
- Adds a festive touch to your holiday decor.
- Can be used as gifts, card decorations, or as part of a holiday garland.
- Customizable with different paper types to suit your theme.
- A fun way to practice traditional origami and spread holiday cheer.
Exclusive Content Just For You
Not sure what you want to make next, but feeling a bit creative? Or maybe you've been searching for a pattern that sparks something new. We've got a few ideas waiting for you.
The Fold Collective, Easy Foldable Creations' community, provides you with a library of exclusive ad-free video tutorials, printable PDF patterns, helpful tips, and more so you can improve your skills and enjoy crafting in your own time.
Skill Level
Difficulty: ★☆☆☆☆ (Easy)
Materials Needed
- Square paper: A 6x6-inch (15cm x 15cm) sheet is ideal for creating a medium sized Santa hat. This is perfect if you want to use it for a Christmas tree ornament. You can also use larger sheets (8x8 or 10x10 inches (20cm x 20cm or 25cm x 25cm)) for bigger hats.
- If you use a really large square of cardstock, you could even make wearable Santa hats! If you do this, use a thicker paper so that it is more durable.
Note: We used a 6x6-inch (15cm x 15cm) sheet for our origami Santa hat, but feel free to try different sizes to create hats that can be used for various purposes, such as decorations or gifts.
Instructions
Step 1: Start with the color you want your hat to be facing down.
Step 2: Fold the paper in half from left to right.
Step 3: Unfold previous step.
Step 4: Fold the top left corner in to meet the middle crease.

Step 5: Repeat previous step for the top right corner.
Step 6: Flip the paper over, keeping the point of the paper at the top.
Step 7: Fold the bottom edge of the paper up slightly. The thickness of this strip depends on what size paper you are using. If you are using paper that is 6" x 6" (15cmx15cm), you could make your strip about 0.39"- 0.60" (1 cm - 1.5cm).
Step 8: Flip the paper over, keeping the point at the top.

Step 9: Fold the left side of the paper at an angle just past the centre.
Step 10: Repeat previous step on the right side, but this time, match the right edge to the left edge.
Step 11: Flip the paper over.
Step 12: Fold the bottom point up, using the bottom of the strip as a guide.

✨ You're almost there! ✨
To unlock the final steps of the photo tutorial and complete your pattern, create a free account with Grow.me. below.
Make sure you tick the box to subscribe to our newsletter and stay up to date with the latest patterns, tips, and more!
Once you're signed up, you'll get instant access to finish your project with the photo tutorial and enjoy exclusive content in the future.
Already signed up? Hit the button below and select 'Switch to Log In' to pick up where you left off and finish your project!
Step 13: Unfold previous step.
Step 14: Carefully open the hat and tuck in the bottom point. You should now have a flat bottom.
Step 15: Flip the paper over.
Step 16: Fold the top point down at an angle.

Step 17: Flip the paper back over and press flat.
Step 18: Completed origami Santa hat. If desired, glue a pom pom on the tip of your hat.

Tips For Success
- Decorative Details: Use decorative paper or add embellishments like glitter or stickers to personalize your Santa hat.
- Garland Creation: To create a festive garland, fold multiple Santa hats and string them together using twine or ribbon.
- Gift Wrapping: Consider attaching a small Santa hat to gift packages for a unique presentation.

How to Turn It Into a Garland
To create a festive garland with your origami Santa hats, simply fold several hats and use a needle and thread to string them together.
Leave a small space between each hat for a charming effect.
You can hang this garland along your mantel, in doorways, or on walls to add a playful touch to your holiday decor. Mixing and matching different colored hats can create a more dynamic and festive display.
How to Turn It Into an Ornament
To transform your origami Santa hat into a lovely ornament, use a piece of ribbon or string.
After completing the hat, poke a small hole at the top point of the hat (this should be done carefully to avoid tearing).
Thread the ribbon through the hole and tie a knot to secure it. You can then hang your ornament on the Christmas tree or attach it to gifts for a personalized touch.
Adding a small jingle bell or other decorative items can enhance the festive feel.
Common Mistakes & How To Avoid Them
Incorrect paper type: If you are making small Santa hats, using paper that is too thick can make it difficult to fold. Choose lightweight paper for easier handling.
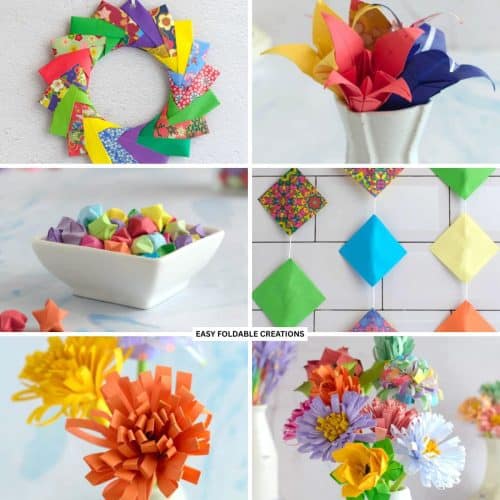
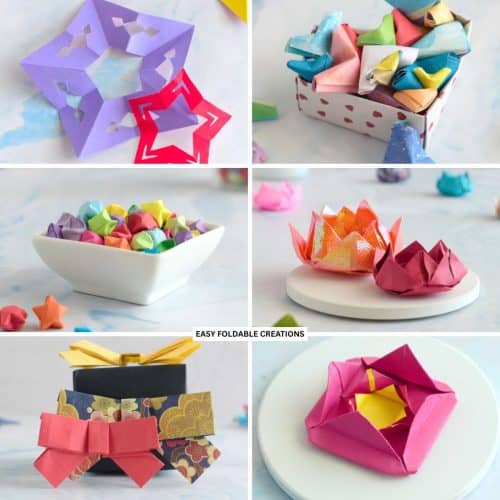
Other Paper Crafts You Might Like To Try:
Helpful Origami Tips
If you're curious to learn more about origami, you might like to look at our basic guides on how to make some common origami folds.
Start with the valley fold and mountain fold-these are the foundation of most origami models.
Once you're comfortable, you might like to try the petal fold for 3D shapes, and explore the bird base and square base for more complex designs.
The water bomb base is also great for creating inflatable or geometric models, like this inflatable origami rabbit.
Useful Paper Craft Terms
Want to learn a little more about paper crafts and origami?
We've made this helpful printable just for you. It explains common terms and helpful tips you might come across when you are folding origami or making a paper craft project.
You can download the useful paper craft terms printable PDF here.
Stay Connected
Made this pattern? Let us know how it went in the comments below!
Pin this post - Pin now to take your paper crafting skills to the next level.
Share on Instagram or Facebook - Capture the beauty of your finished paper craft project and share it on Instagram or Facebook! Tag us @easyfoldablecreations so we can see your work!

Other Patterns You Might Like To Try:
Looking for other easy patterns like this? Try these:
- Minimalist Seasonal Paper Decoration Ideas
- DIY Paper Decor Ideas For Every Season
- Wedding Confetti Alternatives That Are Venue Friendly
- DIY Wedding Table Number Ideas Using Paper
- DIY Paper Wedding Place Card Ideas You Can Make Yourself
- Gift Wrapping Topper Ideas
- Last Minute Gift Wrapping Ideas That Still Look Beautiful and Thoughtful
- Gift Wrapping Ideas For Oddly Shaped Gifts


Comments
No Comments