
Looking for a festive napkin folding idea for Thanksgiving or fall gatherings?
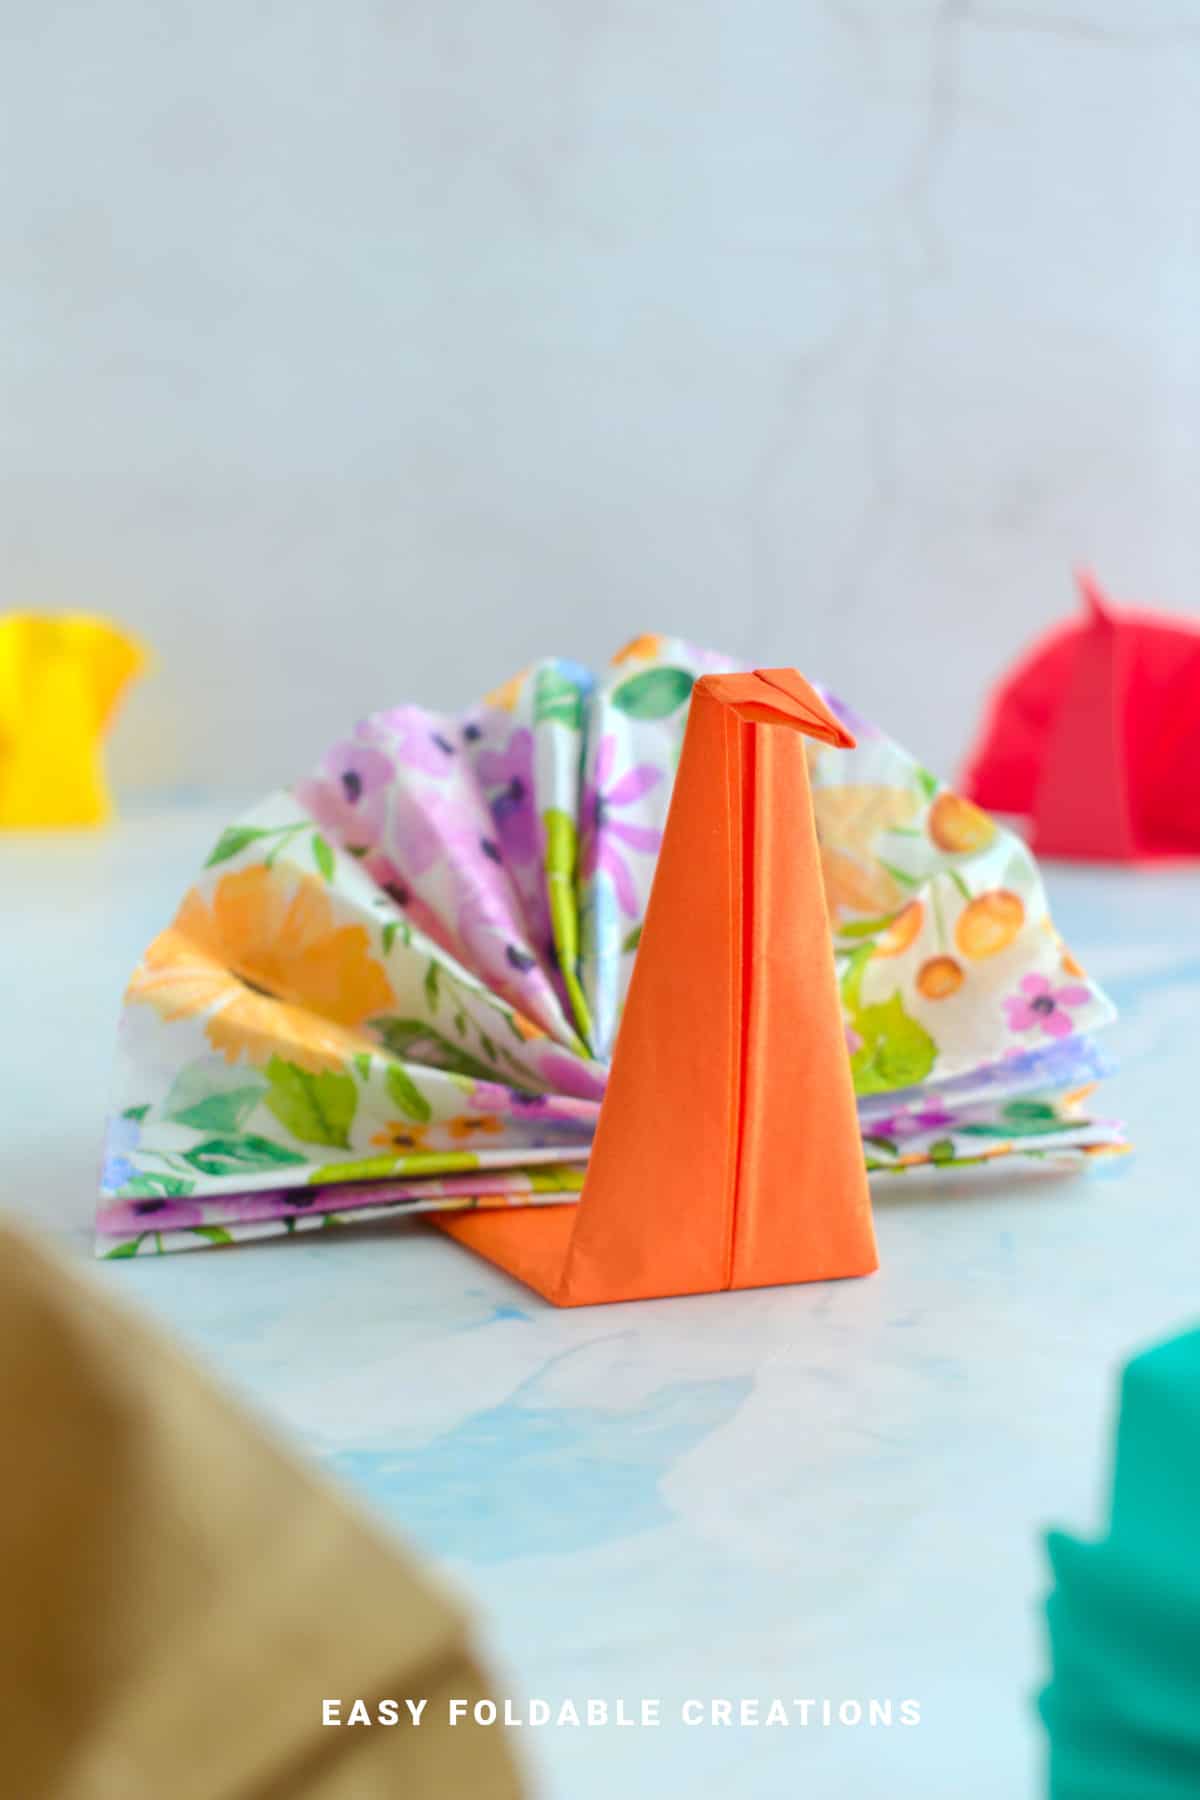
This turkey napkin folding idea uses just two napkins-one for the tail and one for the body-to create an eye-catching table decoration.
Whether you prepare it in advance or put it together last minute, it's a fun and easy way to add seasonal charm to your place settings.
Perfect for family dinners or holiday parties, this simple folding project blends practicality with a playful autumn touch.
Jump to:
Thanksgiving and fall celebrations are all about creating a warm, inviting atmosphere-and table décor plays a big part in setting that tone.
A turkey napkin folding idea is a decorative table-setting technique that shapes napkins into a turkey form for seasonal presentation. It is commonly used for Thanksgiving dinners, festive events, and holiday décor, and relies on structured folding for visual effect.
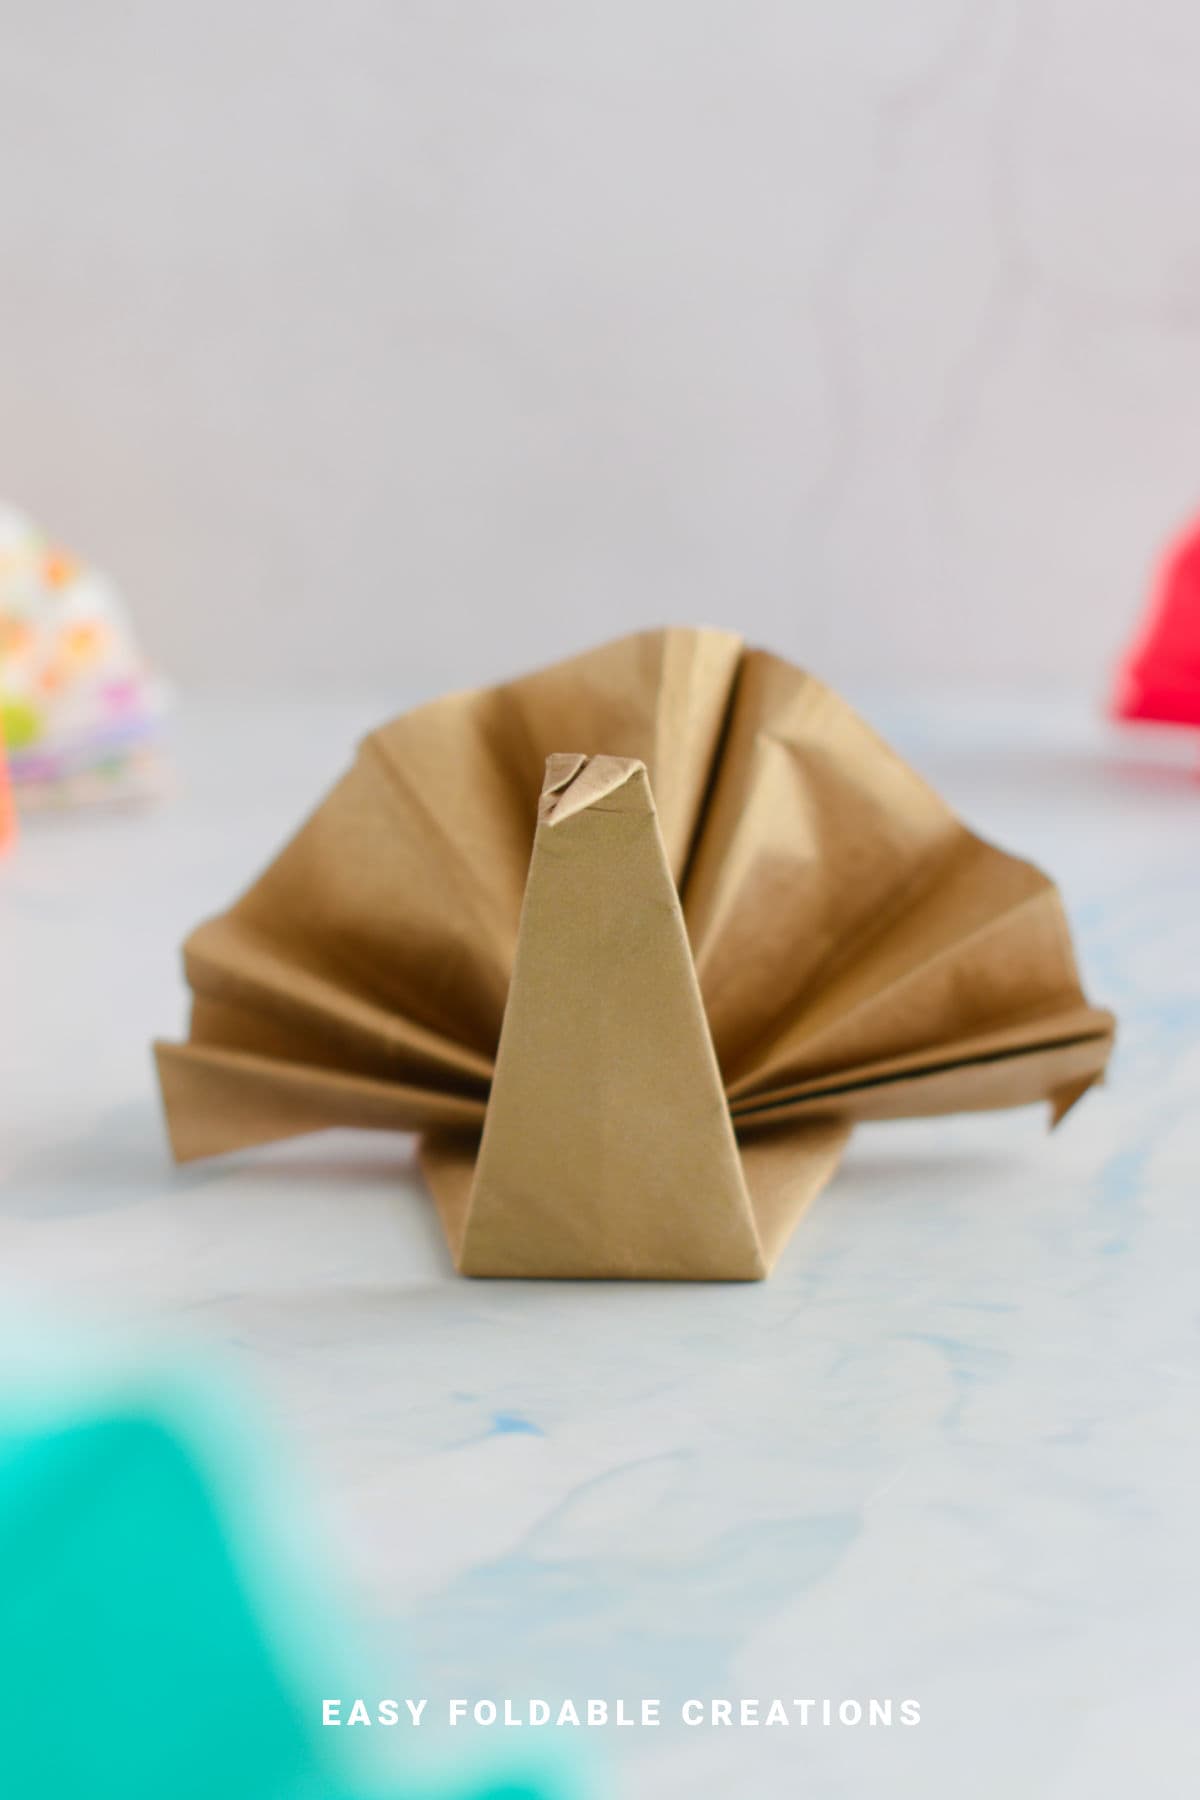
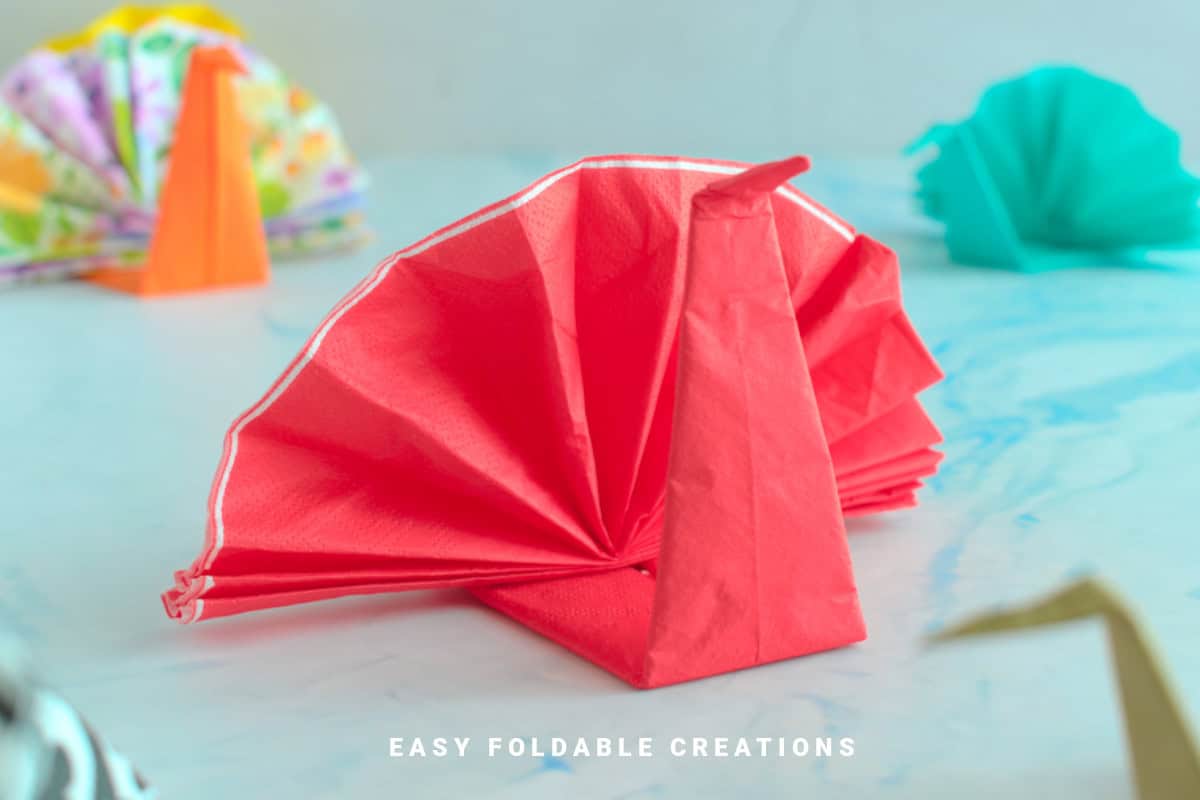
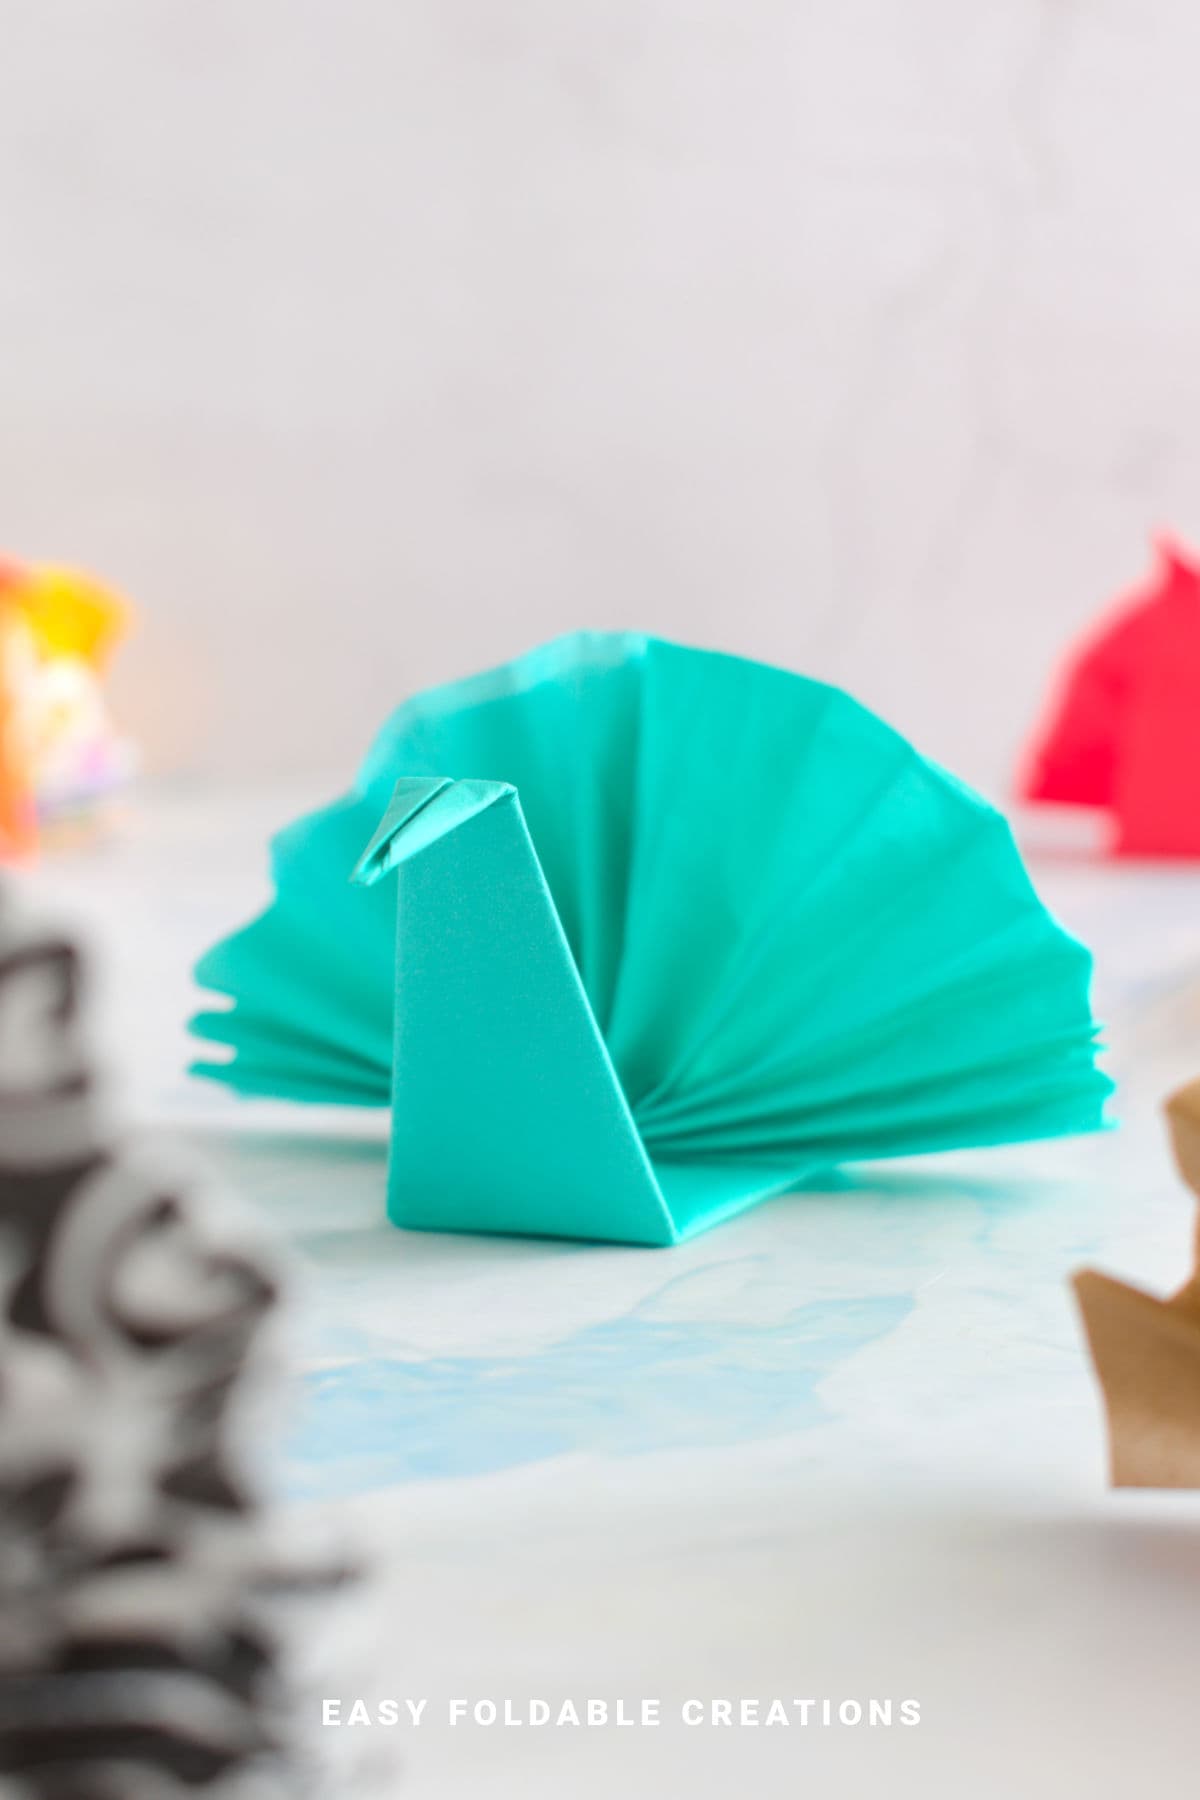
Using just two napkins-one folded to mimic the turkey's tail feathers and the other shaped into its body-this fold is simple enough to do ahead of time or at the last minute.
This turkey napkin folding idea offers a charming and clever way to bring the spirit of the season right to your dining table.
You could even lean a little name placeholder on it!
One of the best things about this napkin fold is its flexibility. You can use cloth or paper napkins, depending on your preference and occasion.
The tail napkin is typically folded in a fan or accordion style, giving that distinctive feathered look, while the body napkin is folded into a sturdy base that keeps the whole setup upright.
It's a great way to combine style and function, as the folded napkins are still easy to unfold and use.
This turkey napkin fold is perfect for Thanksgiving table decor dinner, harvest party, or any fall-themed meal. The colors you choose can amplify the festive feel-think rich browns, oranges, yellows, and deep reds.
Mixing and matching different napkin colors for tail and body also adds a creative flair that guests will appreciate.
Another advantage is how quick and forgiving this folding technique is. Even if you're not an expert at napkin folding, the steps are straightforward, and a little practice goes a long way.
You can fold these napkins in batches to prep your entire table, making hosting less stressful. And because it uses just two napkins per turkey, it's budget-friendly too.
Whether you want a traditional Thanksgiving table or something with a bit more playful charm, this turkey napkin fold delivers.
Why You'll Love This Pattern
- Uses just two napkins for a full turkey look
- Can be prepared ahead or made last minute
- Great for Thanksgiving, fall dinners, and harvest parties
- Adds a fun, festive touch to table settings
- Simple folds with an impressive end result
Exclusive Content Just For You
Not sure what you want to make next, but feeling a bit creative? Or maybe you've been searching for a pattern that sparks something new. We've got a few ideas waiting for you.
The Fold Collective, Easy Foldable Creations' community, provides you with a library of exclusive ad-free video tutorials, printable PDF patterns, helpful tips, and more so you can improve your skills and enjoy crafting in your own time.
Skill Level
★☆☆☆☆ (Easy)
Materials Needed
2 standard square paper napkins per turkey (one for the body and one for the tail)
Note: A turkey napkin fold made with standard sized paper napkins (6.5 inches x 6.5 inches [16 cm x 16 cm]) makes a turkey that is about 7 inches wide x 4 inches long (18 cm x 12 cm).
Instructions
Making The Turkey Tail
Step 1: Open out your napkin.
Typically, napkins come folded into quarters, so when you open out your napkin it should fold out into a larger square with 2 creases which divide the napkin into 4 smaller squares.
Start with the outside color (such as the colored side or patterned side) of the napkin facing down.
Step 2: Fold the left edge to the right edge.
Step 3: Fold the bottom edge up slightly.
Step 4: Flip your paper over from left to right. The folded edge should be at the bottom.

Step 5: Fold the bottom edge up again to the same width you made in step 3.
Step 6: Flip your paper over from left to right.
Step 7: Fold the bottom edge up once again like you did in the previous steps.
Step 8: Repeat steps 4 to 7 until you nearly reach the top. Leave about 1.5 inches to 2 inches (4 cm to 5 cm) unfolded at the top.

✨ You're almost there! ✨
To unlock the final steps of the photo tutorial and complete your pattern, create a free account with Grow.me. below.
Make sure you tick the box to subscribe to our newsletter and stay up to date with the latest patterns, tips, and more!
Once you're signed up, you'll get instant access to finish your project with the photo tutorial and enjoy exclusive content in the future.
Already signed up? Hit the button below and select 'Switch to Log In' to pick up where you left off and finish your project!
Step 8: Repeat steps 4 to 7 until you nearly reach the top. Leave about 1.5 inches to 2 inches (4 cm to 5 cm) unfolded at the top.
Step 9: Flip your napkin over from top to bottom. The folded edges should be at the top.
Step 10: Fold your napkin in half from left to right.
Step 11: Fold the bottom right corners inward diagonally to the left, tucking them under the according folds.

Step 12: Open out your fan. Completed standing napkin fan.

Making The Turkey Body
Step 1: Arrange your napkin so that the open edges are towards you and arrange it to sit like a diamond shape. You should have open edges along the upper left, bottom left, and bottom right edges.
Step 2: Fold the left point to meet the right point.
Step 3: Unfold previous step.
Step 4: Fold both the upper left and upper right edges in to meet the middle.
Step 5: Flip your napkin over from left to right.
Step 6: Fold both the upper left and upper right diagonal edges in to meet the middle.

Step 7: Fold the bottom point up to meet the top point.
Step 8: Flip your paper over from left to right.
Step 9: Fold the top point (top layer only) down slightly. This will form the head.
Step 10: Lift the top flap slightly so it stands. Completed body.
Putting it together: Place the tail on the body, adjusting the turkey as you like.

Tips For Success
- Use contrasting colors for the tail and body napkins to make the turkey stand out.
- Practice folding once or twice before your event to get comfortable.
- For paper napkins, use thicker or double-layered ones for better structure.
- Fold the tail napkin with crisp, even pleats for a neat feather look.
Color, Paper Ideas, and Variations
- Classic fall: Deep orange tail with brown or tan body.
- Bright harvest: Yellow tail and red body for a lively look.
- Rustic charm: Kraft paper or burlap-style cloth napkins for natural textures.
- Metallic accents: Gold or bronze napkins add a festive shimmer.
- Pattern mix: Use patterned tail napkin with solid body for visual interest.
- Mini turkeys: Fold smaller napkins for place card holders or buffet décor.
FAQ
Yes, thick disposable napkins work best to hold the shape.
You can prepare them a few days ahead; store folded napkins flat or upright to keep their shape.
Yes, ideally the napkin for the tail and body should be the same size.
Other Paper Crafts You Might Like To Try:
Helpful Origami Tips
If you're curious to learn more about origami, you might like to look at our basic guides on how to make some common origami folds.
Start with the valley fold and mountain fold-these are the foundation of most origami models.
Once you're comfortable, you might like to try the petal fold for 3D shapes, and explore the bird base and square base for more complex designs.
The water bomb base is also great for creating inflatable or geometric models, like this inflatable origami rabbit.
Useful Paper Craft Terms
Want to learn a little more about paper crafts and origami?
We've made this helpful printable just for you. It explains common terms and helpful tips you might come across when you are folding origami or making a paper craft project.
You can download the useful paper craft terms printable PDF here.
Stay Connected
Made this pattern? Let us know how it went in the comments below!
Pin this post - Pin now to take your paper crafting skills to the next level.
Share on Instagram or Facebook - Capture the beauty of your finished paper craft project and share it on Instagram or Facebook! Tag us @easyfoldablecreations so we can see your work!
Other Patterns You Might Like To Try:
Looking for other easy patterns like this? Try these:
- DIY Paper Wedding Place Card Ideas You Can Make Yourself
- Gift Wrapping Topper Ideas
- Last Minute Gift Wrapping Ideas That Still Look Beautiful and Thoughtful
- Gift Wrapping Ideas For Oddly Shaped Gifts
- DIY Gift Box Ideas
- Restaurant Style Napkin Folding Ideas You Can Do At Home
- Crown Napkin Fold
- Elegant Standing Fan Napkin Fold


Comments
No Comments