

Add a delicate touch to your reading with this beautiful butterfly corner origami bookmark.
Perfect for book lovers, it's easy to fold and versatile enough to suit any occasion!

Table of Contents
- Why You'll Love This Pattern
- More Crafting Ideas Inside The Fold Collective
- Skill Level
- Materials Needed
- Video Tutorial
- Instructions
- Tips For Success
- Common Mistakes & How To Avoid Them
- Color, Paper Ideas, and Variations
- FAQ
- Other Paper Crafts You Might Like To Try:
- Helpful Origami Tips
- Useful Paper Craft Terms
- Stay Connected
- Other Patterns You Might Like To Try:
- Comments
Looking for more paper crafts to try? You'll find exclusive tutorials and printables inside The Fold Collective.
Imagine a butterfly perched gracefully on the corner of your favorite book, marking your place with elegance and charm.
No need to fold the corner of your page anymore to keep your place!
A butterfly corner origami bookmark is a folded paper bookmark designed to slip onto book pages, decorated with a butterfly-inspired shape. It is commonly used for reading accessories, kids' crafts, and handmade gifts, and combines functionality with decorative origami design.
Whether you're gifting it to a loved one for Valentine's Day, Mother's Day, or creating a set for a book-themed party, this simple project is perfect for adding a creative flair.
Crafting these bookmarks is also a great activity to enjoy with kids or friends during a cozy crafting afternoon.
Using just a single sheet of rectangular paper, you can fold your way to a charming and practical piece of art.
Lightweight cardstock makes larger bookmarks sturdier, while standard origami paper works wonderfully for smaller ones.
From large bookmarks that stand out on textbooks to tiny ones perfect for pocket-sized notebooks, these versatile creations are as fun to make as they are to use.
Don't limit yourself-customize with colors, patterns, and themes for occasions like Christmas or birthdays. You could even include them in gift bags or as party favors for book-themed events!
Add a touch of artistry to your reading experience with this butterfly corner origami bookmark.
This easy paper origami animal bookmark isn't just a practical tool for readers-it's also a charming way to celebrate special occasions.
Imagine creating a collection of easy butterfly bookmarks in pastel colors for Easter, perfect for slipping into gift baskets or pairing with spring-themed books.
These DIY butterfly bookmarks also make thoughtful additions to handmade greeting cards or gift bags for Mother's Day or birthdays.
Whether you're looking for a creative Easter craft or a way to personalize your reading experience, this project offers endless possibilities for customization and joy.
Whether for yourself or as a thoughtful handmade gift, this simple craft is sure to bring joy. Try it today and watch your books come alive!

Other easy origami bookmarks you might like to try include this Heart Origami Bookmark, Rectangle Origami Corner Bookmark, Long Heart Origami Bookmark, or this Triangle Origami Corner Bookmark.
Why You'll Love This Pattern
- Unique and Practical: Combines beauty and functionality to mark your favorite pages.
- Customizable: This cute origami insect can be personalized with colors and patterns to match occasions or your style.
- Easy to Make: Requires only one rectangular sheet and minimal folding skills.
- Perfect for Gifting: Great for Valentine's Day, Mother's Day, and book-themed events.
- Eco-Friendly: A sustainable alternative to disposable bookmarks.
- Fun Craft Activity: Enjoy making these with kids, friends, or on a relaxing solo afternoon.
Looking for more paper crafts to try? You'll find exclusive tutorials and printables inside The Fold Collective.
More Crafting Ideas Inside The Fold Collective
Looking for your next paper craft? The Fold Collective gives you access to exclusive ad-free video tutorials, printable PDFs, helpful resources, and more.
Explore The Fold Collective today!
Skill Level
★☆☆☆☆ (Easy)
Materials Needed
1 sheet of rectangular paper (Choose dimensions based on your desired bookmark size). Here are some example paper sizes:
- Small: 3.5 inches x 2.40 inches (9 cm x 6 cm).
- Medium: 3 inches x 4 inches (8 cm x 12 cm).
- Large: 4 inches x 6 inches (10 cm x 15 cm).
Optional: Lightweight cardstock for sturdier bookmarks, especially larger ones.
Paper GSM Guide
- Standard Origami Paper (70-80 GSM): Best for smaller bookmarks; folds are crisp and easy.
- Lightweight Cardstock (150-200 GSM): Ideal for large bookmarks; provides added sturdiness
Video Tutorial
Want to see this project folded step by step? A full video tutorial for this design is available inside The Fold Collective, so you can follow along in real time and pause or replay each step as needed.
The Collective also includes a growing library of exclusive video tutorials and printable PDFs, giving you even more projects to explore.
Prefer The Photo Tutorial?
No problem. The complete step-by-step photo tutorial is waiting just below.
Instructions
You will need to use a rectangle sheet of paper for this butterfly bookmark. If you have square paper, you can trim it down so that it is 1 ½ times longer than it is wide.
E.g. If you have 6 inch x 6 inch (15cm x 15cm) square origami paper, trim it down by 2 inches (5 cm). You will end up with a sheet that is 6 inches x 4 inches (15 cm x 10 cm).
Step 1: Start with the main color you want your butterfly to be facing down. Arrange your paper to sit vertically.
Step 2: Fold the top edge to meet the bottom edge.
Step 3: Fold the left edge to meet the right edge.
Step 4: Unfold previous step.
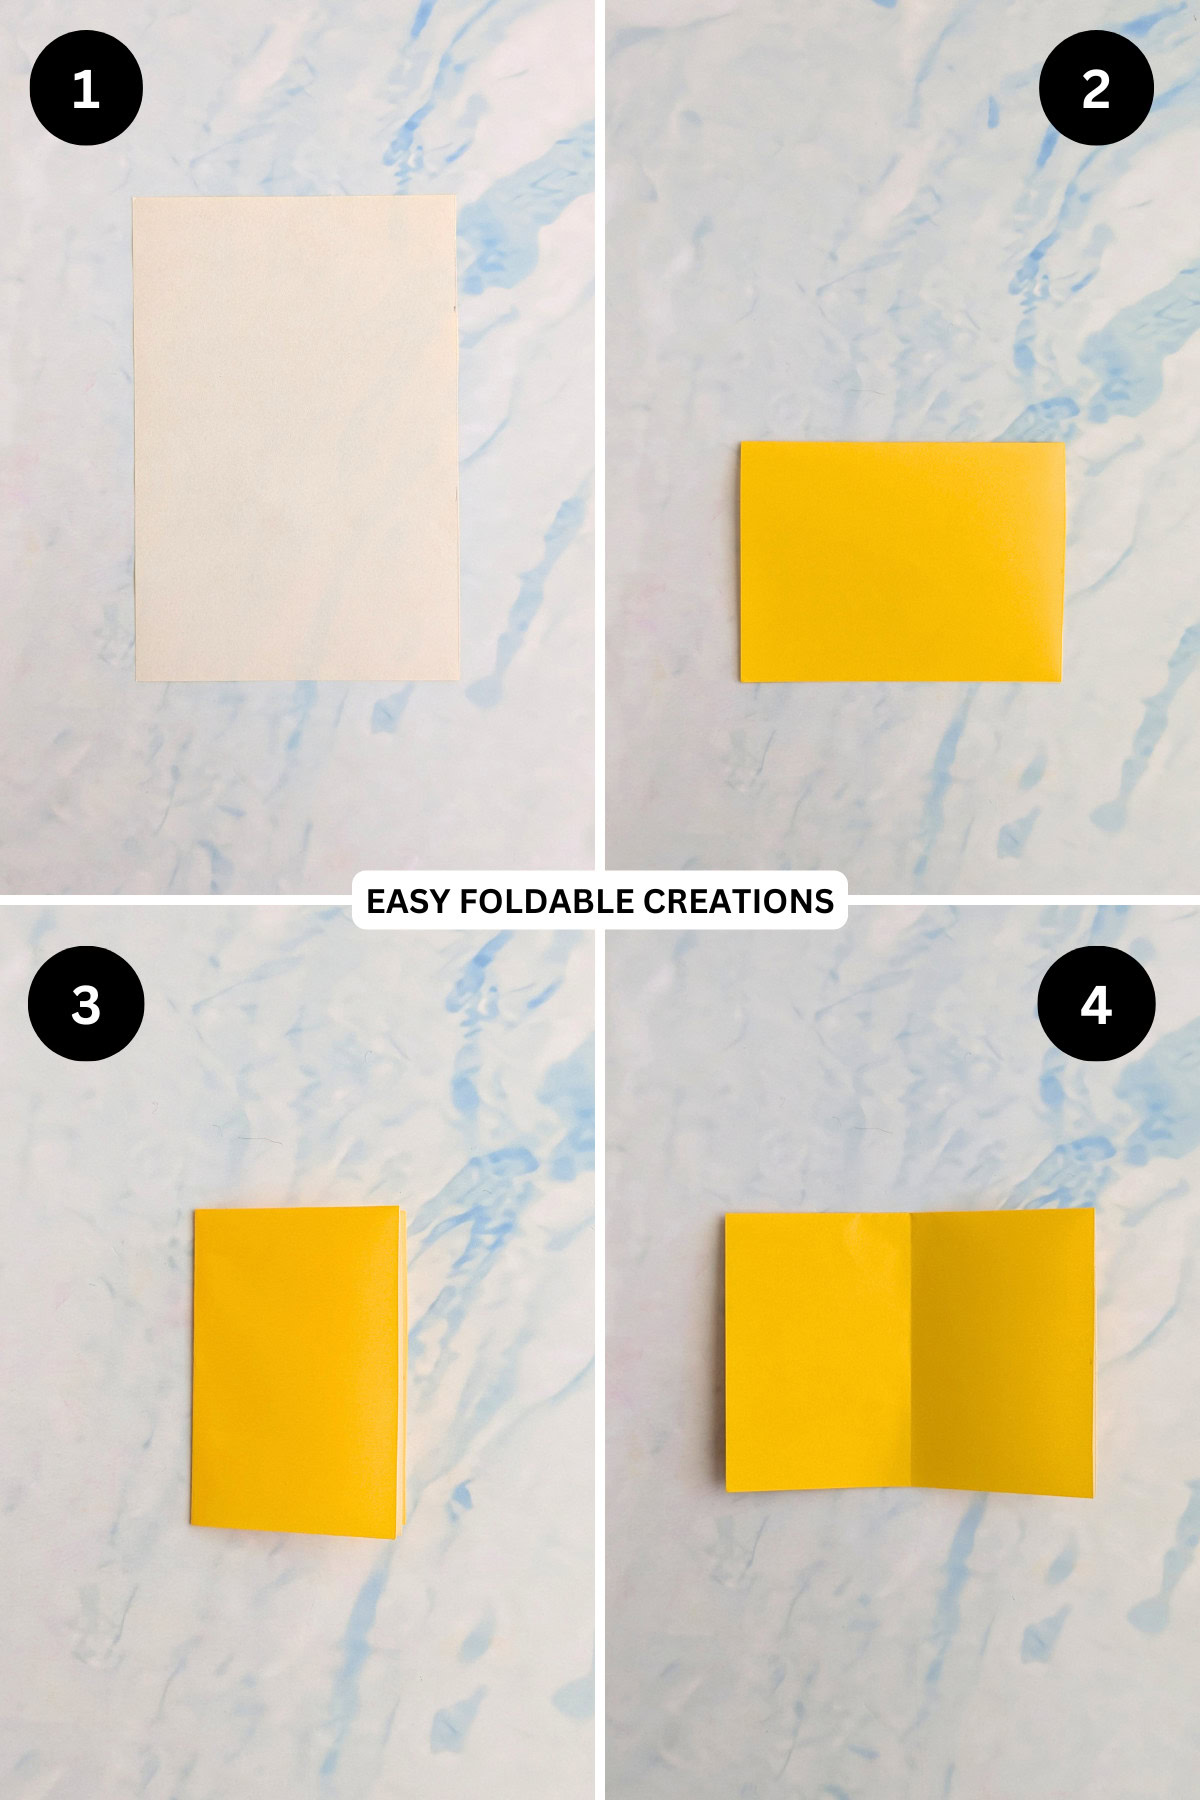
Step 5: Fold the right edge (top layer only) to the left edge and press flat. You will end up with a triangle on the top and a rectangle shape on the bottom.
Step 6: Flip your paper over from left to right.
Step 7: Again, fold the right edge (top layer only) to the left edge, along the existing middle crease, and press flat. You will end up with a triangle on the top and a rectangle shape on the bottom.
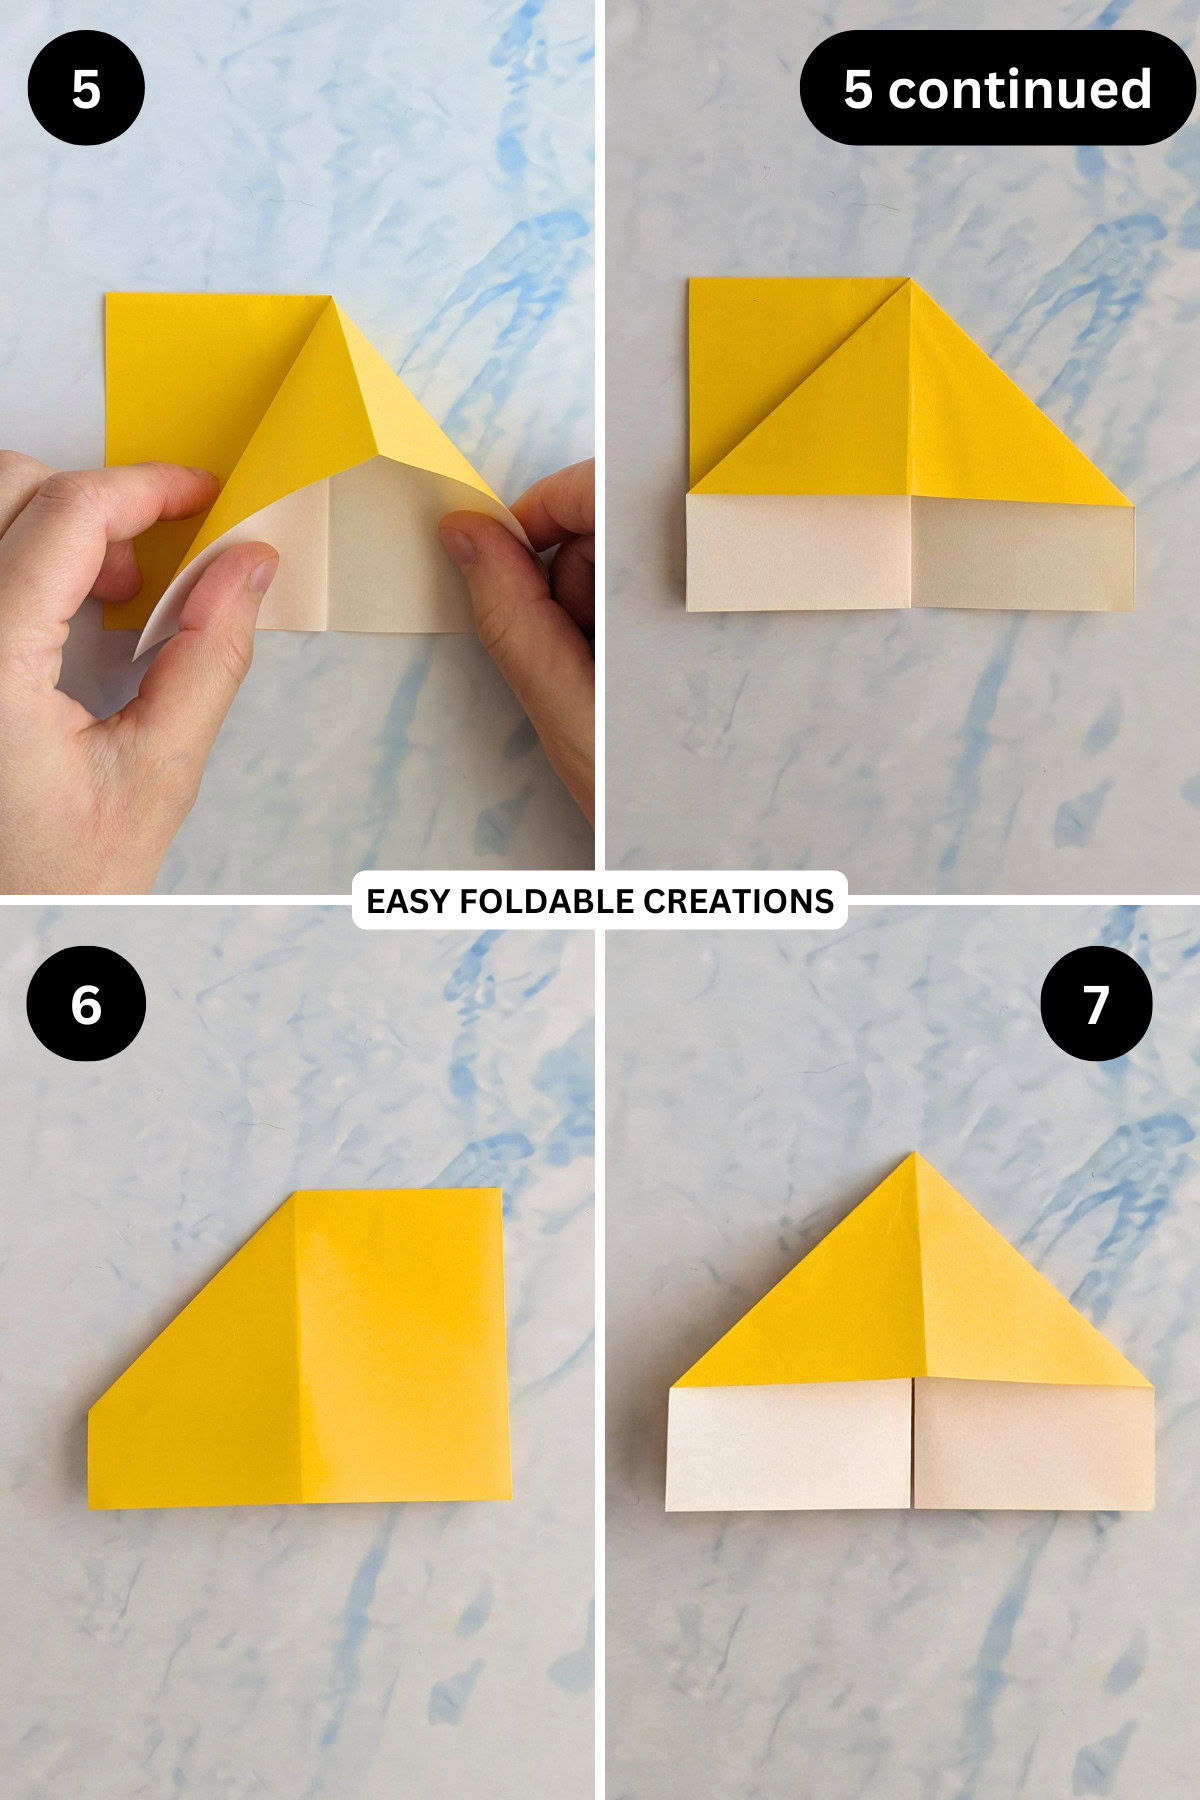
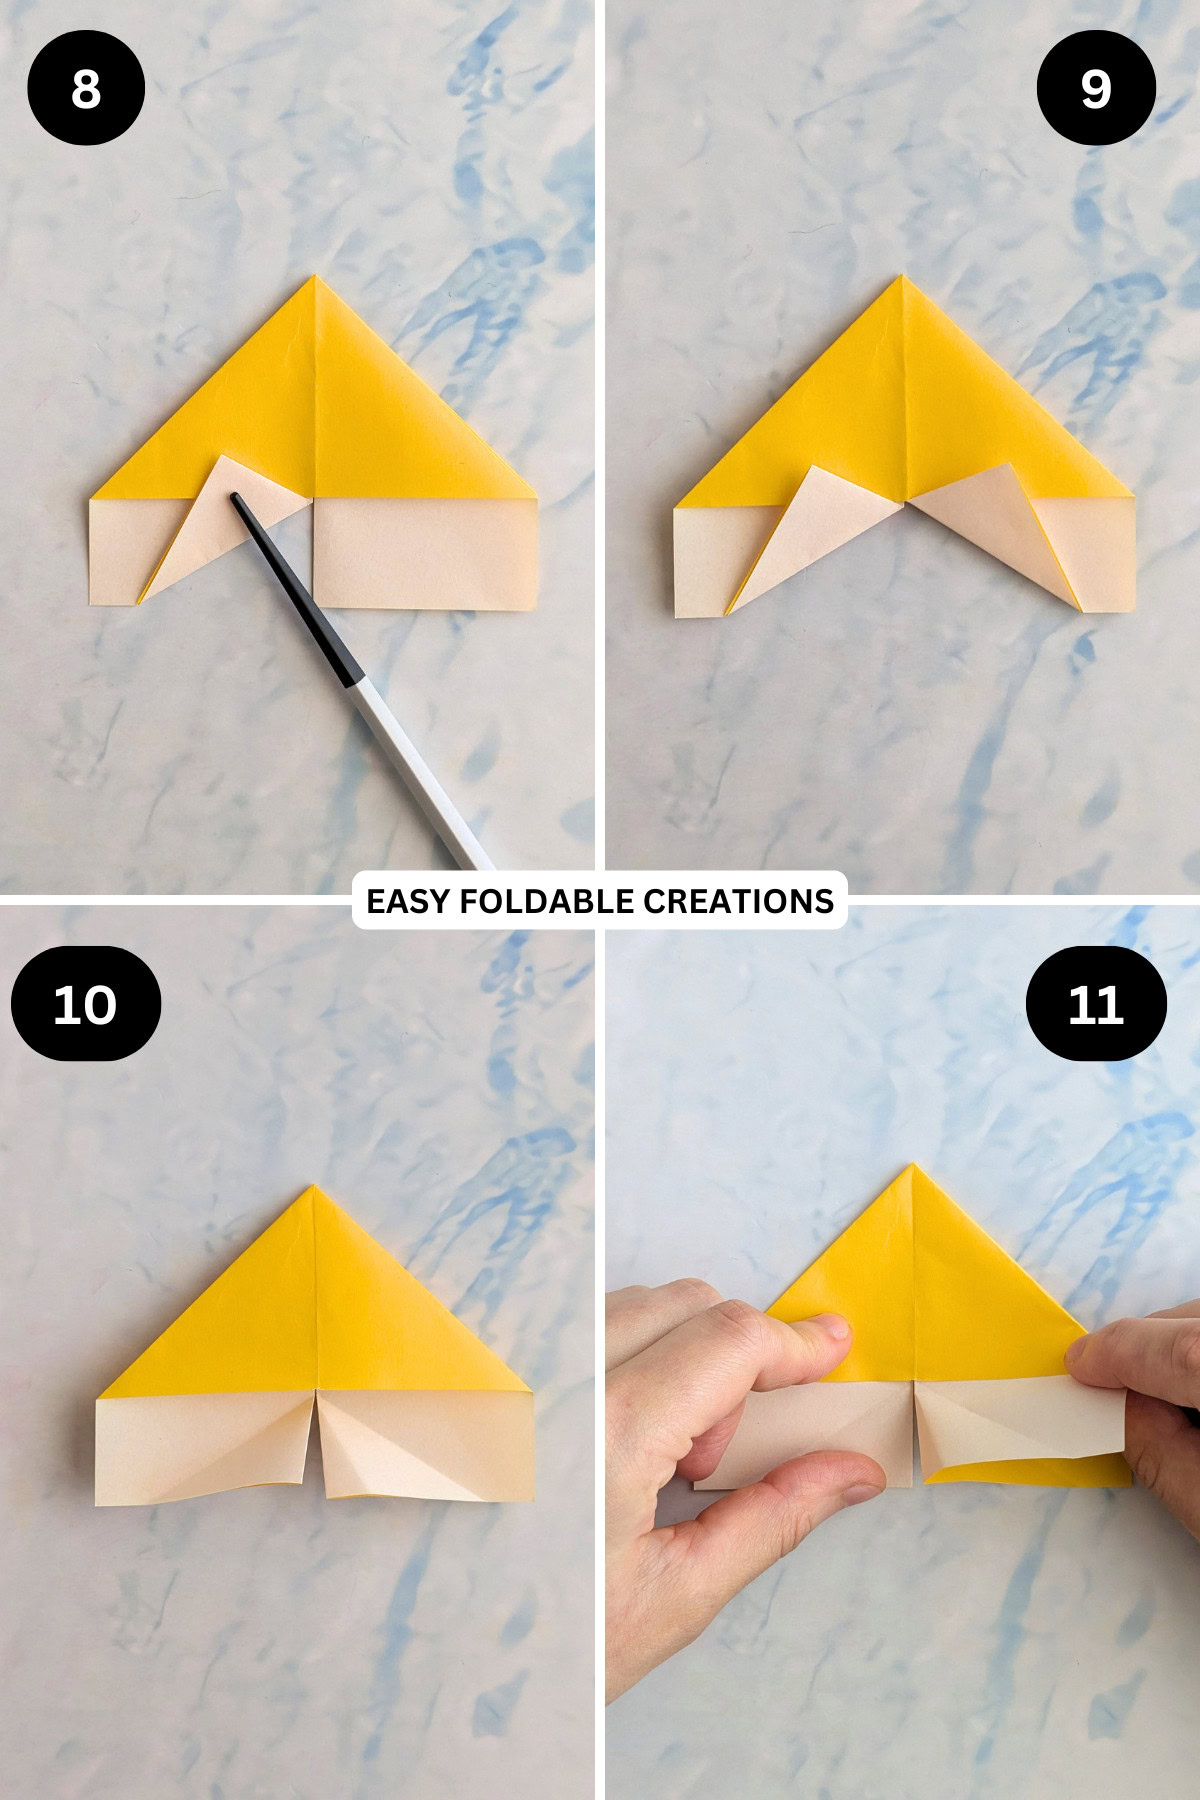
Step 8: Fold the left inner corner towards the left on a diagonal. Make sure that its point overlaps the top triangle.
Step 9: Repeat previous step for the right inner corner, keeping it as symmetrical as possible.
Step 10: Unfold previous 2 steps.
Step 11: Open out the right side of the paper slightly, and reverse fold the inner corner along the existing crease line. Then press flat.
✨ You're almost there! ✨
To unlock the final steps of the photo tutorial and complete your pattern, create a free account with Grow.me. below.
Make sure you tick the box to subscribe to our newsletter and stay up to date with the latest patterns, tips, and more!
Once you're signed up, you'll get instant access to finish your project with the photo tutorial and enjoy exclusive content in the future.
Already signed up? Hit the button below and select 'Switch to Log In' to pick up where you left off and finish your project!
Step 12: Repeat previous step for the left side.
Step 13: Rotate your paper 180 degrees, so that the point of the triangle is facing you.
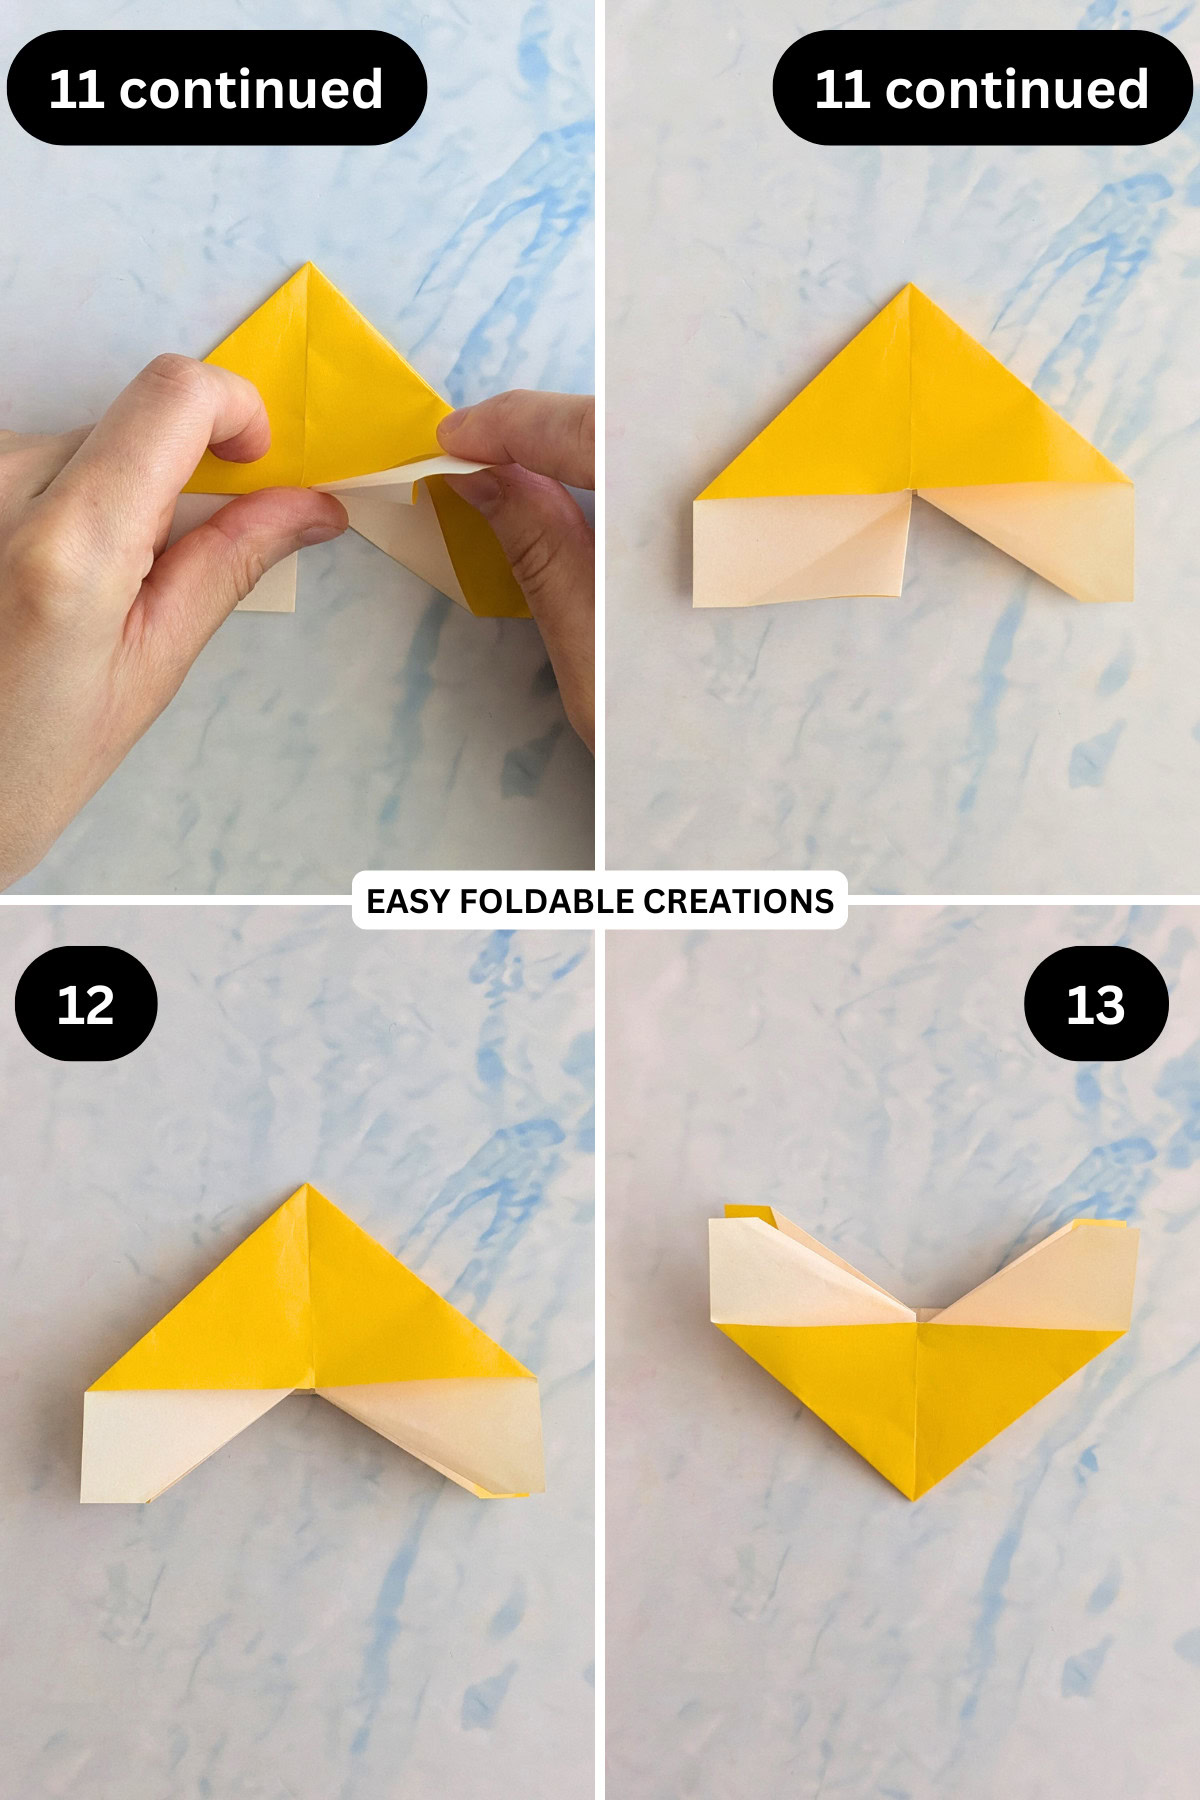
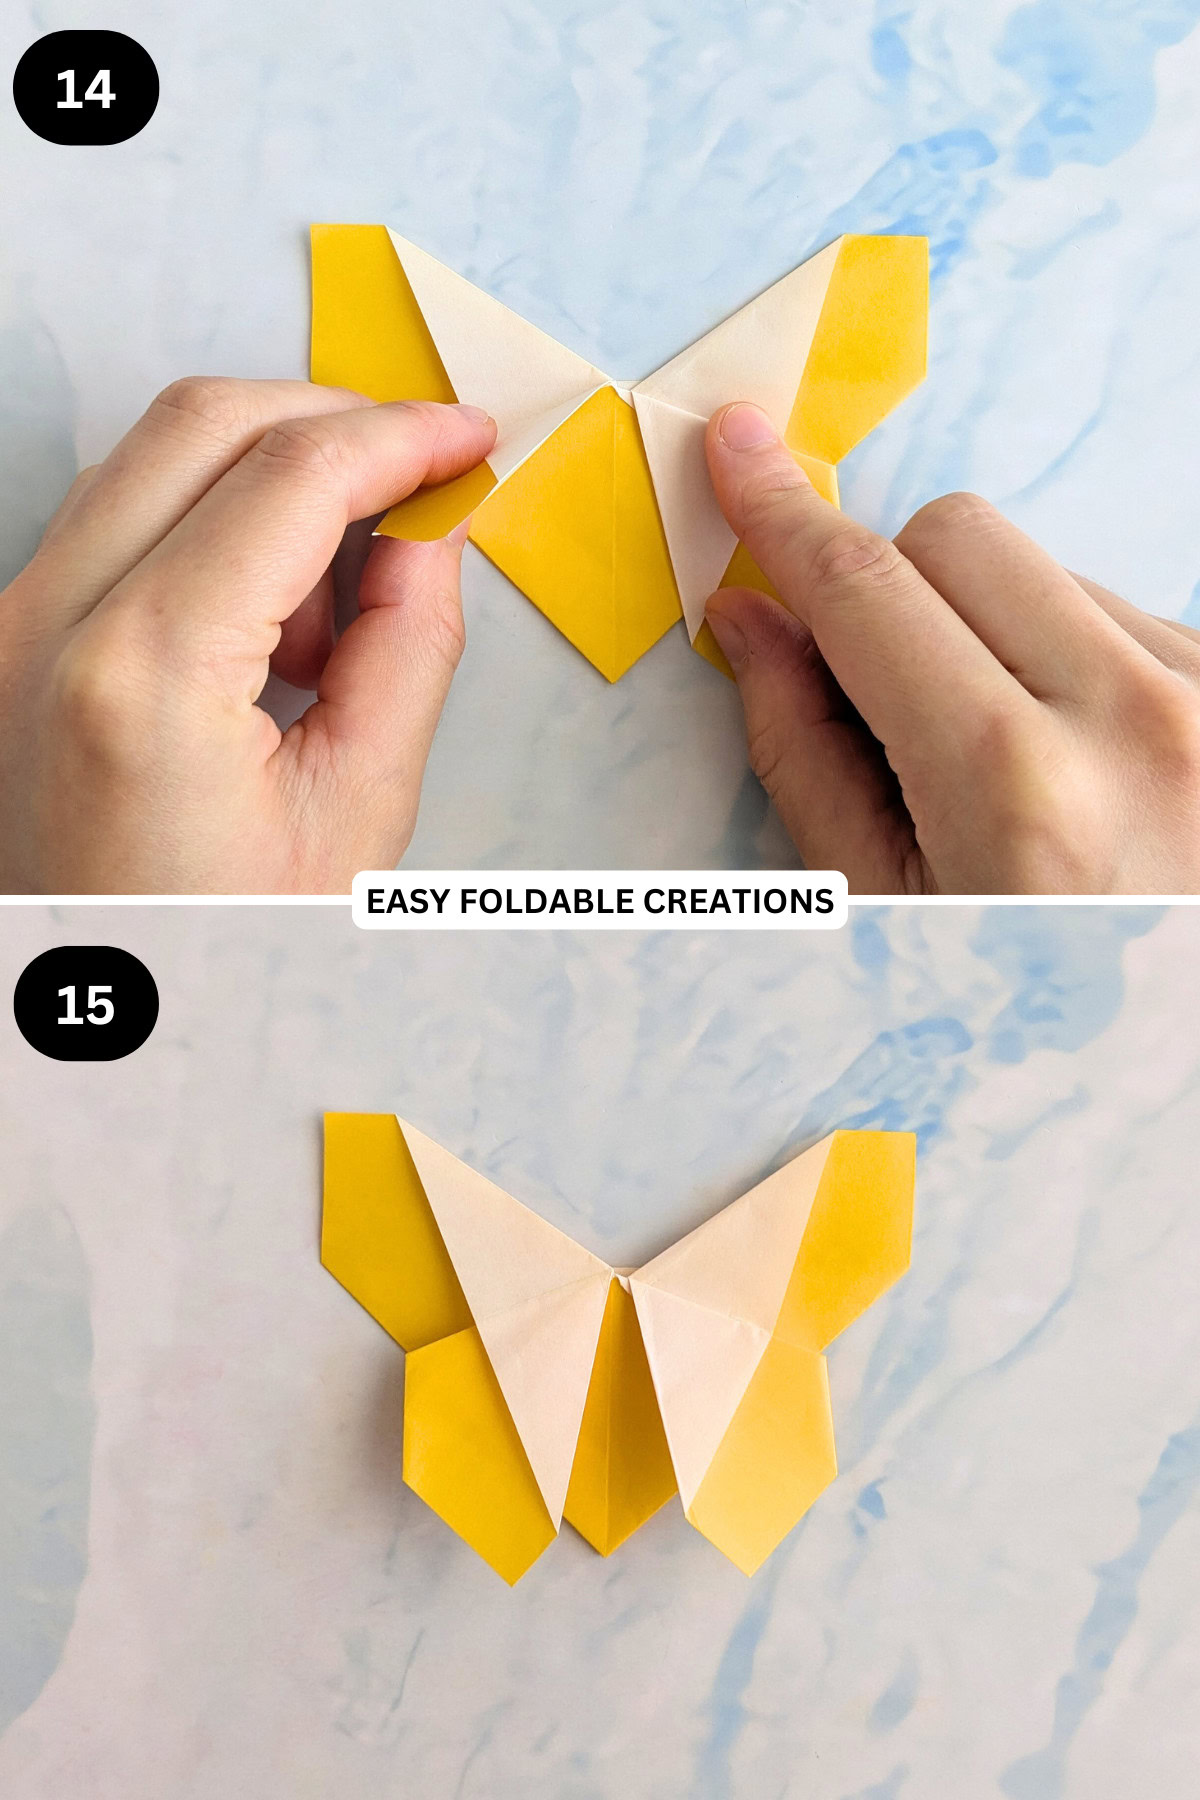
Step 14: Fold both top points down (top layer only) as far as they can go. This will form the wings.
Step 15: Completed butterfly origami bookmark.
Looking for more paper crafts to try? You'll find exclusive tutorials and printables inside The Fold Collective.
Tips For Success
- Use double-sided paper for a colorful, eye-catching butterfly.
- Decorate the finished bookmark with stickers, washi tape, or metallic pens.
- Ensure folds are sharp by running your nail or a bone folder along each crease.
- If making for kids, let them decorate the bookmarks before folding!

Common Mistakes & How To Avoid Them
- Paper Tears: Use smooth, high-quality paper and avoid over-creasing.
- Uneven Folds: Align edges carefully before creasing.
Color, Paper Ideas, and Variations
- Valentine's Day: Pink, red, and white with heart patterns.
- Mother's Day: Soft pastels like lavender or mint green.
- Christmas: Festive reds and greens with snowflake prints.
- Springtime: Bright florals or butterfly prints for a vibrant touch.
- Personalized: Use patterned scrapbook paper for a unique design.
FAQ
For this origami butterfly bookmark, we recommend that you do not use square paper. However, you can cut square paper to size.
Medium-sized paper (3 inches x 4 inches or 8 cm x 12 cm) is easier for small hands to handle.
Other Paper Crafts You Might Like To Try:
Helpful Origami Tips
If you're curious to learn more about origami, you might like to look at our basic guides on how to make some common origami folds.
Start with the valley fold and mountain fold-these are the foundation of most origami models.
Once you're comfortable, you might like to try the petal fold for 3D shapes, and explore the bird base and square base for more complex designs.
The water bomb base is also great for creating inflatable or geometric models, like this inflatable origami rabbit.
Useful Paper Craft Terms
Want to learn a little more about paper crafts and origami?
We've made this helpful printable just for you. It explains common terms and helpful tips you might come across when you are folding origami or making a paper craft project.
You can download the useful paper craft terms printable PDF here.
Stay Connected
Made this pattern? Let us know how it went in the comments below!
Pin this post - Pin now to take your paper crafting skills to the next level.
Share on Instagram or Facebook - Capture the beauty of your finished paper craft project and share it on Instagram or Facebook! Tag us @easyfoldablecreations so we can see your work!

Other Patterns You Might Like To Try:
Looking for other easy patterns like this? Try these:
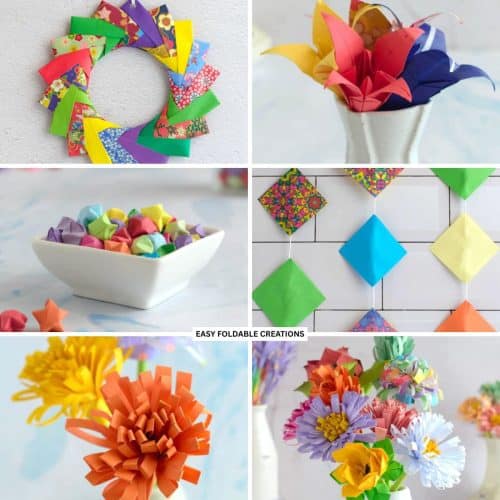
- Easy Paper Craft Ideas For Desk and Home Decoration
- Paper Napkin Folding Ideas For Every Table Styling
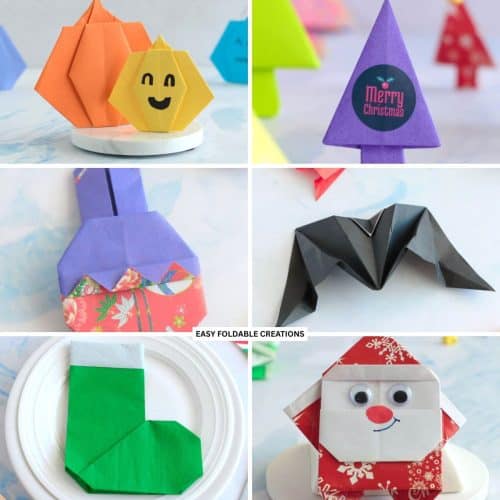
- Quick Seasonal Paper Decor Ideas For Easy Home Updates
- Minimalist Seasonal Paper Decoration Ideas
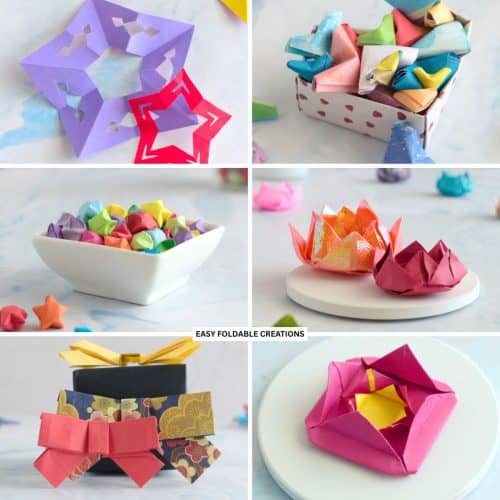
- DIY Paper Decor Ideas For Every Season
- Wedding Confetti Alternatives That Are Venue Friendly
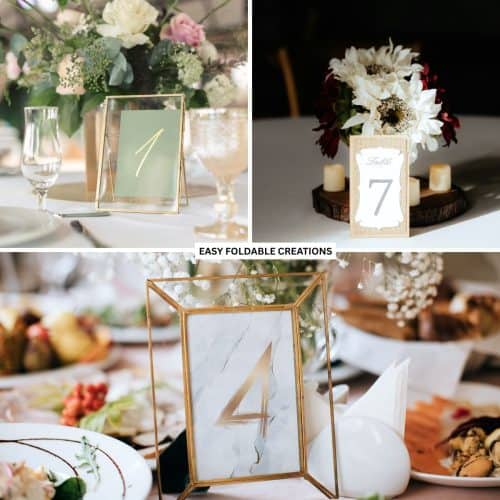
- DIY Wedding Table Number Ideas Using Paper
- DIY Paper Wedding Place Card Ideas You Can Make Yourself


Comments
No Comments